AI Face Restoration using GFPGAN on Vultr Cloud GPU
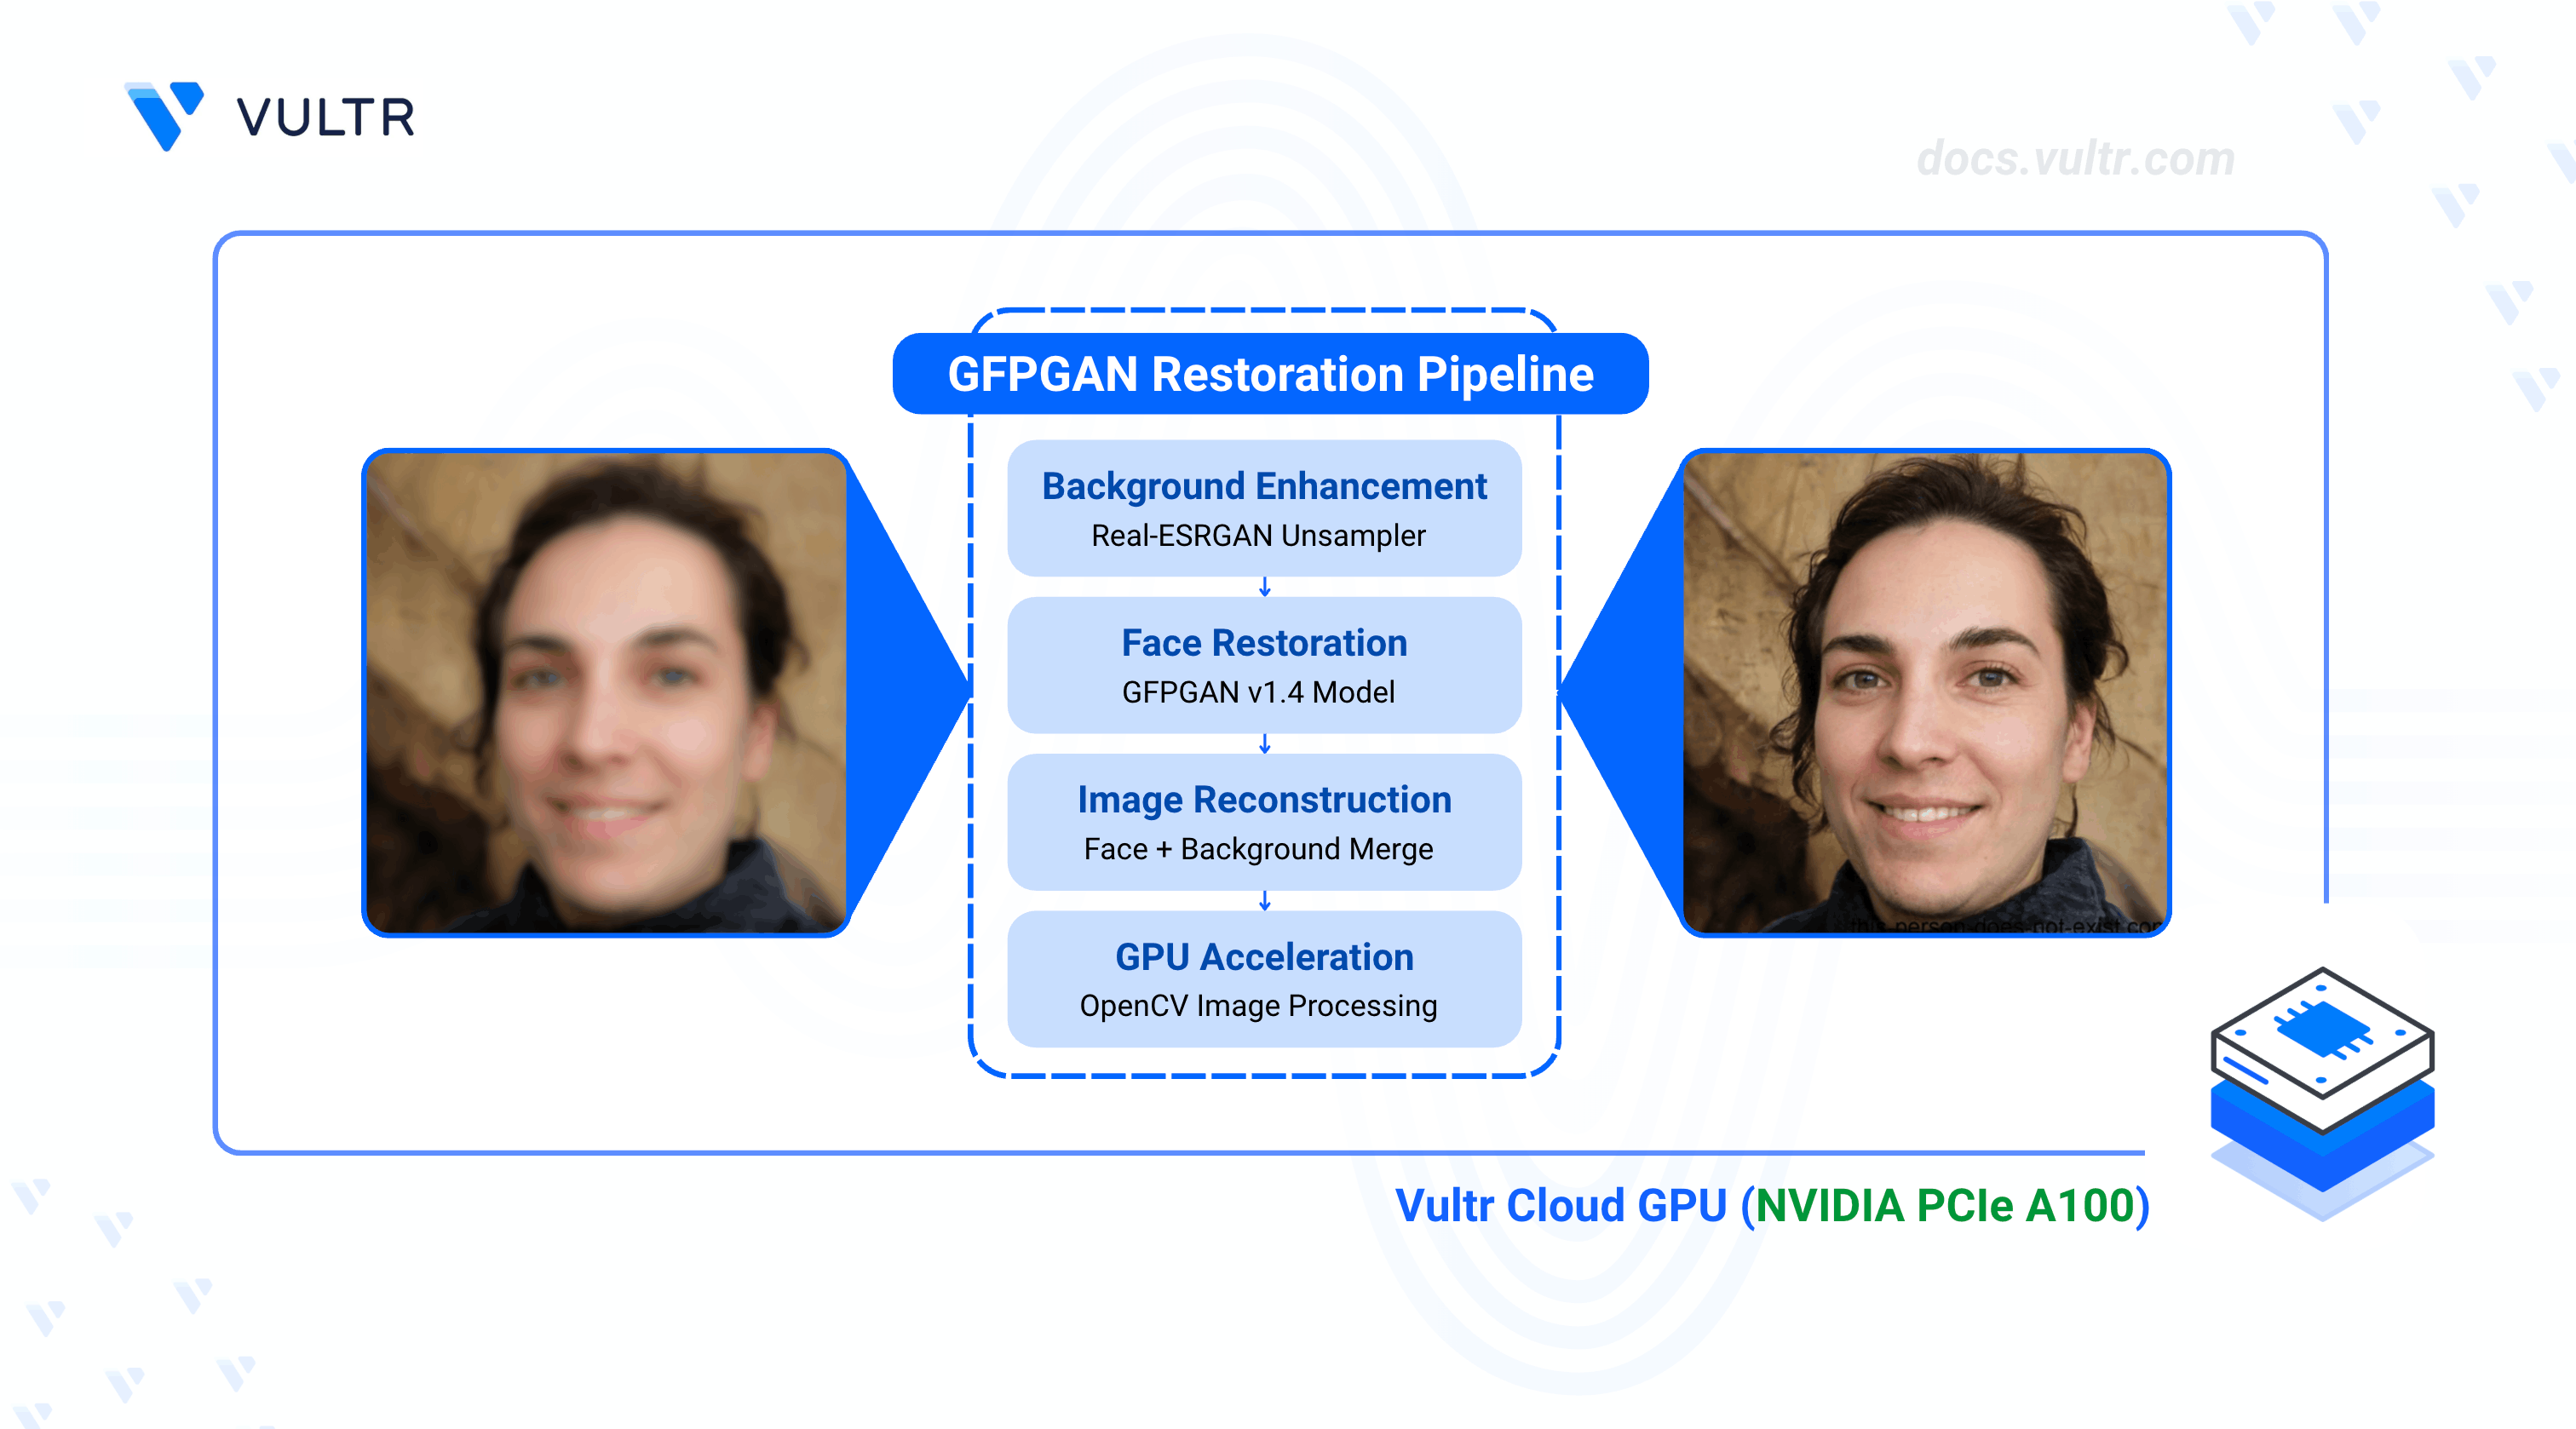
Generative Facial Prior-Generative Adversarial Network (GFPGAN) is a blind face restoration model used to restore and improve images. The model works with multiple image types such as old images, low-resolution, noisy, blurry, and AI-generated images. Generative Facial Prior (GFP) handles the face restoration process through novel channel-split spatial feature transform layers. This enables a balance between realness and fidelity on generated images.
This article explains how to perform AI Face Restoration using GFPGAN on a Vultr Cloud GPU server. You are to restore a single image from a base URL, generate, and export improved images to compare the AI face restoration result.
Prerequisites
Before you begin:
Deploy a Ubuntu A100 Cloud GPU server.
Create a non-root user with sudo privileges
Switch to the non-root sudo user
Set Up the Server Environment
In this section, set up the server environment and install the necessary packages to run the GFPGAN model as described below.
Create a new directory to store generated images
Install PyTorch
The above command installs PyTorch with pre-built CUDA 11.8 libraries.
torchandtorchvisionoffer a platform to develop and train deep learning models, along with tools and pre-trained models for Computer Vision tasks to speed up the process of building vision-based applications. To download the latest version, visit the PyTorch Documentation.Install Jupyter Notebook
Allow the Jupyter Notebook port
8888through the firewallBy default, UFW is active on Vultr servers. The above command allows incoming connections to the Jupyter Notebook port
8888Launch Jupyter Notebook
The above command starts Jupyter Notebook and listens for incoming connections on all server interfaces with the
0.0.0.0directiveWhen successful, a random token displays in your command output as below:
If you receive an error when starting Jupyter Notebook. End your SSH connection, and start a new session to activate Jupyter Notebook on your server.
Using a web browser of your choice, append the generated token to your Server IP to access Jupyter Notebook
Within the Jupyter interface, click New, select Notebook from the dropdown list and create a new Python3 Kernel notebook.
Install Model Dependencies
In this section, use Jupyter Notebook to install necessary GFPGAN model dependencies as described in the steps below.
In a new notebook cell, install the required model libraries
Click the run button on the main menu bar or press Ctrl + Enter to execute the above command
Import the model libraries
Below is what each imported library does:
GFPGANer: is a class within thegfpganpackage that used to perform the actual GFPGAN-based image super-resolutionRRDBNet: (Residual-in-Residual Dense Block Network) is a deep neural network architecture that's used in super-resolution algorithms and it's utilized by the GFPGAN modelRealESRGANer: Handles the image background informationdisplay: allows you to display objects in the Jupyter Notebook output cell instead of a separate file or linkImage: allows you to create an Image object from various sources, such as a path, a URL, or raw image datarequests: Handles HTTP requests when fetching an imagenumpy: Handles numerical computations with support for arrays and matricescv2: Performs computer vision tasks, such as image and video processing, object detection, and more.os: creates a link to the operating system and handles operations related to the file system, environment variables, and other OS-specific tasks.
Run the command to import all required model libraries
Set Up the Model
Initialise and set up the GFPGAN model in your Jupyter Notebook file as described in the steps below.
Define Checkpoints
The checkpoints defined in the above command are:
arch: As set toclean, it's the clean version without custom-compiled CUDA extensions used in StyleGAN2model_name,gfpgan_checkpoint,realersgan_checkpoint: Host a URL pointing to a checkpoint file for the GFPGAN and Real-ESRGAN model. The URL consists of.pthfiles used to save and load the latest model weights
To get the latest version and update the above checkpoints, visit the official GFPGAN releases page.
Define
RRDBNetfor background enhancementsThe following are the defined parameters:
num_in_ch: Specifies the number of input channels for the neural network.num_in_ch=3means that the network expects input images with three color channels, and represent the Red, Green, and Blue (RGB) channelsnum_out_ch: Specifies the number of neural network output channels. Just likenum_in_ch, thenum_out_ch=3declaration represents that the network is to produce output images using RGBnum_feat: Sets the number of feature channels or filters used in the model to determine the depth or complexity of the networknum_block: Sets the number of RRDBs in the network. Increasing this value can make the network deeper and more powerfulnum_grow_ch: Affects how the network scales and transforms informationscale: Sets the upscaling factor that the network can handle.scale=2represents that the network can upscale the input images by a factor of 2
Define the
RealESRGANerobject for background enhancementsThe above command parameters handle the following functions:
model_path: Specifies the path to the checkpoint file.pththat contains the pre-trained weights and parameters of the Real-ESRGAN model you defined earliermodel: Sets an instance of the RRDBNet object that represents the architecture used by the Real-ESRGAN algorithm.tile: Specifies the size of tiles the input image divides to during the upsampling process. Splitting the image into tiles helps in handling large images that might not fit into memory in a batch.tile=400divides the image into tile sizes of 400x400 pixelstile_pad: Determines the number of pixels added as padding around each tile before the upsampling process begins.pre_pad: Specifies additional padding added to the input image before the upsampling process startshalf=True: Performs upsampling functions using the half-precision floating-point arithmetic. UsingFalseperforms the upsampling using full-precision floating-point arithmetic
Define the
GFPGANerobject for face restorationThe above parameters function as below:
model_path: Takes in the latestgfpgan_checkpointversion you defined earlierupscale: Specifies the upscaling factor for the super-resolution. It represents how much the resolution of the input image should increasearch: Takes in the latestarchversion which you defined earlierchannel_multiplier: Controls the number of filters used in the GFPGAN model. Increasing this value makes the model better but also increases the GPU memory usage
Create a function to retrieve the image
The above code declares a function named
download_image()with one argument which hosts an image URL. The declarations inside thedownload_image()function include:response: Uses therequests.get()function to send anHTTP GETrequest to the provided URL to download the image from the URLimage_array: Stores the binary image data in theresponse.contentattribute. It then uses NumPy'snp.frombuffer()function to convert the binary data into a NumPy array of unsigned 8-bit integers (dtype=np.uint8). The array represents the image data in raw pixel formatimage: Stores thecv2.imdecodefunction to decode raw image data stored inimage_array.cv2.IMREAD_COLOR, and specifies that the image should be in color mode, meaning it's a 3-channel image (RGB)
Run the function to prepare the model to import an image URL as the input and perform face restoration tasks
Run the Model
To run the GFPGAN model, import an image from a direct URL with a readable file extension such as .jpg, or .png. When ready, load the image as described in the following steps
Load the image using the
download_image()functionFor a quick addition to the model, upload your image to a public image hosting platform such as
imgurand copy the direct image address to import into the function.Load the image in the
restorerfunction you defined earlierThe restorer function breaks the image and stores it in three data types as below:
cropped_faces: Consists of cropped faces extracted from the input imagerestored_faces: Consists of cropped faces when the restoration is completerestored_img: Consists of the fully restored image
View the Generated Output Image
Run the following function to load the processed image. Replace
.jpgwith your actual source image extensionThe above code creates the function
cv2_imshow()with a single argument that consists of the image URL. The remaining parameters are:_, encoded_image = cv2.imencode('.jpg', image): Usescv2.imencodefrom the OpenCV library to encode the input image in a format defined by the user. The function returns two values, a boolean value that shows whether the encoding is successful, and encoded image data in the form of a NumPy arraydisplay(Image(data=encoded_image.tobytes(): UsesIPython.display.Imageto create an image object from the encoded image data and displays it in the output cell of the Jupyter Notebook usingdisplay(). Thetobytes()method converts the NumPy array containing the encoded image into a bytes object for the Image class.
To view the final images, run the following commands. Replace
iwith your desired array index value such as0,1, or2depending on the number of faces in your imageAs applied in the above command, faces in the image are available in form of an array. Therefore every face has an index value (0,1,2,3 and so on). Set the number
idepending on the face you want to view and the total number of faces in the image.To view the final generated image, run the following command
Verify that the generated image contains notable improvements as compared to your original image.
Save Generated Images
To save the final generated image to the output directory you created earlier, define the directory and filename as below
The above code block consists of:
output_directory: The location to store your final imageoutput_filename: The name to save your exported image asoutput_filepath: Consists of Theos.path.join()function from the os module used to combine theoutput_directoryandoutput_filenameinto a single string representing the complete path of the file to store the restored imageos.path.exists: Checks if the output path exists, else, it creates the path.
Save the image
Output:
The above command returns
Truewhen the image saves successfully to the directory, and below is what the function does:cv2.imwrite(): Consists of a function from thecv2library used to save the restored image to the specifiedoutput_filepath. You can replacerestored_imgwith eithercropped_faces[i],restored_faces[i], or keeprestored_imgdepending on the target image you intend to save.
To download a copy of the generated images, launch a new terminal session and establish an SFTP connection to the server
When logged in, Switch to the
output_imagesdirectory in your user homeView available files in the directory
Download an image file of your choice. For example, to download the
image.jpgfile, run the following commandWhen the download is complete, close the SFTP connection
Using your local computer's file explorer, find the image in your terminal's working directory
Memory Usage
In your Jupyter Notebook session, run the following command to view the GPU memory usage statistics
In Half-bit, your output should look like the one below:
As displayed in the output, with half-bit precision, the model uses about 3 GB of VRAM.
With full-bit precision:
In full-bit precision, the model uses 4.5 GB of VRAM.
Conclusion
In this article, you implemented the GFPGAN model on a Vultr Cloud GPU server. You prepared the server, installed dependency libraries, and used the model through Jupyter Notebook. For more information on how to use GFPGAN, visit the official model repository.
Next Steps
To implement more solutions on your Vultr Cloud GPU server, visit the following resources:
- AI Generated images with OpenJourney and Vultr Cloud GPU
- AI Image Manipulation with Instruct Pix2Pix on Vultr Cloud GPU
- How to use Hugging Face Transformer Models on a Vultr Cloud GPU Server


0 Comments
Be the first to comment and share your perspective with the community.