How to Use Vultr's GPU Stack Marketplace Application

Introduction
Vultr GPU Stack is designed to streamline the process of building Artificial Intelligence (AI) and Machine Learning (ML) projects by providing a comprehensive suite of pre-installed software, including NVIDIA GPU Drivers, NVIDIA CUDA Toolkit, Docker with NVIDIA Container Toolkit and K3s with NVIDIA GPU Operator.
It reduces the time required to set up the server before you can use it for operations like building, fine-tuning, or inferring a model. We ensure that the pre-installed softwares are tested on our infrastructure and are reliable for all your AI/ML development needs.
Software Included in Vultr GPU Stack
NVIDIA GPU Drivers: They ensure to enable your computer to utilize the NVIDIA GPUs making them function properly.
NVIDIA CUDA Toolkit: It is also a set of programming tools and libraries to utilize the potential of NVIDIA GPUs, allowing users to speed up computation and parallel processing tasks.
K3s: It is a lightweight Kubernetes distribution aiming to provide a robust, easy-to-use Kubernetes platform. With NVIDIA GPU operators it allows users to deploy GPU-accelerated applications on lightweight Kubernetes Clusters.
Docker: It is a platform for developing, shipping, and running applications inside containers.
Deploy Vultr GPU Stack
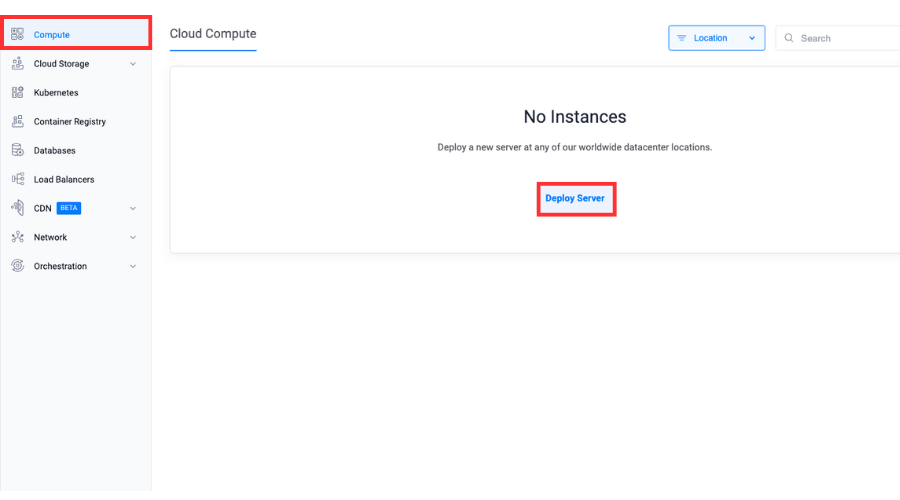
Choose the Compute menu item on the products page.
Click Deploy Server.
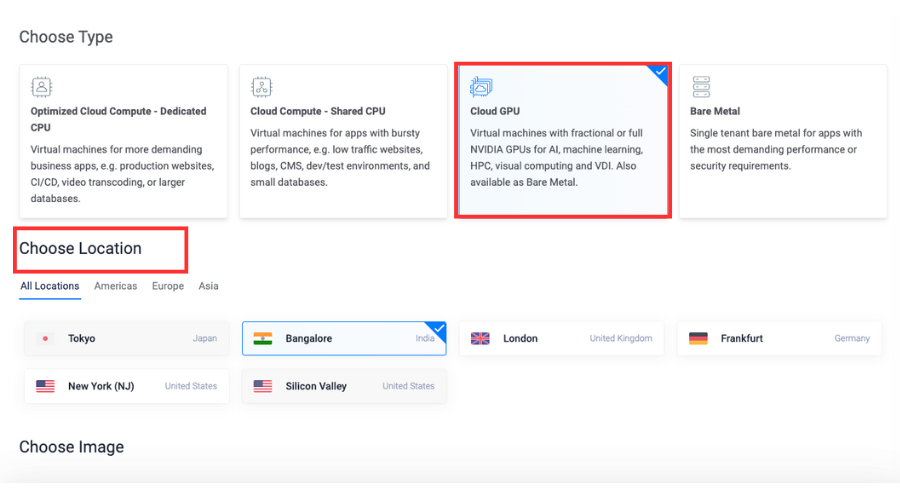
Select Cloud GPU as the server type.
Select a location.
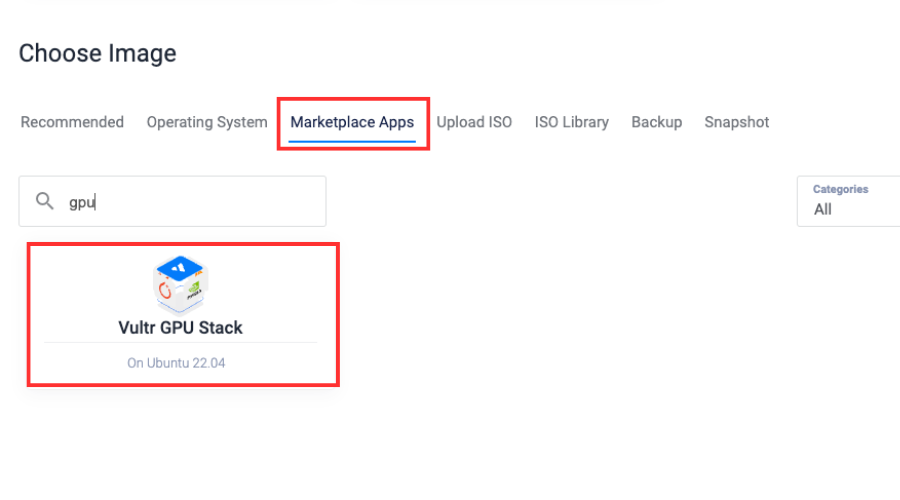
Select Vultr GPU Stack from the marketplace image section.
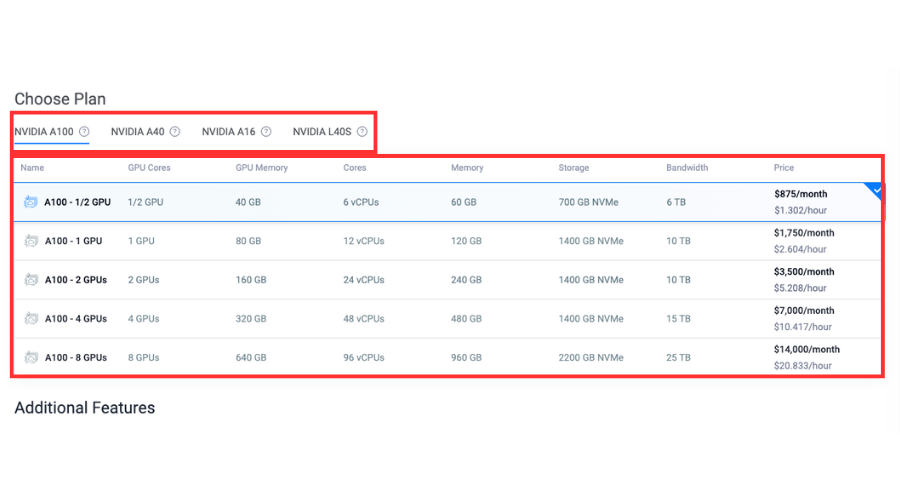
Choose a plan.
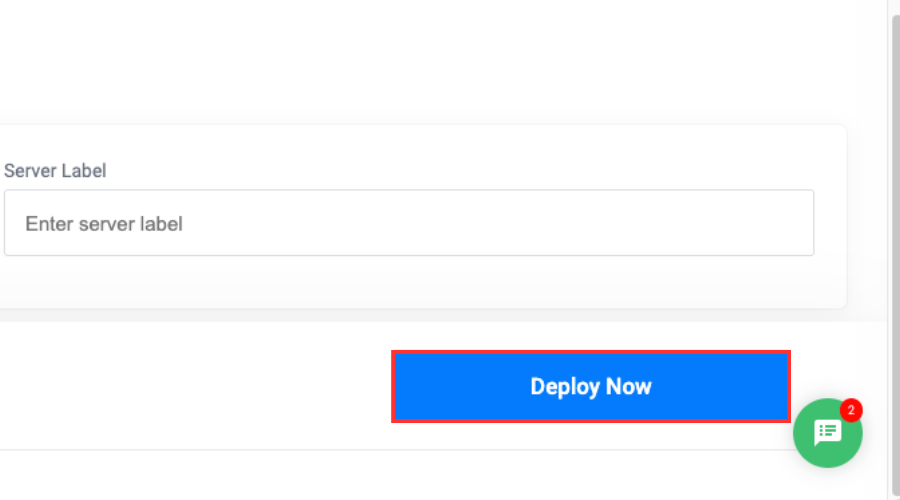
Deploy the server.
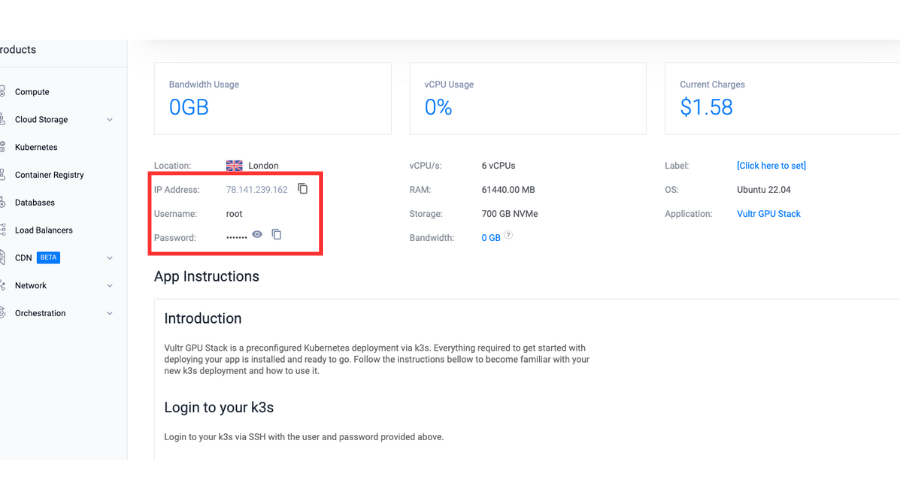
Retrieve the server details.
Access JupyterLab Interface
Apply the JupyterLab manifest.
console# kubectl apply -f /root/jupyterlab.yaml
Optional: Check the status of the pods in the
jupyternamespace.console# kubectl get pods -n jupyter # kubectl describe pod -n jupyter jupyter
Access the JupyterLab in your browser.
Navigate to the following URL.
https://<YOUR_SERVER_IP>:30080The password to access the JupyterLab interface is provided on your instance page.
Create a new notebook and execute the following in a code cell.
pythonimport torch print(f"CUDA Available: {torch.cuda.is_available()}") print(f"CUDA Version: {torch.version.cuda}")
The above code snippet outputs the status of CUDA availability and the pre-installed version CUDA Toolkit.
Output.
CUDA Available: True
CUDA Version: 12.4
Run a GPU Accelerated Container
Apply the PyTorch manifest.
console# kubectl apply -f /root/pytorch.yaml
Optional: Check the status of the pods in the
pytorchnamespace.console# kubectl get pods -n pytorch
Enter the shell environment.
console# kubectl exec -it pytorch -n pytorch -- /bin/bash
Enter the Python console
console# python3Check the GPU availability
pythonimport torch print(f"CUDA Available: {torch.cuda.is_available()}") print(f"CUDA Version: {torch.version.cuda}")
The above code snippet outputs the status of CUDA availability and the pre-installed version CUDA Toolkit.
Output.
CUDA Available: True
CUDA Version: 12.4
Frequently Asked Questions
How do I deploy a server with Vultr GPU Stack?
You can find the Vultr GPU Stack option under the list of Marketplace Applications while deploying a new server.
What servers are compatible with Vultr GPU Stack?
Vultr GPU Stack is compatible with Cloud GPU servers and Bare Metal servers that are equipped with GPU(s).
What softwares come pre-installed when I deploy a server with Vultr GPU Stack?
Vultr GPU Stack comes with the following pre-installed softwares:
- NVIDIA GPU Driver
- NVIDIA CUDA Toolkit
- K3s with NVIDIA GPU Operator
- Docker with NVIDIA Container Toolkit
Can I upload my existing Jupyter/iPython notebooks?
Yes, you can upload your existing notebooks by accessing the JupyterLab interface.
Can I run Docker container in Vultr GPU Stack?
By default, the
dockerservice is disabled in Vultr GPU Stack. You can start and enable the service by executing the following commands.console# systemctl start docker # systemctl enable docker
If you prefer running containers on Docker instead of K3s, it is recommended to use the base operating system options while provisioning a new Cloud GPU instance.Note
Conclusion
You walked through the steps to deploy a Cloud GPU server with Vultr GPU Stack for AI/ML development/deployment. It comes with essential pre-installed softwares that are tested on our infrastructure for compatibility and reliability. The packaged software helps reduce the time to configure the server before you're able to perform any action.