Custom ISO on Bare Metal

Introduction
Bare Metal servers provide full control of the hardware, allowing many unique configurations. Vultr provides several standard OS images and One-Click applications to deploy your Bare Metal server. If you prefer a custom Bare Metal OS, use this guide to install from a custom ISO. Please read and understand all steps before proceeding to deploy your Bare Metal cloud, including the troubleshooting guide.
Overview
Bare Metal servers have dual SSDs. This guide temporarily uses the second SSD to boot an ISO image. The primary steps are:
- Install a temporary OS to the first SSD.
- Copy a custom ISO to the second SSD.
- Boot from the second SSD.
- Install the custom OS on the first SSD, overwriting the temporary OS from step 1.
- Format and reclaim the second SSD.
The ISO image needs to be a hybrid disk image. Most popular Linux ISOs are hybrid ISOs. See the isohybrid utility for more information. Regular ISO-9660 and UDF filesystems will not work for this process.
Due to licensing requirements, we cannot provide support for custom Windows installations. If you intend to attempt a Windows installation on a Bare Metal instance, make sure you have a valid Windows license before proceeding. The majority of Windows licenses are not valid for cloud server deployment.
1. Install Linux
Visit the customer portal and deploy a bare metal instance.
- Choose a temporary OS. This guide is tested with Ubuntu 20.04.
- Choose No RAID - Extra disks unformatted. The "extra disk" is used for the ISO image.
2. Copy the Custom ISO
SSH to the new instance with the root account and password from the server information page.
Download your desired ISO. For example:
# wget http://example.com/CentOS-8.isoWrite the ISO image to the second SSD with dd. The second SSD is /dev/sdb. For example:
# dd if=CentOS-8.iso of=/dev/sdb bs=4096 status=progressWhen dd completes, the second SSD is bootable with the ISO image.
3. Boot From the Second SSD
Open the Web Console on the instance's control panel.
Click the Send CtrlAltDel button at the top right of the Web Console window.
While the instance starts up, tap Delete repeatedly until you see the BIOS screen.
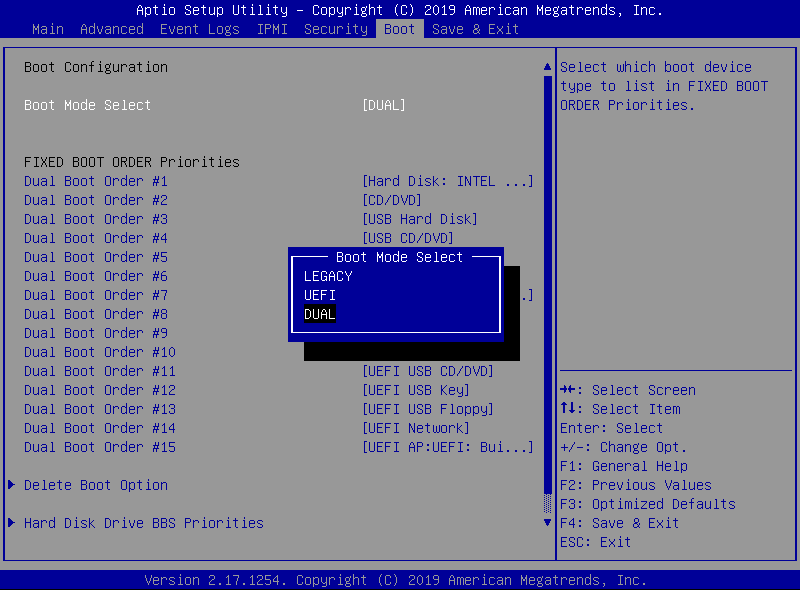
Press Right until the Boot tab is selected.
The hybrid image must match the server configuration, either Legacy (BIOS) or UEFI. Verify Boot Mode Select is correct for your ISO type.

Press F4 to Save & Exit.
The server will proceed to boot from the first SSD. Interrupt this boot by clicking the Send CtrlAltDel button at the top right of the Web Console window.
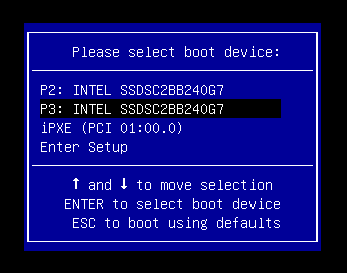
As the instance reboots, tap F11 repeatedly until you see the boot selection screen.
Choose "P3", which is the second SSD containing your ISO image. This changes the boot order one time only. The server will revert to the first SSD on the next boot unless intercepted with F11.

4. Install the Custom OS
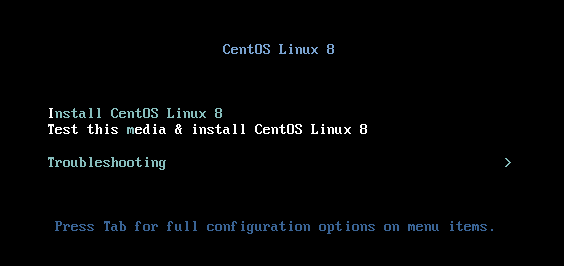
The server will boot from the ISO image. Proceed to install your OS to the first SSD. Most Linux distributions refer to this as /dev/sda.

When finished, reboot the server. The server will boot from the first SSD as usual. If you need to force the server to boot from the ISO, intercept the boot sequence with F11 as before.
5. Format the Second SSD
After installing the custom operating system, use your OS-specific tools to reclaim it as a data device. For example, set it up as a second data volume, or configure software RAID. How to use the second SSD are specific to your installation.
Troubleshooting
You can adapt this technique to install many custom ISOs. It's impossible to cover every scenario, but check these basic troubleshooting steps if you have issues.
Test your ISO for possible corruption.
Verify the ISO is a hybrid ISO that supports Legacy or UEFI mode
Use the Web Console to reboot the server.
- Use Delete to load BIOS setup. You can also choose "Enter Setup" after pressing F11 to reach the boot device selector.
Verify the BIOS settings for Boot Mode.
Review the BIOS settings regarding Boot Order.
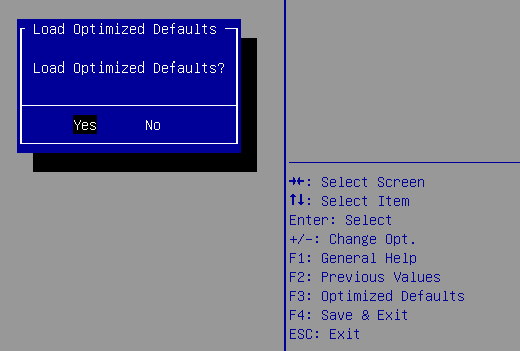
In BIOS setup, try resetting the BIOS to default with F3
