
Introduction
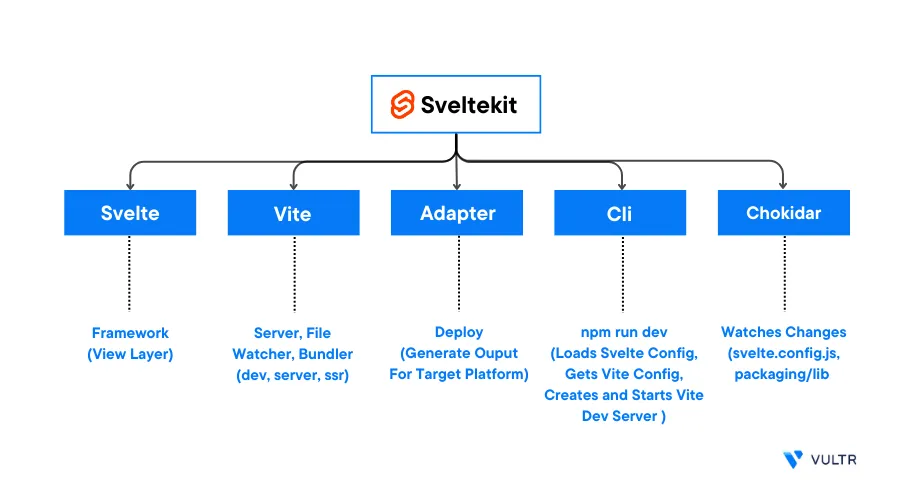
SvelteKit is a web application framework that simplifies the process of building efficient and high-performance web applications. It's based on the Svelte JavaScript framework and offers a complete solution for building web applications that include routing, server-side rendering, and a flexible architecture.
This article explains how you can deploy a SvelteKit web application on a Vultr Ubuntu server. You will deploy a sample application that implements the Wordle game and secure your SvelteKit project with HTTPS to secure client requests on the server.
Prerequisites
Before you begin:
- Deploy a fresh Ubuntu server on Vultr
- Set up a Domain A record pointing to the Server IP Address
- Using SSH, access the server as a non-root user with sudo privileges
- Update the Ubuntu server.
This article uses the following example values. Replace them with your actual server details:
- Sudo user:
example_user - Ubuntu Server IP:
192.0.2.100 - Project domain:
sveltekit.example.com - Project name:
my-app
Install Node.js Using NVM
Using SSH, access the server as a non-root sudo user
$ ssh example_user@192.0.2.100Download the latest NVM installer script
$ wget https://raw.githubusercontent.com/creationix/nvm/master/install.shRun the installation script
$ bash install.shOutput:
 => Downloading nvm as script to '/home/example_user/.nvm'
 => Appending nvm source string to /home/example_user/.bashrc
 => Appending bash_completion source string to /home/example_user/.bashrc
Run the source
~/.profilecommand to reload the environment variables$ source ~/.profileInstall the latest Node.js version. SvelteKit requires at least version
20.0.0to run on your server$ nvm install nodeVerify the installed Node.js version
$ node -vOutput:
v20.7.0
Create the SvelteKit Project
Using
npm, create a new SvelteKit projectmy-app$ npm create svelte@latest my-appWhen prompted, enter
yand press Enter to start the project initialization script. Use the Up and Down arrow keys to select an option, then, press Enter to set up the project as displayed in the following output:create-svelte version 5.0.6 Welcome to SvelteKit! Which Svelte app template? SvelteKit demo app Add type checking with TypeScript? Yes, using JavaScript with JSDoc comments Add type checking with TypeScript? Yes, using JavaScript with JSDoc comments Select additional options (use arrow keys/space bar) none Your project is ready!When successful, switch to the project directory
$ cd my-appUsing
npm, install the project dependencies$ npm installInstall other project dependency packages
$ npm install dotenv express helmet @godaddy/terminusThe above command installs the following packages:
- dotenv: Loads environment variables in a production environment
- express: Creates a custom server that you can run with additional security middleware and server cleanup functions
- helmet: Provides security improvements for the express server functions
- @godaddy/terminus: Provides cleanup functions for HTTP applications
Set Up the SvelteKit Adapter
By default, SvelteKit uses adapter-auto, but it may fail to detect and choose the correct environment. To specify a target environment, use the Node.js adapter as described below.
Install the Node.js
adapter-nodepackage$ npm install -D @sveltejs/adapter-nodeBack up the original
svelte.config.jsfile$ mv svelte.config.js svelte.config.ORIGUsing a text editor such as Nano, recreate the file
$ nano svelte.config.jsAdd the following adapter configurations to the file
 import adapter from '@sveltejs/adapter-node';
 import { vitePreprocess } from '@sveltejs/kit/vite';

 const config = {
     preprocess: vitePreprocess(),
     kit: {
         adapter: adapter()
     }
 };

 export default config;
Save and close the file.
The above configuration implements the Node.js adapter as the default project package. Create the necessary server files to make use of the adapter.
Create a Custom Server
In this section, create a custom server that performs the following functions:
- Load environment variables
- Enable security improvements
- Enable graceful shutdown (automatically close all open connections and run cleanup functions)
Implement these features in a custom server definition file as described below.
Create a new custom server file
server.js$ nano server.jsAdd the following code to the file
 import 'dotenv/config'

 import { handler } from './build/handler.js';
 import express from 'express';
 import helmet from "helmet";
 import http from 'http';
 import { createTerminus } from '@godaddy/terminus'

 const app = express();

 app.use(
   helmet({
     contentSecurityPolicy: {
       directives: {
         ...helmet.contentSecurityPolicy.getDefaultDirectives(),
         "script-src": ["'self'", "'unsafe-inline'"],
       }
     },
     referrerPolicy: {
       policy: ["same-origin"],
     },
   })
 )

 app.use(handler);

 const server = http.createServer(app)

 createTerminus(server, {
   signals: ['SIGTERM', 'SIGINT'],
   onSignal: async () => {
     // Call your cleanup functions below. For example:
     // db.shutdown()
   }
 })

 server.listen(3000, () => {
   console.log('Listening on port 3000');
 });
Save and close the file.
Build the Project
Using npm, build the project with production variables
$ npm run buildOutput:
> my-app@0.0.1 build
> vite build

vite v4.4.9 building SSR bundle for production...
"confetti" is imported from external module "@neoconfetti/svelte" but never used in "src/routes/sverdle/+page.svelte".
✓ 102 modules transformed.

vite v4.4.9 building for production...
✓ 92 modules transformed.
.svelte-kit/output/client/_app/version.json                                                         0.03 kB │ gzip: 0.05 kB

.svelte-kit/output/server/entries/pages/sverdle/_page.server.js                                   146.19 kB

Run npm run preview to preview your production build locally.

> Using @sveltejs/adapter-node
  ✔ done
✓ built in 10.54s
As displayed in your output, verify that a successful build notice ✓ built in 10.54s displays.
Run the Project Using PM2
PM2 is a Node.js package that allows you to run applications as background processes and restart them in case of failures. Using PM2, run the SvelteKit project as described in the steps below.
Using
npm, install PM2 as a global package$ npm install -g pm2Using PM2, start the SvelteKit project using your custom server file
$ pm2 start server.jsOutput:
 [PM2] PM2 Successfully daemonized
 [PM2] Starting /home/linuxuser/my-app/server.js in fork_mode (1 instance)
 [PM2] Done.
View the server logs and verify that the project is running correctly without errors
$ pm2 logsOutput:
 /home/linuxuser/.pm2/logs/server-out.log last 15 lines:
 0|server   | Listening on port 3000
If you want to stop your application:
$ pm2 stop server
Configure Caddy as a Reverse Proxy and Enable HTTPS Access
Caddy is a web server package that automatically generates SSL certificates for configured domain entries. To enable HTTPS access on the SvelteKit project, install Caddy and set up the configuration file to connect to the SvelteKit server on port 3000 as described in the steps below.
To install Caddy, add the official repository GPG key
$ curl -1sLf 'https://dl.cloudsmith.io/public/caddy/stable/gpg.key' | sudo gpg --dearmor -o /usr/share/keyrings/caddy-stable-archive-keyring.gpgAdd the Caddy repository to your APT sources
$ curl -1sLf 'https://dl.cloudsmith.io/public/caddy/stable/debian.deb.txt' | sudo tee /etc/apt/sources.list.d/caddy-stable.listUpdate the server packages to activate the repository changes
$ sudo apt updateInstall the Caddy web server
$ sudo apt install caddyBack up the default Caddyfile configuration file
$ sudo mv /etc/caddy/Caddyfile /etc/caddy/Caddyfile.ORIGCreate a new Caddy configuration file
$ sudo nano /etc/caddy/CaddyfileAdd the following configurations to the file. Replace
sveltekit.example.comwith your actual domainsveltekit.example.com { reverse_proxy localhost:3000 }Save and close the file.
Restart Caddy to apply changes
$ sudo systemctl restart caddyTo enable access to the SvelteKit server over HTTPS, allow port
443through the default UFW firewall table$ sudo ufw allow 443/tcpRestart the firewall to apply changes
$ sudo ufw reloadWhen using additional firewalls such as the Vultr Firewall, allow the HTTP port
443through the firewall to enable access to the SvelteKit server.
Test the SvelteKit Web Application
Using a web browser such as Firefox, visit your configured SvelteKit domain
https://sveltekit.example.comVerify that your SvelteKit web application displays correctly in the browser

On the top navigation menu, click Sverdle or include it in your URL
https://sveltekit.example.com/sverdleA SvelteKit Wordle game should display. To play the game, enter the keyword
appleto continue with your next guess to complete the game.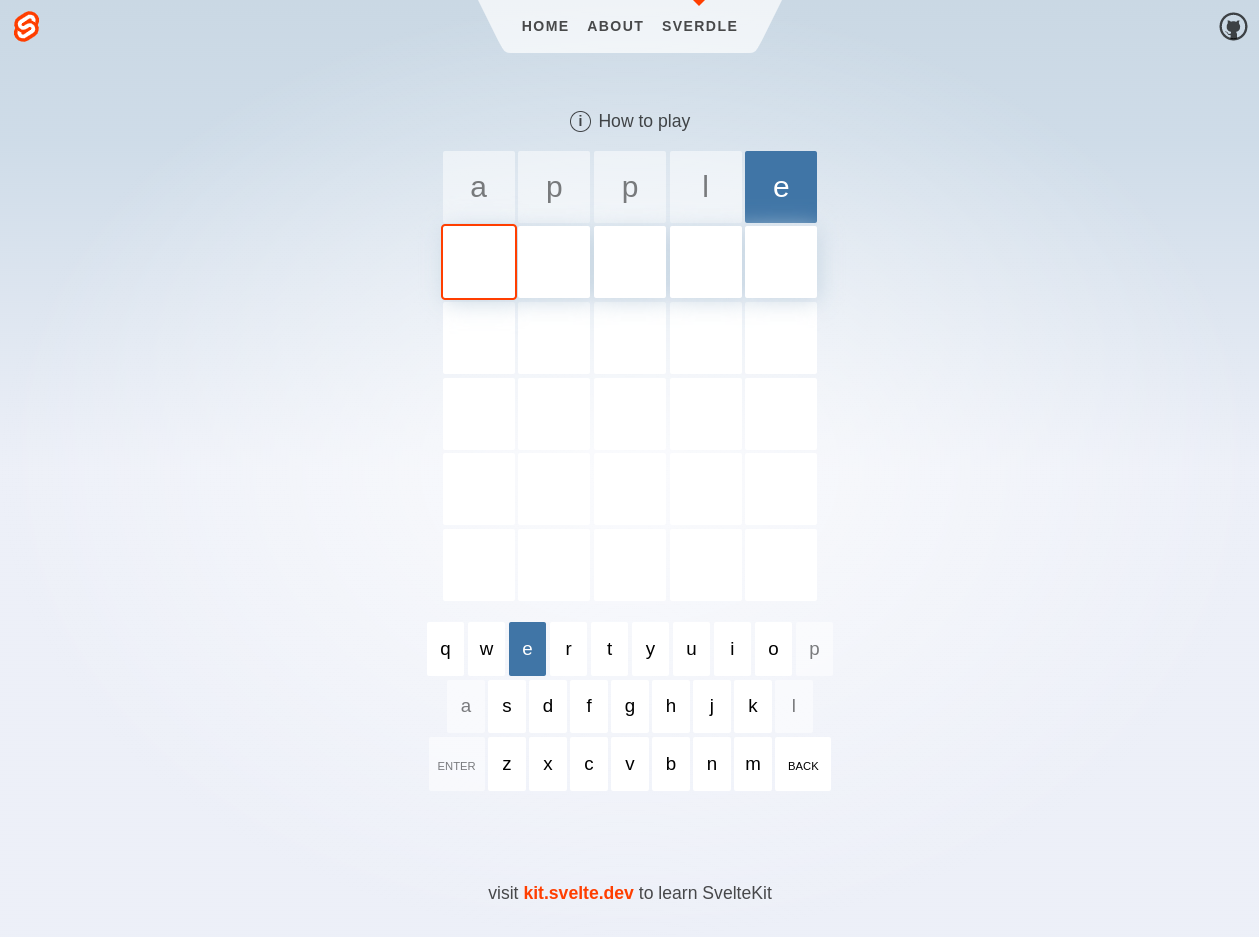
To further test the game functionality, enter the keyword
waterto complete the game sequence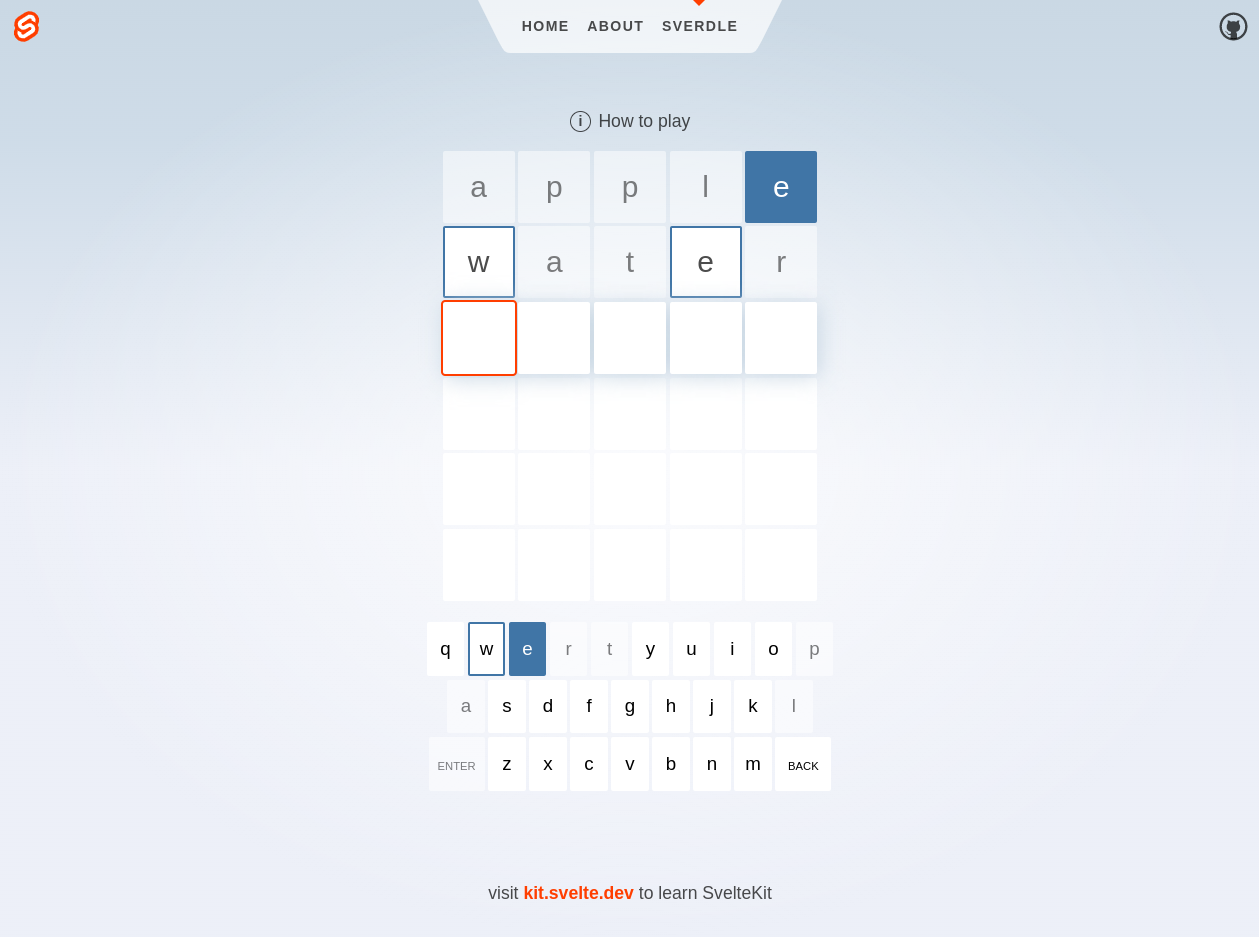
If you don't receive any error page, or log entry, your SvelteKit project is running correctly. Configure the project to match your needs and handle site visitor connection requests over HTTPS.
Troubleshooting
If you encounter the following errors while running your SvelteKit project, troubleshoot them as described in the solutions below.
The SvelteKit Website Loads Indefinitely
View the PM2 server logs and verify that no error displays
$ pm2 logsUsing Curl, verify that the SvelteKit server runs on the default port
3000specified in your configuration$ curl 127.0.0.1:3000Allow the HTTPS port
443through the firewall$ sudo ufw allow 443/tcp
The SvelteKit Web Application Displays with a Broken Layout and No Styling
The helmet middleware only accepts HTTPS connections to your web application in a production environment. Configure a domain record and generate SSL certificates to use HTTPS on the server. To use the server without a domain record and HTTPS access, remove the helmet parts from your server.js configuration file.
Conclusion
You have deployed a SvelteKit web application on a Vultr Ubuntu server using the latest Node.js version with NVM. Depending on your use case, you can configure your SvelteKit project to run and serve site visitors with ready applications such as the Wordle game applied in this article. For more information, visit the SvelteKit documentation.
No comments yet.