
How to Deploy AMD Enterprise AI Reference Stack on Vultr
AMD Enterprise AI Reference Stack is a platform for building, deploying, and running AI workloads on Kubernetes tuned for AMD hardware. System administrators, platform teams, AI researchers, and developers use it to operate AI infrastructure on AMD Instinct™ GPUs.
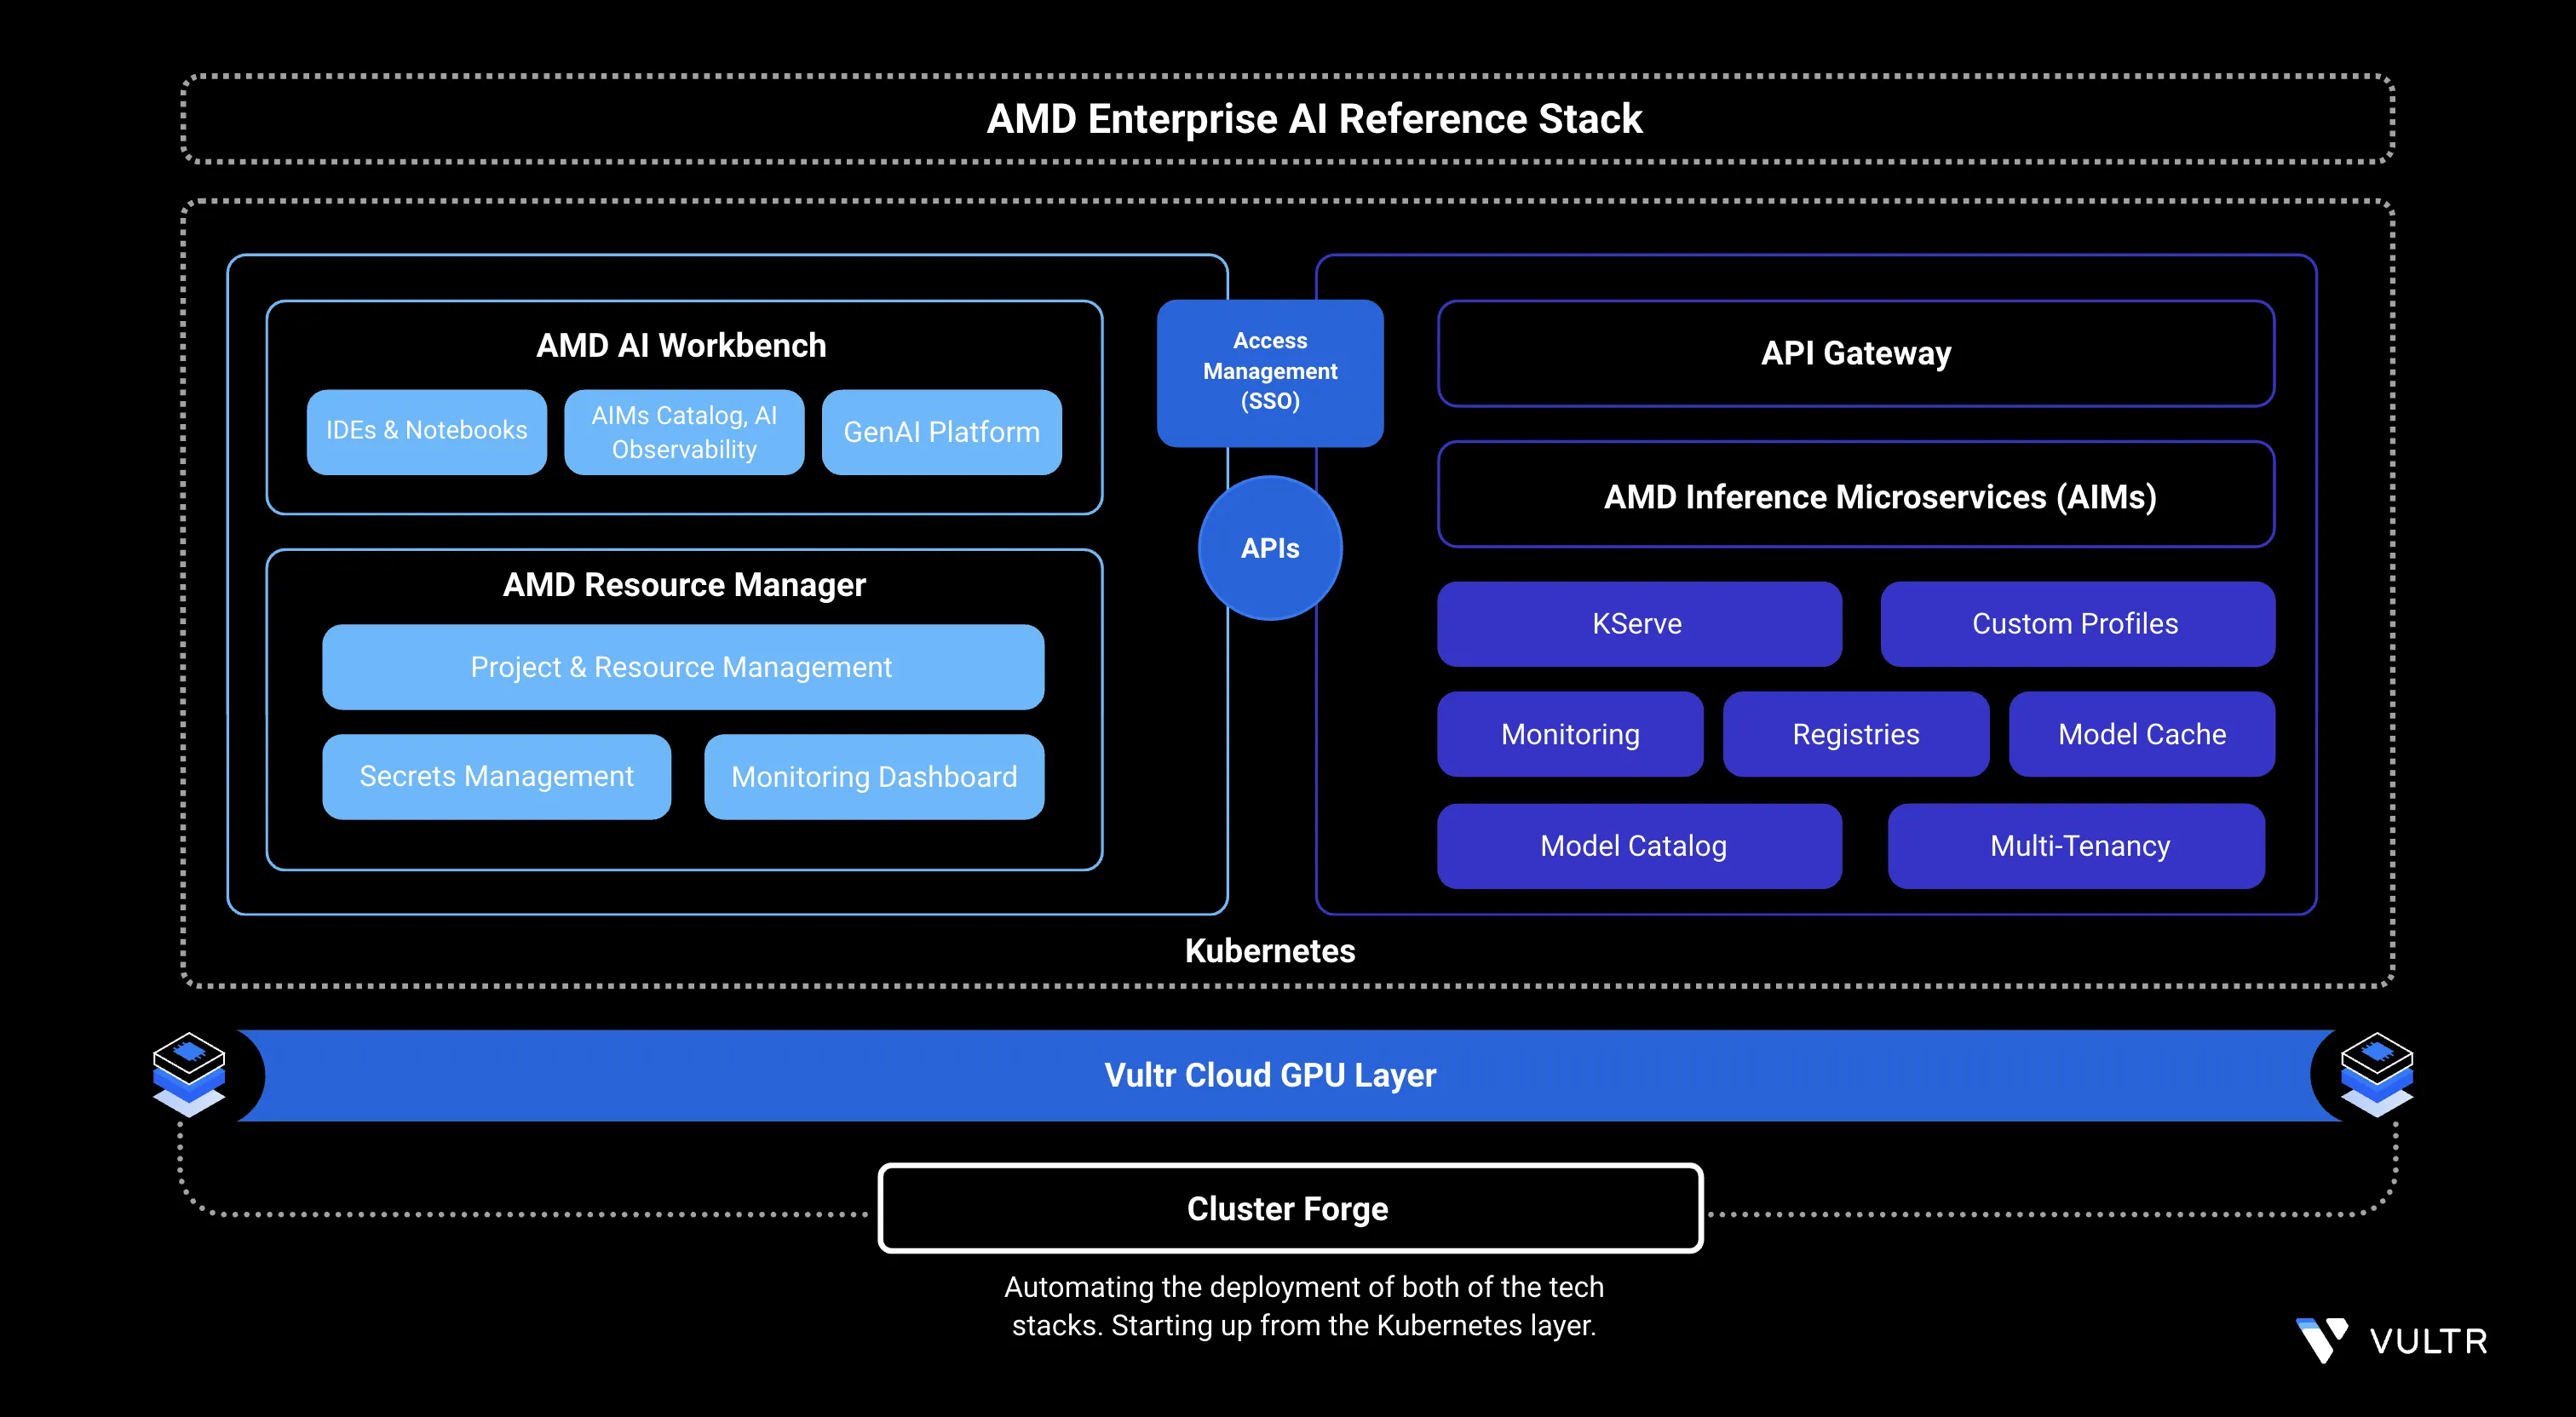
This guide explains how to deploy the AMD Enterprise AI Reference Stack on Vultr Cloud GPU using the Bloom installer, configure a Let's Encrypt TLS certificate, and access the AMD AI Workbench and AMD Resource Manager UIs. It covers the platform's core components: AMD AI Workbench, AMD Resource Manager, Kubernetes AI Workload Orchestrator (Kaiwo), Kubernetes Platform, Cluster Forge, and AMD Inference Microservices (AIMs).
Prerequisites
Before you begin, ensure you:
- Have access to an AMD Instinct™ MI300X, MI325X, or MI355X bare-metal server running Ubuntu 24.04 as a non-root user with sudo privileges.
- Have a 2TB Block Storage volume attached but not mounted. The installer manages the disk directly.
- Have created a wildcard DNS A record pointing to your server's public IP address.
amd-ai-workbench.example.com in this guide with the domain or subdomain you selected for installation.
Key Components of the Platform
AMD AI Workbench: Focuses on simplifying the execution of fine-tuning, inference, or other jobs, enabling researchers to manage AI workloads by offering low-code approaches for developing AI applications. With a comprehensive model catalog and integrations with MLops tools such as MLflow, TensorBoard, and Kubeflow, AMD AI Workbench allows researchers to use AI development tools in an efficient manner.
AMD Resource Manager: Helps organizations control and optimize how users and teams access GPUs, data, and compute resources. It improves GPU utilization through fair scheduling and shared access, while offering dashboards to monitor usage across projects and departments.
Kubernetes AI Workload Orchestrator (Kaiwo): Enhances GPU efficiency by reducing idle time through intelligent scheduling. It manages AI job placement using a Kubernetes operator and supports features such as multiple queues, fair sharing, quotas, and topology-aware scheduling to run workloads more effectively.
Kubernetes Platform: Serves as the core container orchestration layer that powers the deployment, scaling, and management of AI workloads. It provides the flexibility and reliability needed for tasks ranging from training large models to running production inference.
Cluster Forge: Simplifies the setup of a production-ready AI platform by automating the deployment of Kubernetes control and compute planes. It integrates open-source tools and packaged AI workloads, enabling teams using AMD hardware to get started within hours.
AMD Inference Microservices (AIMs): Streamlines the process of serving AI and LLM models by automatically selecting optimal runtime settings based on the model, hardware, and user inputs. Its expanding catalog of prebuilt microservices makes deploying inference workloads fast and efficient.
Key Features of the Platform
- Optimized GPU utilization and lower operational costs: Intelligent scheduling maximizes GPU usage, reduces waste, and lowers overall compute costs.
- Unified AI infrastructure: Brings all AI tools and environments together into a single, consistent platform for easier collaboration and governance.
- Accelerated Time-to-Production: Built-in microservices and streamlined workflows help teams move AI models into production faster.
- AI-native workload orchestration: Purpose-built scheduling and inference services ensure efficient, high-performance execution of AI workloads on AMD Instinct™ GPUs.
Deploy AMD Enterprise AI Reference Stack
Deploy the AMD Enterprise AI Reference Stack using the bloom installer. Download the Bloom binary, configure the required YAML settings, and run the non-interactive CLI installer to trigger the full platform deployment.
Download the official
bloombinary. Visit the GitHub releases page to get the latest version.console$ wget https://github.com/silogen/cluster-bloom/releases/download/v2.0.7/bloom
Make the
bloombinary executable.console$ chmod +x bloom
Create the Bloom configuration file.
console$ nano bloom.yaml
Add the following content to the file. Replace
amd-ai-workbench.example.comwith your domain and/dev/vdb1with the block device attached to your server.yamlDOMAIN: amd-ai-workbench.example.com FIRST_NODE: true GPU_NODE: true CERT_OPTION: generate CLUSTER_DISKS: /dev/vdb1 DNSMASQ: true FIX_DNS: true
In the above configuration:
- DOMAIN: Sets the base domain the platform uses.
- FIRST_NODE: Marks this server as the initial node in the cluster.
- GPU_NODE: Enables GPU capabilities for this node.
- CERT_OPTION: Instructs bloom how to handle TLS certificates. Set to
generateso bloom generates a self-signed certificate during installation. This is required for OIDC authentication configuration to complete successfully. - CLUSTER_DISKS: The disk or partition the cluster uses for storage.
- DNSMASQ: Deploys dnsmasq as the cluster DNS resolver.
- FIX_DNS: Automatically corrects broken DNS configuration on the host before installation.
Start the installation process.
console$ sudo ./bloom cli bloom.yaml
The
clisubcommand runs the installation non-interactively using the values inbloom.yaml. No browser or SSH tunnel is required.The deployment usually takes 20 minutes to finish.Note
Configure SSL and Access the Resource Manager UI
The platform deploys with a self-signed TLS certificate generated by bloom. To access the Resource Manager UI without browser security warnings and over a trusted HTTPS connection, replace the self-signed certificate with a Let's Encrypt certificate by following the steps in this section.
You can use either of the following SSL methods:
A Let's Encrypt wildcard SSL certificate for your domain.
A SAN-based SSL certificate that includes these subdomains:
- airmui.amd-ai-workbench.example.com
- aiwbui.amd-ai-workbench.example.com
- argocd.amd-ai-workbench.example.com
- gitea.amd-ai-workbench.example.com
- kc.amd-ai-workbench.example.com
- minio.amd-ai-workbench.example.com
- openbao.amd-ai-workbench.example.com
Replace
amd-ai-workbench.example.comwith the domain or subdomain you selected for your installation.
Generate a Wildcard Let's Encrypt SSL Certificate
Generate a Let's Encrypt wildcard SSL certificate for your domain using certbot.
Update your package index and install certbot.
console$ sudo apt update && sudo apt install certbot -y
Generate a wildcard certificate.
console$ sudo certbot certonly --manual --preferred-challenges dns -d '*.amd-ai-workbench.example.com'
Creating a wildcard SSL certificate requires domain ownership verification. Certbot can automate this process using DNS plugins, but only for supported DNS providers. TheNote--manualmethod works with any DNS provider, but requires you to create aTXTrecord manually.Certbot displays output similar to:
Please deploy a DNS TXT record under the name:

_acme-challenge.amd-ai-workbench.example.com.

with the following value:

zyuf8RXatvvwgPFH-gqj.......................
From the output, copy the record name and value, then open your DNS panel and create a
TXTrecord using those values.After the DNS record propagates, press ENTER to continue domain validation.
Output:
Successfully received certificate.
Certificate is saved at: /etc/letsencrypt/live/amd-ai-workbench.example.com/fullchain.pem
Key is saved at:         /etc/letsencrypt/live/amd-ai-workbench.example.com/privkey.pem
From the output, note the certificate paths for later use.
Replace the TLS Secret
Bloom creates a cluster-tls secret during installation using the self-signed certificate. Delete it and replace it with a new secret using the Let's Encrypt certificate, then restart the gateway to load the updated certificate.
Delete the existing self-signed TLS secret.
console$ kubectl delete secret cluster-tls -n kgateway-system
Output:
secret "cluster-tls" deletedCreate the new TLS secret using the Let's Encrypt certificate.
console$ kubectl create secret tls cluster-tls \ -n kgateway-system \ --key /etc/letsencrypt/live/amd-ai-workbench.example.com/privkey.pem \ --cert /etc/letsencrypt/live/amd-ai-workbench.example.com/fullchain.pem
Ensure your user has permission to read the certificate files. If not, prependNotesudoto the command. If you run the command withsudo, ensure the root user has access to Kubernetes credentials (via/root/.kube/configor system-wide configuration).Verify that Kubernetes created the secret successfully.
console$ kubectl get secret/cluster-tls -n kgateway-system
The output displays the
cluster-tlssecret listed in thekgateway-systemnamespace.Restart the HTTPS gateway so it loads the new certificate.
console$ kubectl rollout restart deployment/https -n kgateway-system
Access the Platform
After the gateway restarts, access the AMD Resource Manager and AMD AI Workbench UIs and sign in using the default credentials to complete the initial login process.
Open the platform UIs in your browser.
- AMD Resource Manager:
https://airmui.amd-ai-workbench.example.com - AMD AI Workbench:
https://aiwbui.amd-ai-workbench.example.com
- AMD Resource Manager:
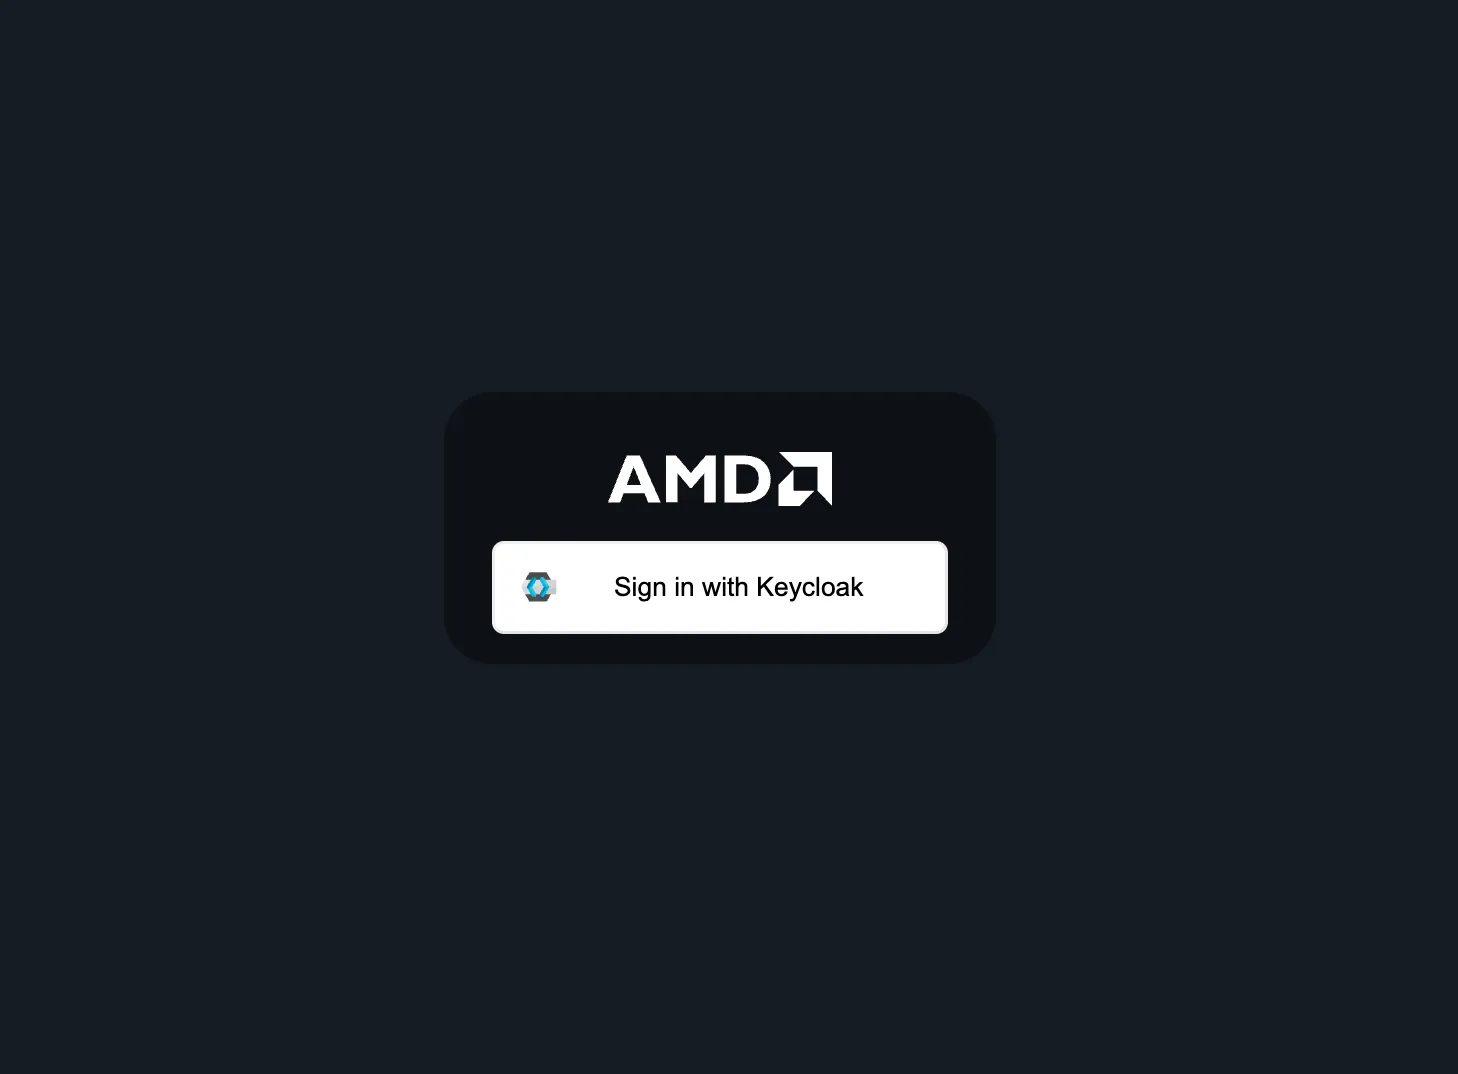
Click Sign in with Keycloak. It redirects you to the Keycloak login page.
Retrieve the initial password for the
devuseraccount.console$ kubectl -n keycloak get secret airm-realm-credentials \ -o jsonpath='{.data.KEYCLOAK_INITIAL_DEVUSER_PASSWORD}' | base64 --decode && echo
Enter the following credentials to log in. Replace
amd-ai-workbench.example.comwith the domain you configured.- Username:
devuser@amd-ai-workbench.example.com - Password: The value retrieved in the previous step.
- Username:
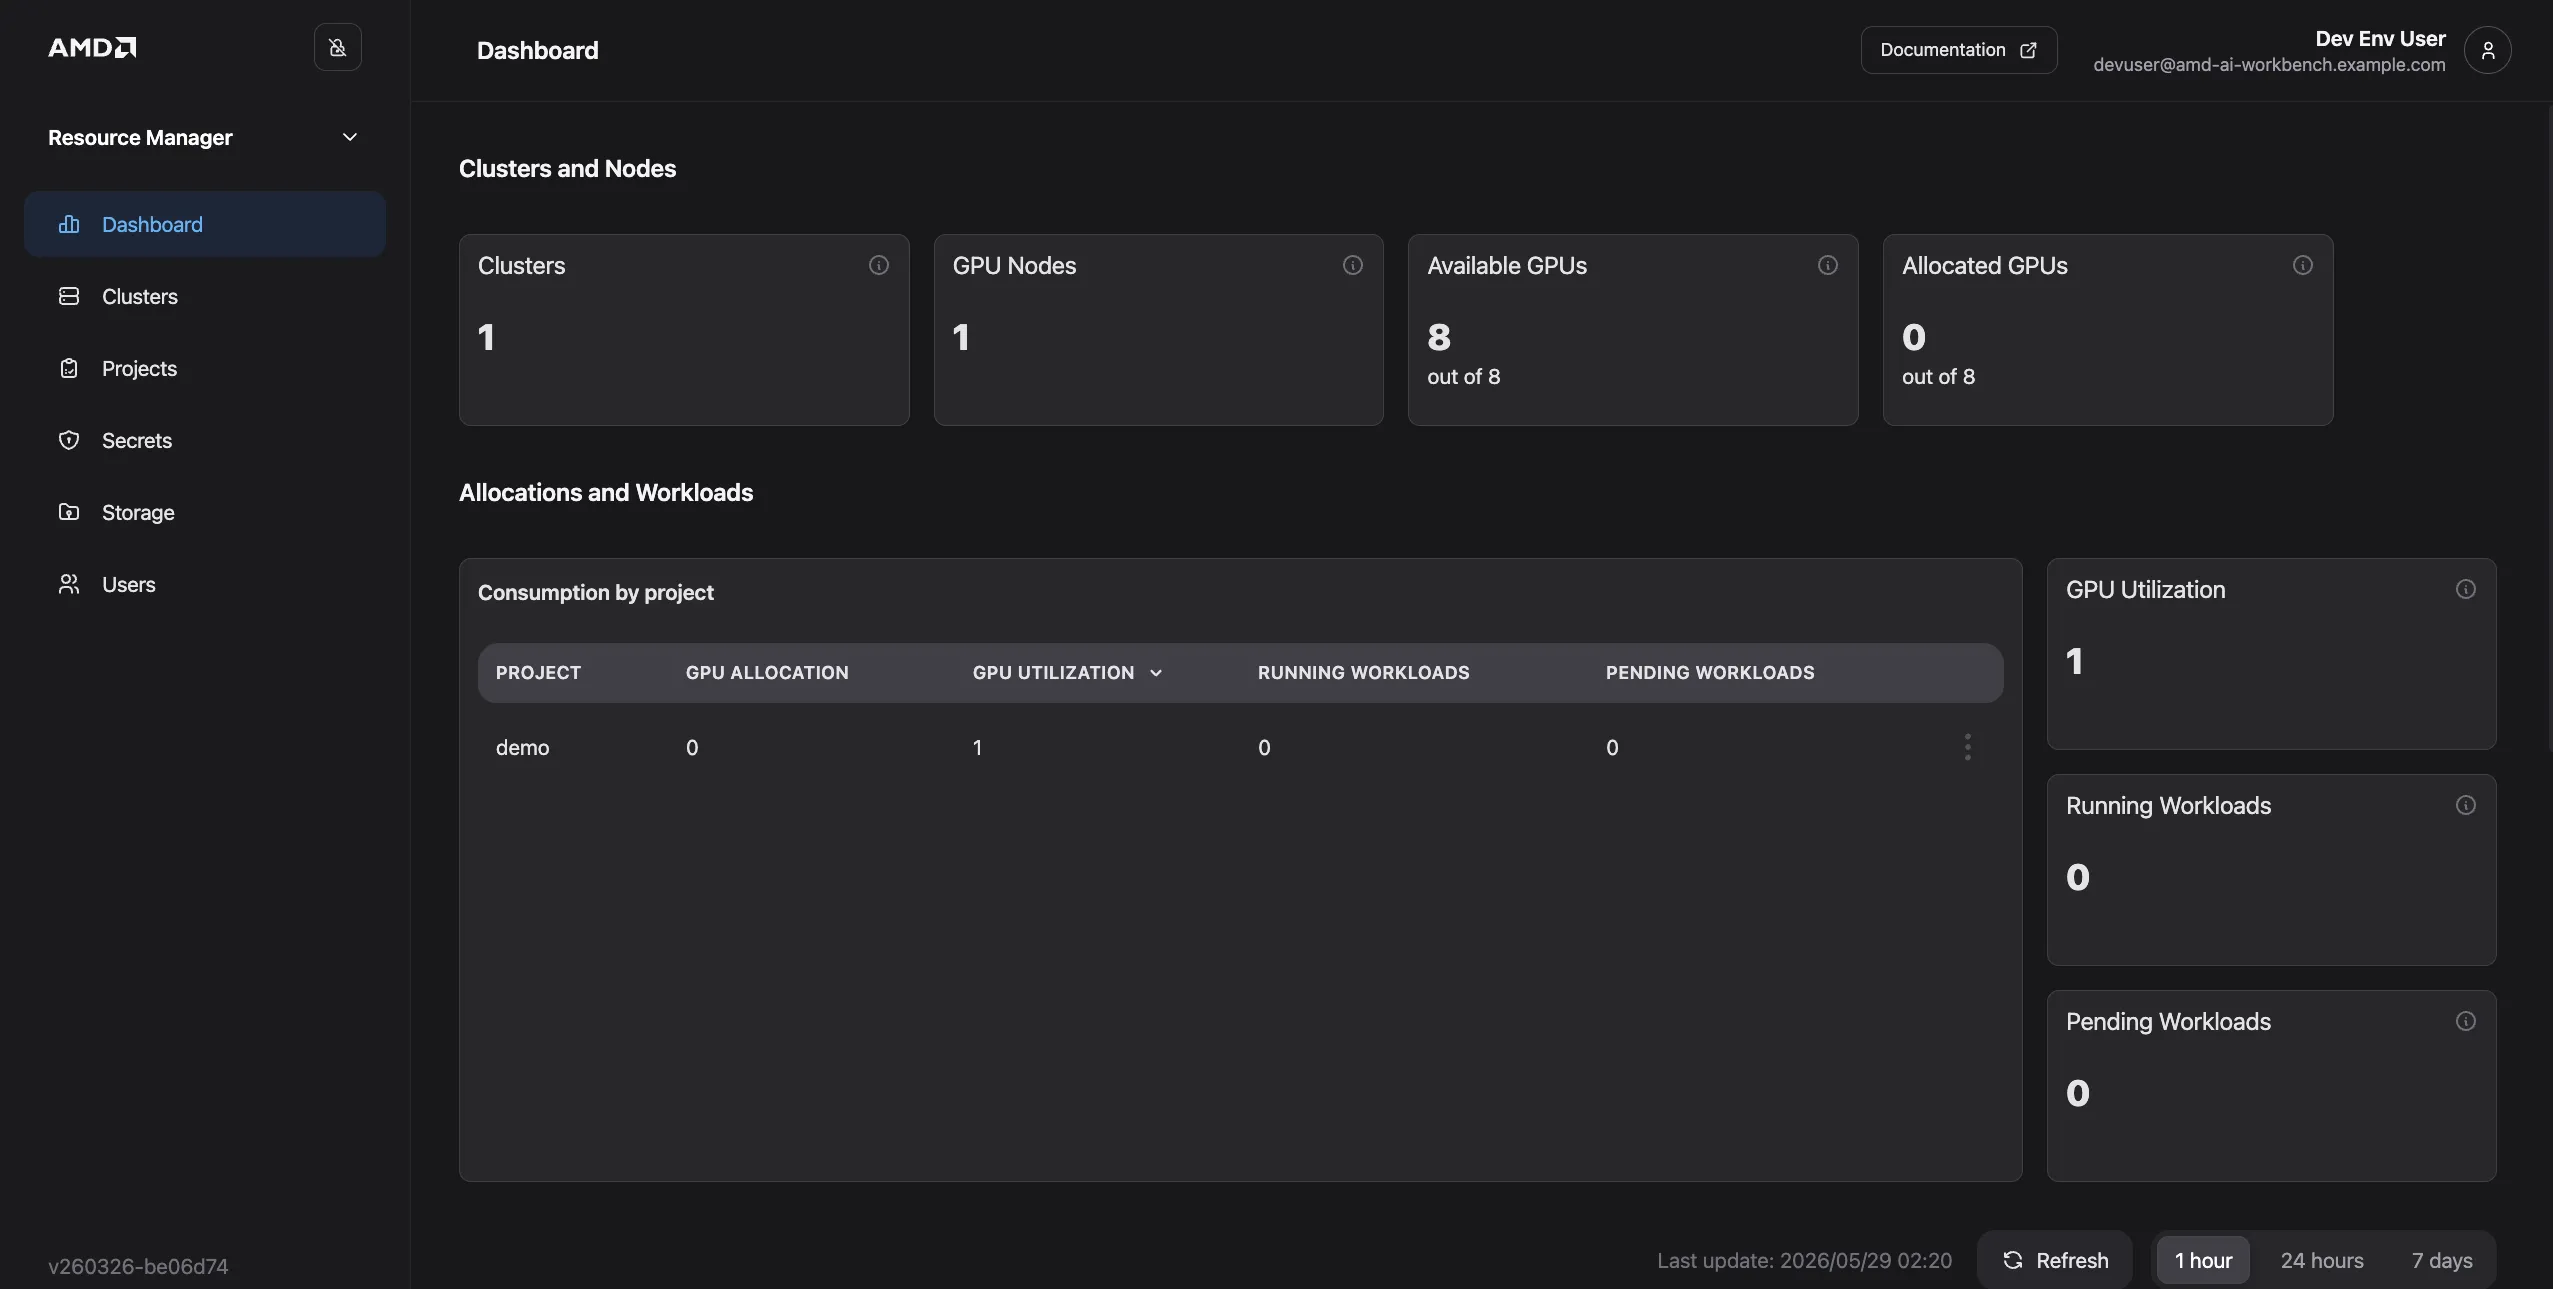
On first login, Keycloak prompts you to set a new password. Enter a strong password and confirm it. The dashboard then loads and displays the AMD Resource Manager interface.
Open
https://aiwbui.amd-ai-workbench.example.comin your browser to access the AMD AI Workbench. Click Sign in with Keycloak and use the samedevusercredentials to log in.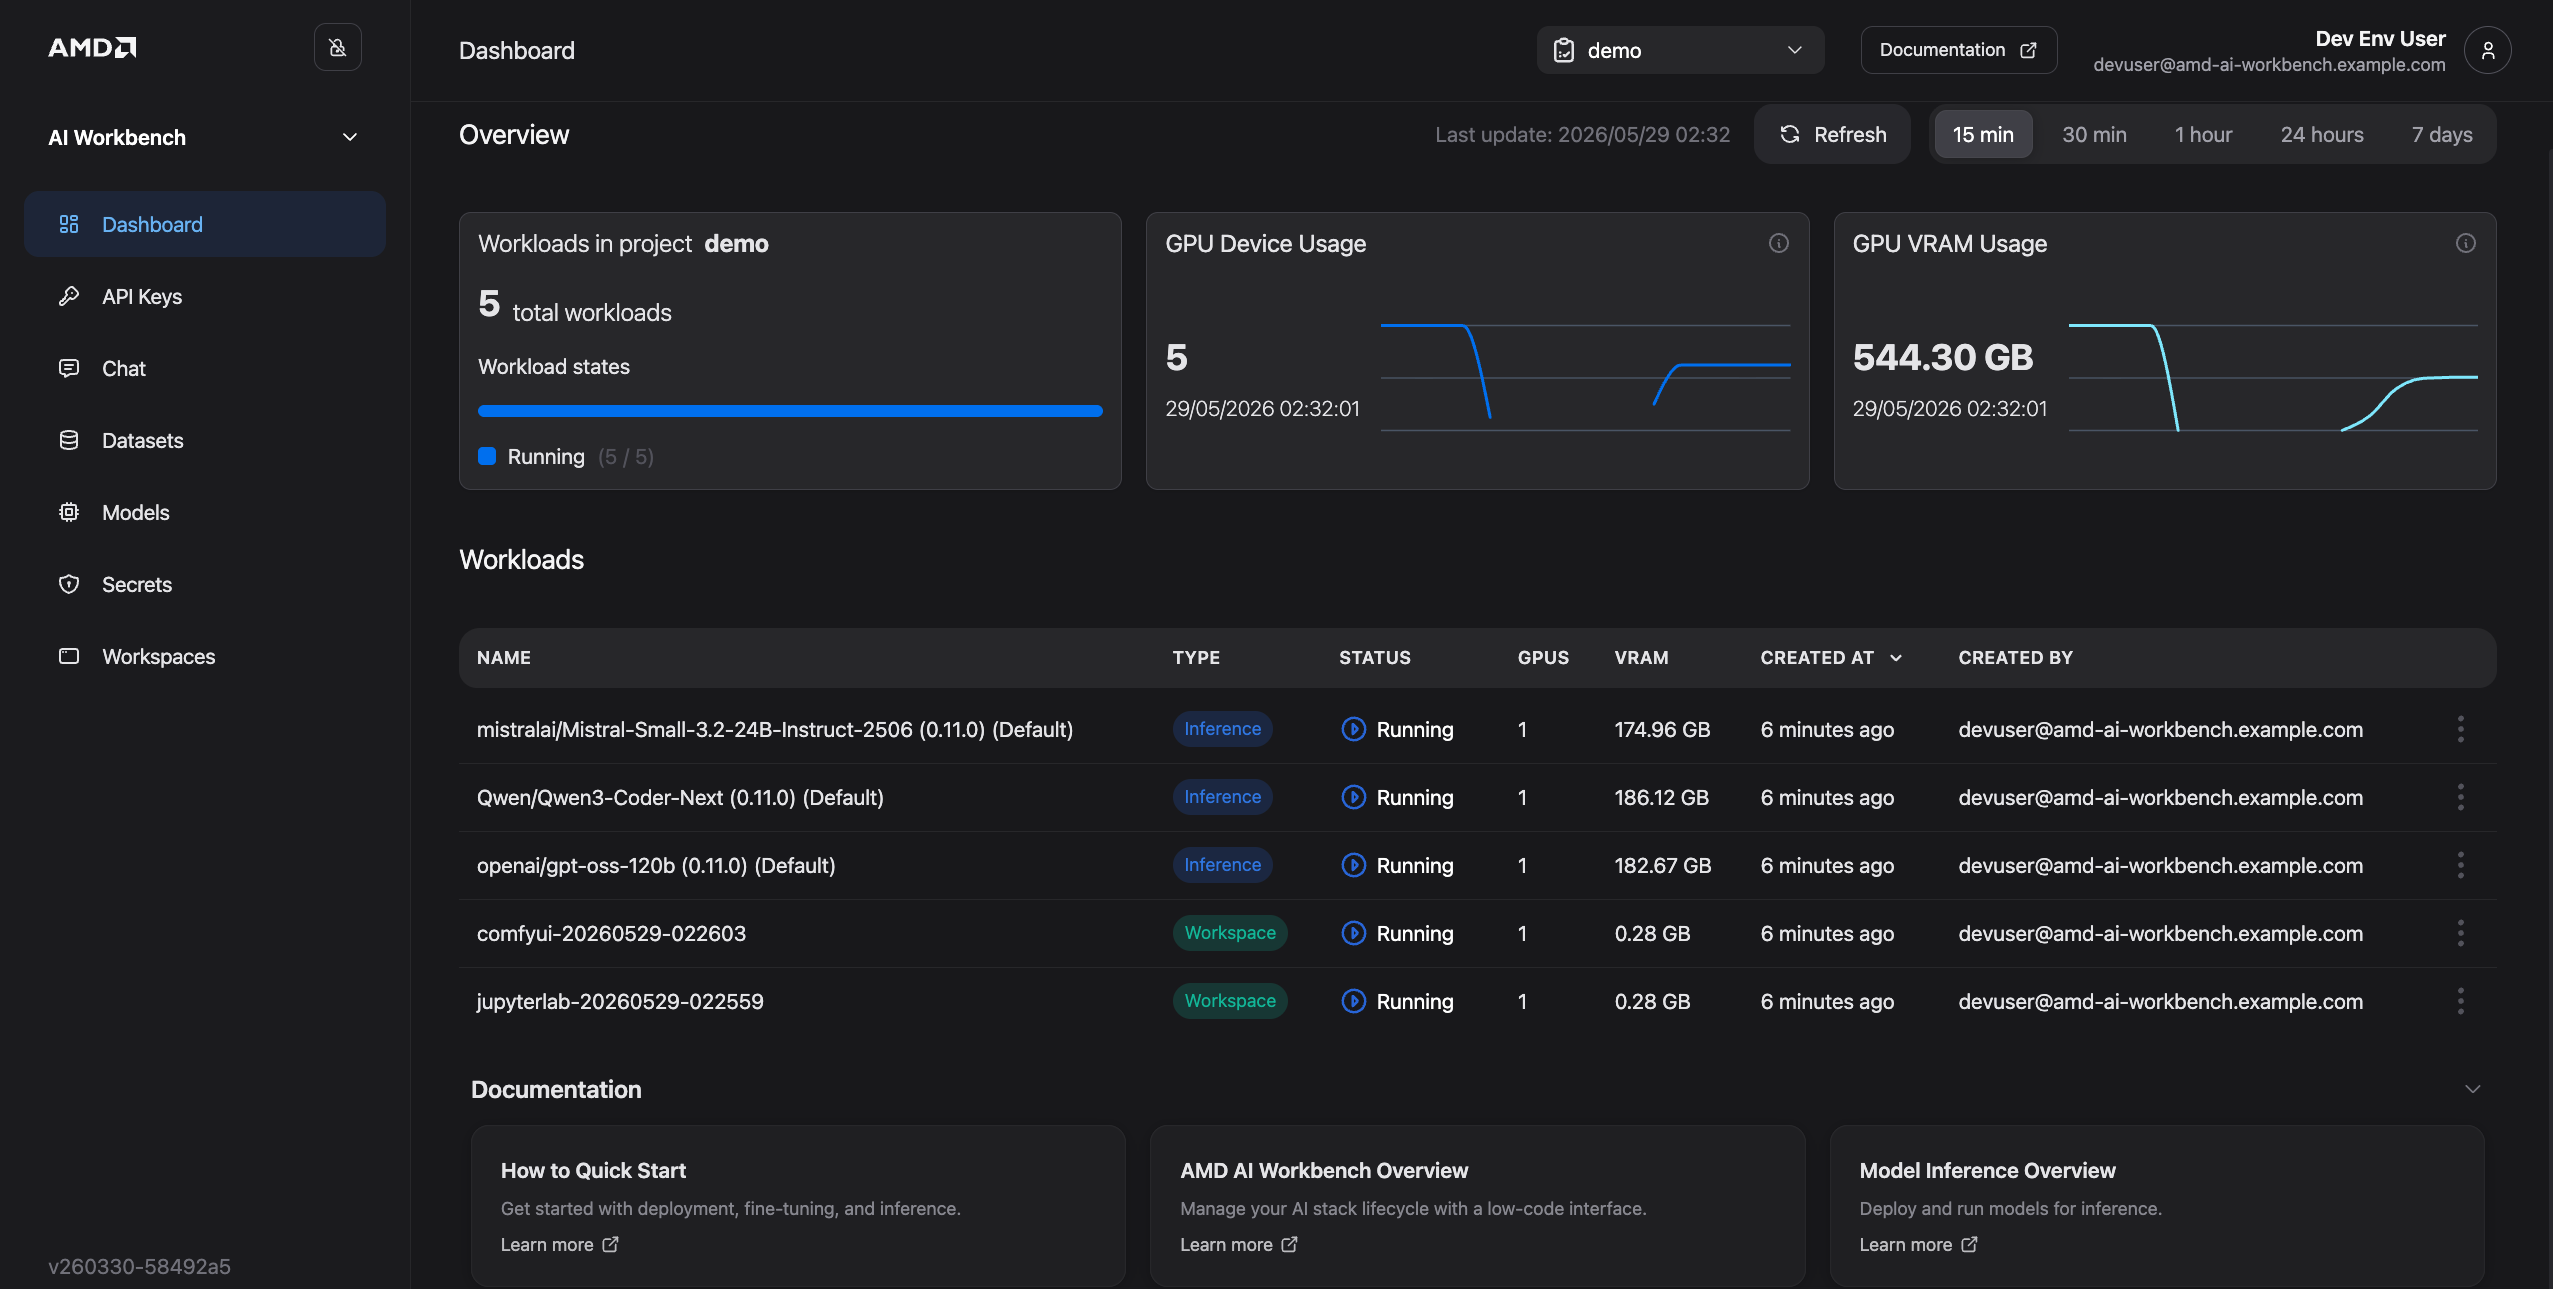
To access the Keycloak Admin console, retrieve the admin password.
console$ kubectl -n keycloak get secret keycloak-credentials \ -o jsonpath='{.data.KEYCLOAK_INITIAL_ADMIN_PASSWORD}' | base64 --decode && echo
Open
https://kc.amd-ai-workbench.example.comin your browser and log in with the following credentials.- Username:
silogen-admin - Password: The value retrieved in the previous step.
- Username:
Conclusion
By following this guide, you deployed the AMD Enterprise AI Reference Stack on Vultr using AMD Instinct™ GPUs and the Bloom installer. The platform now combines AI Workbench, Resource Manager, Kaiwo, Cluster Forge, and AIMs into a unified, scalable, high-performance AI infrastructure. For a Kubernetes-based deployment using the Vultr Marketplace Application, see How to Use Vultr's AMD AI Workbench VKE Application. For more information, visit the official AMD Enterprise AI documentation.