
How to Install Elasticsearch on Ubuntu 24.04
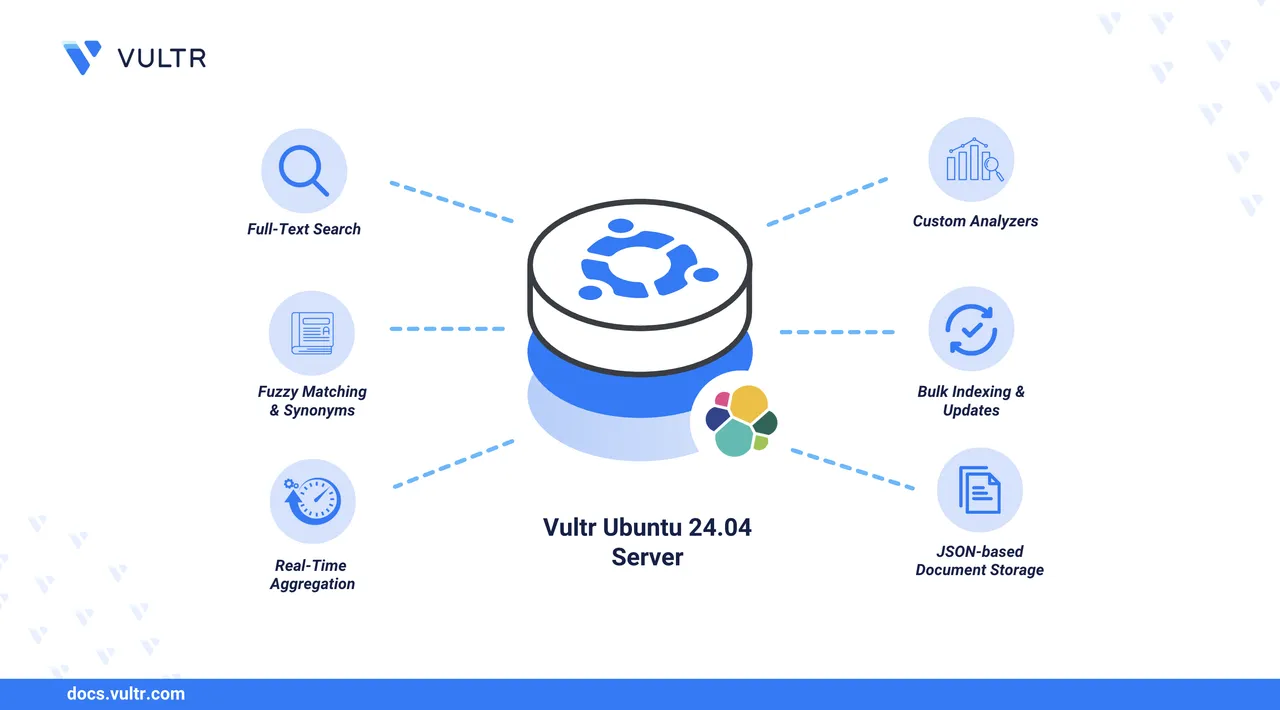
Elasticsearch is a distributed, open-source search engine built on Apache Lucene. It stores and retrieves large volumes of structured, unstructured, and vector data with high speed and scalability. It is commonly used as part of the Elastic Stack alongside Logstash and Kibana for logging, analytics, and full-text search.
In this article, you will install Elasticsearch on Ubuntu 24.04, configure it for secure local access, test its functionality, and secure it with Let's Encrypt SSL certificates and Nginx as a reverse proxy.
Prerequisites
Before you begin, you need to:
- Have access to an Ubuntu 24.04 server as a non-root user with sudo privileges.
- A DNS record pointing to your server’s IP address, such as
www.example.com.
Install Dependencies
Install Certbot and Nginx to prepare for securing Elasticsearch with SSL.
Update your system’s package list.
console$ sudo apt update
Install Certbot, Nginx, and the Nginx plugin.
console$ sudo apt install -y certbot nginx python3-certbot-nginx
Install Elasticsearch
Elasticsearch is not available in Ubuntu’s default package repositories. Add the official Elastic APT repository and install it as follows:
Import the Elasticsearch GPG signing key.
console$ curl -fsSL https://artifacts.elastic.co/GPG-KEY-elasticsearch | \ sudo gpg --dearmor -o /usr/share/keyrings/elasticsearch-keyring.gpg
Add the Elasticsearch APT source list.
console$ echo "deb [signed-by=/usr/share/keyrings/elasticsearch-keyring.gpg] https://artifacts.elastic.co/packages/8.x/apt stable main" | \ sudo tee /etc/apt/sources.list.d/elastic-8.x.list
Update your package list again to include the new repository.
console$ sudo apt update
Install Elasticsearch.
console$ sudo apt install -y elasticsearch
Configure Elasticsearch
Restrict Elasticsearch to listen only on localhost to prevent external access.
Open the Elasticsearch configuration file.
console$ sudo nano /etc/elasticsearch/elasticsearch.yml
Find the following line (usually near the bottom) and replace or add it to restrict access to
localhost:yamlnetwork.host: 127.0.0.1
Setting
network.hostto127.0.0.1ensures Elasticsearch is not exposed to external networks.Save the file and exit.
Manage the Elasticsearch Service
Restart and enable the Elasticsearch service to apply changes and ensure it starts on boot.
Reload systemd to register service changes.
console$ sudo systemctl daemon-reload
Restart the Elasticsearch service.
console$ sudo systemctl restart elasticsearch
Enable Elasticsearch to start automatically on reboot.
console$ sudo systemctl enable elasticsearch
Verify that the service is active and running.
console$ sudo systemctl status elasticsearch
Test Elasticsearch
Verify that Elasticsearch is working by allowing required firewall ports, resetting the default user password, and querying the API.
Allow HTTP and HTTPS ports.
console$ sudo ufw allow 80/tcp $ sudo ufw allow 443/tcp
Enable the firewall.
console$ sudo ufw enable
Confirm that the rules are active.
console$ sudo ufw status
Output:
Status: active

To                         Action      From
--                         ------      ----
22/tcp                     ALLOW       Anywhere
80/tcp                     ALLOW       Anywhere
443/tcp                    ALLOW       Anywhere
22/tcp (v6)                ALLOW       Anywhere (v6)
80/tcp (v6)                ALLOW       Anywhere (v6)
443/tcp (v6)               ALLOW       Anywhere (v6)
Reset the
elasticuser password.console$ sudo /usr/share/elasticsearch/bin/elasticsearch-reset-password -u elastic
The command above generates and displays a new password for the
elasticuser, which you will use in the next step.Test the Elasticsearch API with the generated password.
console$ curl -u elastic:<password> -k https://127.0.0.1:9200
Replace
<password>with the value generated in the previous step to authenticate the request. The-koption skips SSL certificate validation.Elasticsearch enables authentication by default since version 8.0. Resetting theNoteelasticuser password is required for API access.The response should resemble:
{
   "name": "vultr",
   "cluster_name": "elasticsearch",
   "cluster_uuid": "495uUfkmREWsiiHmXwoY5Q",
   "version": {
       "number": "8.18.2",
       "build_flavor": "default",
       "build_type": "deb",
       "build_hash": "c6b8d8d951c631db715485edc1a74190cdce4189",
       "build_date": "2025-05-23T10:07:06.210694702Z",
       "build_snapshot": false,
       "lucene_version": "9.12.1",
       "minimum_wire_compatibility_version": "7.17.0",
       "minimum_index_compatibility_version": "7.0.0"
   },
   "tagline": "You Know, for Search"
}
This confirms that Elasticsearch is functioning and accessible via a secure API.
Secure Elasticsearch
To enable secure remote access, use Let's Encrypt SSL certificates with an Nginx reverse proxy.
Create a new reverse proxy configuration for Nginx.
console$ sudo nano /etc/nginx/sites-available/elasticsearch
Add the following configuration and replace
www.example.comaccordingly.iniserver { listen 80; server_name www.example.com; location / { proxy_pass https://localhost:9200; proxy_ssl_verify off; proxy_set_header Host $host; proxy_set_header X-Real-IP $remote_addr; proxy_set_header X-Forwarded-For $proxy_add_x_forwarded_for; proxy_set_header X-Forwarded-Proto $scheme; } }
Enable the new Elasticsearch reverse proxy.
console$ sudo ln -s /etc/nginx/sites-available/elasticsearch /etc/nginx/sites-enabled/
Restart Nginx.
console$ sudo systemctl restart nginx
Request a TLS certificate using Certbot.
console$ sudo certbot --nginx -d www.example.com
After completing the prompt, Certbot stores the certificates at:
/etc/letsencrypt/live/www.example.com/fullchain.pem/etc/letsencrypt/live/www.example.com/privkey.pem
Remove the default Nginx site.
console$ sudo rm /etc/nginx/sites-enabled/default
Open your browser and visit
https://www.example.com.You should see a login prompt:
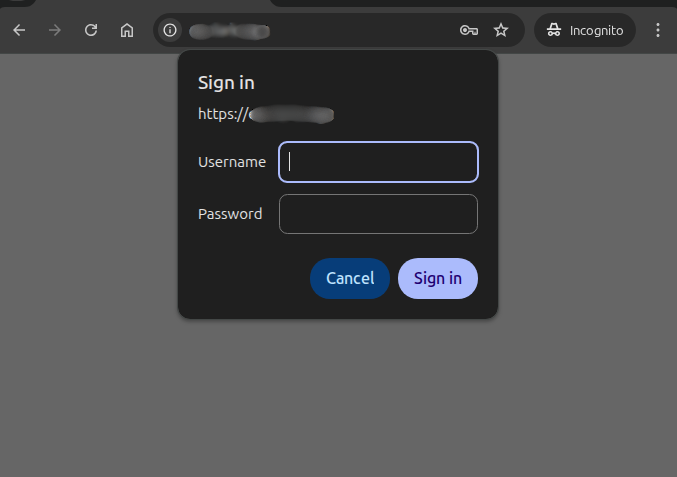
Log in using the
elasticuser and password to reach the homepage.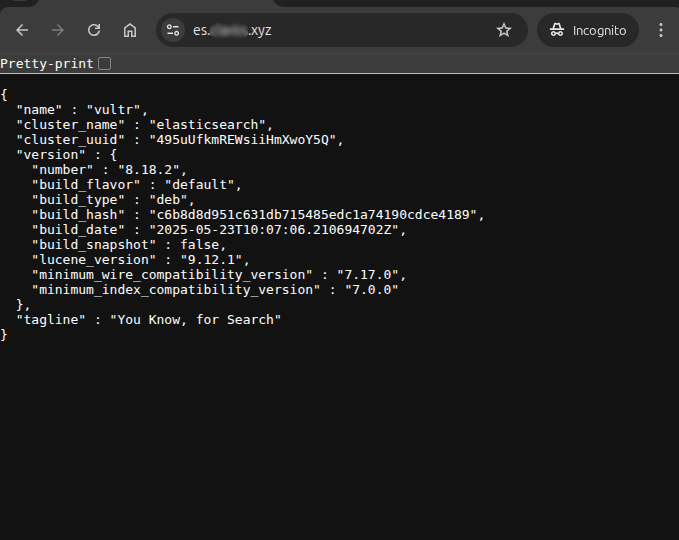
This confirms that Elasticsearch is securely accessible over HTTPS.
Conclusion
In this article, you installed Elasticsearch on Ubuntu 24.04, restricted its access to localhost, reset the elastic user password, verified its API functionality, and secured remote access using Let's Encrypt SSL certificates with an Nginx reverse proxy. This setup provides a secure and production-ready Elasticsearch environment.
For advanced use cases and cluster management, refer to the official Elasticsearch documentation.