
How to Install Gradle on Ubuntu 24.04

Gradle is an open-source build automation tool that streamlines multi-language development workflows, especially for large-scale Java applications. To get started, you can install Gradle on Ubuntu 24.04, which automates tasks such as compiling, testing, packaging, and deploying applications using Java, Kotlin, Scala, Android, Groovy, C++, or Swift. It also integrates with other tools and platforms to simplify the build, test, and deployment processes.
This article explains how to install Gradle on Ubuntu 24.04 and set it up to run applications on a server.
Install Gradle on Ubuntu 24.04
You can install Gradle using the latest release file, APT or Snap on Ubuntu 24.04. Follow the steps below to use a specific installation method to install Gradle on your server.
The Gradle release ZIP archive enables you to install the latest or a specific version from source. This ensures compatibility and access to up-to-date features for your applications. Follow the steps below to install the required dependency packages and download the latest Gradle release file to install on your server.
Update the server's package index.
console$ sudo apt update
Install the required Java Development Kit (JDK) package.
console$ sudo apt install default-jdk -y
View the installed Java version.
console$ java --version
Visit the Gradle release page, identify the latest version, and copy its binary direct download link. Then, use
wgetto download the file. For example, download the Gradle8.12version.console$ wget https://services.gradle.org/distributions/gradle-8.12-bin.zip
Extract the Gradle ZIP archive contents to a system-wide directory such as
/optconsole$ sudo unzip -d /opt/gradle gradle-8.12-bin.zip
Setup Environment Variables
Setting up a global environment variable with your Gradle installation directory allows you to execute the Gradle binary as a global system-wide command. Follow these steps to create a script in the /etc/profile.d directory for the new global environment variable
Create a new
gradle.shscript in the/etc/profile.ddirectory.console$ sudo nano /etc/profile.d/gradle.sh
Add the following directives to the
gradle.shfile.shexport GRADLE_HOME=/opt/gradle/gradle-8.12 export PATH=${GRADLE_HOME}/bin:${PATH}
Save and close the file.
Enable execute permissions on the script.
console$ sudo chmod +x /etc/profile.d/gradle.sh
Load the Gradle environment configuration in your active shell.
console$ source /etc/profile.d/gradle.sh
Verify the installed Gradle version.
console$ gradle --version
Output:
Welcome to Gradle 8.12!
Here are the highlights of this release:
 - Enhanced Error and Warning Messages
 - IDE Integration Improvements
 - Daemon JVM Information
For more details see https://docs.gradle.org/8.12/release-notes.html
------------------------------------------------------------
Gradle 8.12
------------------------------------------------------------
Gradle is available in the default APT package repositories on Ubuntu 24.04. However, the Gradle version is not the latest. Follow the steps below to install Gradle and all required dependencies using the APT package manager on your server.
Update the server's package index.
console$ sudo apt update
Install Gradle.
console$ sudo apt install gradle -y
View the installed Gradle version.
console$ gradle --version
Your output should be similar to the one below.
openjdk version "21.0.5" 2024-10-15
OpenJDK Runtime Environment (build 21.0.5+11-Ubuntu-1ubuntu124.04)
OpenJDK 64-Bit Server VM (build 21.0.5+11-Ubuntu-1ubuntu124.04, mixed mode, sharing)
------------------------------------------------------------
Gradle 4.4.1
------------------------------------------------------------
Build time:   2012-12-21 00:00:00 UTC
Revision:     none
Groovy:       2.4.21
Ant:          Apache Ant(TM) version 1.10.14 compiled on September 25 2023
JVM:          21.0.5 (Ubuntu 21.0.5+11-Ubuntu-1ubuntu124.04)
OS:           Linux 6.8.0-48-generic amd64
Gradle is available in the Snap Store, but the included version might not be the latest. Snap offers a direct installation procedure with faster updates for installed Gradle versions. Follow the steps below to install Gradle on your server using Snap.
Install the Snap daemon if it's not installed.
console$ sudo apt install snapd -y
Search the available Gradle version in the Snap Store.
console$ sudo snap search gradle
Output:
Name           Version   Publisher      Notes    Summary
gradle         7.2       snapcrafters✪  classic  An open-source build automation tool
gum            0.13.0    aalmiray       classic  Gum is a Gradle/Maven/Ant/Bach/JBang wrapper written in Go
jreleaser      1.0.0-M1  aalmiray       -        Release Java projects quickly and easily with JReleaser
om26er-gradle  4.7       om26er         -        Accelerate developer productivity
jrel-test      1.0.0-M9  aalmiray       -        Release projects quickly and easily with JReleaser
Gradle
7.2is the available version in the Snap Store based on the above output.Install Gradle using Snap.
console$ sudo snap install gradle --classic
View the installed Gradle version.
console$ sudo snap run gradle --version
Output:
Welcome to Gradle 7.2!
Here are the highlights of this release:
 - Toolchain support for Scala
 - More cache hits when Java source files have platform-specific line endings
 - More resilient remote HTTP build cache behavior
For more details see https://docs.gradle.org/7.2/release-notes.html
------------------------------------------------------------
Gradle 7.2
------------------------------------------------------------
Create a Basic Java Application Using Gradle
Follow the steps below to create a basic Java application and run it using Gradle on your server.
Create a new
sample_projectdirectory to use with Gradle.console$ mkdir sample_project
Switch to the
sample_projectdirectory.console$ cd sample_project
Initialize the Gradle project to create a basic Gradle project structure.
console$ gradle init --type java-application
Output:
.........
BUILD SUCCESSFUL in 6s
2 actionable tasks: 2 executed
Press Enter to use the default Java version in your project.
Starting a Gradle Daemon (subsequent builds will be faster)

Enter target Java version (min: 7, default: 21):
Verify your project name and press Enter.
Project name (default: sample_project):Enter
1to set up a single application project.Select application structure: 1: Single application project 2: Application and library project Enter selection (default: Single application project) [1..2]Select your desired build language. For example, enter
1to select Kotlin as the build script language.Select build script DSL: 1: Kotlin 2: Groovy Enter selection (default: Kotlin) [1..2]Select the target test framework. For example, enter
1to select JUnit 4.Select test framework: 1: JUnit 4 2: TestNG 3: Spock 4: JUnit Jupiter Enter selection (default: JUnit Jupiter) [1..4]Press
yesto use new APIs with Gradle and initialize your project.Generate build using new APIs and behavior (some features may change in the next minor release)? (default: no) [yes, no]
Your output should be similar to the one below when the build process is successful.
BUILD SUCCESSFUL in 1m 5s
1 actionable task: 1 executed
Create the
src/main/javadirectory to store your application files.console$ mkdir -p src/main/java
Create a new
App.javaJava application file in thesrc/main/javadirectory using a text editor such asnano.console$ nano src/main/java/App.java
Add following contents to the file.
javapublic class App { public static void main(String[] args) { System.out.println("Greetings from Vultr!"); } }
Save and close the file.
The above Java program outputs a
Greetings from Vultrmessage when executed.Open the
build.gradlefile to ensure it includes the Java plugin and specifies the main class.console$ nano build.gradle
Add the following contents to the file.
iniplugins { id 'application' } application { // Define the main class mainClass = 'App' } jar { manifest { attributes( 'Main-Class': 'App' ) } } repositories { mavenCentral() } dependencies { // Add dependencies here if needed }
Save and close the file.
Build and compile the Java application into a single file using Gradle.
console$ gradle build
The above command compiles the Java application code, runs tests, and packages the application into a single
.jarfile.Output:
Calculating task graph as no cached configuration is available for tasks: build

BUILD SUCCESSFUL in 1m 12s
12 actionable tasks: 12 executed
Configuration cache entry stored.
Run the application using Gradle.
console$ gradle run
Output:
> Task :run
Greetings from Vultr!

> Task :app:run
Hello World!

BUILD SUCCESSFUL in 1s
4 actionable tasks: 2 executed, 2 up-to-date
Run the bundled
.jarfile using Java.console$ java -jar build/libs/sample_project.jar App
Output:
Greetings from Vultr!
Add Web Server Dependencies for Gradle
Gradle supports multiple dependencies to perform specific application functions. Follow the steps below to install the Spark Java web server dependency to enable Gradle to run web applications using dedicated ports on your server.
Open the
build.gradlefile.console$ nano build.gradle
Modify the
dependenciessection to include a new SparkJava directive.inidependencies { // Add Spark Java for lightweight HTTP server implementation 'com.sparkjava:spark-core:2.9.4' }
Save and close the file.
Your modified
dependenciessection should look like the one below.inidependencies { // Add dependencies here if needed // Add Spark Java for lightweight HTTP server implementation 'com.sparkjava:spark-core:2.9.4' }
Back up the
App.javaapplication file.console$ mv src/main/java/App.java src/main/java/App.ORIG
Create the
App.javafile again.console$ nano src/main/java/App.java
Add the following code to the
App.javafile to enable a basic HTTP server using Spark Java.javaimport static spark.Spark.*; public class App { public static void main(String[] args) { port(8080); // Set the port number // Define a route for the root URL get("/", (req, res) -> { res.type("text/html"); return "<h1>Greetings from Vultr!</h1>"; }); System.out.println("Server is running at http://localhost:8080/"); } }
Save and close the file.
The above modified Java application code imports the Spark Java package, runs the application on port
8080and outputs aGreetings from Vultrmessage when accessed.Allow connections to port
8080through the default firewall.console$ sudo ufw allow 8080
Reload UFW to apply the firewall changes.
console$ sudo ufw reload
Start the application using Gradle.
console$ gradle run
Output:
> Task :run
SLF4J: Failed to load class "org.slf4j.impl.StaticLoggerBinder".
SLF4J: Defaulting to no-operation (NOP) logger implementation
SLF4J: See http://www.slf4j.org/codes.html#StaticLoggerBinder for further details.
Server is running at http://localhost:8080/
<====---------> 37% EXECUTING [49s]
> :run
Access your server's IP address on port
8080using a web browser such as Firefox and verify that your web application displays.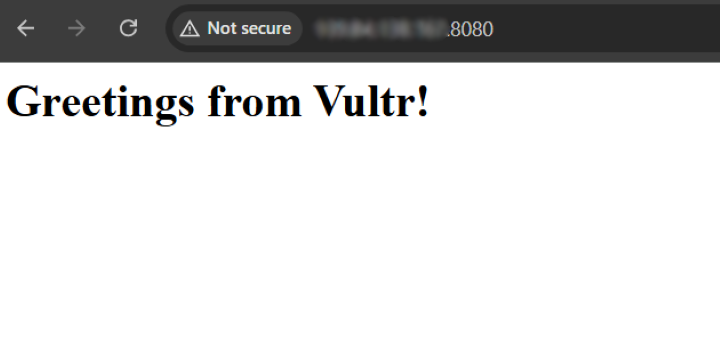
Uninstall Gradle on Ubuntu 24.04
Follow the steps below to uninstall Gradle on your server if necessary depending on your installation method.
Delete the Gradle binary to disable it on your server.
console$ sudo rm -rf /opt/gradle/gradle-8.12/bin/gradle
Remove the Gradle environment variable script.
console$ sudo rm /etc/profile.d/gradle.sh
Run the following command to uninstall Gradle if you installed it using APT.
console$ sudo apt autoremove gradle -y
Uninstall Gradle if installed using Snap.
console$ sudo snap remove gradle
Conclusion
You have installed Gradle on Ubuntu 24.04 and run sample applications on your server. Gradle is highly scalable and integrates with multiple frameworks to manage and build applications. For more information and configuration options, visit the Gradle documentation.