
How to Install RabbitMQ on Ubuntu 26.04
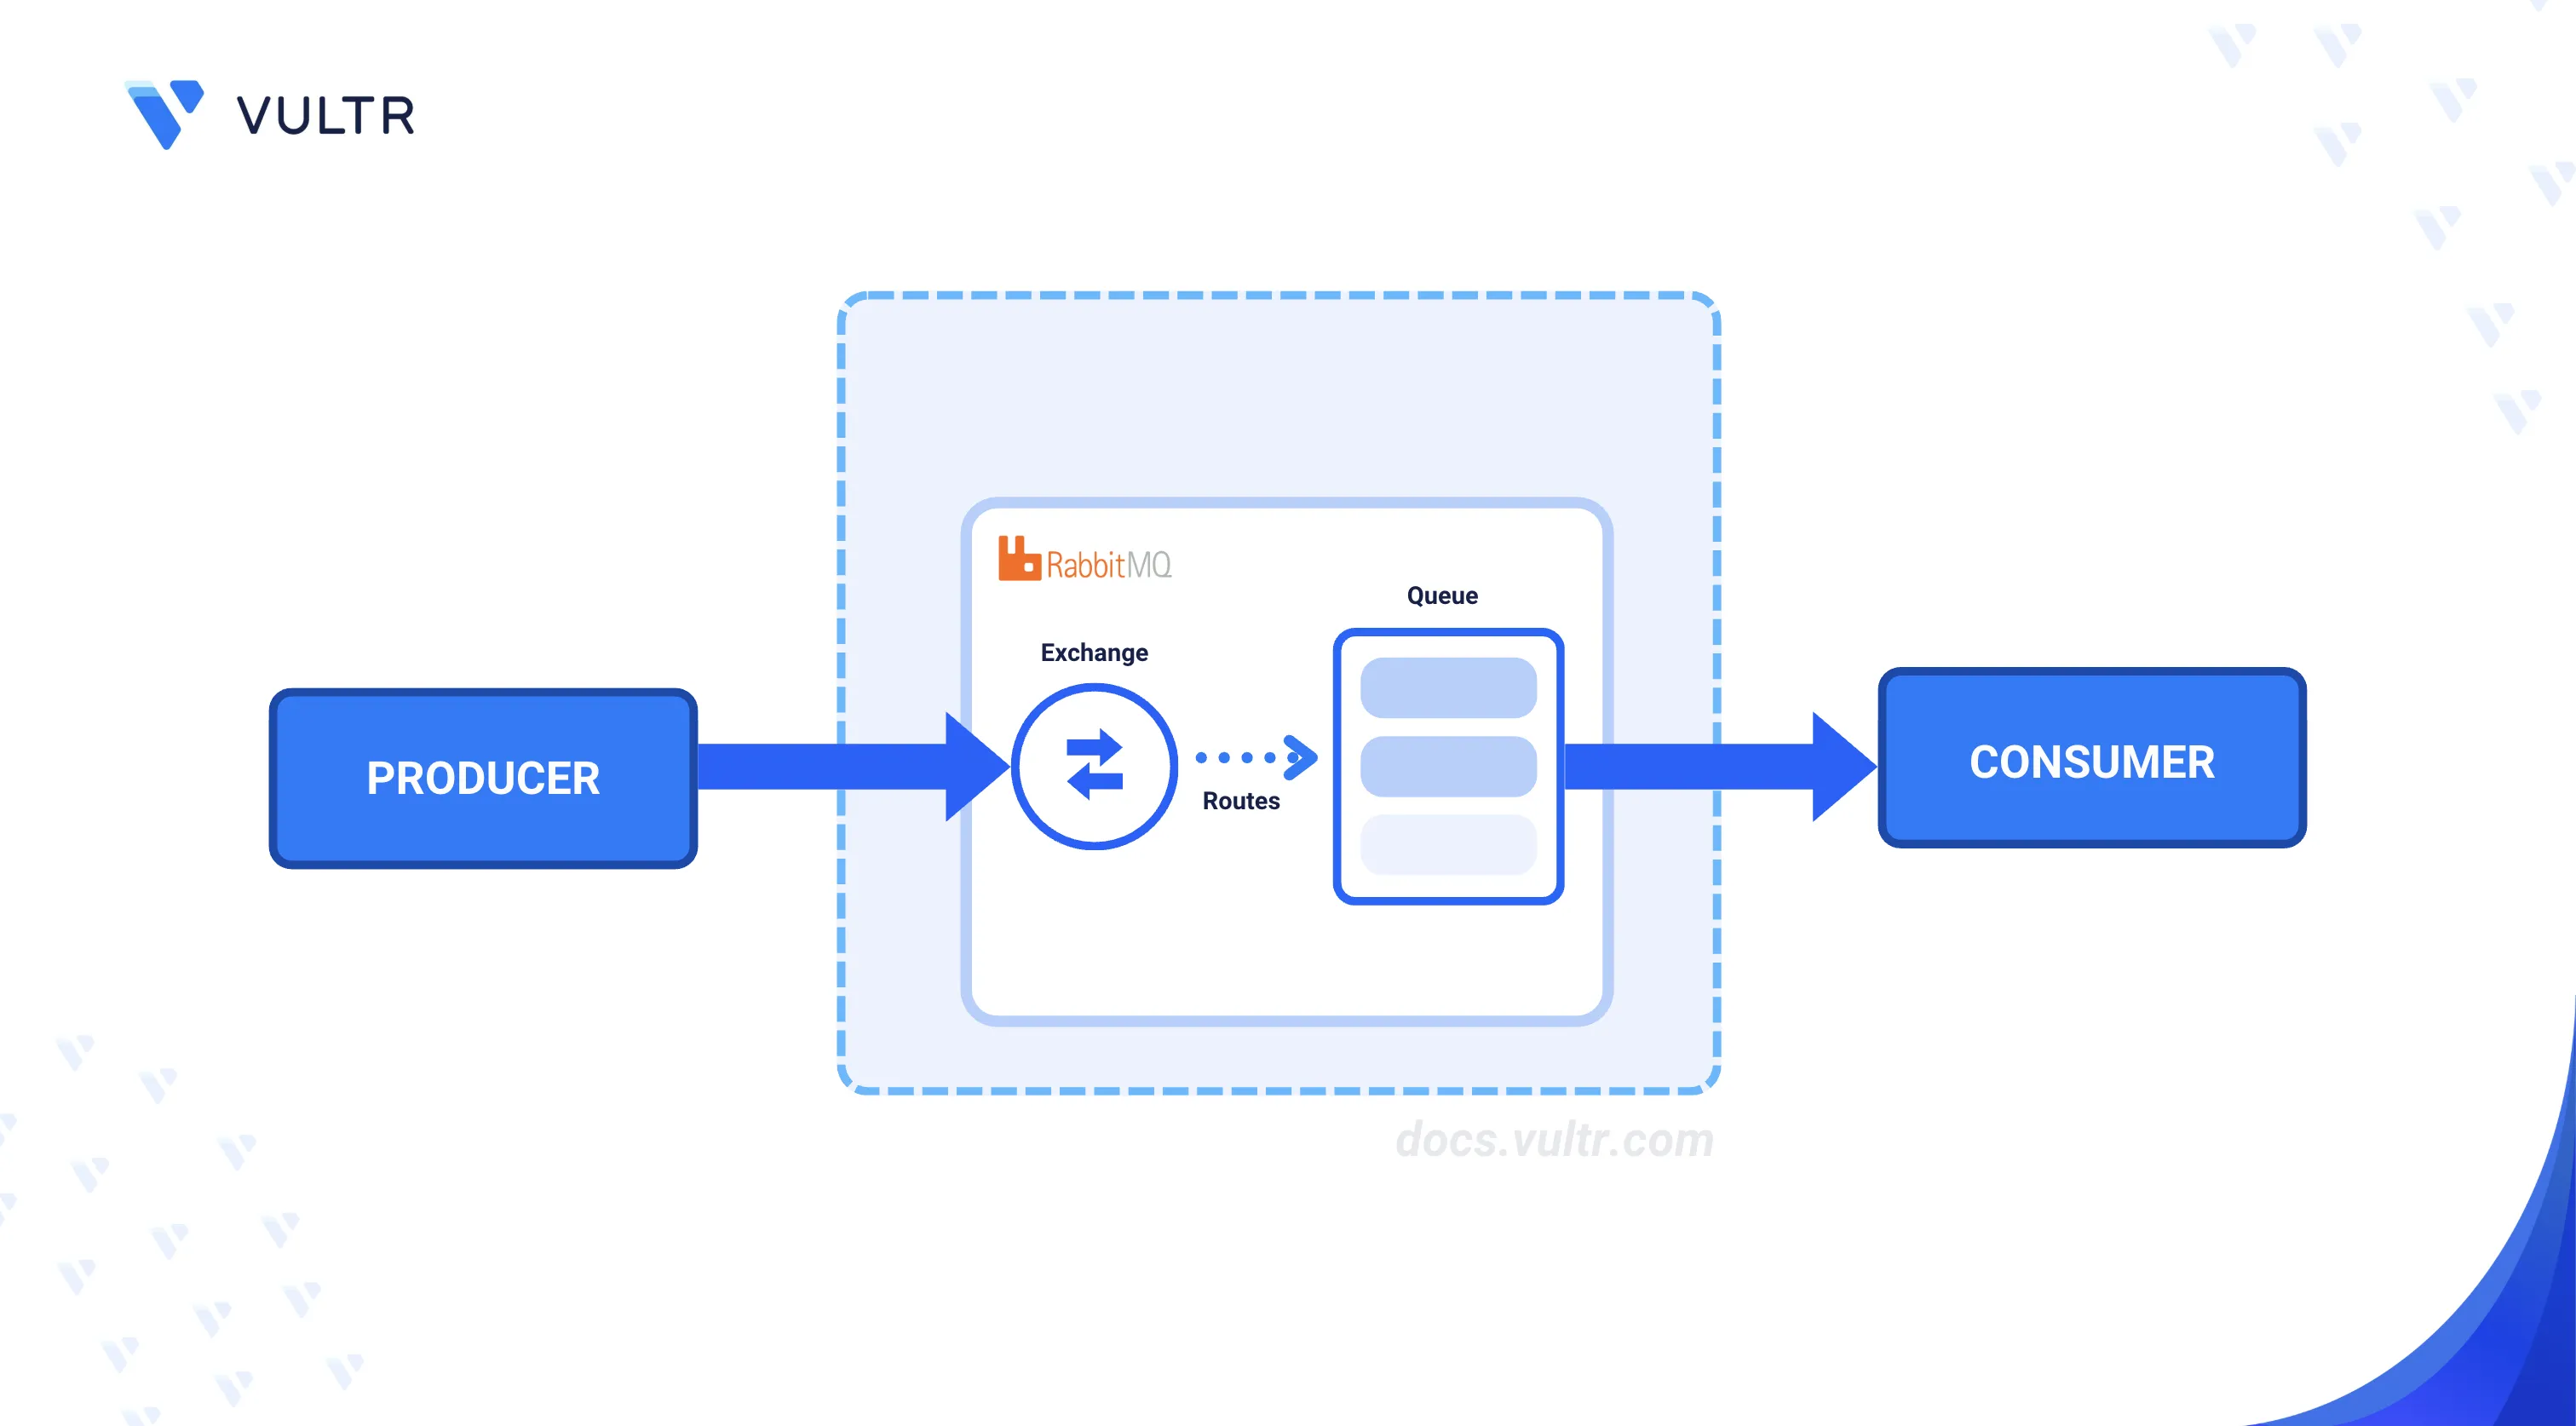
RabbitMQ is an open-source message broker that facilitates communication between distributed applications through message queuing. It supports multiple messaging protocols including AMQP, MQTT, and STOMP, and provides features such as message routing, delivery acknowledgments, and clustering for high-availability deployments.
This article explains how to install RabbitMQ on an Ubuntu 26.04 server, enable the web management interface, set up Nginx as a reverse proxy with SSL encryption, and configure firewall rules for secure access.
Prerequisites
Before you begin, you need to:
- Have access to an Ubuntu 26.04 server instance as a non-root user with sudo privileges.
- Have a domain A record pointing to the server's public IP address. For example,
rabbitmq.example.com.
Install RabbitMQ
RabbitMQ and its Erlang dependency are available in the default Ubuntu 26.04 APT repositories. The following steps install both packages and verify the installation.
Update the APT package index.
console$ sudo apt update
Install the Erlang runtime and the
gnupgpackage required by RabbitMQ.console$ sudo apt install gnupg erlang -y
Install the RabbitMQ server.
console$ sudo apt install rabbitmq-server -y
Manage the RabbitMQ System Service
The rabbitmq-server systemd service controls the RabbitMQ broker process. The following steps enable automatic startup on boot and verify the service status.
Enable RabbitMQ to start automatically at boot time.
console$ sudo systemctl enable rabbitmq-server
Start the RabbitMQ service.
console$ sudo systemctl start rabbitmq-server
Verify that RabbitMQ is active and running.
console$ sudo systemctl status rabbitmq-server
The output should display
active (running), confirming that the RabbitMQ broker is operational.
Configure RabbitMQ
RabbitMQ includes a built-in management plugin that provides a web-based interface for monitoring queues, exchanges, and connections. The following steps enable the plugin and create an administrative user with full permissions.
Enable the RabbitMQ management plugin.
console$ sudo rabbitmq-plugins enable rabbitmq_management
Create a new administrative user. Replace
example_adminwith your desired username andstrong_passwordwith a secure password.console$ sudo rabbitmqctl add_user example_admin strong_password
Assign the administrator tag to the user.
console$ sudo rabbitmqctl set_user_tags example_admin administrator
Grant the user full permissions on all RabbitMQ resources.
console$ sudo rabbitmqctl set_permissions -p / example_admin ".*" ".*" ".*"
The three
".*"patterns grant configure, write, and read permissions respectively on all resources in the default virtual host.
Set Up Firewall Rules
Uncomplicated Firewall (UFW) is active by default on Ubuntu 26.04. The following steps open ports for HTTP and HTTPS traffic required by the Nginx reverse proxy.
Allow HTTP traffic on port
80.console$ sudo ufw allow 80/tcp
Allow HTTPS traffic on port
443.console$ sudo ufw allow 443/tcp
Secure RabbitMQ
The RabbitMQ management interface listens on localhost port 15672 by default. Setting up Nginx as a reverse proxy allows access through a domain name on standard HTTP/HTTPS ports. The following steps install Nginx, configure the reverse proxy, and generate a trusted SSL certificate.
Set Up Nginx as a Reverse Proxy
Install Nginx.
console$ sudo apt install nginx -y
Enable Nginx to start automatically at boot time.
console$ sudo systemctl enable nginx
Start the Nginx service.
console$ sudo systemctl start nginx
Unlink the default Nginx virtual host configuration.
console$ sudo unlink /etc/nginx/sites-enabled/default
Create a new Nginx virtual host configuration file. Replace
rabbitmq.example.comwith your actual domain.console$ sudo nano /etc/nginx/sites-available/rabbitmq.conf
Add the following configuration to the file. Replace
rabbitmq.example.comwith your actual domain.iniserver { listen 80; server_name rabbitmq.example.com; location / { proxy_pass http://127.0.0.1:15672; proxy_set_header Host $host; proxy_set_header X-Real-IP $remote_addr; proxy_set_header X-Forwarded-For $proxy_add_x_forwarded_for; proxy_set_header Upgrade $http_upgrade; proxy_set_header Connection "upgrade"; proxy_redirect off; proxy_http_version 1.1; } }
Save and close the file.
This configuration listens on port
80and forwards all requests to the RabbitMQ management interface running on127.0.0.1:15672.Enable the virtual host by creating a symbolic link.
console$ sudo ln -s /etc/nginx/sites-available/rabbitmq.conf /etc/nginx/sites-enabled/
Test the Nginx configuration for syntax errors.
console$ sudo nginx -t
The output should confirm that the configuration syntax is ok and the test is successful.
Restart Nginx to activate the virtual host.
console$ sudo systemctl restart nginx
Generate a Trusted SSL Certificate
Install the Certbot Let's Encrypt client and the Nginx plugin.
console$ sudo apt install certbot python3-certbot-nginx -y
Generate an SSL certificate for your domain. Replace
rabbitmq.example.comwith your actual domain.console$ sudo certbot --nginx -d rabbitmq.example.com --agree-tos
Follow the on-screen prompts to complete the certificate generation. Certbot automatically updates the Nginx configuration to enable HTTPS.
Access the RabbitMQ Console
The RabbitMQ management interface is now accessible through your domain over HTTPS.
Open a web browser and navigate to your domain. Replace
rabbitmq.example.comwith your actual domain.https://rabbitmq.example.comEnter the administrative username and password you created earlier to log in.
Click Nodes in the navigation bar to view broker statistics including memory usage, message rates, and connection counts.
Conclusion
You have installed RabbitMQ on an Ubuntu 26.04 server, enabled the web management interface, and secured it with Nginx as a reverse proxy and a trusted Let's Encrypt SSL certificate. RabbitMQ supports clustering and federation for scaling message throughput across multiple nodes. For more information, refer to the official RabbitMQ documentation.