
How to Install WireGuard VPN on Ubuntu 26.04
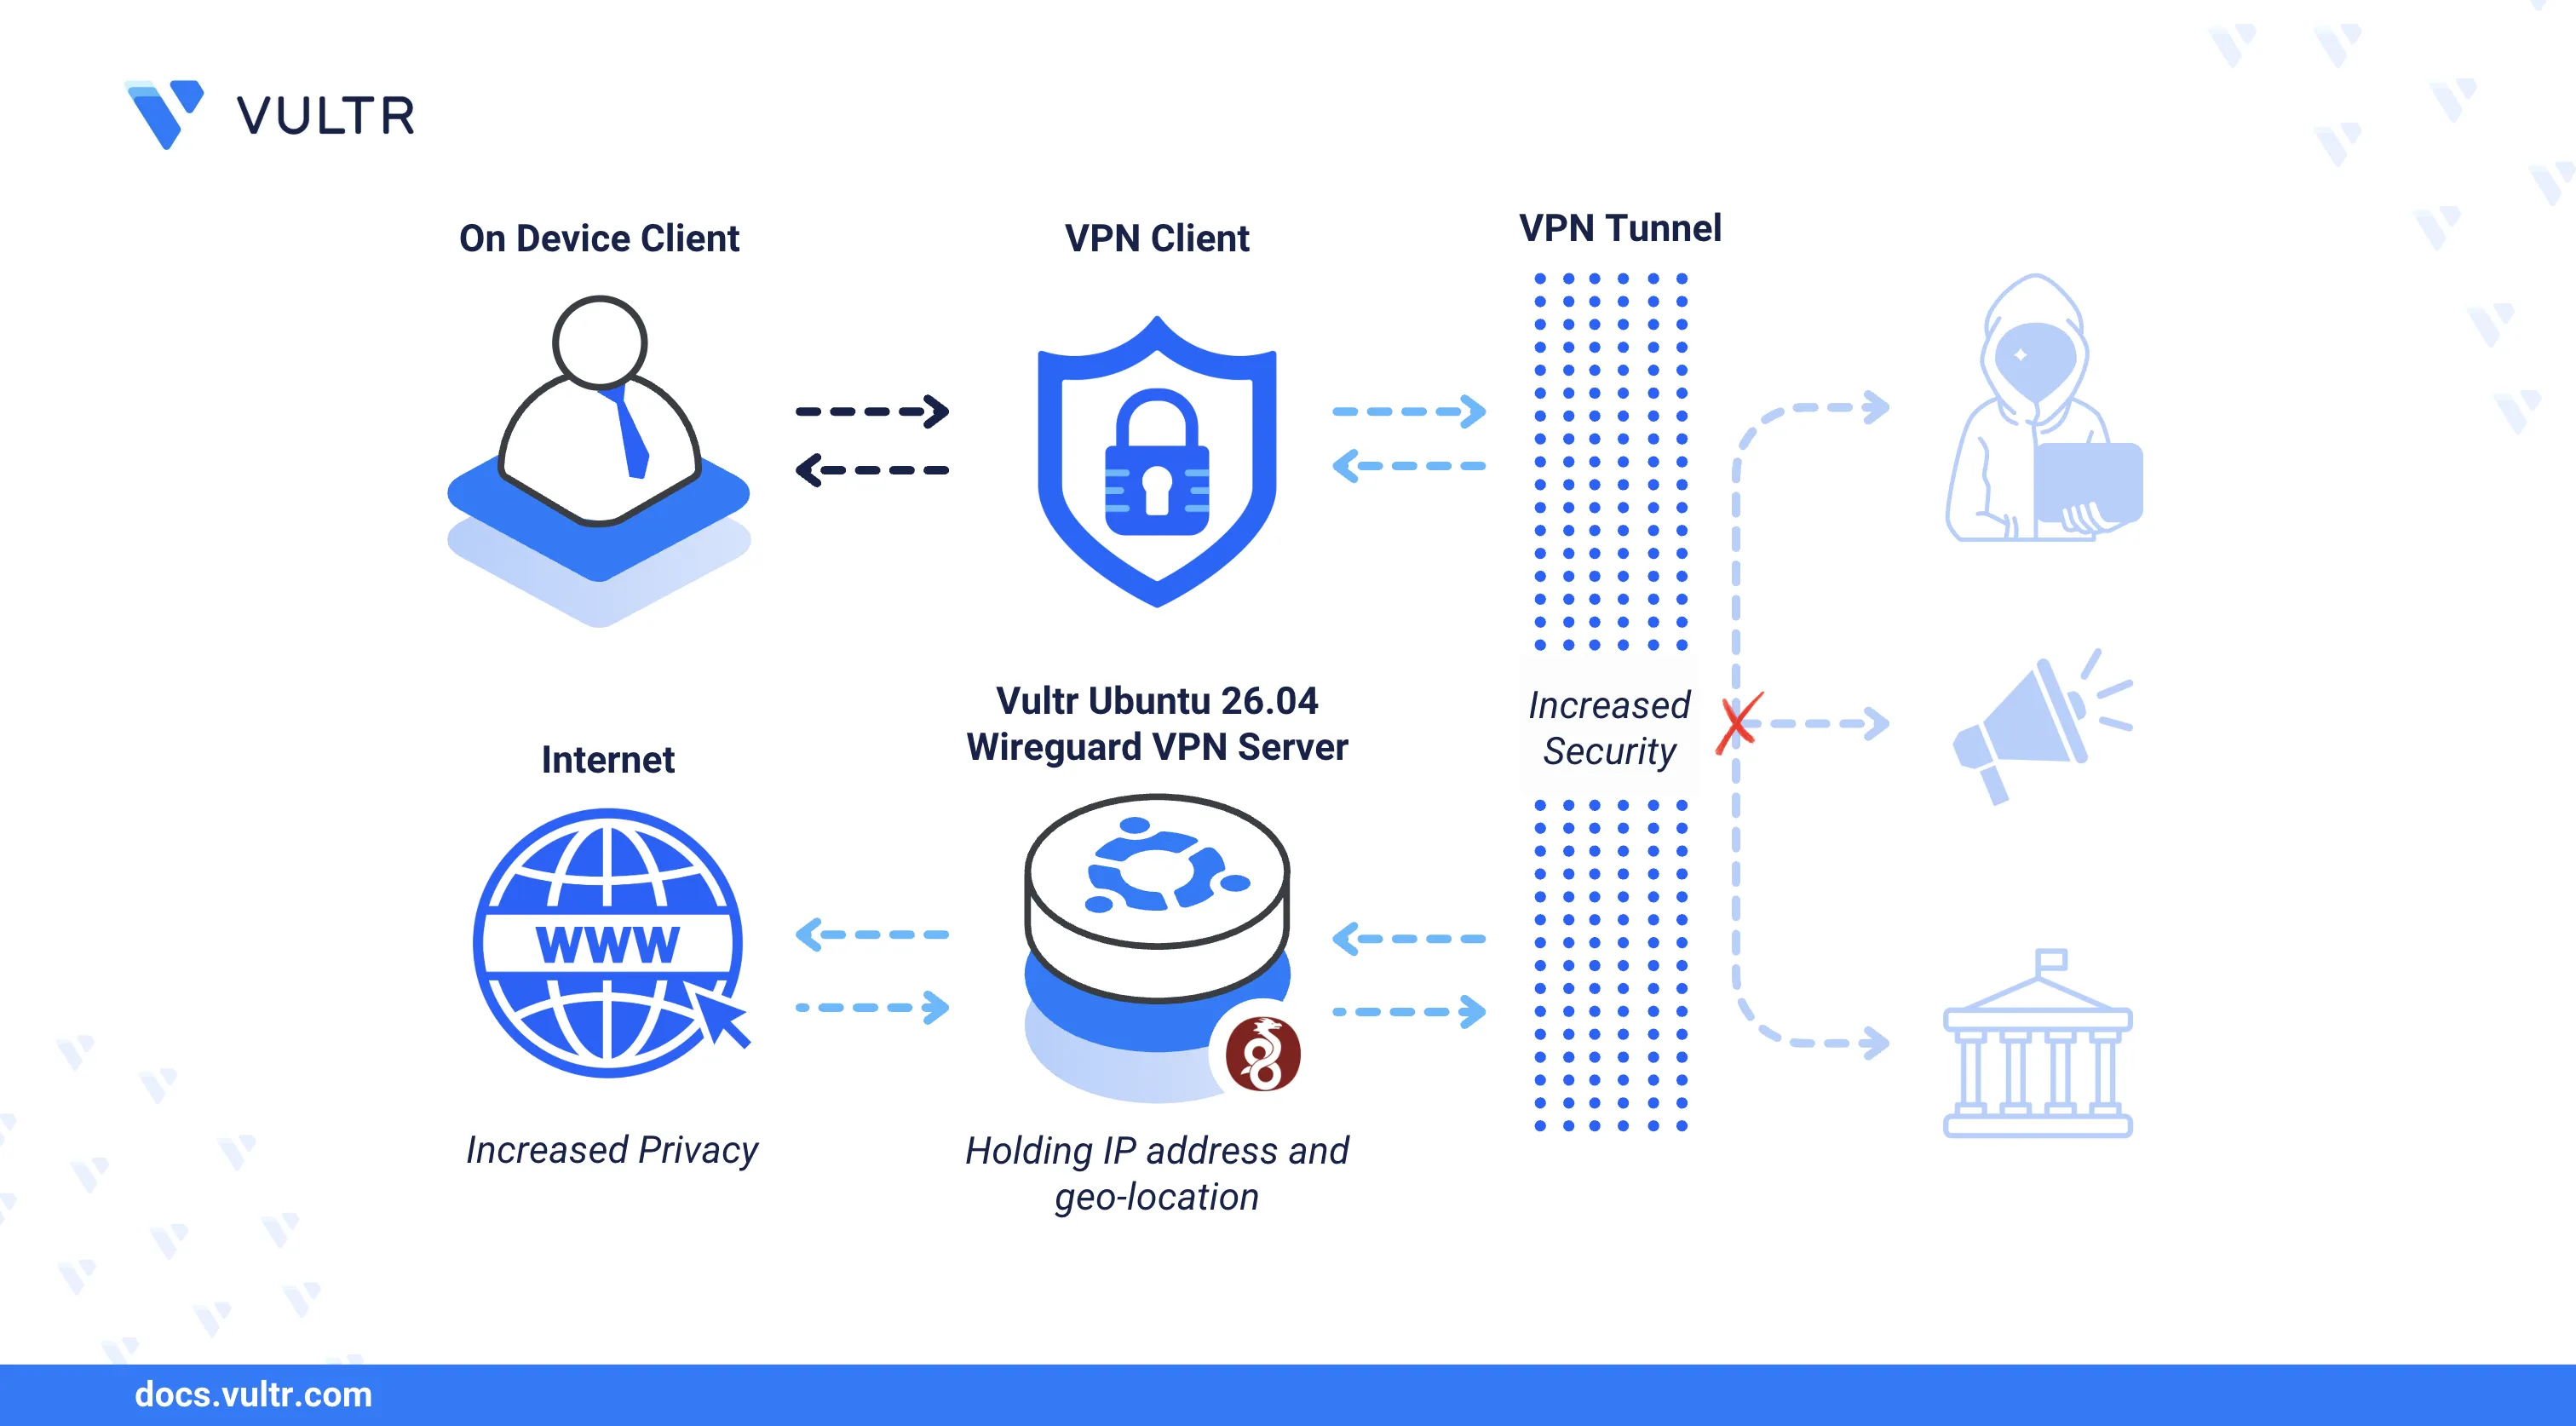
WireGuard is a modern, open-source VPN protocol that uses state-of-the-art cryptography to create secure point-to-point tunnels between a server and client devices. Its minimal codebase and kernel-level implementation deliver faster connection speeds and lower overhead compared to traditional VPN solutions such as OpenVPN and IPsec.
This article explains how to install and configure WireGuard VPN on an Ubuntu 26.04 server, generate server and client key pairs, set up firewall rules with IP forwarding, and connect a client device to the VPN tunnel.
Prerequisites
Before you begin, you need to:
- Have access to an Ubuntu 26.04 server instance as a non-root user with sudo privileges.
Install WireGuard
The default Ubuntu 26.04 APT repositories include the WireGuard package. The following steps install WireGuard and verify the installed version.
Update the APT package index.
console$ sudo apt update
Install WireGuard.
console$ sudo apt install wireguard -y
Confirm the installed WireGuard version.
console$ wg --version
Your output should be similar to the one below:
wireguard-tools v1.0.20250521 - https://git.zx2c4.com/wireguard-tools/
Configure the WireGuard Server
WireGuard uses Cryptokey Routing to authenticate peers through public-private key pairs. Each interface requires a unique private key, and peers identify each other using the corresponding public keys. The following steps generate the server key pair, identify the main network interface, and create the WireGuard tunnel configuration.
Generate a server private key and save it to
/etc/wireguard/server_private.key.console$ sudo wg genkey | sudo tee /etc/wireguard/server_private.key
Copy the generated private key from the output.
Restrict the private key file permissions to the
rootuser only.console$ sudo chmod 600 /etc/wireguard/server_private.key
Derive the corresponding public key and save it to
/etc/wireguard/server_public.key.console$ sudo cat /etc/wireguard/server_private.key | wg pubkey | sudo tee /etc/wireguard/server_public.key
Copy the generated public key from the output.
Identify the main network interface name on your server.
console$ ip -o -4 route show to default | awk '{print $5}'
Note the interface name in the output (for example,
enp1s0). WireGuard uses this interface to route traffic to the internet.Create the WireGuard server interface configuration file.
console$ sudo nano /etc/wireguard/wg0.conf
Add the following configuration to the file. Replace
SERVER_PRIVATE_KEYwith your generated server private key andenp1s0with your main network interface name.ini[Interface] Address = 10.8.0.1/24 SaveConfig = true PrivateKey = SERVER_PRIVATE_KEY PostUp = iptables -A FORWARD -i wg0 -j ACCEPT; iptables -t nat -I POSTROUTING -o enp1s0 -j MASQUERADE PreDown = iptables -D FORWARD -i wg0 -j ACCEPT; iptables -t nat -D POSTROUTING -o enp1s0 -j MASQUERADE ListenPort = 51820
Save and close the file.
Within the configuration:
Address: Assigns the private IP subnet10.8.0.1/24to the WireGuard interface.SaveConfig: Preserves the runtime configuration when the interface shuts down.PrivateKey: Specifies the server private key for authentication.PostUp: Adds iptables rules when the interface starts —FORWARDaccepts traffic from the WireGuard interface andMASQUERADEenables NAT so clients access the internet through the server's public IP.PreDown: Removes the iptables rules when the interface stops.ListenPort: Sets the UDP port WireGuard listens on for incoming connections.
Generate a Client Configuration
Each WireGuard client requires its own key pair and a configuration file containing the server's public key and endpoint address. The following steps generate client keys and build a configuration file that can be imported on any WireGuard client application.
Generate a client private key.
console$ sudo wg genkey | sudo tee /etc/wireguard/client1_private.key
Copy the generated private key from the output.
Derive the client public key from the private key.
console$ sudo cat /etc/wireguard/client1_private.key | wg pubkey | sudo tee /etc/wireguard/client1_public.key
Copy the generated public key from the output.
View the server public key (generated earlier) for use in the client configuration.
console$ sudo cat /etc/wireguard/server_public.key
Create the client configuration file.
console$ sudo nano /etc/wireguard/client1.conf
Add the following configuration to the file. Replace
CLIENT_PRIVATE_KEYwith the client private key,SERVER_PUBLIC_KEYwith the server public key, andSERVER-IPwith your server's public IP address.ini[Interface] PrivateKey = CLIENT_PRIVATE_KEY Address = 10.8.0.2/24 DNS = 8.8.8.8 [Peer] PublicKey = SERVER_PUBLIC_KEY AllowedIPs = 0.0.0.0/0 Endpoint = SERVER-IP:51820 PersistentKeepalive = 15
Save and close the file.
Within the configuration:
PrivateKey: Specifies the client private key for authentication.Address: Assigns the tunnel IP10.8.0.2to the client.DNS: Sets the DNS resolver the client uses while connected to the VPN.PublicKey: Specifies the server public key for peer verification.AllowedIPs: Routes all client traffic (0.0.0.0/0) through the VPN tunnel.Endpoint: Defines the server's public IP and WireGuard port.PersistentKeepalive: Sends a keepalive packet every 15 seconds to maintain the connection.
Register the client as a peer in the server configuration. Open the server configuration file.
console$ sudo nano /etc/wireguard/wg0.conf
Add the following peer block at the end of the file. Replace
CLIENT_PUBLIC_KEYwith the client public key.ini[Peer] PublicKey = CLIENT_PUBLIC_KEY AllowedIPs = 10.8.0.2/32
Save and close the file.
Copy the client configuration to your home directory for easy download.
console$ sudo cp /etc/wireguard/client1.conf ~/client1.conf
Set Up Firewall Rules
Uncomplicated Firewall (UFW) is active by default on Ubuntu 26.04. The following steps allow WireGuard traffic through the firewall and enable IPv4 packet forwarding so that VPN clients can access the internet through the server.
Allow the WireGuard UDP port
51820through the firewall.console$ sudo ufw allow 51820/udp
Enable IPv4 forwarding to allow traffic to pass between the WireGuard interface and the server's public interface.
console$ echo 'net.ipv4.ip_forward = 1' | sudo tee -a /etc/sysctl.conf
Apply the sysctl changes.
console$ sudo sysctl -p
Manage the WireGuard Service
The wg-quick systemd service controls the WireGuard interface lifecycle. The following steps start the interface, enable it to persist across reboots, and verify the tunnel status.
Start the WireGuard
wg0interface.console$ sudo systemctl start wg-quick@wg0.service
Enable the interface to start automatically at boot time.
console$ sudo systemctl enable wg-quick@wg0.service
Verify that the WireGuard service is active.
console$ sudo systemctl status wg-quick@wg0.service
The output should display
active (exited), confirming that the WireGuard interface is up.View the WireGuard interface details and registered peers.
console$ sudo wg show wg0
The output displays the server public key, listening port, and any connected peers with their allowed IP addresses.
Connect a Client to the VPN
WireGuard client applications are available for Windows, macOS, Linux, iOS, and Android. The following steps transfer the client configuration to a device and establish the VPN tunnel.
Download the client configuration from the server to your local device using
scp. ReplaceUSERwith your server username andSERVER-IPwith the server's public IP address.console$ scp USER@SERVER-IP:~/client1.conf .
Download and install the WireGuard client application on your device.
Open the WireGuard application and import the
client1.conffile using the Add Tunnel or Import tunnel(s) from file option.Click Activate to connect to the VPN server.
Test the VPN connection by pinging the server's WireGuard interface IP from your device.
console$ ping -c 4 10.8.0.1
A successful response confirms that the VPN tunnel is active and the client can communicate with the server.
Conclusion
You have installed and configured WireGuard VPN on an Ubuntu 26.04 server with a client tunnel configuration. WireGuard supports multiple peer connections on a single interface, allowing you to generate additional client configurations for different devices. For more information, refer to the official WireGuard documentation.