
How to Integrate Okta OIDC with Vultr Kubernetes Engine
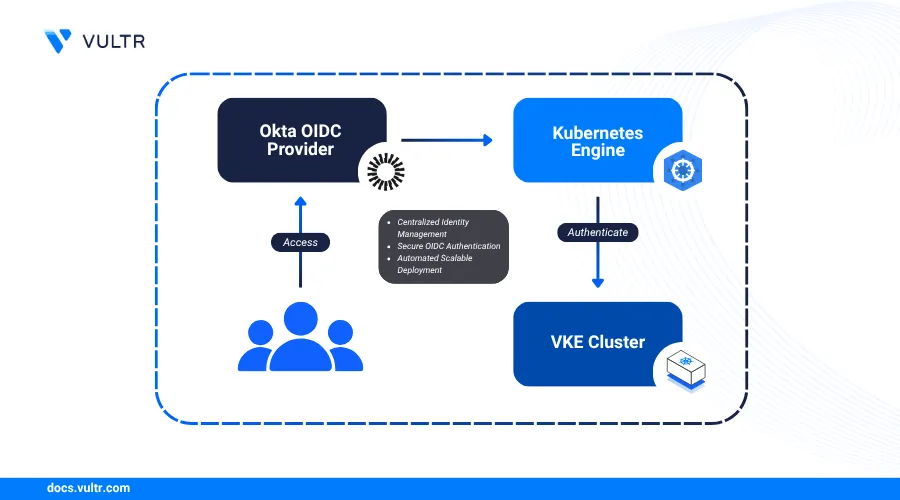
Integrating an external identity provider (IdP) with Kubernetes allows you to centralize user authentication and leverage existing identity management workflows. OpenID Connect (OIDC) is the standard protocol for this integration, enabling secure authentication against providers like Okta. By using Okta, you can enforce consistent security policies, manage user access from a single dashboard, and give a seamless Single Sign-on (SSO) experience for developers accessing your Vultr Kubernetes Engine (VKE).
This guide explains how to automate the entire integration process using Terraform. You will configure an OIDC application in Okta, deploy a VKE cluster with OIDC authentication enabled, and set up the necessary kubectl plugins to authenticate users with their Okta credentials.
Prerequisites
Before you begin, you need to:
- Have access to an Okta Admin Account with an API Token. If you don't have one, you can create it by visiting the Sign up page.
- Have access to your Vultr API Key.
- Install Terraform CLI on your workstation.
Configure Okta OIDC Integration Using Terraform
This section provides the steps to provision the Okta OIDC application using a pre-configured Terraform project from a Git repository. This automates the creation of the necessary resources in Okta, ensuring your configuration is repeatable and version-controlled.
Clone the Terraform manifests repository from GitHub.
console$ git clone https://github.com/vultr-marketing/code-samples.git $ cd code-samples/vke-oidc-integration
Edit the
terraform.tfvarsand set your Okta credentials.console$ nano terraform.tfvars
Update the following variables:
org_name  = "Your Okta Org Name"
base_url  = "Your Okta Base URL"
api_token = "Your Okta API Token"
admin_email = "Admin User Email"
restricted_email = "Restricted User Email"
Save and close the file.
For example, if your Okta domain is
trial-9859852.okta.com, then use the following values:- org_name:
trial-9859852- This is the subdomain part of your Okta URL. - base_url:
okta.com- This is the root domain used across all Okta tenants. - api_token: Your Okta API Token retrieved from your Okta Admin dashboard.
- admin_email: The email for the user who will have administrative cluster access.
- restricted_email: The email for the user who will have restricted cluster access.
- org_name:
Initialize Terraform to download the Okta provider.
console$ terraform init
Validate the manifest file to check for syntax errors and ensure that the manifest is correct.
console$ terraform validate
This above command should display a success output confirming that the configuration is valid.
Review the execution plan to see the resources Terraform will create.
console$ terraform plan
Apply the manifest to create the Okta application and related resources.
console$ terraform apply
When prompted, enter
yesto allow Terraform to create the following resources:- Groups:
k8s-admins: A group for users who will have admin access to the VKE Cluster.k8s-restricted-users: A group for users who will have limited access.
- Application: An application named VKE OIDC to handle the OIDC authentication flow between Vultr Kubernetes Engine and Okta.
- Authorization Server: An authorization server named
k8s-authis created which is linked to the VKE OIDC application.- Claim: A claim is configured to include groups in the ID token that start with the prefix
k8s-. - Access Policy: An access policy that defines the token lifetime and the grant types for the application.
- Claim: A claim is configured to include groups in the ID token that start with the prefix
After the command completes, Terraform will display the output with the credentials for your OIDC application, save these credentials for later use:
k8s_oidc_client_id = "0oast9pnpbKLdQiUu697" k8s_oidc_client_secret = <sensitive> k8s_oidc_issuer_url = "https://trial-9859852.okta.com/oauth2/ausxxxxx"- Groups:
Create a VKE Cluster with OIDC Enabled
In this section, you will provision a VKE cluster by making a direct API call using curl. This approach allows you to include the OIDC configuration retrieved from Okta, enabling secure authentication integration between your VKE cluster and Okta's identity provider.
Set environment variables for your Vultr API Key and the OIDC values from the Terraform output.
console$ export VULTR_API_KEY="YOUR_VULTR_API_KEY" $ export OIDC_ISSUER_URL="YOUR_ISSUER_URL" $ export OIDC_CLIENT_ID="YOUR_CLIENT_ID"
In the above commands, replace
YOUR_VULTR_API_KEYwith your Vultr API Key,YOUR_ISSUER_URLwith your Okta Authorization Server Issuer URL,YOUR_CLIENT_IDwith your Okta Client ID provided by Terraform output.Run the following
curlcommand to create the VKE cluster. It sends aPOSTrequest to the Vultr API with your cluster definition, including the OIDC configuration.console$ curl --location 'https://api.vultr.com/v2/kubernetes/clusters' \ --header 'Content-Type: application/json' \ --header "Authorization: Bearer ${VULTR_API_KEY}" \ --data '{ "label": "oidc-cluster", "region": "ewr", "version": "v1.33.0+1", "oidc": { "issuer_url": "'"${OIDC_ISSUER_URL}"'", "client_id": "'"${OIDC_CLIENT_ID}"'", "username_claim": "sub", "groups_claim": "groups" }, "node_pools": [ { "node_quantity": 4, "min_nodes": 4, "max_nodes": 8, "auto_scaler": true, "label": "oidc-cluster", "plan": "vhp-2c-4gb-amd", "tag": "oidc-cluster" } ] }'
This request provisions a VKE cluster with the following settings:
- A VKE Cluster with version
v1.33.0+1is deployed. To use the latest available version, send a GET request to list all supported Kubernetes versions. - The VKE cluster is deployed in the
ewrregion. This refers to Vultr'sNew Jersey (EWR)region. You can list all available regions by sending a GET request. - OIDC authentication enabled using the following configuration:
issuer_url: The base URL of your OIDC provider's discovery document. Kubernetes uses this to fetch metadata and validate ID tokens.client_id: The Client ID of your registered OIDC application. It ensures that the tokens are issued for this Kubernetes cluster.username_claim: The claim from the ID token that Kubernetes will use as the username. Typically set tosub, which is a unique and immutable user ID.groups_claim: The claim in the ID token that lists the user's groups. Used to assign RBAC roles in Kubernetes.
- A node pool with
4nodes with autoscaling enabled between4and8nodes. - The
vhp-2c-4gb-amdcompute plan for each node.
Modify the configuration as needed to match your infrastructure requirements. The response includes a
id, which you can use to check the cluster status by sending aGETrequest.- A VKE Cluster with version
After the cluster is provisioned, download the
kubeconfig.ymlfile from the Vultr Console.- Navigate to Kubernetes in the Vultr dashboard.
- Select your newly created cluster.
- Click Download Kubeconfig to download the file to your local system.
Move the
kubeconfig.ymlfile to the default Kubernetes configuration directory and rename it toconfig.console$ mkdir -p ~/.kube $ mv /path/to/kubeconfig.yml ~/.kube/config
ReplaceNote/path/to/kubeconfig.ymlwith the actual path to the file you downloaded. If you already have a~/.kube/configfile, back it up first to avoid overwriting existing configurations:console$ mv ~/.kube/config ~/.kube/config.backup
Verify that your system can communicate with the VKE API server by running the following command.
console$ kubectl get nodes
This above command returns the number of nodes available in the VKE Cluster.
Install CLI Tools and OIDC Plugin
Use the following steps to install Krew, the plugin manager for kubectl, and the oidc-login plugin, which enables authentication via Okta OIDC.
Create a file named
install-krew.sh.console$ nano install-krew.sh
Add the following script to the file.
bash#!/bin/bash set -euo pipefail cd "$(mktemp -d)" OS="$(uname | tr '[:upper:]' '[:lower:]')" ARCH="$(uname -m)" if [[ "$ARCH" == "x86_64" ]]; then ARCH="amd64" elif [[ "$ARCH" == "aarch64" ]]; then ARCH="arm64" fi KREW="krew-${OS}_${ARCH}" curl -fsSLO "https://github.com/kubernetes-sigs/krew/releases/latest/download/${KREW}.tar.gz" tar zxvf "${KREW}.tar.gz" ./"${KREW}" install krew
Save and exit the file.
Give the executable permission to the file.
console$ chmod +x install-krew.sh
Execute the script to install the
krewplugin manager.console$ ./install-krew.shAdd the krew's installation directory to your PATH.
console$ export PATH="${KREW_ROOT:-$HOME/.krew}/bin:$PATH"
Add the above line to your shell configuration file (e.g.,
~/.bashrcor~/.zshrc) to persist it across sessions.Install the
oidc-loginplugin using Krew.console$ kubectl krew install oidc-login
This plugin enables
kubectlto authenticate with Kubernetes clusters using the OIDC login flow provided by Okta.To clear the saved OIDC authentication cache, run the following command:Noteconsole$ kubectl oidc-login clean
Authenticate with Okta OIDC
In this section, you define the RBAC roles and create separate kubectl contexts for your admin and restricted users. This allows you to test the OIDC integration and verify that the correct permissions are applied based on Okta group membership.
Apply RBAC Roles and Bindings
Use the following pre-created YAML files located in the k8s/ directory to configure role-based access for your Okta user groups:
k8s-admins-CRB.yaml: Grants full cluster-wide administrative access to users in thek8s-adminsgroup by binding it to the built-incluster-adminrole.k8s-restricted-users-CR.yaml: Creates a customClusterRolenamedrestricted-pod-accessthat allows basic pod operations such as listing, creating, updating, and deleting. This role is designed for users with limited access needs.k8s-restricted-users-CRB.yaml: Binds thek8s-restricted-usersgroup to therestricted-pod-accessrole, enforcing scoped access within the cluster for non-admin users.
Apply all RBAC configurations using:
$ kubectl apply -f k8s/
This command provisions the necessary permissions for both admin and restricted users based on group membership defined in your Okta configuration.
Set Up Kubernetes Configurations for Different User Roles
Use the following steps to configure Kubernetes access for users in the k8s-admins group.
Clear any cached OIDC authentication tokens.
console$ kubectl oidc-login clean
Export your OIDC credentials and cluster name as environment variables.
console$ export OIDC_ISSUER_URL="YOUR_ISSUER_URL" $ export OIDC_CLIENT_ID="YOUR_CLIENT_ID" $ export OIDC_CLIENT_SECRET="YOUR_CLIENT_SECRET" $ export CLUSTER_NAME="YOUR_VKE_CLUSTER_NAME"
Replace each placeholder with the appropriate value:
Use the following command to retrieve the value for the client secret
k8s_oidc_client_secret:console$ terraform output k8s_oidc_client_secret
Other credentials like OIDC_ISSUER_URL and OIDC_CLIENT_ID can be retrived by running
terraform output.To identify the cluster name, run:
console$ kubectl config get-contexts
The output lists all available contexts. Use the value in the NAME column that corresponds to your VKE cluster.
Set the OIDC login credentials for the admin user.
console$ kubectl config set-credentials admin-user \ --exec-command=kubectl \ --exec-api-version=client.authentication.k8s.io/v1 \ --exec-interactive-mode=IfAvailable \ --exec-arg=oidc-login \ --exec-arg=get-token \ --exec-arg=--oidc-issuer-url="$OIDC_ISSUER_URL" \ --exec-arg=--oidc-client-id="$OIDC_CLIENT_ID" \ --exec-arg=--oidc-client-secret="$OIDC_CLIENT_SECRET" \ --exec-arg=--oidc-extra-scope=profile \ --exec-arg=--oidc-extra-scope=email
The Terraform manifest used in this guide configures the Okta OIDC application with the Application Type set toNoteWeb. As a result, you must include the--oidc-client-secretflag in the above command. If you manually configured the application using thenativeapplication type, omit the--oidc-client-secretflag or the authentication will fail.Create and use the admin context.
console$ kubectl config set-context admin \ --cluster="$CLUSTER_NAME" \ --user=admin-user $ kubectl config use-context admin
Run a test command to authenticate and verify access.
console$ kubectl get nodes
This above command opens a browser window for Okta login and after successful authentication,
kubectlreturns a list of number of nodes in the cluster.
Follow the steps below to configure a Kubernetes access for users in the k8s-restricted-users group.
Clear any cached OIDC authentication tokens.
console$ kubectl oidc-login clean
Export your OIDC credentials and cluster name as environment variables.
console$ export OIDC_ISSUER_URL="YOUR_ISSUER_URL" $ export OIDC_CLIENT_ID="YOUR_CLIENT_ID" $ export OIDC_CLIENT_SECRET="YOUR_CLIENT_SECRET" $ export CLUSTER_NAME="YOUR_VKE_CLUSTER_NAME"
Replace each placeholder with the appropriate value:
Use the following command to retrieve the value for client secret
k8s_oidc_client_secret:console$ terraform output k8s_oidc_client_secret
Other credentials like OIDC_ISSUER_URL and OIDC_CLIENT_ID can be retrived by running
terraform output.To identify the cluster name, run:
console$ kubectl config get-contexts
The output lists all available contexts. Use the value in the NAME column that corresponds to your VKE cluster.
Configure OIDC credentials for the restricted user.
console$ kubectl config set-credentials restricted-user \ --exec-command=kubectl \ --exec-api-version=client.authentication.k8s.io/v1 \ --exec-interactive-mode=IfAvailable \ --exec-arg=oidc-login \ --exec-arg=get-token \ --exec-arg=--oidc-issuer-url="$OIDC_ISSUER_URL" \ --exec-arg=--oidc-client-id="$OIDC_CLIENT_ID" \ --exec-arg=--oidc-client-secret="$OIDC_CLIENT_SECRET" \ --exec-arg=--oidc-extra-scope=profile \ --exec-arg=--oidc-extra-scope=email
The Terraform manifest used in this guide configures the Okta OIDC application with the Application Type set toNoteWeb. As a result, you must include the--oidc-client-secretflag in the above command. If you manually configured the application using thenativeapplication type, omit the--oidc-client-secretflag or the authentication will fail.Create and switch to the
restrictedcontext.console$ kubectl config set-context restricted \ --cluster="$CLUSTER_NAME" \ --user=restricted-user $ kubectl config use-context restricted
Verify the user’s access level.
console$ kubectl auth can-i delete deployments
When you run this command, it opens your default web browser and prompts you to authenticate with Okta using the configured OIDC credentials.
After successful authentication, the command checks whether the current user has permission to delete deployments. Based on the restricted role configuration, the expected output is:
no
Conclusion
In this guide, you integrated Okta OIDC with VKE to enable secure, centralized authentication for your clusters. You used Terraform to configure the OIDC application in Okta, then deployed a VKE cluster with OIDC authentication enabled via the Vultr API. After downloading and setting up the kubeconfig file, you installed the required CLI tools including kubectl, krew, and the oidc-login plugin. You applied RBAC roles to manage access for admin and restricted users, created separate Kubernetes configurations for each group, and verified access to ensure the correct permissions were enforced through Okta-based authentication.