
How to Migrate DigitalOcean Block Storage Volumes to Vultr Block Storage
Migrating Block Storage volumes allows you to securely move existing data from one instance to another. Vultr Block Storage supports regular SSD and NVME drives, providing you with multiple options to store your data. DigitalOcean Block Storage volumes are attached to Droplets, while Vultr Block Storage volumes are attached to Vultr Cloud Compute instances. You can use the attached instance to migrate existing volumes to Vultr Block Storage with a similar or larger volume size.
Follow this guide to migrate DigitalOcean Block Storage volumes to Vultr Block Storage with little or no downtime for your linked applications.
Prerequisites
Before you start, you need to:
- Have an existing Droplet to use for migration.
- Have an existing DigitalOcean Block Storage volume to migrate and attach it to your Droplet.
In a single Vultr location:
- Deploy a Vultr Block Storage volume to use as the destination volume with the same or larger size as your source volume.
- Deploy an Ubuntu Vultr Cloud Compute instance and attach your Vultr Block Storage volume.
Set Up the Migration Environment
Follow the steps below to set up the source DigitalOcean Droplet and verify that a block storage volume is attached to the instance. Then, set up the destination Vultr Cloud Compute instance and verify that a Vultr Block Storage volume is attached to migrate the source data.
Set Up the Source DigitalOcean Block Storage Volume
Follow the steps below to access your source DigitalOcean Droplet and verify the attached block storage volume information.
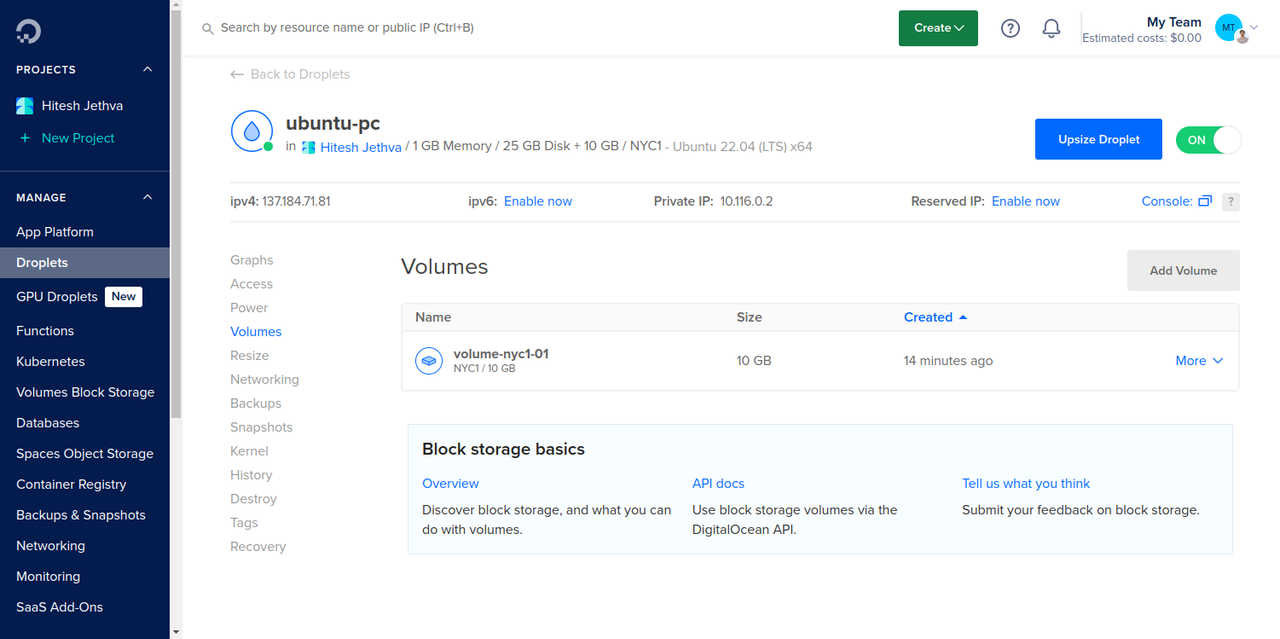
Access your DigitalOcean Droplet's management page and verify that your target block storage volume is attached.
Access your Droplet using SSH as a non-root user with sudo privileges.
console$ ssh user@droplet-ip-address
List all attached devices and verify the block storage volume name.
console$ lsblkYour output should be similar to the one below.
NAME MAJ:MIN RM SIZE RO TYPE MOUNTPOINTS loop0 7:0 0 63.9M 1 loop /snap/core20/2318 loop1 7:1 0 87M 1 loop /snap/lxd/28373 loop2 7:2 0 38.8M 1 loop /snap/snapd/21759 sda 8:0 0 10G 0 disk /mnt/volume_nyc1_01 vda 252:0 0 25G 0 disk ├─vda1 252:1 0 24.9G 0 part / ├─vda14 252:14 0 4M 0 part └─vda15 252:15 0 106M 0 part /boot/efi vdb 252:16 0 482K 1 disksdais the attached block storage volume mounted to the default/mnt/volume_nyc1_01directory, and it's10GBin size based on the above output. DigitalOcean volumes use thesdnaming scheme and increment the device name for additional disks such assdb,sdc,sdd, depending on the attached volume.Create a new
/mnt/sourcedirectory to mount the block storage volume if it's not mounted.console$ sudo mkdir -p /mnt/source
Mount the
/dev/sdavolume to the/mnt/sourcedirectory.console$ mount /dev/sda /mnt/source
List all attached block devices and the filesystem information.
console$ lsblk -f
Your output should be similar to the one below.
NAME FSTYPE FSVER LABEL UUID FSAVAIL FSUSE% MOUNTPOINTS sda ext4 1.0 0ac73034-11d4-4351-aac5-9cc11b7dfbe1 9.2G 0% /mnt/source /mnt/volume_nyc1_01 vda ├─vda1 ext4 1.0 cloudimg-rootfs 88dc15c6-7fee-4d93-ab61-4fc00c0180a7 21.3G 8% / ├─vda13 ext4 1.0 BOOT 237258cf-7101-4c8c-8067-89f9351dbd03 859.3M 6% /boot ├─vda14 └─vda15 vfat FAT32 UEFI 477B-AA8F 98.2M 6% /boot/efi vdb iso9660 config-2 2025-02-12-16-13-42-00ext4is the active filesystem format forsdablock storage volume mounted with two directories,/mnt/sourceand/mnt/volume_nyc1_01based on the above output. Keep note of the volume's filesystem format to use on your destination Vultr Block Storage volume.View the disk usage information and verify the volume's usage ratio.
console$ df -h
Your output should be similar to the one below.
Filesystem      Size  Used Avail Use% Mounted on
tmpfs            96M 1008K   95M   2% /run
/dev/vda1        25G  1.7G   23G   7% /
tmpfs           479M     0  479M   0% /dev/shm
tmpfs           5.0M     0  5.0M   0% /run/lock
/dev/vda15      105M  6.1M   99M   6% /boot/efi
/dev/sda        9.8G   24K  9.3G   1% /mnt/source
tmpfs            96M  4.0K   96M   1% /run/user/0
The source
/dev/sdablock storage volume is mounted on the/mnt/sourcedirectory with a1%usage based on the above output.If your DigitalOcean Block Storage volume has multiple partitions, verify the size of each partition and the filesystem format to apply on your destination Vultr Block Storage volume.Note
Set Up the Destination Vultr Block Storage Volume
Follow the steps below to set up the destination Vultr Block Storage volume and prepare it to transfer data from the source block storage volume.
Access your Vultr Block Storage volume's management page and verify that it's attached to your target Vultr Cloud Compute instance.

Access your Vultr Cloud Compute instance using SSH as a non-root sudo user. Replace
Vultr-Server-IPwith your actual instance's public IP address.console$ ssh linuxuser@Vultr-Server-IP
List all attached devices and verify that the Vultr Block Storage volume is available.
console$ lsblkYour output should be similar to the one below.
NAME MAJ:MIN RM SIZE RO TYPE MOUNTPOINTS loop0 7:0 0 87M 1 loop /snap/lxd/29351 loop1 7:1 0 38.8M 1 loop /snap/snapd/21759 loop2 7:2 0 63.9M 1 loop /snap/core20/2318 loop3 7:3 0 63.7M 1 loop /snap/core20/2434 loop4 7:4 0 89.4M 1 loop /snap/lxd/31333 sr0 11:0 1 1024M 0 rom vda 252:0 0 25G 0 disk ├─vda1 252:1 0 512M 0 part /boot/efi └─vda2 252:2 0 24.5G 0 part / vdb 252:16 0 40G 0 disk/dev/vdbis the Vultr Block Storage volume name, and its40GBin size based on the above output. Vultr Block Storage volumes use thevdnaming scheme, and the disk value increments when additional volumes are attached. For example,vdb,vdc,vdd, andvdebased on the number of attached volumes.Format the
/dev/vdbblock storage volume with the source's filesystem, such asext4.console$ sudo mkfs.ext4 /dev/vdb
Create a new
/mnt/destinationdirectory to mount the Vultr Block Storage volume.console$ sudo mkdir /mnt/destination
Mount the
/dev/vdbvolume to the/mnt/destinationmount directory.console$ sudo mount /dev/vdb /mnt/destination
Grant your active sudo user ownership privileges to the
/mnt/destinationdirectory. Replacelinuxuserwith your actual user.console$ sudo chown -R linuxuser:linuxuser /mnt/destination
View the disk usage information and verify that the volume is mounted.
console$ df -h
Your output should be similar to the one below.
Filesystem      Size  Used Avail Use% Mounted on
tmpfs            96M  2.4M   93M   3% /run
/dev/vda2        23G  6.6G   16G  30% /
tmpfs           476M     0  476M   0% /dev/shm
tmpfs           5.0M     0  5.0M   0% /run/lock
/dev/vda1       511M  6.1M  505M   2% /boot/efi
tmpfs            96M  4.0K   96M   1% /run/user/0
/dev/vdb         40G   24K   38G   1% /mnt/destination
The
/dev/vdbVultr Block Storage volume is mounted to the/mnt/destinationdirectory based on the above output.If the source DigitalOcean Block Storage volume has multiple partitions, partition your destination Vultr Block Storage volume with the same filesystem format and a similar or larger size.Note
Migrate the DigitalOcean Block Storage Volume to Vultr Block Storage
There are multiple methods you can use to copy and migrate data from a source volume to the destination volume. Rsync also knows a remote sync is a file synchronization tool used to transfer files from one location to another and ensure that the source matches the destination. Follow the steps below to use Rsync to transfer data from your source block storage volume to the destination Vultr Block Storage volume.
Access your Droplet using SSH.
console$ ssh user@Droplet-IP
Install Rsync if it's not installed on the source Droplet and the destination Vultr Cloud Compute instance.
console$ sudo apt install rsync -y
Transfer files from the source DigitalOcean Block Storage volume's
/mnt/source/mount directory to your destination Vultr Block Storage's mount directory. Enter your destination instance's password when prompted.console$ rsync -avz --progress /mnt/source/ linuxuser@Vultr-Server-IP:/mnt/destination/
Monitor the transfer process to ensure that it's successful and all files are transferred to the destination directory without errors similar to the following output.
sending incremental file list
./
...................

sent 182,112,461 bytes  received 114 bytes  21,425,008.82 bytes/sec
total size is 185,915,222  speedup is 1.02
The above Rsync command transfers all files from the
/mnt/source/directory to the destination/mnt/destination/directory on your Vultr Cloud Compute instance. Within the command:-a: Preserves all file permissions, timestamps, and symbolic links.-v: Displays the command progress and active transfer operations.-z: Compresses all data during the transfer.--progress: Displays the transfer progress of each file.
Repeat the above file transfer process for all block storage volume partitions attached to your source Droplet.Note
Test the Vultr Block Storage Volume
Verifying the integrity of transferred files is essential to ensure that the migration process is successful and files are not corrupted during transfer. Follow the steps below to perform a file integrity check and verify that the Vultr Block Storage volume contents match the source DigitalOcean Block Storage volume.
Generate checksums on the source volume's
/mnt/sourcemount directory.console$ sudo find /mnt/source -type f -exec md5sum {} \; > source-checksums.txt
The above command creates a
source-checksums.txtfile that contains the MD5 checksums and paths for all files in the/mnt/sourcedirectory.Generate checksums on the destination Vultr Block Storage volume's
/mnt/destinationmount directory.console$ find /mnt/destination -type f -exec md5sum {} \; > destination-checksums.txt
The above command creates a
destination-checksums.txtfile that contains the checksums and paths for all files in the/mnt/destinationmount directory.Copy the
source-checksums.txtfile to the Vultr Cloud Compute instance using SFTP.console$ sftp linuxuser@Vultr-server-ip:/mnt/destination <<< $'put source-checksums.txt'
Compare the
destination-checksums.txtand thesource-checksums.txtusingdiffto verify that the checksums for both files match.console$ diff -y --suppress-common-lines /mnt/destination/source-checksums.txt destination-checksums.txt
Your output should be similar to the one below.
3cab3c1037dd9200eb259f03eb497474  /mnt/source/hosts	      |	3cab3c1037dd9200eb259f03eb497474  /mnt/destination/hosts
e57fd77c50de7b8a8eec19de0ec3f4f3  /mnt/source/crontab	      |	e57fd77c50de7b8a8eec19de0ec3f4f3  /mnt/destination/crontab
c22a55a143c56ab59eca28432646f23f  /mnt/source/fstab	      |	c22a55a143c56ab59eca28432646f23f  /mnt/destination/etc.tar.gz
af14ad56c113a639b618fa4c729cf025  /mnt/source/lib.tar.gz      |	af14ad56c113a639b618fa4c729cf025  /mnt/destination/lib.tar.gz
6d6e28e8185af4aa29daa230d32846f5  /mnt/source/etc.tar.gz      |	6d6e28e8185af4aa29daa230d32846f5  /mnt/destination/fstab
The checksums for the source DigitalOcean Block Storage volume match the destination Vultr Block Storage volume with similar files in both directories based on the above output. When the checksums are different, transfer the files again and verify that the files are not corrupted during the transfer.
Cutover to Vultr Block Storage
Cutting over to Vultr Block Storage after migrating your existing DigitalOcean Block Storage volume allows you to transfer your applications and services. Follow the recommendations below when the migration is successful and cut over your applications or services to Vultr Block Storage.
- Login to your domain registrar and modify your DNS records to point to the destination Vultr Cloud Compute instance's public IP address.
- Detach and destroy your source DigitalOcean Block Storage volume if all files are available in your destination Vultr Block Storage volume.
- Migrate all applications and services to the destination Vultr Block Storage volume to cut over traffic.
Conclusion
You have migrated DigitalOcean Block Storage volumes to Vultr Block Storage. You can resize the destination Vultr Block Storage volume and cut over all applications to use the new volume. For more information and volume options, visit the Vultr Block Storage product documentation.