
How to Migrate from AWS to Vultr Using FluidCloud
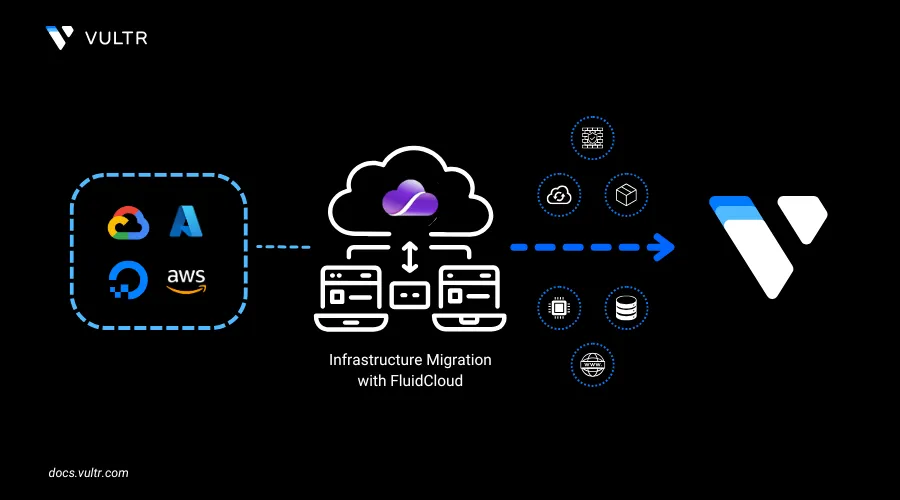
FluidCloud is a multi-cloud management platform that centralizes infrastructure operations across cloud providers and accounts. It enables seamless backup, restoration, and duplication of cloud resource configurations, allowing teams to replicate infrastructure across regions, providers, and environments with ease. In addition, FluidCloud features a built-in compliance dashboard that continuously assesses your cloud environments against leading industry standards such as SOC 2, GDPR, ISO-27001, and other frameworks—ensuring security, visibility, and regulatory alignment.
This guide demonstrates how to migrate infrastructure deployed on an AWS account to Vultr Account.
Prerequisites
- An existing account on FluidCloud
- An existing AWS account with resources deployed.
Add Vultr as a Provider to the FluidCloud Account
Navigate to the Accounts section on the left navigation window in your FluidCloud account.
Click Add Account button available on the right.
Select Vultr as a cloud provider.
Provide an Account Name for easier identification, the Email associated with your Vultr account, add the API Key of your Vultr account and choose a region where you want to deploy the migrated resources.
Click Add Account.
Within a few minutes, your Vultr account will appear on the dashboard, allowing you to view and manage any existing resources.
Repeat the same steps to add AWS account with correct IAM permissions and policies.
Migrate Resources to Vultr
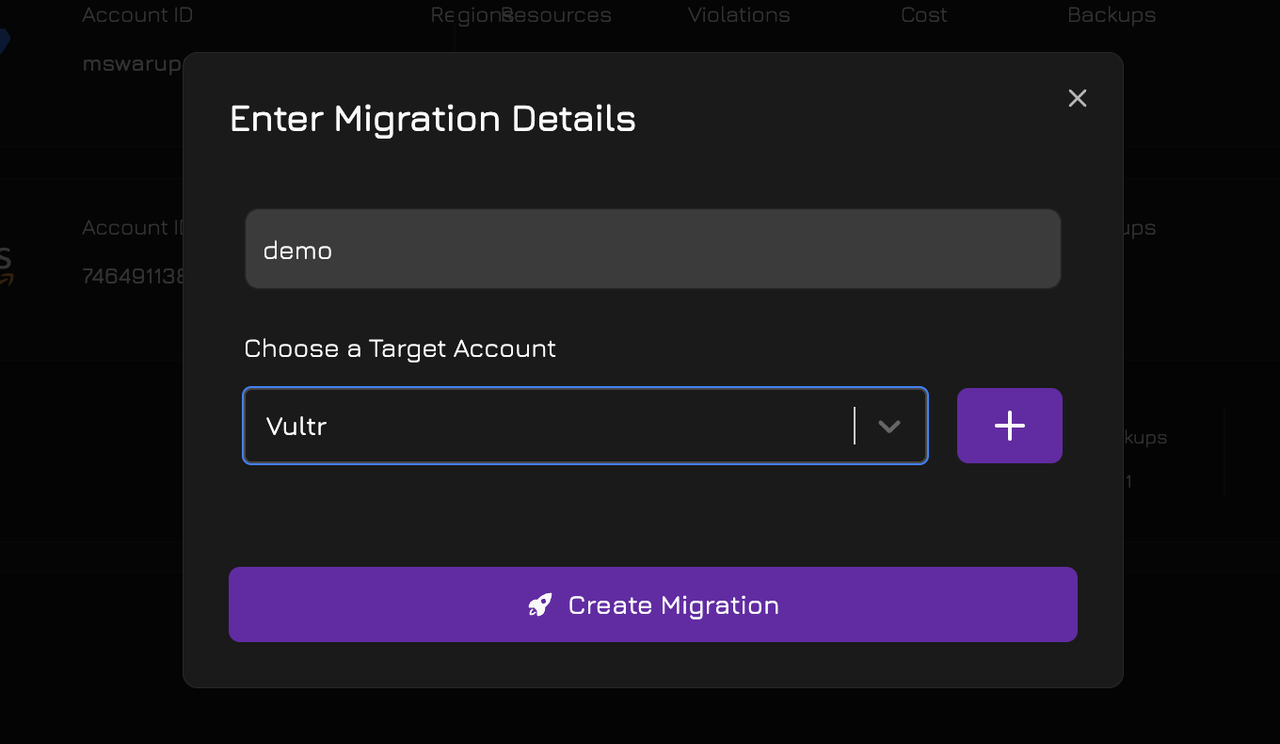
Choose Migrate from the Account menu of the account and region you want to migrate from.
Provide a Migration Name for easier migration.
Choose your Vultr account which you previously added as the destination.
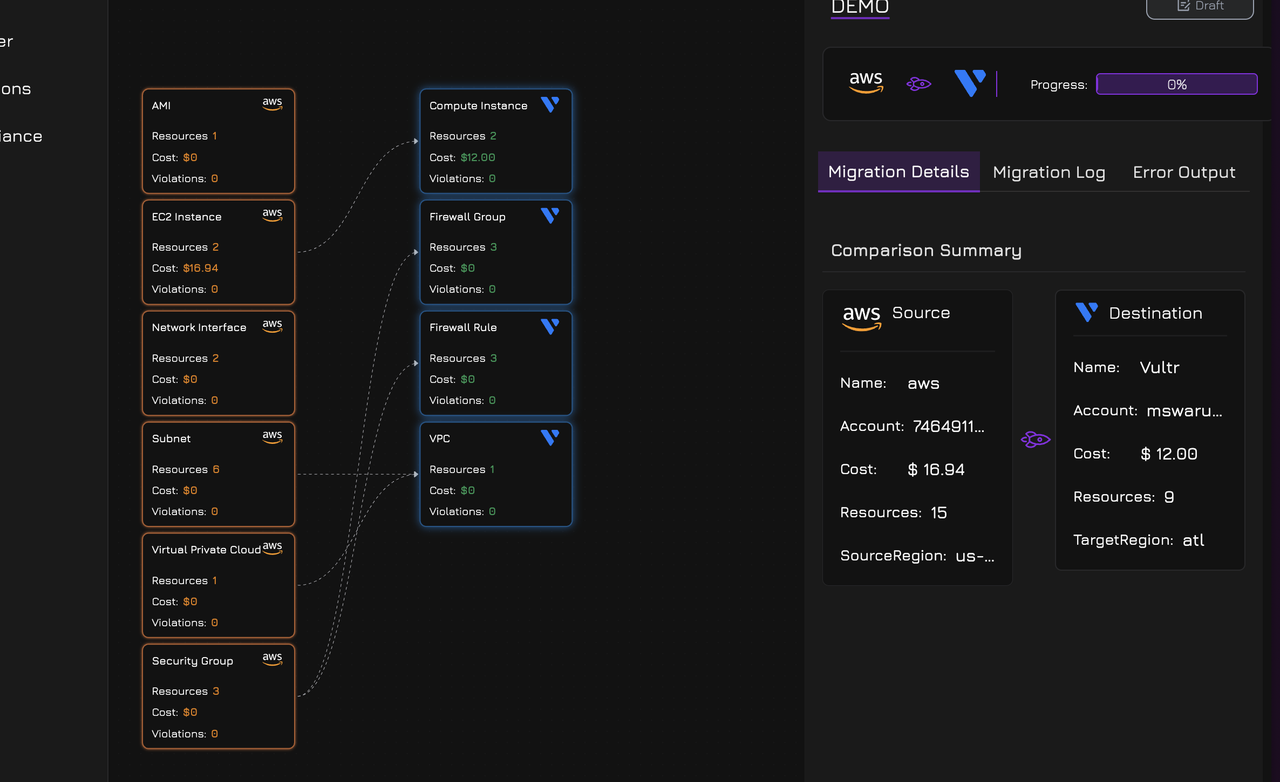
Map the resources which you want migrated in your Vultr account.
Click Launch Migration to start the migration.
You can follow the migration by viewing the logs in the migration window.
Subsequently follow the migration in your Vultr Console.
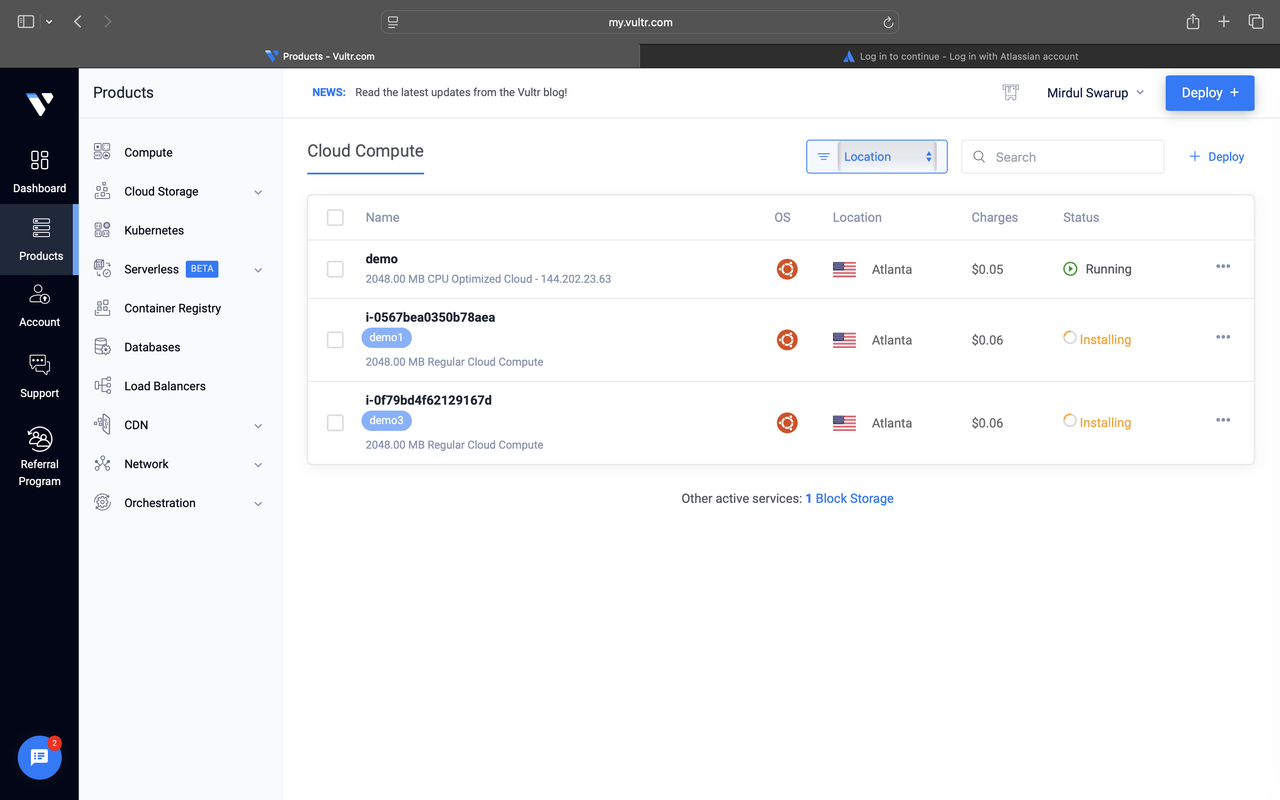
Once the migration is successful, the status will change the success and the progress will be marked as 100%.
You can also download the Terraform config created by Fluid Cloud to provision resources in Vultr.

Follow the same procedure to migrate your infrastructure from other cloud providers to Vultr.
Conclusion
In this guide, you successfully configured FluidCloud to manage both your AWS and Vultr accounts, enabling seamless infrastructure migration between providers. You added Vultr as a destination cloud provider, initiated a migration from AWS, mapped the relevant resources, and launched the migration using FluidCloud’s intuitive interface. By monitoring the migration logs and validating the results in the Vultr Console, you ensured a smooth transition. Additionally, you gained the ability to download Terraform configurations for repeatable deployments—empowering you to replicate this workflow across other providers and environments.