
How to Migrate RoCE Bare-Metal Servers to a Managed Cluster on Vultr
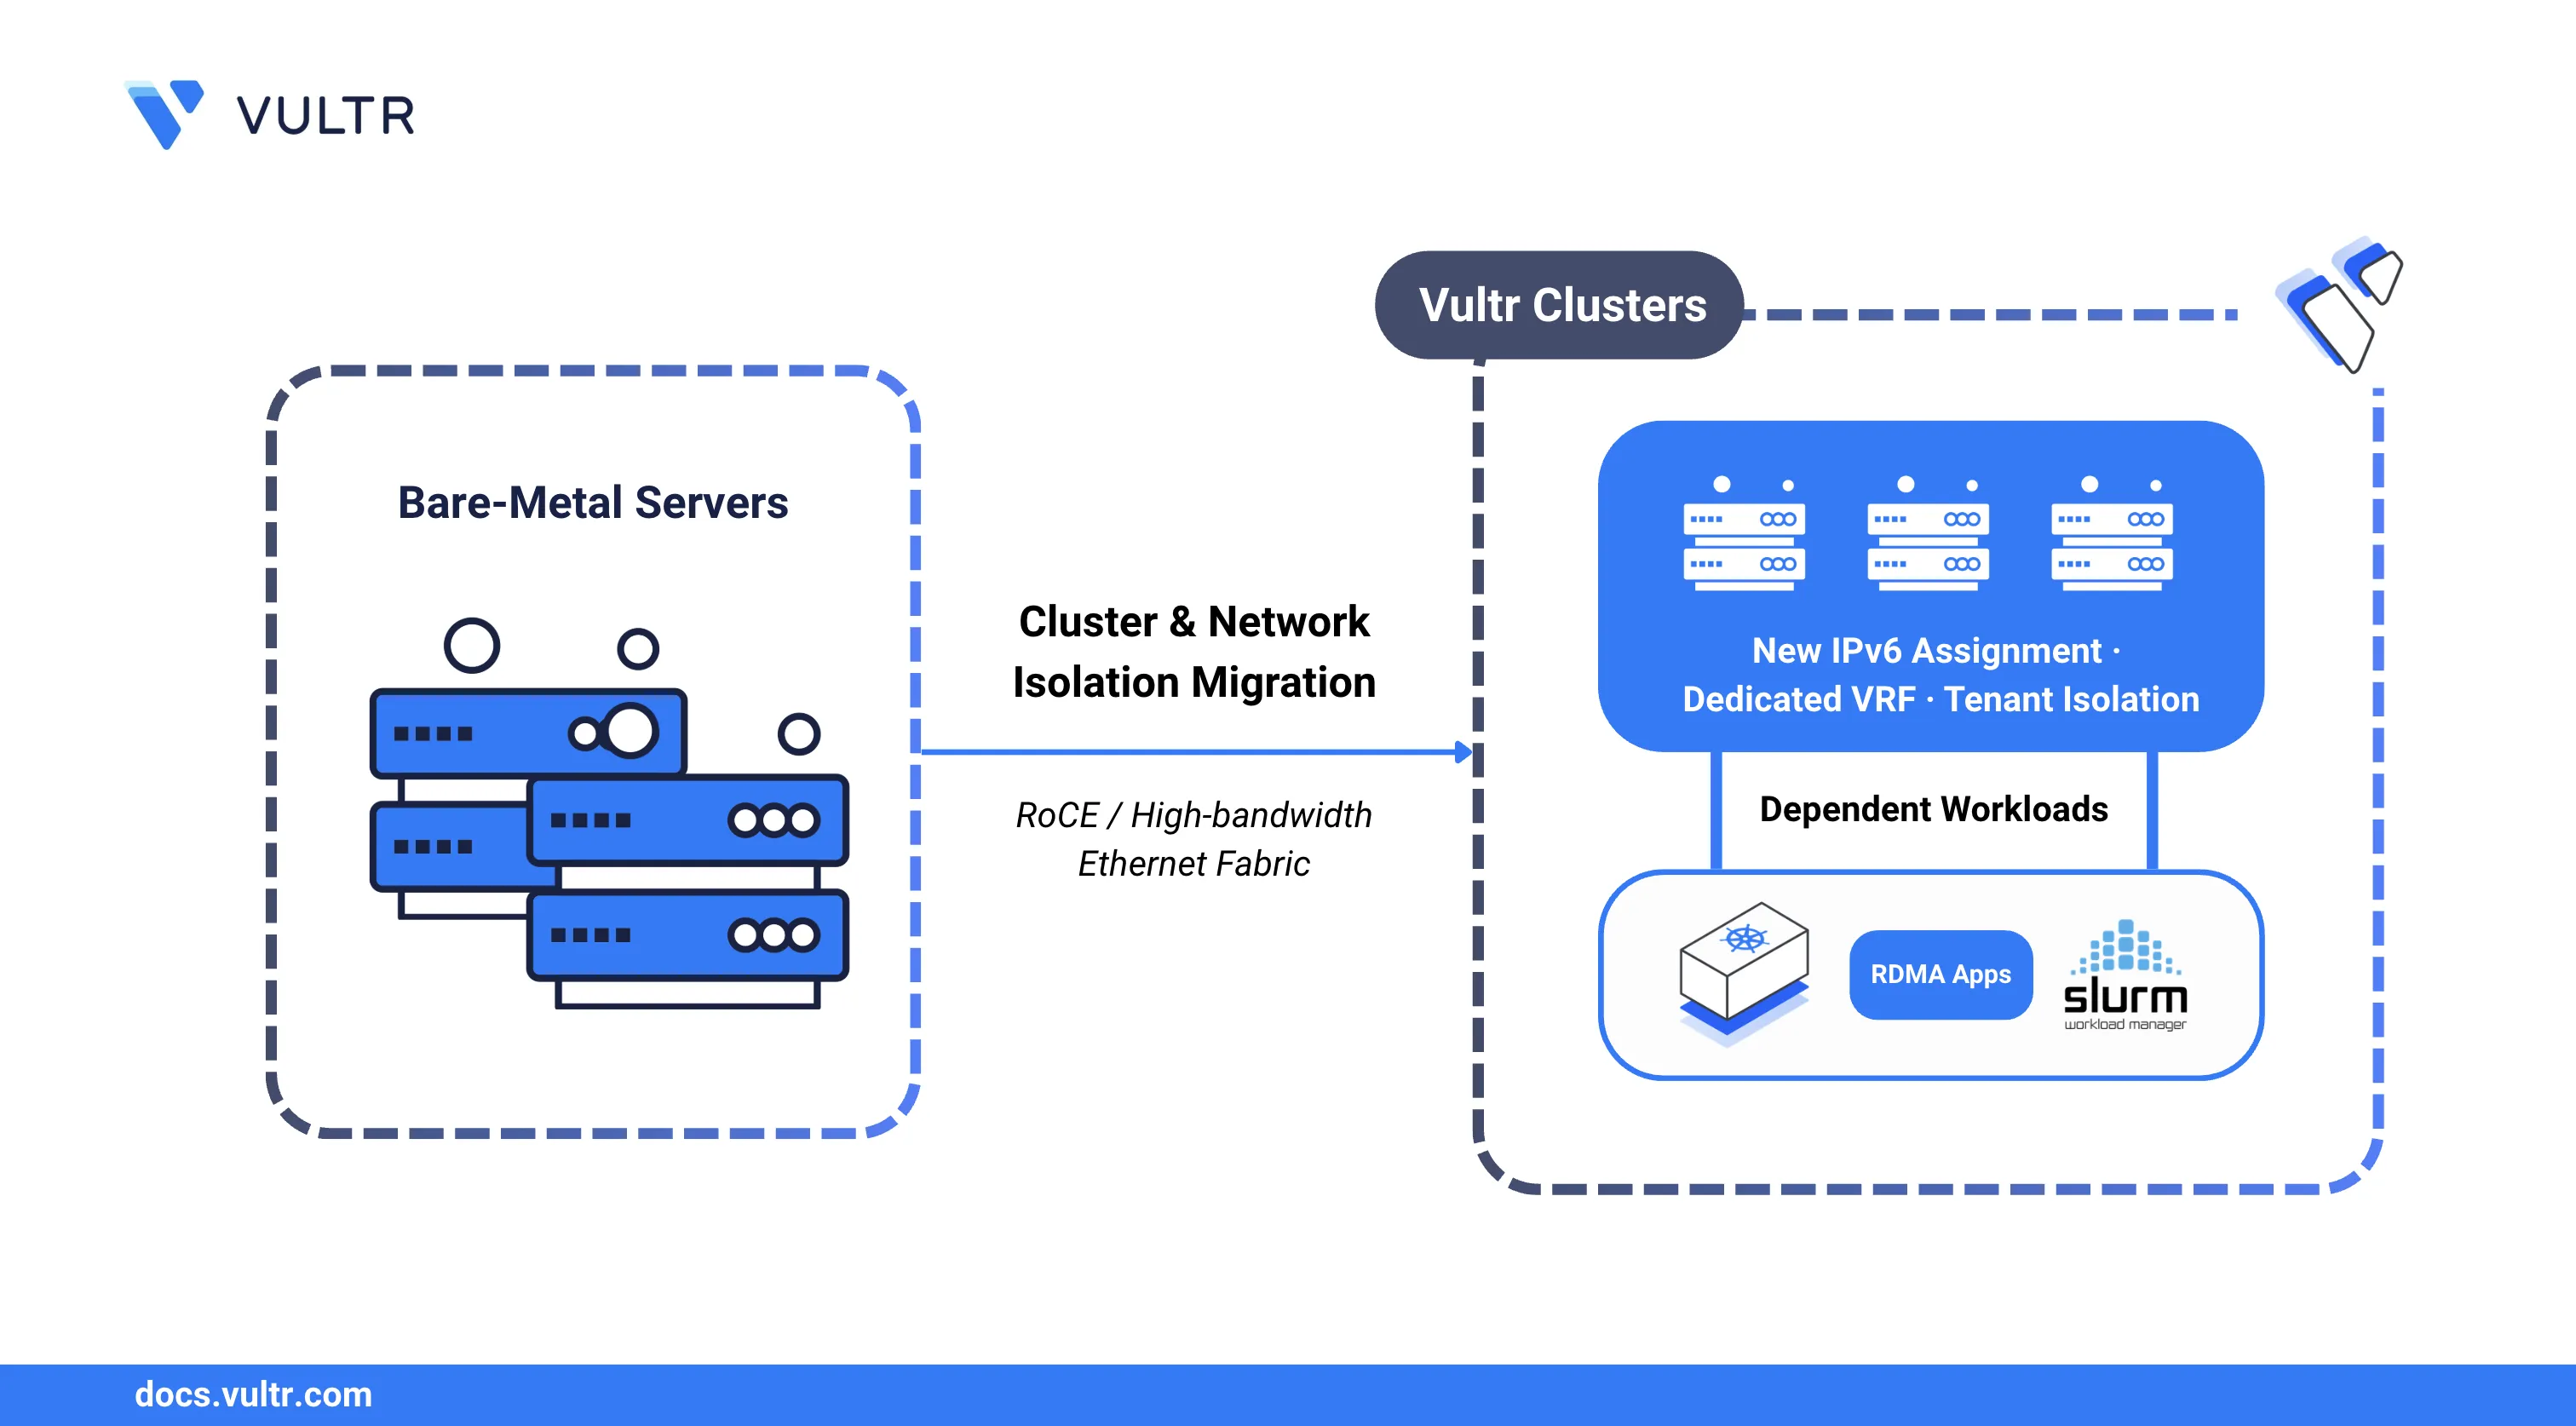
Clusters are a first-class object in Vultr that group multiple instances under a single managed entity. For clusters that leverage GPU fabric, each cluster enforces tenant isolation at the network layer. During migration, Vultr reconfigures the physical switch fabric to assign the dedicated VRF to your cluster and issues new IPv6 addresses on the Remote Direct Memory Access over Converged Ethernet (RoCE) interface.
This guide applies to existing bare-metal customers with servers connected to a RoCE/Ethernet high-bandwidth fabric who have received a migration notification from Vultr. If you received an email with the subject line "Your RoCE fabric instances are being migrated to a managed Cluster - action required", follow the steps in this guide to complete your migration.
The post-migration process covers RoCE interface configuration, IPv6 address verification, connectivity testing between cluster members, and restarting workloads that bind to the fabric interface.
Prerequisites
Before you begin, ensure you:
Have received the migration confirmation email from Vultr confirming the fabric reconfiguration is complete. Do not proceed until you receive this confirmation.
Have SSH access to each bare-metal server in the cluster. The steps in this guide must be performed on each server individually.
Have a Vultr API key exported as an environment variable.
console$ export VULTR_API_KEY=YOUR_API_KEY
Verify the Migration
Before restarting any interfaces, confirm the new Cluster has appeared in your account and contains your existing servers. Verifying the cluster exists before proceeding avoids reconfiguring servers against an incomplete migration.
Run the following command to query the Clusters API and confirm the migration is complete.
$ curl -s https://api.vultr.com/v2/clusters \
    -H "Authorization: Bearer $VULTR_API_KEY" | \
    jq '.clusters[] | {id, label, fabric_type, region, instances}'
The output displays a cluster object with fabric_type: "roce" containing your existing server IDs as members.
Restart the RoCE Network Interface
After Vultr reconfigures the physical switch fabric, each server receives new IPv6 addresses on the RoCE interface. Restarting the interface causes the operating system to apply the new network configuration and pick up the updated addresses.
Perform the following steps on each server in the cluster. Replace ROCE-INTERFACE with your RoCE network interface name (for example, enp175s0f0). Run ip link show to list available interfaces if you are unsure of the name.
The commands differ depending on which network manager controls the RoCE interface. Expand the section that matches your configuration. If your distribution does not use Netplan, systemd-networkd, or NetworkManager, restart networking according to your distribution's convention, or use the manual configuration steps.
Use netplan apply to re-render and apply all active Netplan configurations, causing the interface to pick up the new IPv6 address from the updated network plan.
$ sudo netplan apply
Use networkctl to signal the network daemon to re-read the interface configuration and assign the new IPv6 address without bouncing the link.
$ sudo networkctl reconfigure ROCE-INTERFACE
Reload the connection profile from disk, then bring the connection up so NetworkManager negotiates the new IPv6 address on the RoCE interface.
Reload all connection profiles.
console$ sudo nmcli connection reload
Bring up the RoCE connection. Replace
ROCE-CONNECTION-NAMEwith your connection name.console$ sudo nmcli connection up ROCE-CONNECTION-NAME
Cycle the interface down and back up to force a fresh address negotiation. Use this method if no network manager is running on the server.
Bring the interface down.
console$ sudo ip link set ROCE-INTERFACE down
Bring the interface back up.
console$ sudo ip link set ROCE-INTERFACE up
(Optional) If the server uses DHCPv6, request a new lease.
console$ sudo dhclient -6 ROCE-INTERFACE
Verify the New IPv6 Address
After restarting the interface, confirm the operating system has received the new IPv6 address assigned to the cluster VRF. The old IPv6 address may still appear in a deprecated state while it ages out. This is expected behavior.
Display the IPv6 addresses assigned to the RoCE interface. Replace ROCE-INTERFACE with your interface name.
$ ip -6 addr show ROCE-INTERFACE
Your output should be similar to the one below:
3: enp175s0f0: <BROADCAST,MULTICAST,UP,LOWER_UP> mtu 4096 state UP
    inet6 2001:db8:1::/64 scope global dynamic
       valid_lft 86398sec preferred_lft 14398sec
    inet6 2001:db8:0::/64 scope global dynamic deprecated
       valid_lft 3599sec preferred_lft 0sec
The new IPv6 address appears with scope global dynamic. A deprecated entry for the previous address may also appear with preferred_lft 0sec. This is expected behavior and ages out automatically.
Verify RoCE Connectivity
With the new IPv6 addresses in place, test that RoCE traffic flows between servers in the cluster. This confirms the dedicated VRF is active and inter-server communication is restored before restarting any dependent workloads.
Ping another server in the cluster using its RoCE IPv6 address. Replace
PEER-IPV6-ADDRESSwith the IPv6 address of another cluster member.console$ ping6 PEER-IPV6-ADDRESS
(Optional) If your workload uses RDMA, verify the RDMA device and link state.
console$ ibv_devinfo $ rdma link show
The
ibv_devinfooutput lists the device inPORT_ACTIVEstate when the link is functional.
Restart Dependent Services
Distributed training and inference workloads that bind directly to the RoCE interface retain the old IPv6 address in their runtime state. Restarting those services causes them to re-bind to the updated address. Perform this step on each server.
For Kubernetes pods that use the RoCE network, replace ROCE-DEPENDENT-DAEMONSET with your DaemonSet name.
$ kubectl rollout restart daemonset/ROCE-DEPENDENT-DAEMONSET
For Slurm jobs, replace JOB-ID with your job identifier.
$ scontrol requeue JOB-ID
Manage Your Cluster
With RoCE connectivity restored, the Cluster is available through the Vultr Console and the Clusters API. Use the following endpoints to manage cluster membership as your workload scales. Replace CLUSTER-ID and INSTANCE-ID with the appropriate identifiers from your account.
- Retrieve cluster details:
GET /v2/clusters/CLUSTER-ID - Attach a server to the cluster:
POST /v2/clusters/CLUSTER-ID/attach/INSTANCE-ID - Detach a server from the cluster:
POST /v2/clusters/CLUSTER-ID/detach/INSTANCE-ID
Troubleshooting
New IPv6 Address Does Not Appear
IPv6 address assignment via SLAAC or DHCPv6 may take up to 30 seconds after the interface restarts. Wait 30 seconds, then run the verification command again.
If the address still does not appear, confirm the interface is up.
$ ip link show ROCE-INTERFACE
The output must show state UP. If the interface is down, run a full restart cycle.
$ sudo ip link set ROCE-INTERFACE down
$ sleep 5
$ sudo ip link set ROCE-INTERFACE up
$ sleep 10
$ ip -6 addr show ROCE-INTERFACE
If the address still does not appear, open a support ticket and reference your account ID and cluster ID.
RoCE Connectivity Is Not Restored
- Confirm that both the source and destination servers have completed the interface restart steps.
- Check that firewall rules on both servers permit traffic from the new IPv6 address range.
- Verify the RDMA device is functional. The
ibv_devinfooutput must show the device inPORT_ACTIVEstate. - If the issue persists, open a support ticket and reference your cluster ID.
Interface Restarted Before Migration Was Complete
No permanent damage occurs if the interface was restarted before the migration finished. Bring the interface back up, wait for the migration confirmation email, and then repeat the restart steps after the reconfiguration is confirmed complete.
Conclusion
You have successfully migrated your RoCE bare-metal servers to a managed Cluster. Each server now operates on a dedicated VRF with updated IPv6 addresses, and your distributed workloads are restored. Use the Clusters API or the Vultr Console to manage cluster membership as your infrastructure evolves. For more information, visit the Vultr API documentation.