How to Set Up Automatic Backups With Duplicati and Vultr Object Storage
Introduction
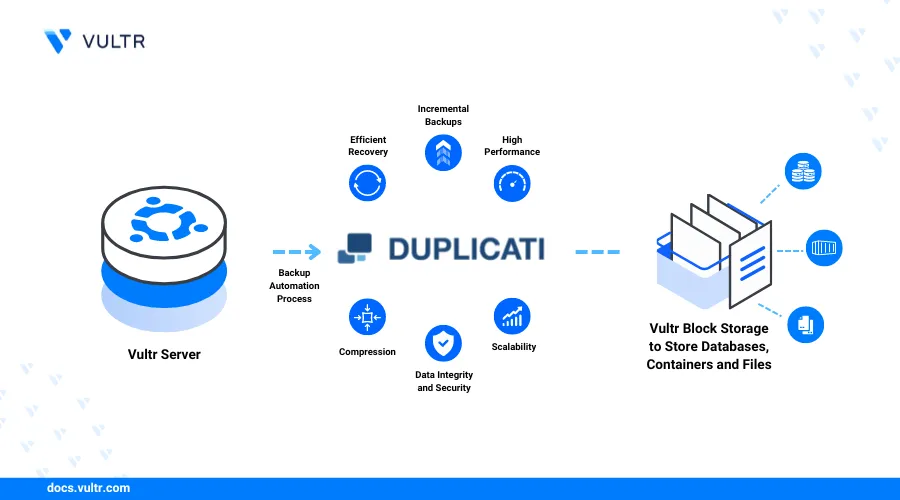
Duplicati is a free, open-source backup solution for encrypting, compressing, and storing files in the cloud. Duplicati is mainly written in C# and supports various storage protocols like SFTP and S3 compatible storage solutions like Vultr Object Storage.
You can use the Duplicate intuitive web interface to set up and schedule regular backups for your Cloud Compute instances to remote storage. Duplicate backups are fully automated and secured with solid data encryption algorithms like AES-256 and TLS/SSL protocols.
This guide walks you through setting up automatic backups with Duplicati and Vultr Object Storage on Ubuntu 22.04.
Prerequisites
Before you begin:
- Deploy Ubuntu 22.04 Cloud Compute instance.
- SSH to the Cloud Compute instance.
- Create a non-root
sudouser account and switch to the account. - Update the Cloud Compute instance.
- Create a non-root
- Deploy a Vultr Object Storage and copy the S3 credentials.
Install and Configure Duplicati
Duplicati maintains a central repository where you can download the latest installation files depending on your operating system. Follow the steps below to install Duplicati.
Install Duplicati
Install Duplicati using the Ubuntu apt command:
Navigate to the
/tmpdirectory.console$ cd /tmp
Visit the Official Duplicati Download page and get a link to download the installation file for Debian/Ubuntu.
Install the Mono dependency package.
console$ sudo apt install mono-complete -y
Use the following Linux
wgetcommand to download the Duplicati installation package file.console$ wget https://updates.duplicati.com/beta/duplicati_2.0.8.1-1_all.deb
Install the Duplicati package.
console$ sudo apt install ./duplicati* -y
Configure Duplicati
Make the following configuration changes before you start using the Duplicati service:
Open the default Duplicati configuration file using a text editor like Nano.
console$ sudo nano /etc/default/duplicati
Locate the
DAEMON_OPTSdirective.... # Additional options that are passed to the Daemon. DAEMON_OPTS=""Change the default value
""to the following content. This setting allows you to access the Duplicati web interface through your server's private IP address on port8200.DAEMON_OPTS="--webservice-interface=any --webservice-port=8200 --portable-mode"Save and close the file.
Allow port
8200through Uncomplicated Firewall (UFW) and reload the new firewall changes.console$ sudo ufw allow 8200 $ sudo ufw reload
Start Duplicati and enable the service to start at boot.
console$ sudo systemctl start duplicati $ sudo systemctl enable duplicati
Run Duplicati Backups
After installing Duplicati, follow the steps below to access the web interface, set up an administrator password, and schedule backup:
Create a new
projectdirectory under your home directory. In a production environment, you may skip this step and select an existing directory you want to back up.console$ mkdir ~/project
Switch to the new
~/projectdirectory.console$ cd ~/project
Create two sample text files under the directory.
console$ touch test1.txt $ touch test2.txt
Open a web browser and enter the following URL. Replace
192.0.2.1with the public IP address of your Cloud Compute instance.http://192.0.2.1:8200Click YES in the dialog box that appears to set up a password.
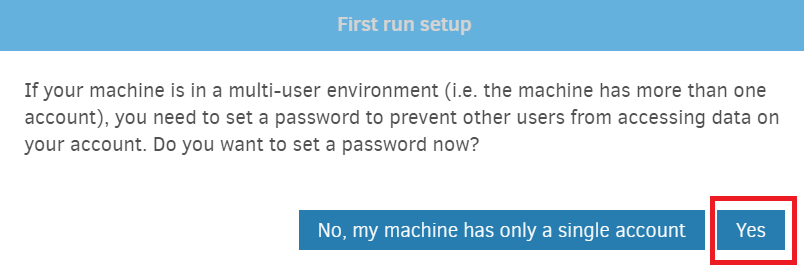
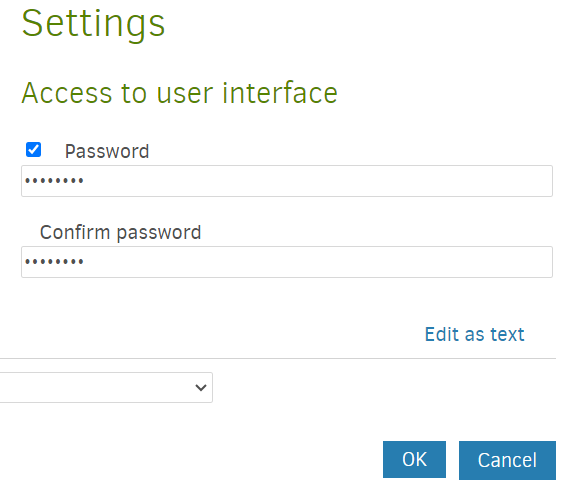
Enter a new Duplicati password. Scroll down and click OK.
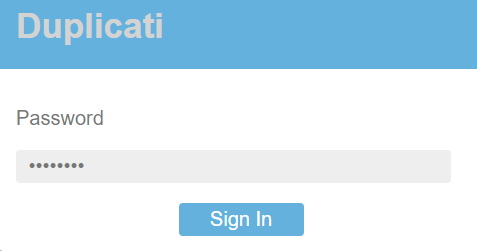
Sign in to Duplicati on the next screen using the password.
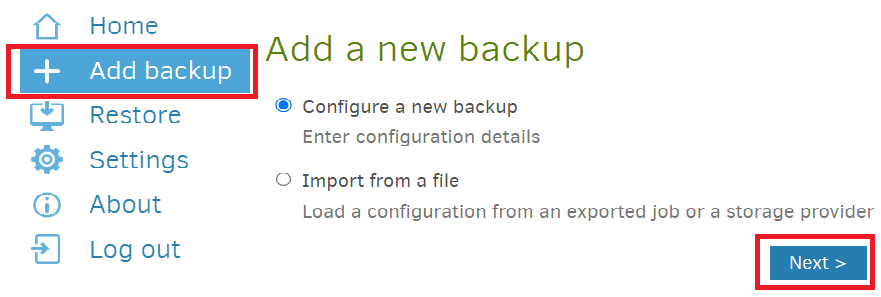
Click Add backup in the main menu, select Configure a new backup and click Next>
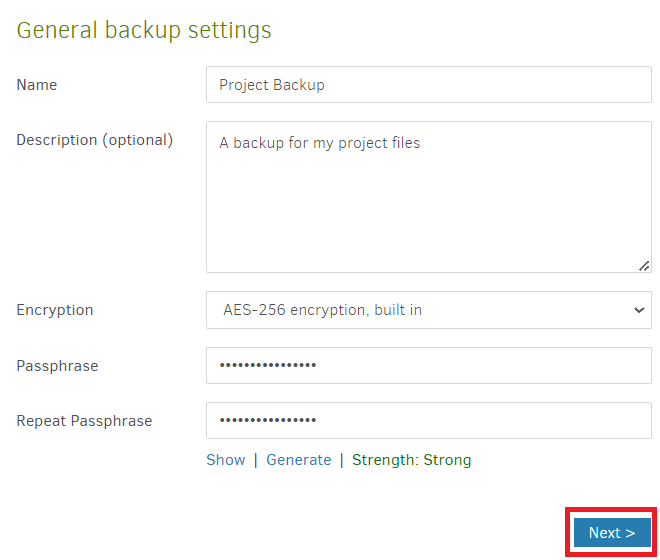
Enter the following backup details and click Next>. That is, backup name, description, and file encryption passphrase.
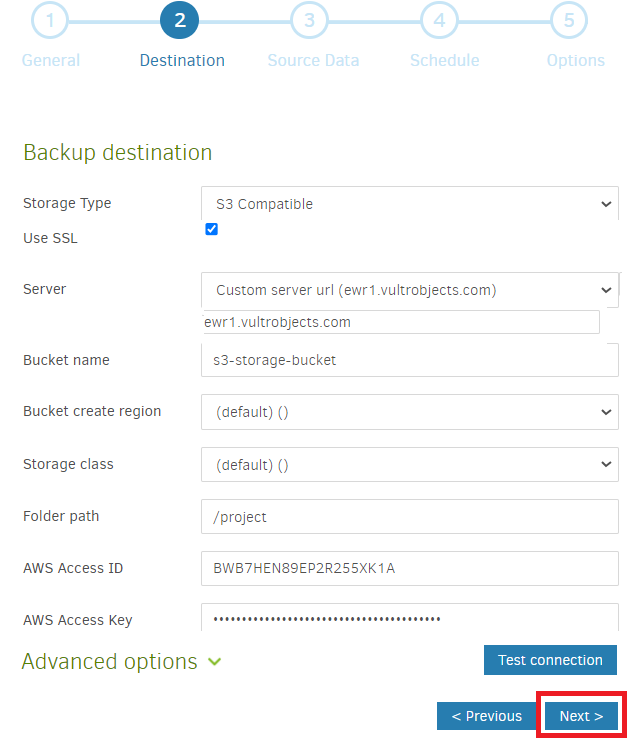
Select S3 Compatible as the Storage Type, enable the Use SSL checkbox, and then, enter your Vultr Object Storage credentials as follows including the bucket name. Match Access ID with Vultr Access Key and Access Key with Vultr Secret Key.
Select the source data under Computer. Then, locate the
projectdirectory you created earlier under/home/user/and select its content.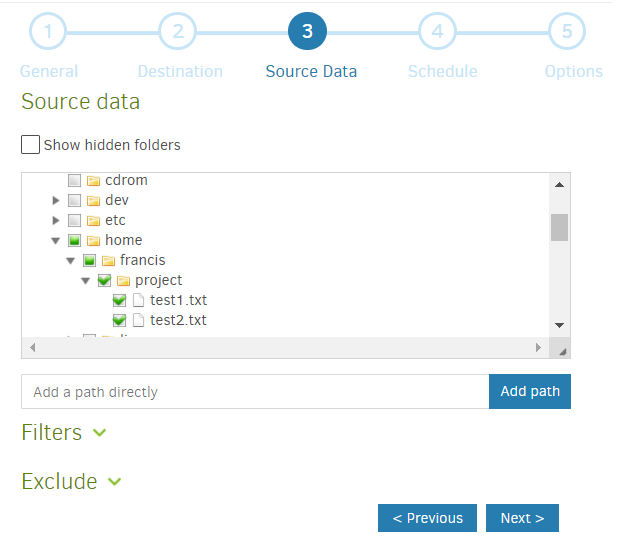
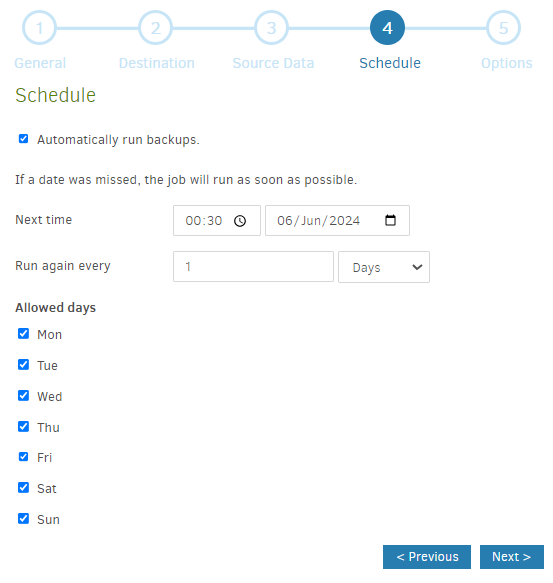
Configure the backup schedule. Consider running a backup job when your system is less busy. For instance, 30 minutes past midnight. Then, click Next.
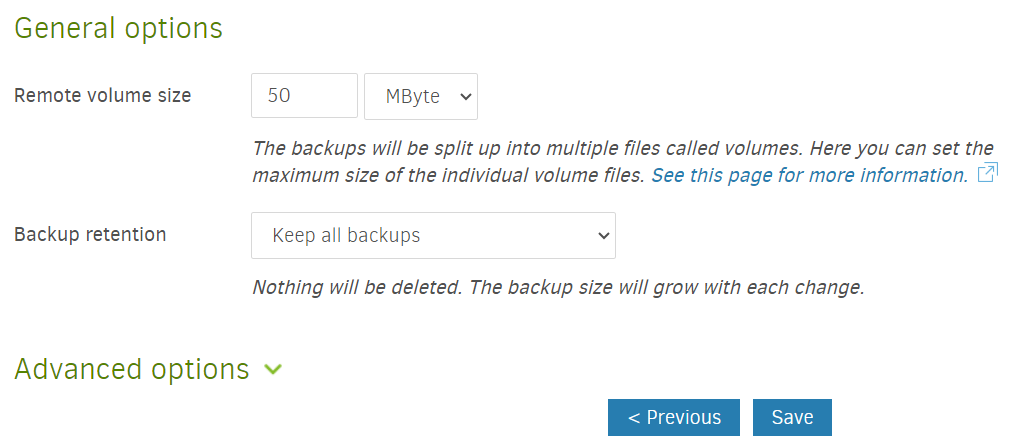
Configure the remote volume size and backup retention policy. Then, click Save.
Duplicati should show the backup summary. Click Run Now to execute the backup job manually before the schedule starts.

Restore Backups
Duplicati allows you to restore backup files directly to the original source directory in case you accidentally delete the files. Follow the steps below to restore backups:
Delete the original files from the local storage.
console$ rm ~/project/test1.txt ~/project/test2.txt
Ensure the local storage directory is empty.
console$ ls -ls ~/project
Output.
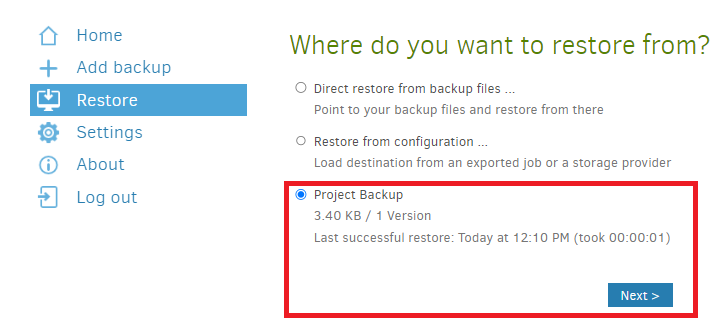
total 0Navigate to the Duplicati web interface and click Restore on the main menu. Then, select the backup name and Click Next>
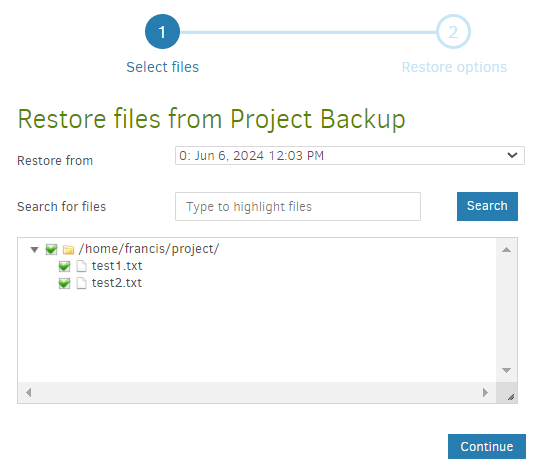
Select the files that you want to restore and click Continue.
Select Original location and click Restore.
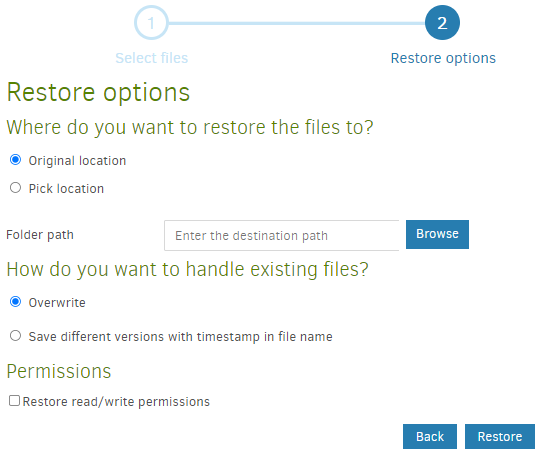
Duplicati restores the files to the original source directory.
Review the content of the local storage directory.
console$ ls -ls ~/project
Output.
0 -r--r--r-- 1 root root 0 Jun 9 19:49 test1.txt 0 -r--r--r-- 1 root root 0 Jun 9 19:49 test2.txtFor best results, always follow the 321 backup rule to ensure data redundancy, diversity, and geographic separation:Note- Always keep three 3 of your critical data.
- Store the data copies on 2 different media.
- Keep 1 copy of your data offsite.
Conclusion
This guide walked you through setting up automatic backups with Duplicati and Vultr Object Storage. You have installed and configured Duplicati in a Vultr Cloud Compute instance. Then, you used the Duplicati web interface to backup and restore files.