How to Set Up Vultr CDN Pull Zones for WordPress Websites with WP Super Cache

Introduction
WP Super Cache is a WordPress caching plugin that creates static files using your dynamic website files to improve the general website performance. WP Super Cache integrates with Content Delivery Networks (CDNs) such as Vultr CDN Pull Zones to enable the faster delivery of WordPress content and improve the general website performance.
This article explains how to set up Vultr CDN Pull Zones for WordPress websites using the WP Super Cache plugin.
Prerequisites
Before you begin:
Create a Vultr CDN Pull Zone for your WordPress website by providing the domain name as the origin URL.
Login to the WordPress administration dashboard.
https://example.com/wp-adminSet your WordPress Permalink structure to Post name to use the WP Super Cache plugin with a CDN.
Install WP Super Cache
Navigate to the Plugins page on your main WordPress navigation menu.
Click Add New Plugin to browse the WordPress plugins directory.
Enter
wp super cachein the search field and press Enter to search the plugin.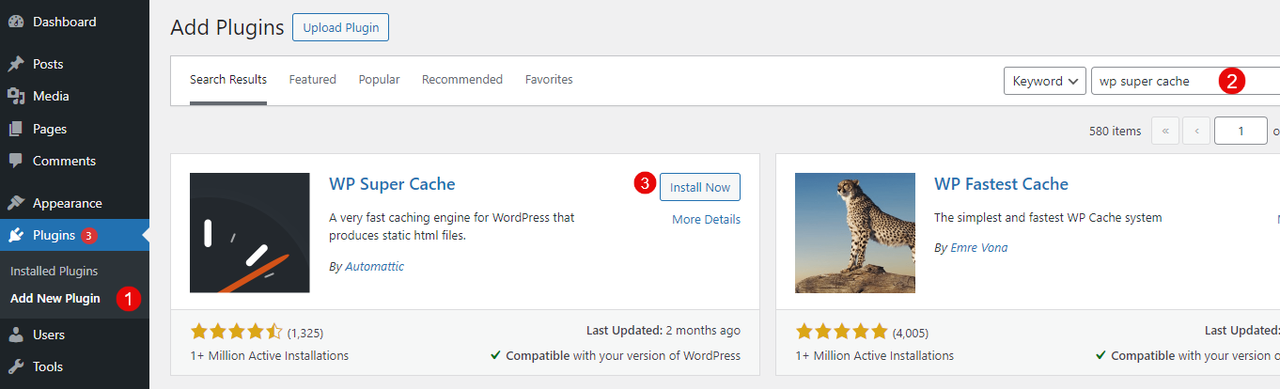
Find the WP Super Cache plugin result and click Install to add it to your WordPress site.
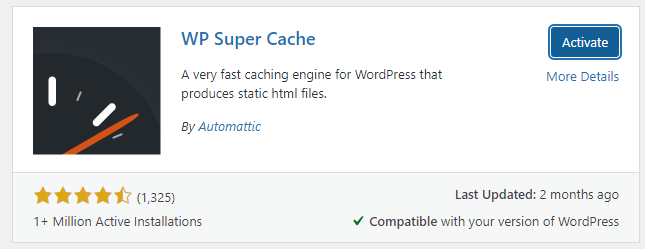
Click Activate to enable the plugin.
Configure WP Super Cache
Find and click Settings on the main navigation menu.
Click WP Super Cache to open the plugin's configuration page.
Click Caching On (Recommended) to enable caching on your WordPress site.
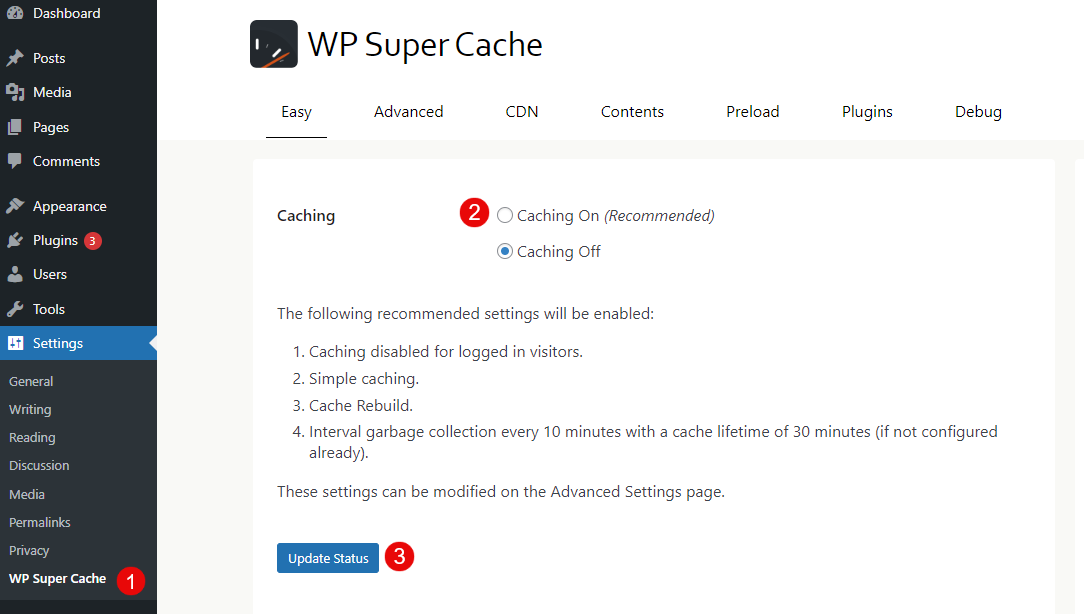
Click Update Status to apply changes.
Navigate to the CDN tab.
Check the Enable CDN Support option to enable the CDN configuration options.
Enter your WordPress website URL in the Site URL field.
Enter your Vultr CDN Pull Zone's URL in the Off-site URL field.
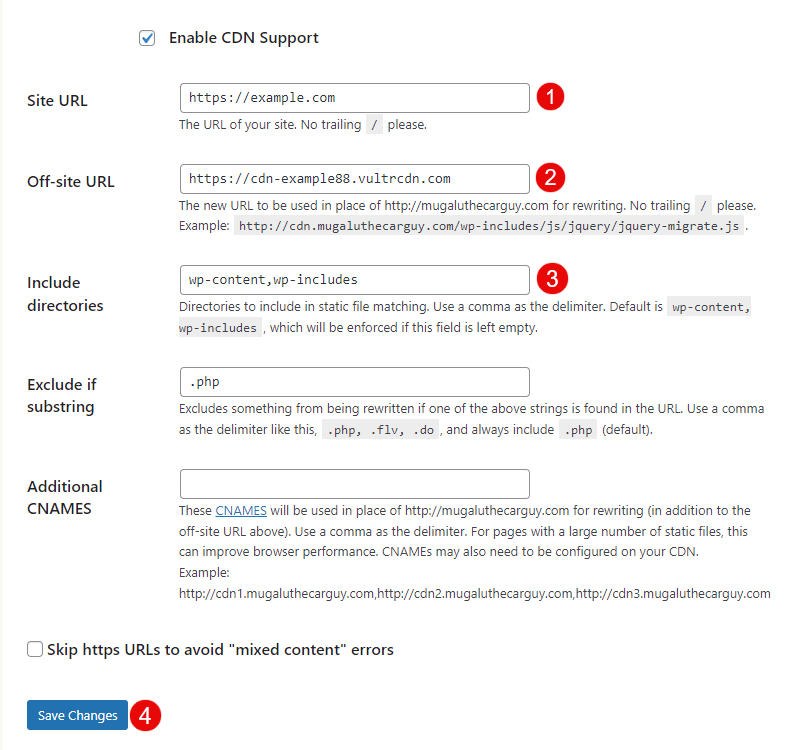
Verify the Include directories asset types to cache with your Vultr CDN Pull Zone.
Click Save Changes to apply changes and test the CDN configurations.
Test the Vultr CDN Pull Zone Integration
Access your WordPress site as a regular user using a different web browser such as Firefox.
https://example.comRight-click anywhere on your WordPress site and select Inspect from the list of options.
Navigate to the Sources tab and verify that your Vultr CDN Pull Zone's URL is available on the list of site sources.

Expand the Vultr CDN Pull Zone source and compare the cached files with those from your main WordPress domain.
Troubleshooting
Depending on your WordPress website configurations, you may experience any of the following errors when integrating WP Super Cache with your Vultr CDN Pull Zone. Verify and fix the error as described in the following steps.

Permalink Structure Error:
A custom URL or permalink structure is required for this plugin to work correctly. Please go to the Permalinks Options Page to configure your permalinks.WP Super Cache requires a custom permalink structure to work correctly with a CDN. Navigate to Settings > Permalinks to set up a custom structure such as
Post Name,Numeric, orMonth and Day.
Conclusion
You have installed WP Super Cache and configured your WordPress website to serve cached content from your Vultr CDN Pull Zone. You can offload all supported assets and use WP Super Cache to improve your general website performance. For more information and plugin options, visit the WP Super Cache documentation.