How to Sync Between Servers in a Vultr Private Cloud (VPC) with Syncthing

Introduction
Syncthing is a peer-to-peer continuous file synchronization application that allows you to keep files between servers updated in real-time. It offers a privacy-first approach by encrypting all data when transporting between nodes. A Node can be your personal computer, or any server in a Virtual Private Cloud (VPC)
In this guide, you will set up real-time sync between servers in a single Vultr VPC with Syncthing. Also, Machine A represents the main sync server, and Machine B refers to any other server in the VPC.
Prerequisites
In this guide, we'll use two Ubuntu 20.04 servers in a single virtual private cloud (VPC).
Install Syncthing
Install the apt transport protocol.
$ sudo apt-get install curl apt-transport-httpsAdd the Syncthing release key.
$ sudo curl -s https://syncthing.net/release-key.txt | sudo apt-key add -Now, set up the Syncthing repository using the following command.
$ sudo echo "deb https://apt.syncthing.net/ syncthing stable" | sudo tee /etc/apt/sources.list.d/syncthing.listUpdate the server. $ sudo apt update
Install Syncthing
$ sudo apt install syncthingConfigure Syncthing
First, enable Syncthing to run as a system service on the server and allow it to start at boot time using the following commands:
$ sudo systemctl enable syncthing@example.service
$ sudo systemctl start syncthing@example.service
Replace
examplewith your actual user account.
Two directories are now present in your user home directory, Sync contains files for transfer, and the hidden folder .config contains all configuration files.
Now, open the syncthing subdirectory under the .config directory, and edit the file config.xml using your preferred text editor.
Change to the directory.
$ cd /home/example/.config/syncthingEdit the file.
$ nano config.xmlLocate the following configuration line:
</device>
    <gui enabled="true" tls="false" debugging="false">
        <address>127.0.0.1:8384</address>
        <apikey>6Tg22ZGfkCfYQUTcMyrCdM5eJtR2b436</apikey>
        <theme>default</theme>
    </gui>
    <ldap></ldap>
Change the listening IP to 0.0.0.0, and retain 8384 as the port number. Your section should now look like the one below:
</device>
    <gui enabled="true" tls="false" debugging="false">
        <address>0.0.0.0:8384</address>
        <apikey>6Tg22ZGfkCfYQUTcMyrCdM5eJtR2b436</apikey>
        <theme>default</theme>
    </gui>
    <ldap></ldap>
    <options>
Save and exit the file.
Restart Syncthing.
$ sudo systemctl restart syncthing@example.serviceNext, open all Syncthing network ports on the firewall with the following.
$ sudo ufw allow syncthingAllow access to the Syncthing web GUI.
$ sudo ufw allow syncthing-guiRestart the firewall.
$ sudo ufw reloadRepeat the above steps on Machine B.
Access Syncthing and Sync Files between the VPC servers
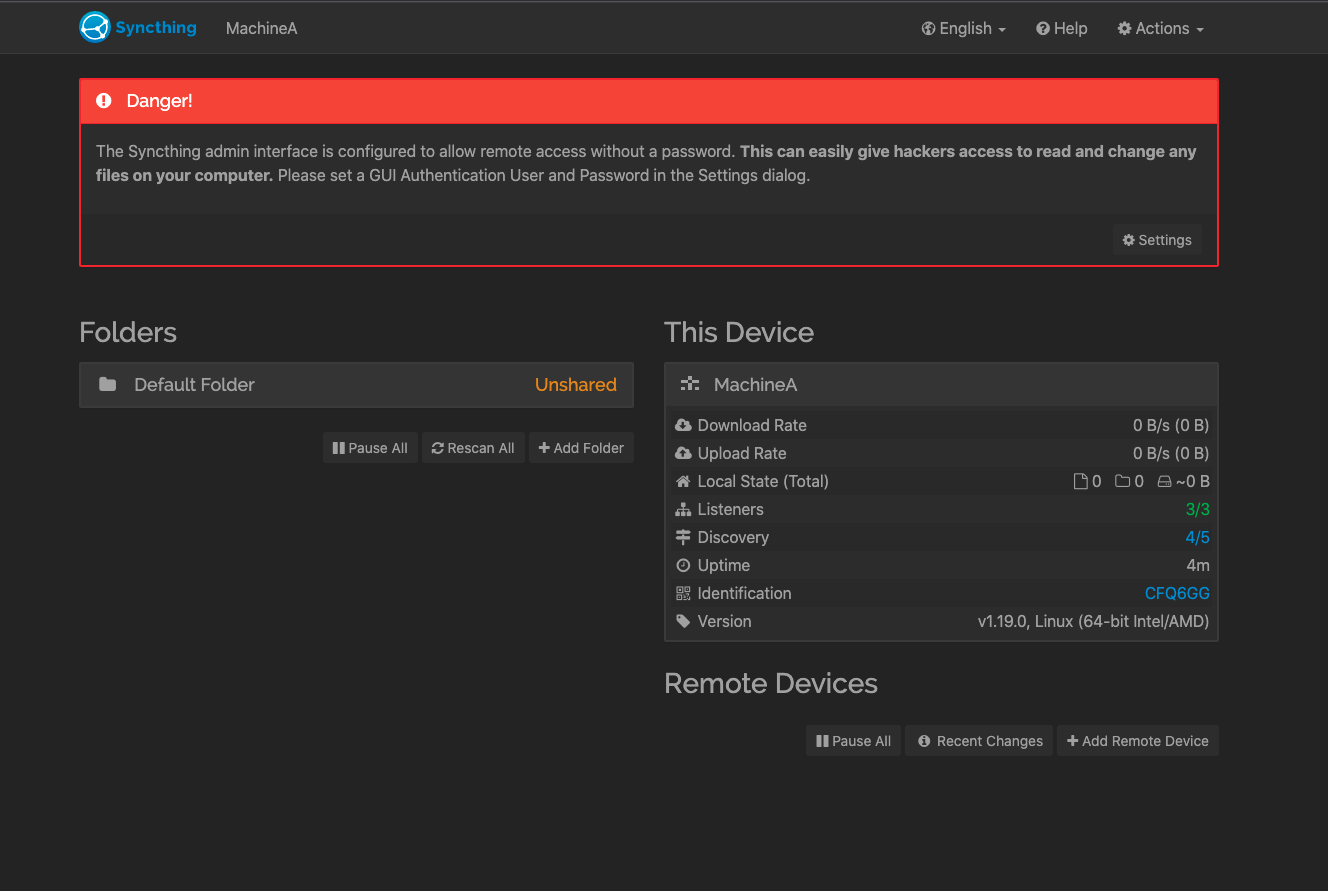
Now that Syncthing is set up on both servers in the VPC, access the Syncthing GUI by visiting the respective Server IP addresses on Port 8384.
http://machineA-IP:8384
http://machineb-IP:8384
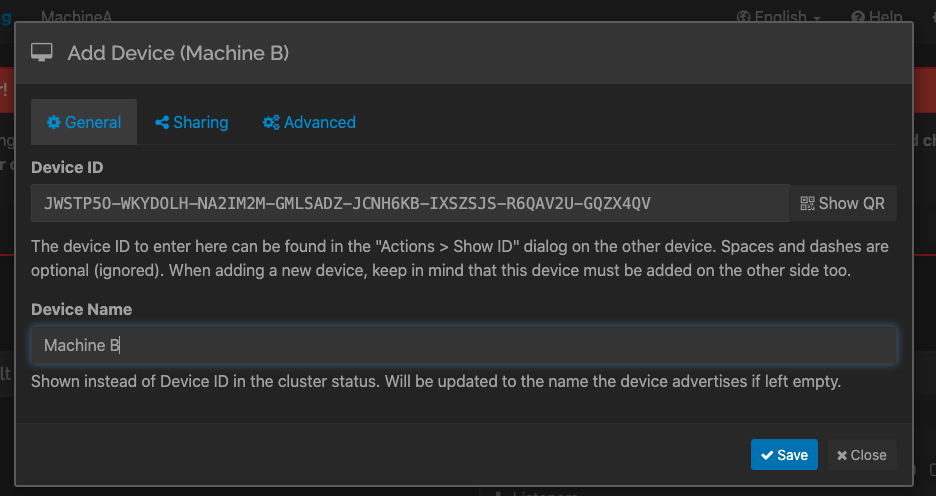
On the main Syncthing Machine B dashboard, click the Actions menu in the top right corner, and select Show ID from the options list. Copy the ID to your clipboard.
Now, on Machine A, locate the remote devices section, and click Add Remote Device. Then, paste the Machine B ID, assign it a name for easy identification, and save changes.

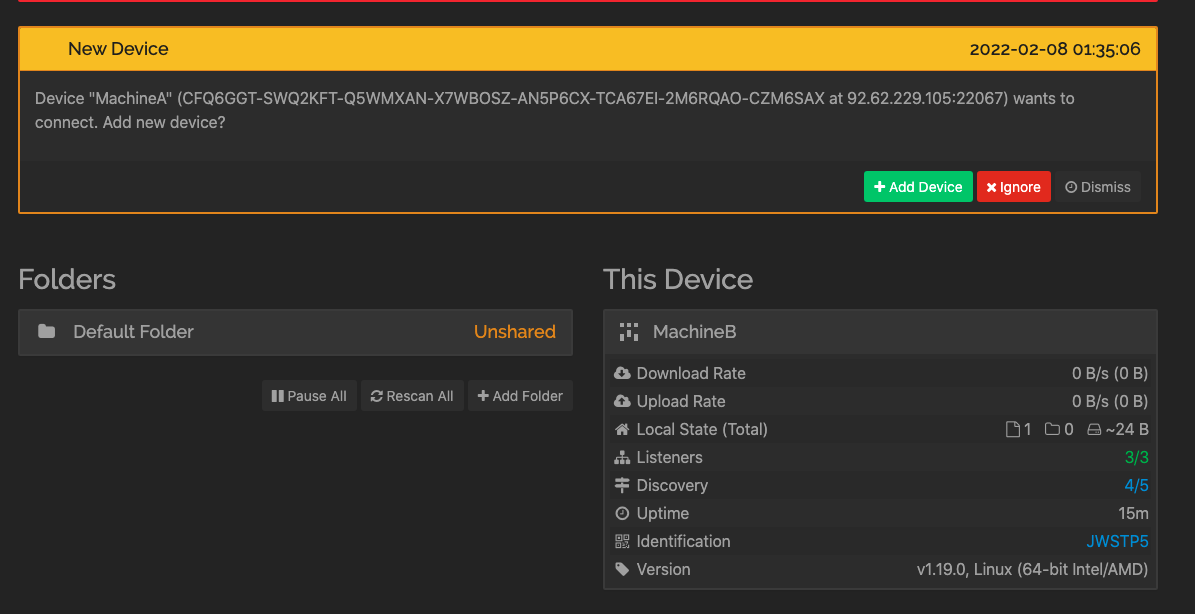
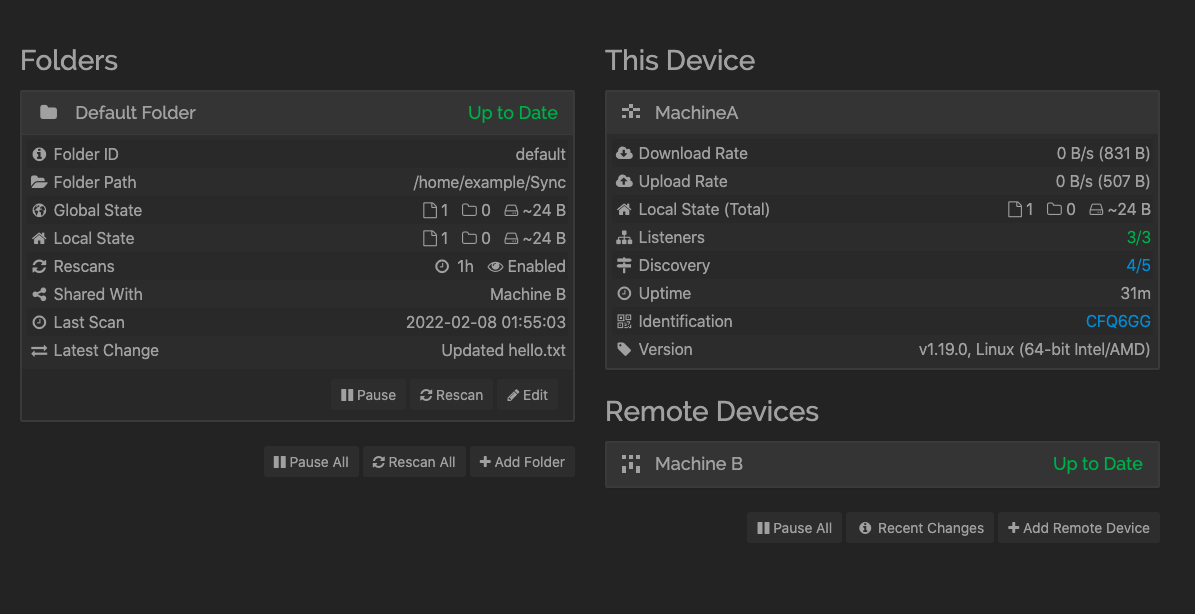
Revisit the Machine B dashboard, and click Add Device on the New Device pop-up prompt. Then, under Folders, click Edit, select Sharing from the main navigation bar, and check Machine A to share the default folder. Finally, accept the shared folder on Machine A to start syncing.

Your servers are now in sync. To test the service, create a simple hello.txt file in the Machine B Sync folder, and it will automatically Sync to the Machine A Sync folder.
$ echo "Hello Sync on Vultr VPC"> /home/example/Sync/hello.txt
To secure Syncthing from authorized access, visit the Settings Page, and select GUI from the navigation bar to set up a new administrative user and password. Optionally, you can also change the port that Syncthing listens on to a random port.
Conclusion
You have successfully set up real-time sync between servers in a VPC with Syncthing. If the firewall is well configured, other servers in the VPC will be automatically discovered and added to your private sync network. Optionally, you can link other devices like smartphones and your personal computer to the Sync network using the Vultr server IP Address.