
How to Use Vultr's InvokeAI Marketplace Application to Generate Images
Introduction
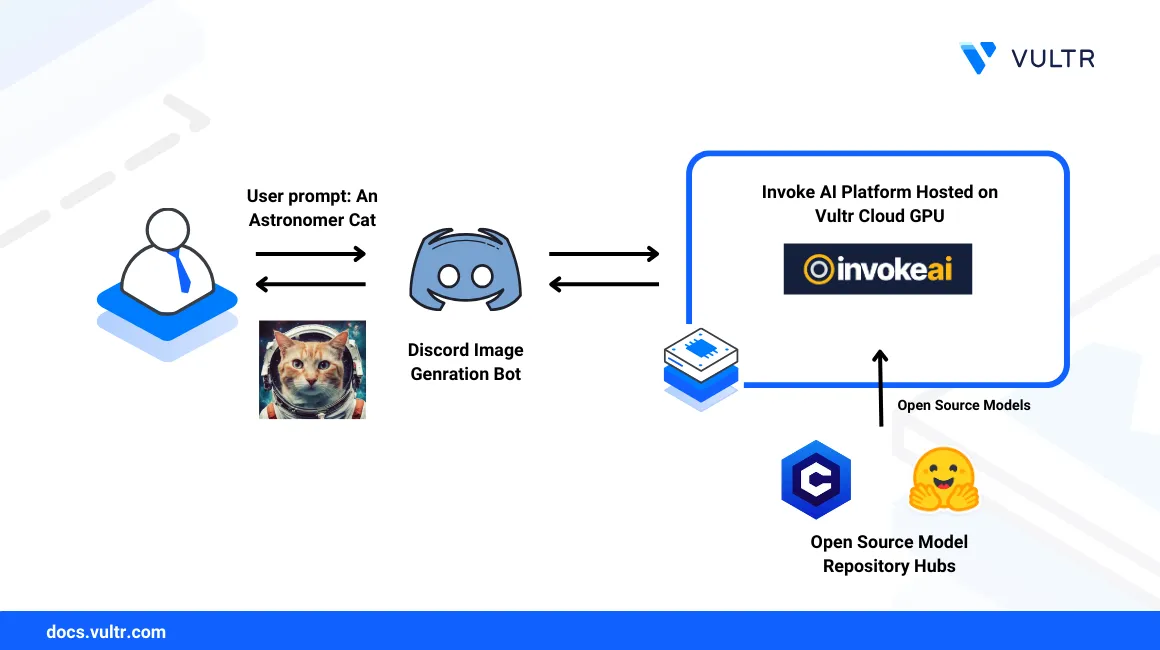
InvokeAI is a creative image generation platform that implements open-source AI models such as Stable Diffusion. InvokeAI runs with a user-friendly graphical web interface that supports text-to-image, image-to-image and text-to-video prompts with multiple options that enhance the image-generation process.
This guide explains how to use InvokeAI with the Vultr Marketplace application to generate images on a Cloud GPU instance. You will configure the server to securely access the InvokeAI interface, add new AI models from platforms such as Hugging Face, and create a sample Discord bot to generate AI images from prompts using your InvokeAI instance.
Prerequisites
Before you begin:
Deploy a fresh Invoke AI instance using the Vultr Marketplace application with at least
8 GBGPU RAM.Set up a new domain A record pointing to the InvokeAI server IP address.
Access the server using SSH.
Create a non-root user with sudo privileges. For example,
linuxuser.Switch to the user account:
console# su linuxuser
Configure Nginx with the InvokeAI Virtual Host Profile
Nginx is the default web server package pre-installed with the InvokeAI Vultr marketplace application. To securely expose the InvokeAI for production use, set up Nginx as a reverse proxy to forward incoming connection requests using your domain name to the backend InvokeAI port 9090. When using a different web server package, securely forward all requests to mask the backend InvokeAI ports. Follow the steps below to modify the default Nginx virtual host configuration to handle requests forward connection requests to InvokeAI.
View the Nginx web server status and verify that it's active and running.
console$ sudo systemctl status nginx
Output:
● nginx.service - A high performance web server and a reverse proxy server
     Loaded: loaded (/lib/systemd/system/nginx.service; enabled; vendor preset: enabled)
     Active: active (running) since Sat 2024-02-17 21:32:46 UTC; 2min 58s ago
       Docs: man:nginx(8)
    Process: 6970 ExecStartPre=/usr/sbin/nginx -t -q -g daemon on; master_process on; (code=exited, status=0/SUCCESS)
    Process: 6971 ExecStart=/usr/sbin/nginx -g daemon on; master_process on; (code=exited, status=0/SUCCESS)
   Main PID: 6972 (nginx)
Navigate to the Nginx virtual host configurations directory
/etc/nginx/sites-available.console$ cd /etc/nginx/sites-available
List the directory files and verify that the default configuration
invokeai.confis availableconsole$ lsOutput:
default invokeai.confOpen the InvokeAI configuration
invokeai.conffile using a text editor such as Nano.console$ sudo nano invokeai.conf
Replace the
server_namedirective value-with your domain name. For example,invokeai.example.com.YAMLserver_name invokeai.example.com;Your modified
invokeai.confconfiguration should look like the one below:nginxupstream invokeai { server 127.0.0.1:9090; } server { listen 443 ssl http2 default_server; listen [::]:443 ssl http2 default_server; server_name invokeai.example.com; root /var/www/html/; index index.html; access_log /var/log/nginx/nginx_http_access.log combined; error_log /var/log/nginx/nginx_http_error.log; ssl_certificate /etc/nginx/ssl/server.crt; ssl_certificate_key /etc/nginx/ssl/server.key; proxy_set_header Host $host; proxy_http_version 1.1; proxy_set_header X-Real-IP $remote_addr; proxy_set_header X-Forwarded-For $proxy_add_x_forwarded_for; proxy_set_header X-Forwarded-Proto $scheme; proxy_set_header Sec-WebSocket-Extensions $http_sec_websocket_extensions; proxy_set_header Sec-WebSocket-Key $http_sec_websocket_key; proxy_set_header Sec-WebSocket-Version $http_sec_websocket_version; proxy_set_header Upgrade $http_upgrade; proxy_set_header Connection "Upgrade"; location / { auth_basic "Restricted"; auth_basic_user_file /etc/nginx/htpasswd/invokeai; proxy_pass http://invokeai$request_uri; } } server { listen 80 default_server; listen [::]:80 default_server; server_name _; rewrite ^/(.*)$ https://$host:443/$1 redirect; }
Keep note of the
auth_basic_user_file /etc/nginx/htpasswd/invokeai;directive when adding new users to grant access to your InvokeAI interface.Test the Nginx configuration for errors.
console$ sudo nginx -t
When your configuration is valid, the test should be successful similar to the output below:
consolenginx: the configuration file /etc/nginx/nginx.conf syntax is ok nginx: configuration file /etc/nginx/nginx.conf test is successful
Restart Nginx to apply your configuration changes.
console$ sudo systemctl restart nginx
Secure InvokeAI with Let's Encrypt SSL Certificates
SSL Certificates encrypt the connection between users and your web server. To secure InvokeAI in a production environment, generate valid SSL certificates using a trusted authority such as Let's Encrypt. Follow the steps below to enable HTTPS connections and secure InvokeAI with trusted Let's Encrypt SSL certificates.
Install the Certbot Let's Encrypt client using Snap.
console$ sudo snap install --classic certbot
Request a new Let's Encrypt SSL certificate using your InvokeAI domain associated with the Nginx configuration. Replace
invokeai.example.comwith your actual domain name, anduser@example.comwith a valid email address.console$ sudo certbot --nginx -d invokeai.example.com -m user@example.com --agree-tos
When successful, your output should look like the one below:
Deploying certificate
Successfully deployed certificate for vultrtest.ddns.net to /etc/nginx/sites-enabled/invokeai.conf
Congratulations! You have successfully enabled HTTPS on https://invokeai.example.com
We were unable to subscribe you the EFF mailing list because your e-mail address appears to be invalid. You can try again later by visiting https://act.eff.org.
Verify that Certbot auto-renews the SSL certificate upon expiry.
console$ sudo certbot renew --dry-run
Output:
Account registered.
Simulating renewal of an existing certificate for vultrtest.ddns.net

- - - - - - - - - - - - - - - - - - - - - - - - - - - - - - - - - - - - - - - -
Congratulations, all simulated renewals succeeded:
  /etc/letsencrypt/live/vultrtest.ddns.net/fullchain.pem (success)
- - - - - - - - - - - - - - - - - - - - - - - - - - - - - - - - - - - - - - - -
When successful, Certbot automatically renews your SSL certificate every 90 days before expiry.
Restart Nginx to apply SSL configuration changes.
console$ sudo systemctl restart nginx
Access your InvokeAI domain using a web browser such as Chrome to verify that the web server accepts HTTPS connections.
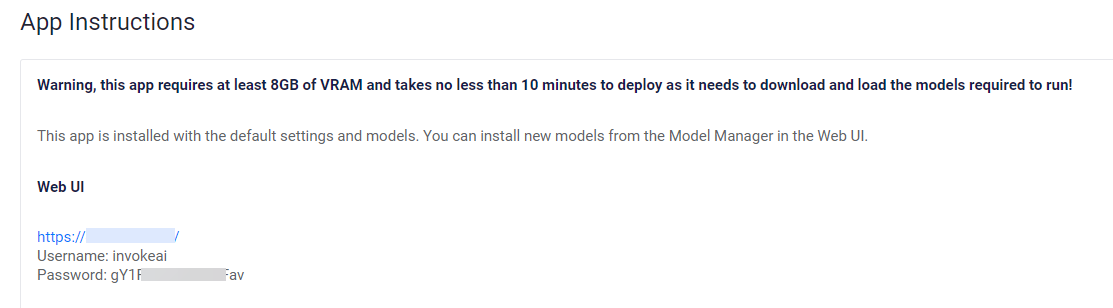
https://invokeai.example.comWhen prompted, log in to the InvokeAI interface using the generated Username and Password value listed in your App Instructions section within the instance control panel.
When successful, verify that the InvokeAI web interface loads correctly in your browser session.
 To change the default InvokeAI login information, modify your Nginx basic authentication values fileNote
/etc/nginx/htpasswd/invokeai;to include new usernames and passwords to grant access to the InvokeAI web interface.
Generate Images with Invoke AI
InvokeAI supports text-to-image and image-to-image generation based on the working AI model. By default, InvokeAI supports Stable Diffusion version 1.5 and Stable Diffusion XL unless extended with additional models. Follow the steps below to generate images with InvokeAI within your web browser session.
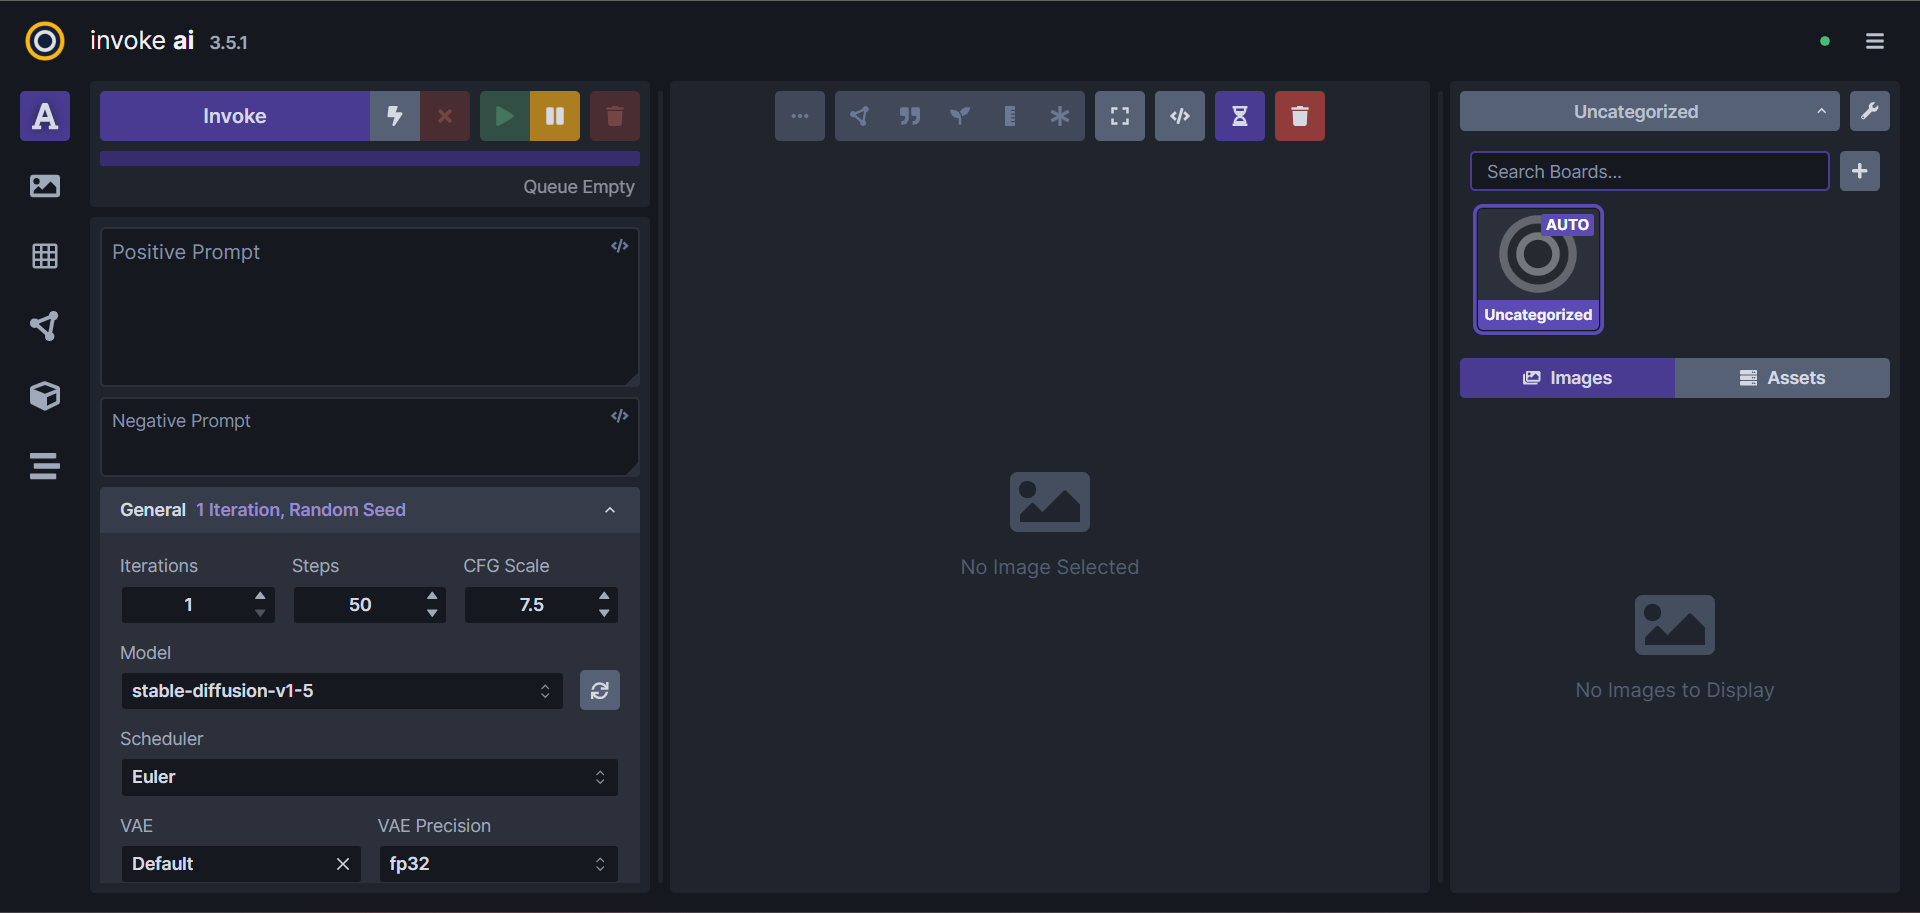
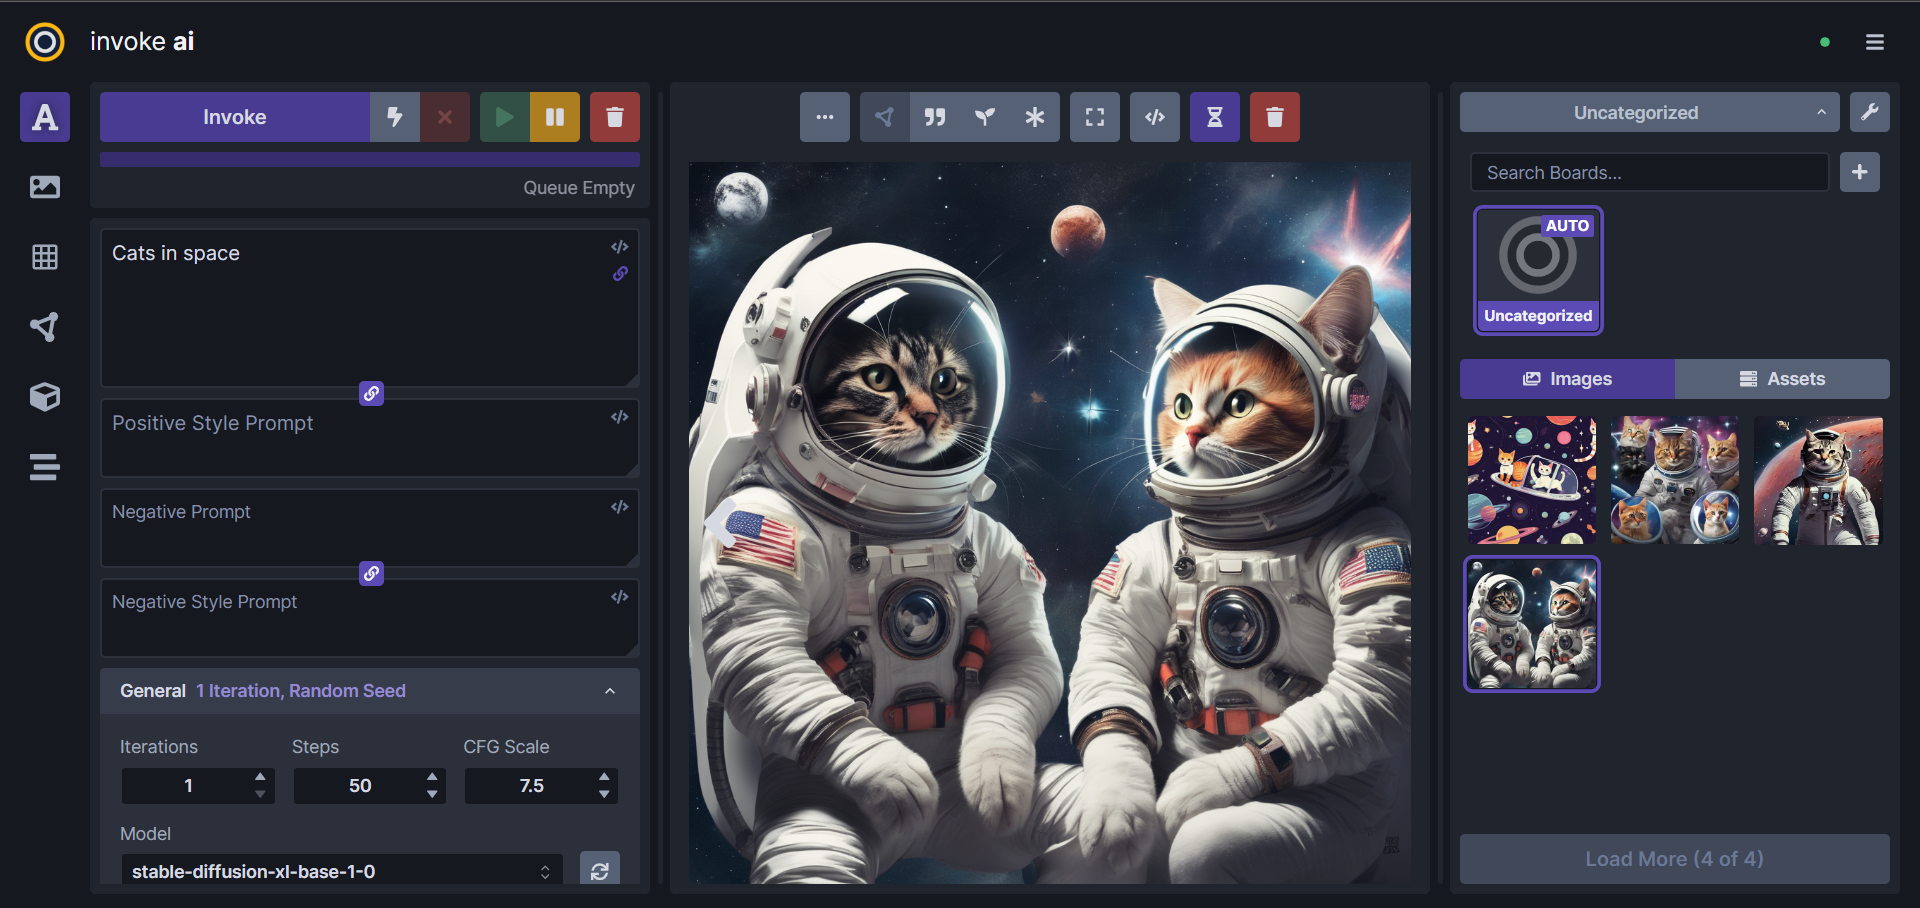
Find the prompts section within the InvokeAI interface and enter a text prompt in the
Positive Promptfield to define your image output. For example,cats in space.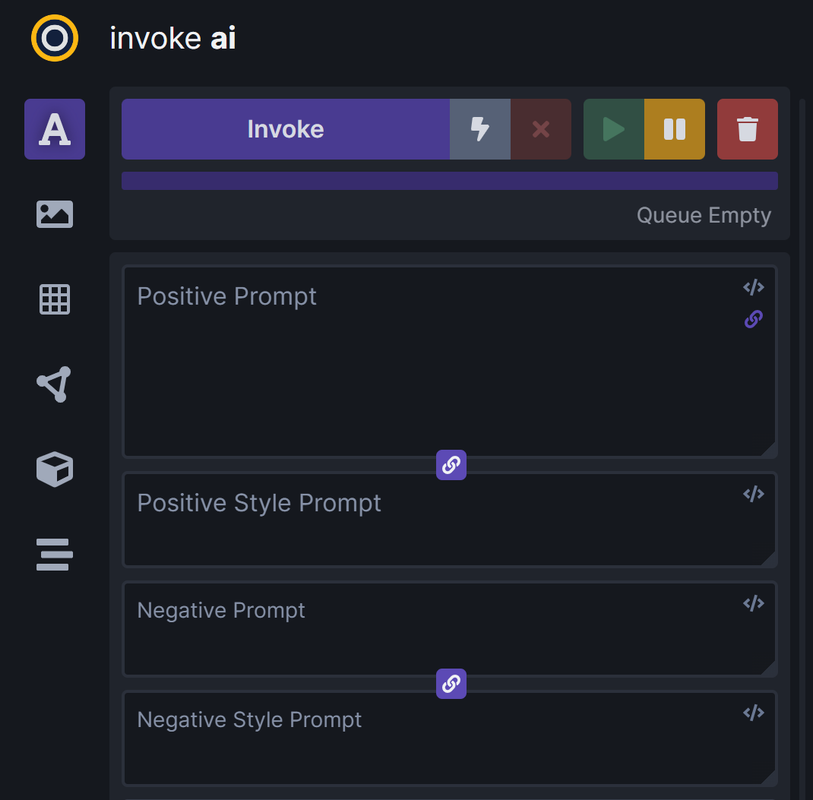
Enter a negative prompt in the
Negative Promptfield to further define the generated image result.Click the Model dropdown within the General section to view the available image generation models.
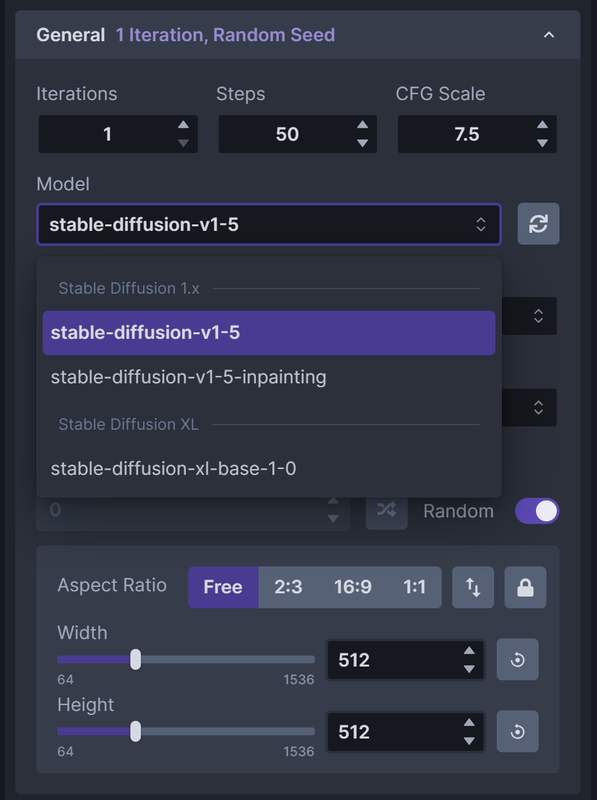
Select your desired model such as
stable-diffusion-v1-5and verify the additional image generation values such as the number of steps, image size, and model interations to refine your image generation process.Click Invoke to start the image generation process.
Wait at least
30 secondsdepending on your GPU server resources for the image generation process to complete.Verify your generated image, and view additional images generated from additional prompts within the Images section.
To improve the generated image context, modify your positive and negative prompts with more details to match your desired output.
Add New Models to InvokeAI
Add new models to InvokeAI to extend its functionality and enable new image generation features. To add new models to InvokeAI, you can either install a model directly within the InvokeAI interface, or load the model checkpoints to specific data directories. Follow the sections below to install models using the InvokeAI interface from platforms such as Hugging Face and CivitAI.
Hugging Face
Hugging Face is a machine learning (ML) and data science platform that actively supports community collaborations on models, datasets, and AI applications. By assisting users to build, deploy, run, and train machine learning models, Hugging Face hosts detailed model cards that contain specifications and code samples for each model. Follow the steps below to import models from Hugging Face to your InvokeAI web application.
Visit the Hugging Face website in a new web browser session.
Click the
Search models, datasets,users...search bar and enter your target keyword to search for a specific model.For example, enter
Stable Diffusion xland selectstabilityai/stable-diffusion-xl-base-1.0from the Models search result.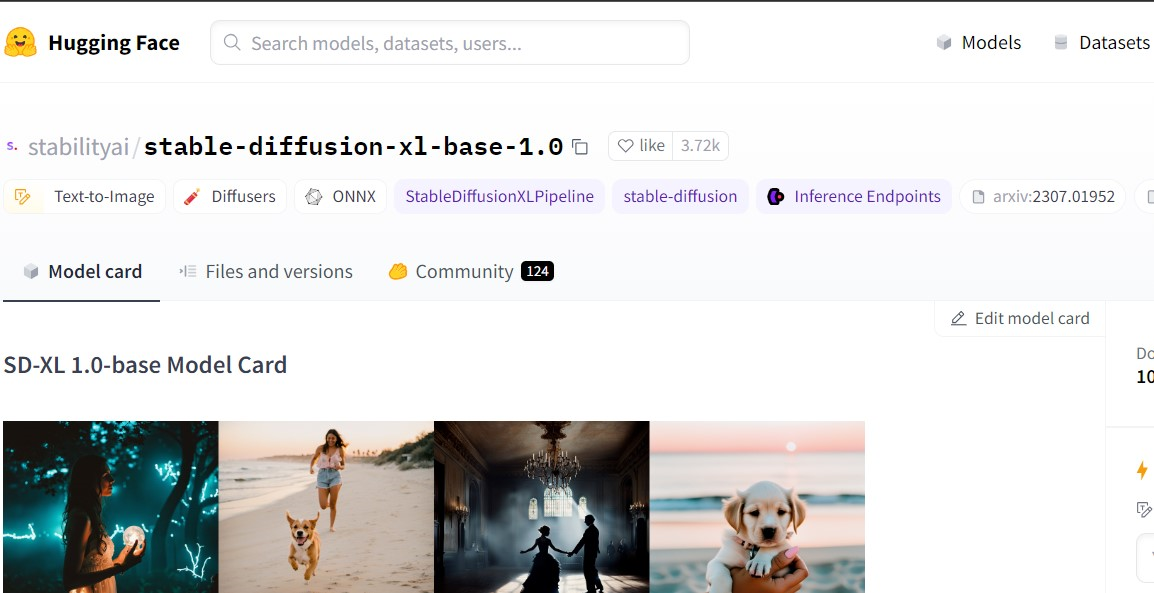
Navigate to the Files and Versions tab to view the model repository
Scroll and find the model checkpoint file at the bottom of the page. For example,
sd_xl_base_1.0.safetensors.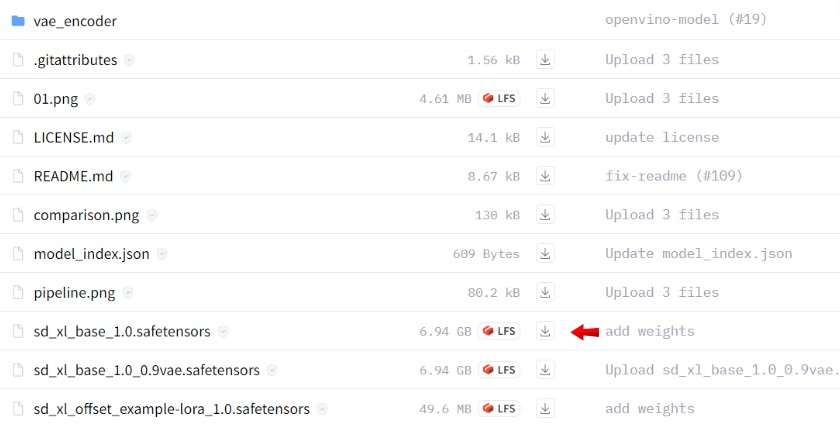
Right-click the file download symbol and select Copy link address to copy the direct download URL to your clipboard.
Switch to your InvokeAI browser session and click Model Manager on the left navigation menu.
Navigate to the import Models tab and paste your model checkpoint file URL in the Model Location field.
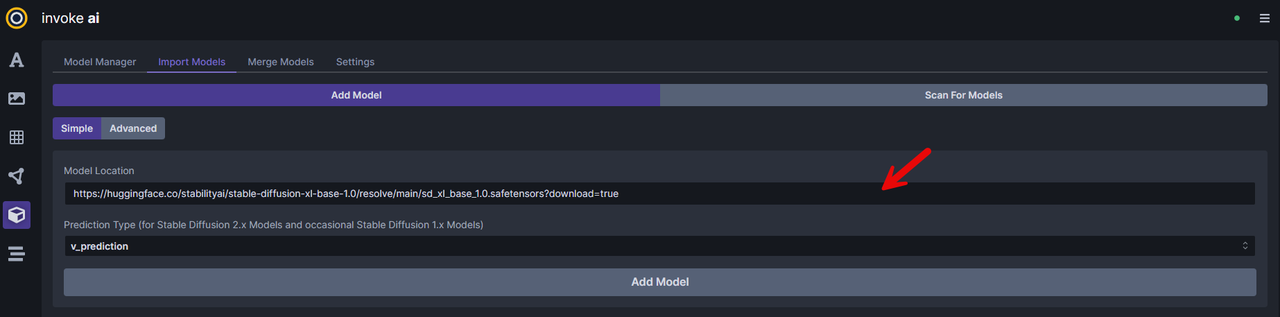
Click the Prediction Type drop-down and select
v_predictionwhen using Stable Diffusion models.Click Add Model to download the model to your server.
Wait for the download process to complete. When ready, navigate to the Model Manager tab and verify that the new model is available
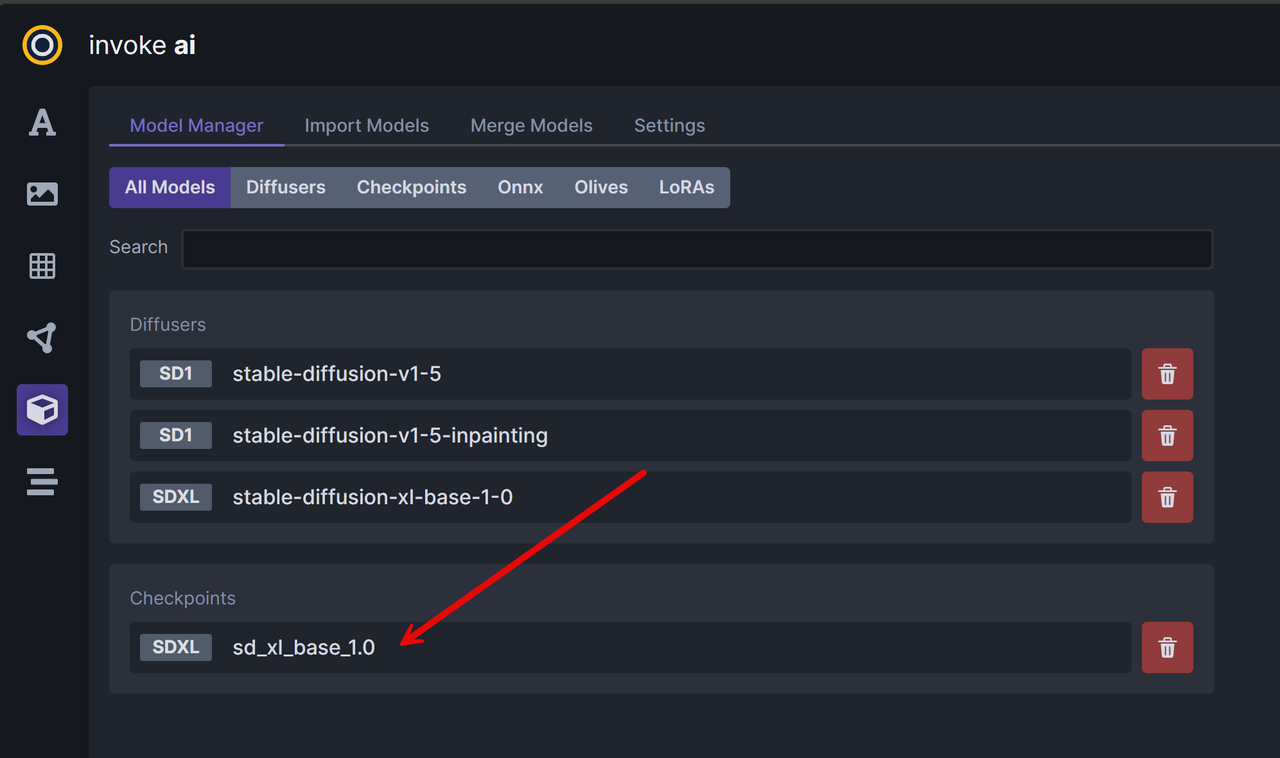
When generating images in your InvokeAI, click the Model dropdown and select your new model to generate images in your session.
CivitAI
CivitAI is an open-source generative AI image and model-sharing platform. CivitAI acts as a hub for AI art enthusiasts to share and discover resources for creating AI-generated art while uploading, sharing, and refining models such as Stable Diffusion. Follow the steps below to import generative AI models from CivitAI to the InvokeAI web interface.
Visit the CivitAI websitein a new web browser window.
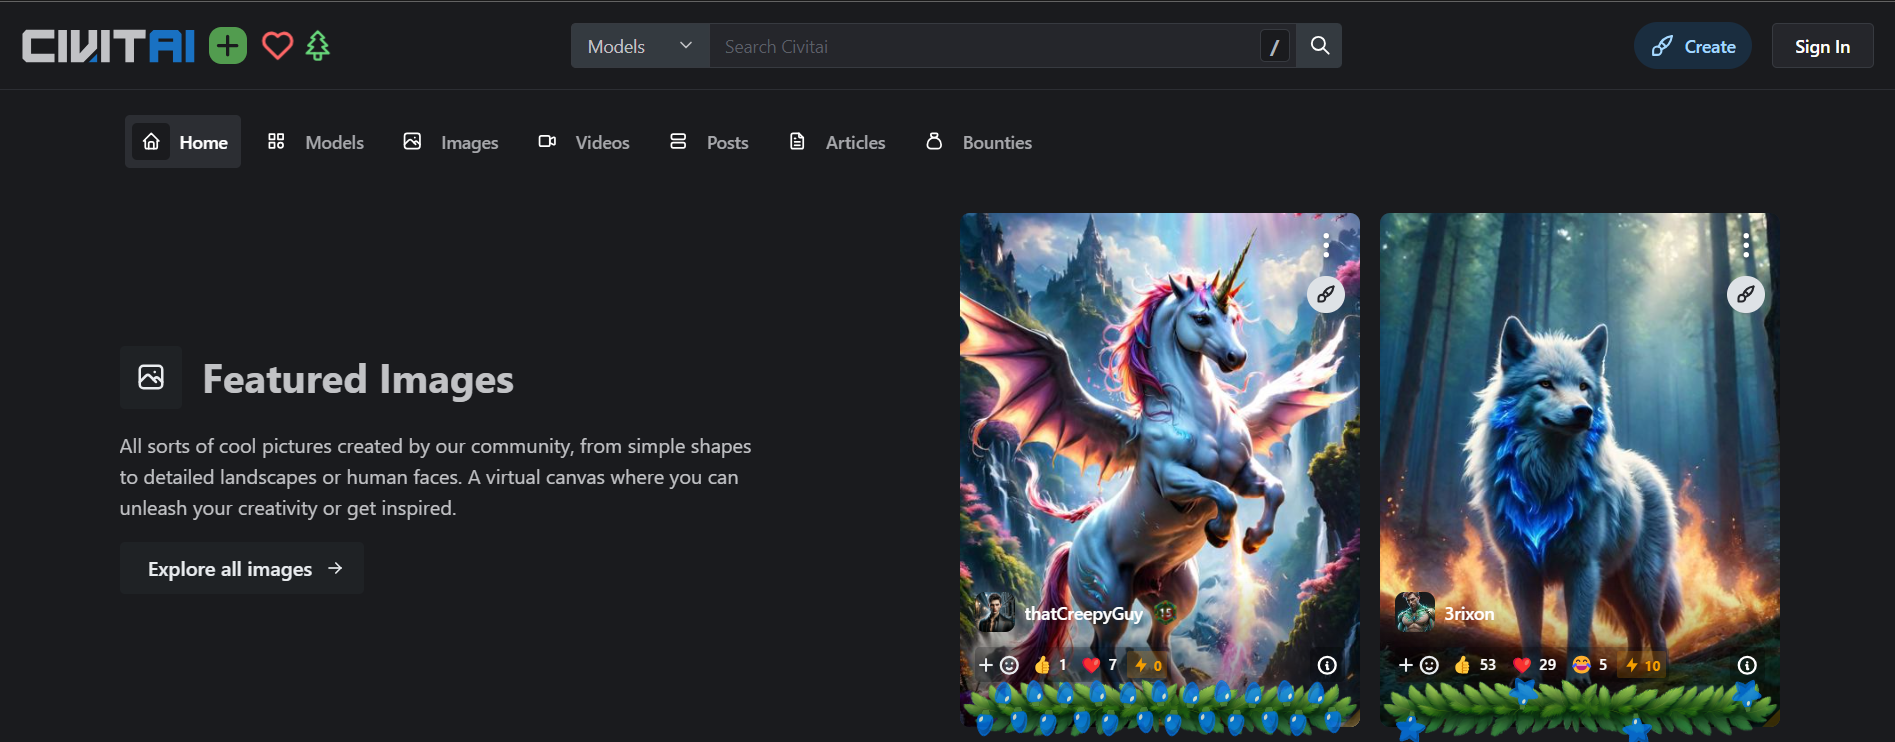
Enter your model search keyword in the
Search Civitaifield. For example,Stable Diffusion XL.Select your target model from the search results. For example,
Stable-Diffusion-XL-Anime.Right-click the model download button and select
copy the link addressto copy the model URL to your clipboard.
Access your InvokeAI browser session, and navigate to Model Manager.
Click Import Models and paste the CivitAI URL in the
Model Locationfield.Click Add Model to download the model to your InvokeAI server.
Wait for the download process to complete and verify that your new model is available in the Model Manager tab.
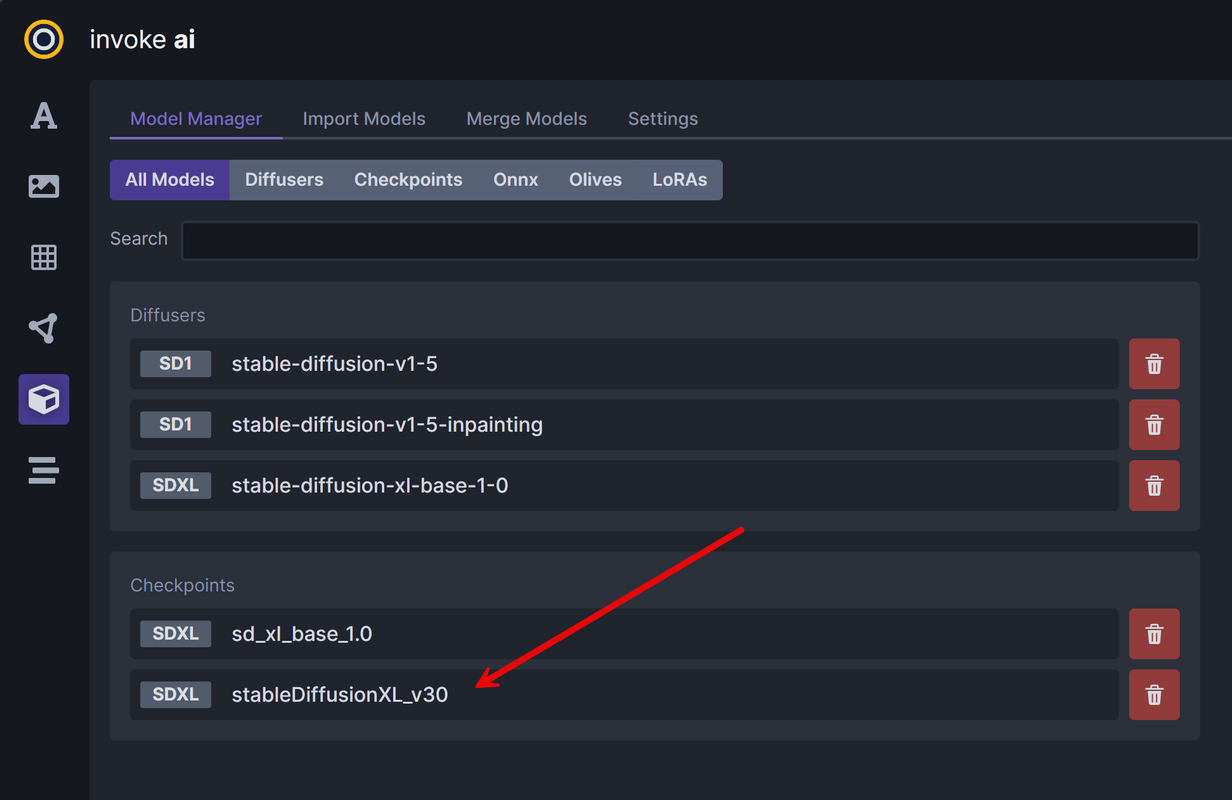
When generating images within the Invoke AI interface, select the model from your dropdown list to start the image generation process.
Set Up a Discord Bot to Generate Images with Invoke AI
To extend your generative image server functionalities, integrate a Discord bot with InvokeAI to generate images from prompts without accessing the main application interface. By default, the Vultr InvokeAI marketplace application includes a discord configuration template within the /home/invokeai/stable-diffusion-discord-bot/config/ directory. Follow the steps below to create a new Discord bot that generates images using your InvokeAI server.
Log in to your Discord account.
Click +
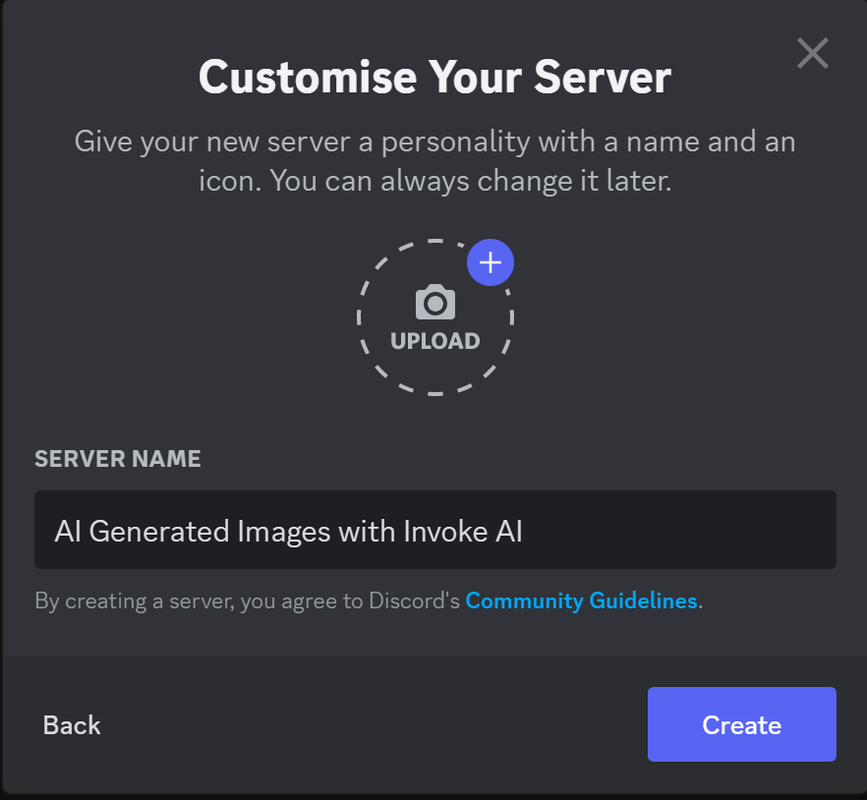
Add a Serverto set up a new Discord server.Choose your desired server type and customize its features to create it on your Discord account.
Access the Discord developers portal to create a new bot application
Click New Application in the top right corner to set up a new Discord bot.
Enter your desired bot name, agree to the Discord developer terms, and click Create to enable the new bot application
Add information about your bot application within the General Information section.
Keep note of the Application ID value and click Copy to add it to your clipboard.
Navigate to Bot on the left navigation menu to set up your application authorization.
Click Reset Token to create a new bot access token. When prompted, click Yes,do it! and enter your Discord password to reset the bot application token.
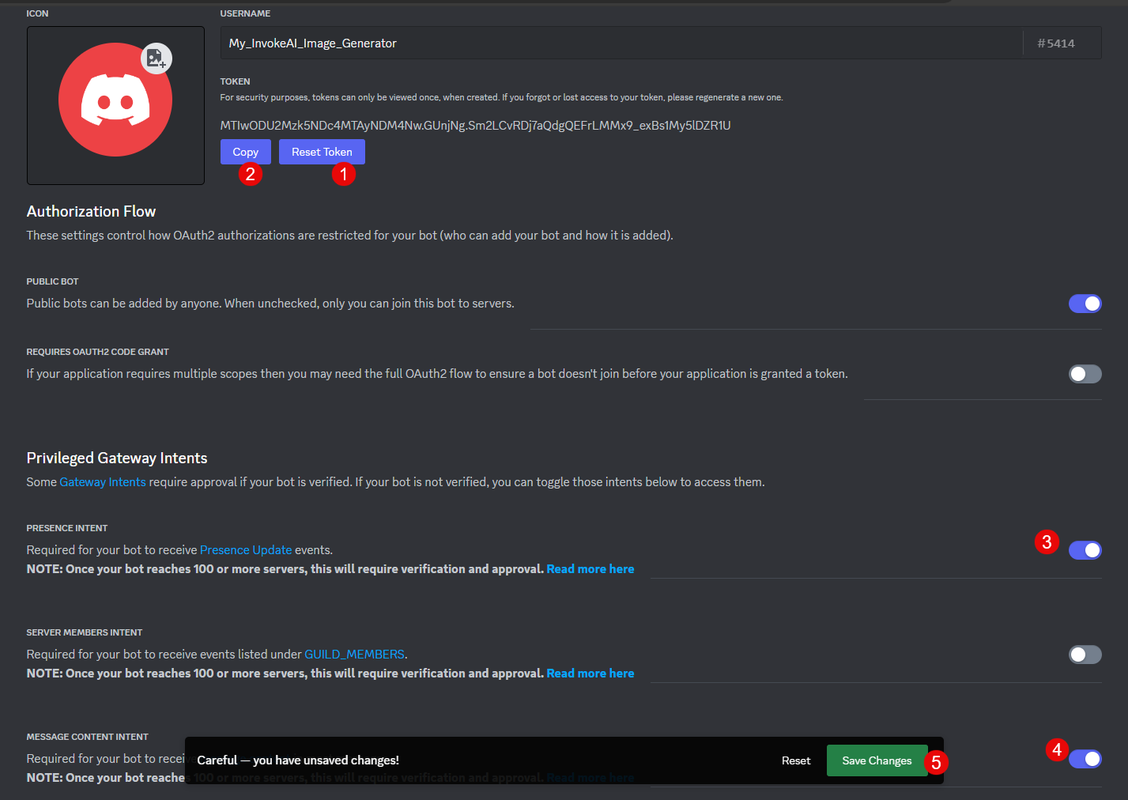
Click Copy to add the token to your clipboard and store it in a safe location.
Scroll to the Privileges Gateway Intents section and enable Presence Intent, Message Content Intent to grant the bot application enough privileges.
Connect the Discord Bot to InvokeAI
Navigate to the InvokeAI Discord configuration files directory.
console$ cd /home/invokeai/stable-diffusion-discord-bot/config
Open the
config.jsonfile.console$ sudo nano config.json
Search and replace the following directives with your respective values in the file.
JSON"discordBotKey":"Discord-bot-Token", "adminID":"Discord-bot-application-id", "model":"Enter-InvokeAI-model-name",
Save and close the file.
Within the above directives:
"discordBotKey":Uses the Discord bot application token you copied earlier to authenticate and perform image generation tasks."adminID":Uses the Discord bot application ID value to create an invite link and push generated images to a Discord server."model":Sets the default image generation model to use with the Discord bot application. For example,stable-diffusion-xl-base-1-0.
Restart the Node.js process manager to apply your Discord configuration changes.
console$ sudo npm restart
When successful, verify and copy the Discord bot invitation URL displayed in your output similar to the one below:
> stable-diffusion-discord-bot@2.0.0 start
> node src/main.js
(node:9704) [DEP0040] DeprecationWarning: The `punycode` module is deprecated. Please use a userland alternative instead.
(Use `node --trace-deprecation ...` to show where the warning was created)
Loaded 685 TTF fonts
Connected to primary with InvokeAI Version: 3.5.1
Models: 3, Loras: 0, Embeddings: 1, Vaes: 2, Controlnets: 4, Ip Adapters: 1, T2i Adapters: 0
Connected to  discord in 2 guilds
Invite bot to server: https://discord.com/oauth2/authorize?client_id=1234567890123456789&scope=bot&permissions=123456
Paste the generated Discord bot invite URL in your web browser address bar.
When prompted, log in to your Discord account, verify the bot permissions, click the ADD TO SERVER: drop-down, and select your target server you created earlier to invite the bot.
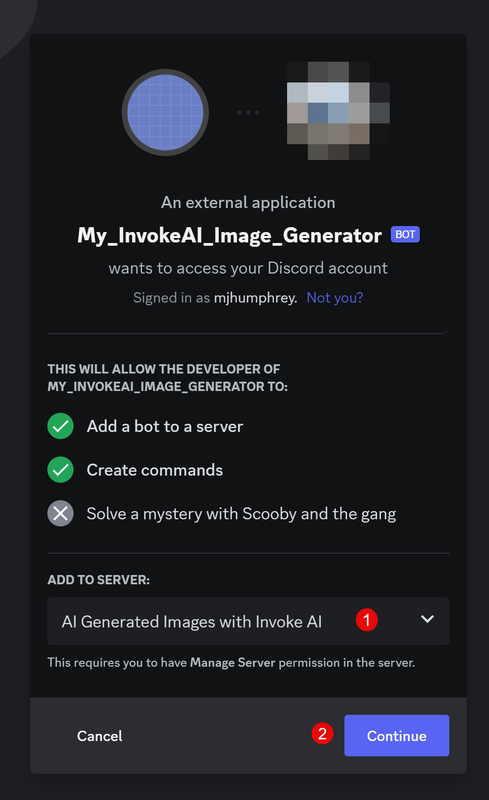
Click Continue to verify the full bot permissions to your Discord Server and click Authorise to apply changes.
Verify that the new Discord bot is added to your Discord server and ready to use with InvokeAI.
Enter
/dreamin your Discord message field and press Enter to auto-add apromptkeyword.
Enter your desired image generation prompt next to the
promptmessage and press Enter.Wait for a few seconds for the image generation process to complete, then, verify that the generated image matches your text prompt.

You have generated AI images using your Discord bot application. For each image generation task, the bot directly uses your InvokeAI server to generate the image in your Discord server chat.
Conclusion
You have generated AI Images with InvokeAI on a Vultr Cloud GPU server. By Integrating InvokeAI with a bot application, you can extend your server functionality with multiple applications and image generation models for use in a production environment. Depending on your desired model sources, you can integrate multiple models and configure the server to use a specific model for certain tasks while keeping all integrations running. For more information about InvokeAI, visit the official project repository.