
How to Use Vultr's cPanel Marketplace Application
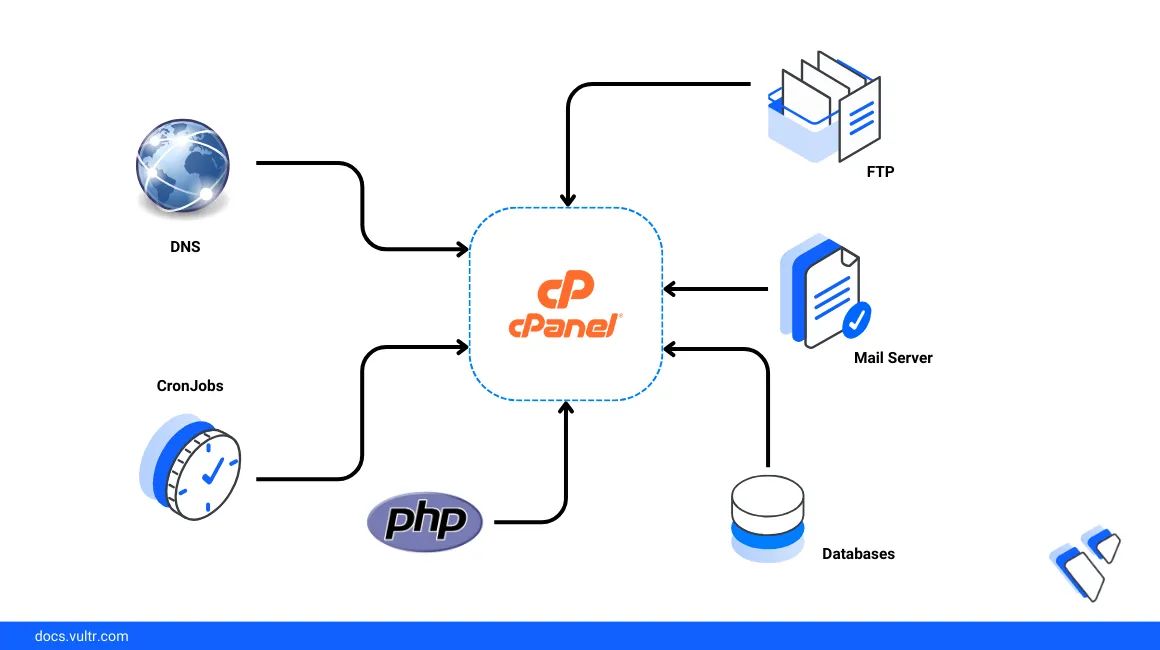
cPanel is a popular web hosting control panel that provides a graphical interface for managing websites, databases, email accounts, and server configurations. Paired with WHM (Web Host Manager) for server-level administration, cPanel enables hosting providers and website owners to manage multiple accounts efficiently. The Vultr Marketplace provides a pre-configured cPanel/WHM instance, enabling quick deployment and setup on a Vultr server.
This guide explains deploying and using Vultr's cPanel Marketplace Application. You will deploy an instance, configure DNS and SSL, complete the WHM initial setup, create hosting accounts, and implement best practices for production deployments.
Deploy Vultr's cPanel Marketplace Application
Log in to your Vultr Console and click the Deploy Server button.
Select your preferred server type.
Choose a server location.
Select a server plan with at least 2GB RAM and 2 CPU cores for production workloads.
Click the Configure button to proceed.
Under Marketplace Apps, search for
cPaneland select it as the Marketplace Application.Select the Limited Login option from the Additional Features section to create a limited user with sudo access.
Review your configurations and click the Deploy Now button to start deployment.
It may take up to 15 minutes for your server to finish installing cPanel/WHM. The instance may reboot once during installation.NoteAfter the instance shows the status of Running, navigate to the Server Overview page and copy the SSH connection details.
Initial Setup and Configuration
After deployment, configure DNS, verify the installation, and complete the WHM initial setup before creating hosting accounts.
Create a DNS A record pointing to your server's IP address, such as
cpanel.example.com.Connect to your Vultr server instance over SSH using the connection details from the Server Overview page.
Verify cPanel Installation
Check the cPanel service status.
console$ sudo /usr/local/cpanel/cpanel -V
This displays the installed cPanel version.
Verify the cPanel license status.
console$ sudo /usr/local/cpanel/cpkeyclt
The license should show as valid. If you see license errors, run this command to refresh.
Access WHM by visiting
https://YOUR_SERVER_IP:2087in a web browser.You'll see a browser warning because of the self-signed certificate. Bypass it to continue.
Configure Firewall Security
Secure your server by configuring the firewall to allow only necessary traffic.
Allow SSH connections.
console$ sudo ufw allow OpenSSH
Allow HTTP and HTTPS traffic.
console$ sudo ufw allow 80/tcp $ sudo ufw allow 443/tcp
Allow WHM and cPanel ports.
console$ sudo ufw allow 2087/tcp $ sudo ufw allow 2083/tcp
Enable the firewall.
console$ sudo ufw enable
Verify firewall status.
console$ sudo ufw status
Complete WHM Initial Setup
Open the WHM interface in your browser.
https://cpanel.example.com:2087/If DNS is not yet configured, use your server's IP address instead.
Log in with the
rootaccount credentials from the Server Overview page.Accept the license agreement.
Enter your admin email address and default nameservers. If using Vultr DNS, enter:
ns1.vultr.comns2.vultr.com
Click Finish to complete the initial setup.
Secure cPanel with SSL/TLS
Enable AutoSSL to automatically provision Let's Encrypt certificates for your domains.
In WHM, navigate to SSL/TLS > Manage AutoSSL.
Choose Let's Encrypt or cPanel (Sectigo) as the certificate provider.
Click Run AutoSSL to request and install certificates for your server hostname.
Once complete, reload WHM using your secure domain URL:
https://cpanel.example.com:2087/The certificate warning should no longer appear.
Change Server Hostname
In WHM, navigate to Networking Setup > Change Hostname.
Enter your FQDN (e.g.,
cpanel.example.com).Click Change to apply.
Alternatively, use the command line:
console$ sudo /usr/local/cpanel/bin/set_hostname cpanel.example.com
Do not use a hostname that begins withNotewww, a number, or ends with a hyphen. Use a unique FQDN that identifies the server.
Create Hosting Accounts
Set up cPanel accounts to host websites and applications.
Create a New Account in WHM
In WHM, click Account Functions > Create a New Account.
Enter the domain name, username, password, and email for the account.
Select a hosting package or leave default settings.
Click Create to provision the account.
Access cPanel
Visit the cPanel interface:
https://cpanel.example.com:2083/Log in with the account username and password created in WHM.
From cPanel, you can:
- Manage files, databases, and email accounts
- Install applications using Softaculous
- Configure SSL/TLS certificates
- Set up backups and cron jobs
Explore cPanel Features
cPanel/WHM provides comprehensive hosting management capabilities.
Database Management
In cPanel, navigate to Databases > MySQL Databases.
Create databases and database users.
Manage databases using phpMyAdmin.
Access MySQL from the command line:
console$ sudo mysql
Email Configuration
In cPanel, navigate to Email > Email Accounts.
Create email accounts for your domains.
Configure email clients using the provided settings.
Set up forwarders, autoresponders, and filters.
SMTP port 25 is blocked by default on Vultr. To enable outgoing email, open a support request. Alternatively, use an external SMTP relay service.Note
File Management
Use File Manager in cPanel to upload, edit, and manage files.
Access files via SFTP using your cPanel credentials.
Public website files are stored in the
public_htmldirectory.
Best Practices and Configuration
Implement these recommendations to ensure your cPanel server runs securely and efficiently.
Security Hardening
Enable two-factor authentication in WHM.
Navigate to Security Center > Two-Factor Authentication.
Enable cPHulk brute force protection.
Navigate to Security Center > cPHulk Brute Force Protection.
Keep cPanel updated.
Navigate to cPanel > Upgrade to Latest Version or run:
console$ sudo /scripts/upcp
Restrict SSH access to specific IP addresses if possible.
Regularly review and remove unused accounts.
Performance Optimization
Enable PHP-FPM for better PHP performance.
Navigate to MultiPHP Manager and configure PHP-FPM.
Configure caching solutions like Varnish or LiteSpeed Cache for high-traffic sites.
Monitor server resources in WHM under Server Status > Service Status.
Backup Configuration
In WHM, navigate to Backup > Backup Configuration.
Enable scheduled backups (Daily, Weekly, or Monthly).
Configure backup destinations:
- Local directory
- Remote FTP/SFTP
- Amazon S3 or compatible storage
Test backup restoration periodically.
Troubleshooting
This section covers common issues and diagnostic commands.
Check Service Status
Verify cPanel services are running.
console$ sudo /scripts/restartsrv_httpd $ sudo /scripts/restartsrv_mysql
Check overall service status.
console$ sudo whmapi1 servicestatus
View cPanel error logs.
console$ sudo tail -f /var/log/messages $ sudo tail -f /usr/local/cpanel/logs/error_log
Common Issues
License Errors
Refresh the cPanel license.
console$ sudo /usr/local/cpanel/cpkeyclt
If issues persist, open a Vultr support ticket.
SSL Certificate Not Issuing
Verify DNS is properly configured.
console$ dig cpanel.example.com
Run AutoSSL manually in WHM under SSL/TLS > Manage AutoSSL.
Check AutoSSL logs for errors.
Cannot Access WHM/cPanel
Verify the service is running.
console$ sudo /scripts/restartsrv_cpsrvd
Check firewall allows ports 2087 and 2083.
console$ sudo ufw status | grep -E "2087|2083"
Database Connection Issues
Verify MySQL is running.
console$ sudo /scripts/restartsrv_mysql
Check MySQL error logs.
console$ sudo tail -f /var/lib/mysql/*.err
Use Cases
cPanel excels in various web hosting scenarios:
- Web Hosting Agencies: Centralize client website management with isolated accounts, automated SSL, DNS management, and comprehensive backups.
- Reseller Hosting: Offer customer accounts with built-in isolation, WHM access controls, and automated provisioning.
- Small Business Websites: Launch WordPress, e-commerce, and PHP applications with easy SSL, email, and database management.
- Multi-Site Management: Host multiple domains and websites on a single server with organized account separation.
- Staging Environments: Create isolated test environments for validating updates, themes, and plugins before production deployment.
- Email Hosting: Manage professional email accounts with webmail access, spam filtering, and forwarders.
Conclusion
In this guide, you deployed Vultr's cPanel Marketplace Application and configured it for production use. You secured the server with firewall rules and SSL/TLS certificates, completed the WHM initial setup, created hosting accounts, and implemented best practices for security and backups. With cPanel's comprehensive hosting management features and Vultr's infrastructure, you can efficiently manage websites, databases, and email for multiple clients and applications.