
Introduction to Vultr Creator Dashboard
Introduction
Vultr Creator Dashboard is a centralized platform that offers Vultr Creators tools and features to propose, create, monitor, and manage assignments. Through the dashboard, you can request a new assignment, submit and monitor its progress while receiving guidance from the Vultr Creator Program team.
To effectively use the Vultr Creator Dashboard, familiarize yourself with the available topics page, how to request and submit your assignments as described in this guide.
How to Set Up a Vultr Creator Dashboard Account
In your web browser, visit the Vultr Creator Dashboard.
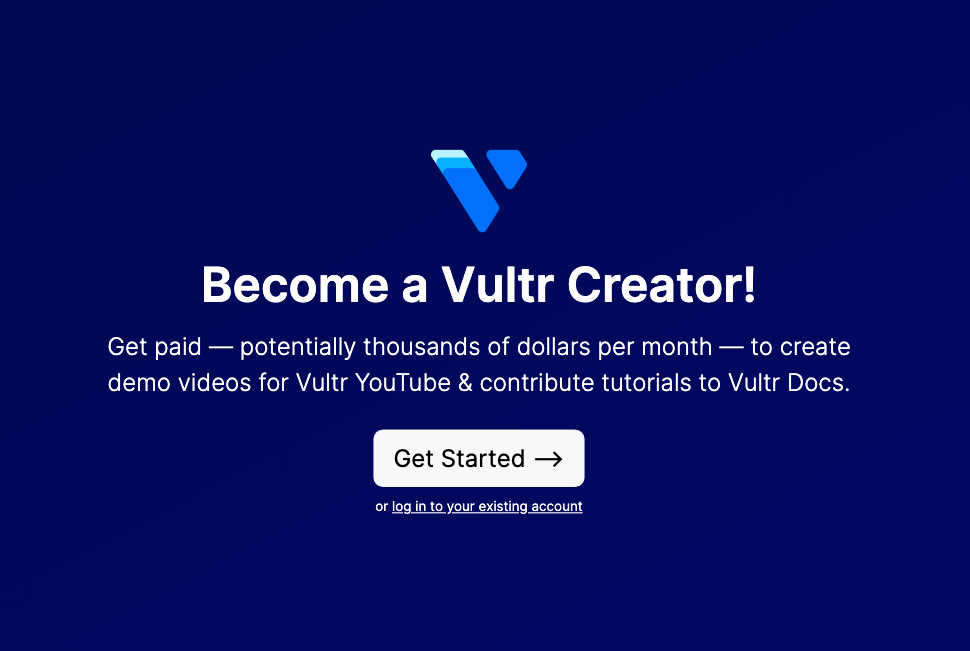
Click Get Started to access the Sign Up page.
Fill in the First Name and Last Name fields with your name exactly as you want it to appear on Vultr submissions.
Enter your active email address in the Email field.
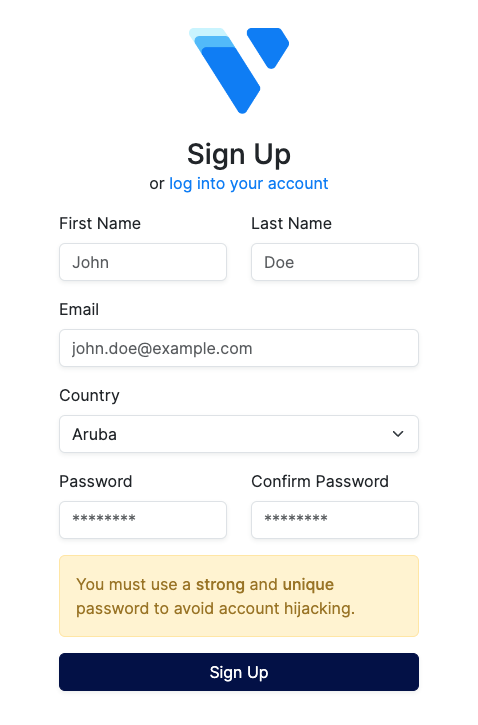
Click the Country dropdown and select your country of residence.
In the Password field, enter a strong password with at least 12 characters.
We recommend testing your password strength with tools such as Kaspersky Password Checker.
Re-enter your password in the Confirm Password to verify that it matches.
Click the Sign Up button to create your account.
When prompted, pass the security CAPTCHA challenge to finish your account setup.
Check your Email for a verification link to verify your new account.
When your account is verified, log in to the Vultr Creator Dashboard to start requesting assignments.
What Are Available Topics
Available Topics are assignment requests pre-selected by the Vultr editorial team. These assignments are set depending on the available priority categories, and they include Notes and a proposed article Outline you should follow or adjust when writing your article.
How To Request an Assignment from Available Topics
Log in to the Vultr Creator Dashboard.
Click Home if you're not redirected to Available Topics page.
Find the Vultr Docs and Vultr Videos sections, and view the list of available topics.
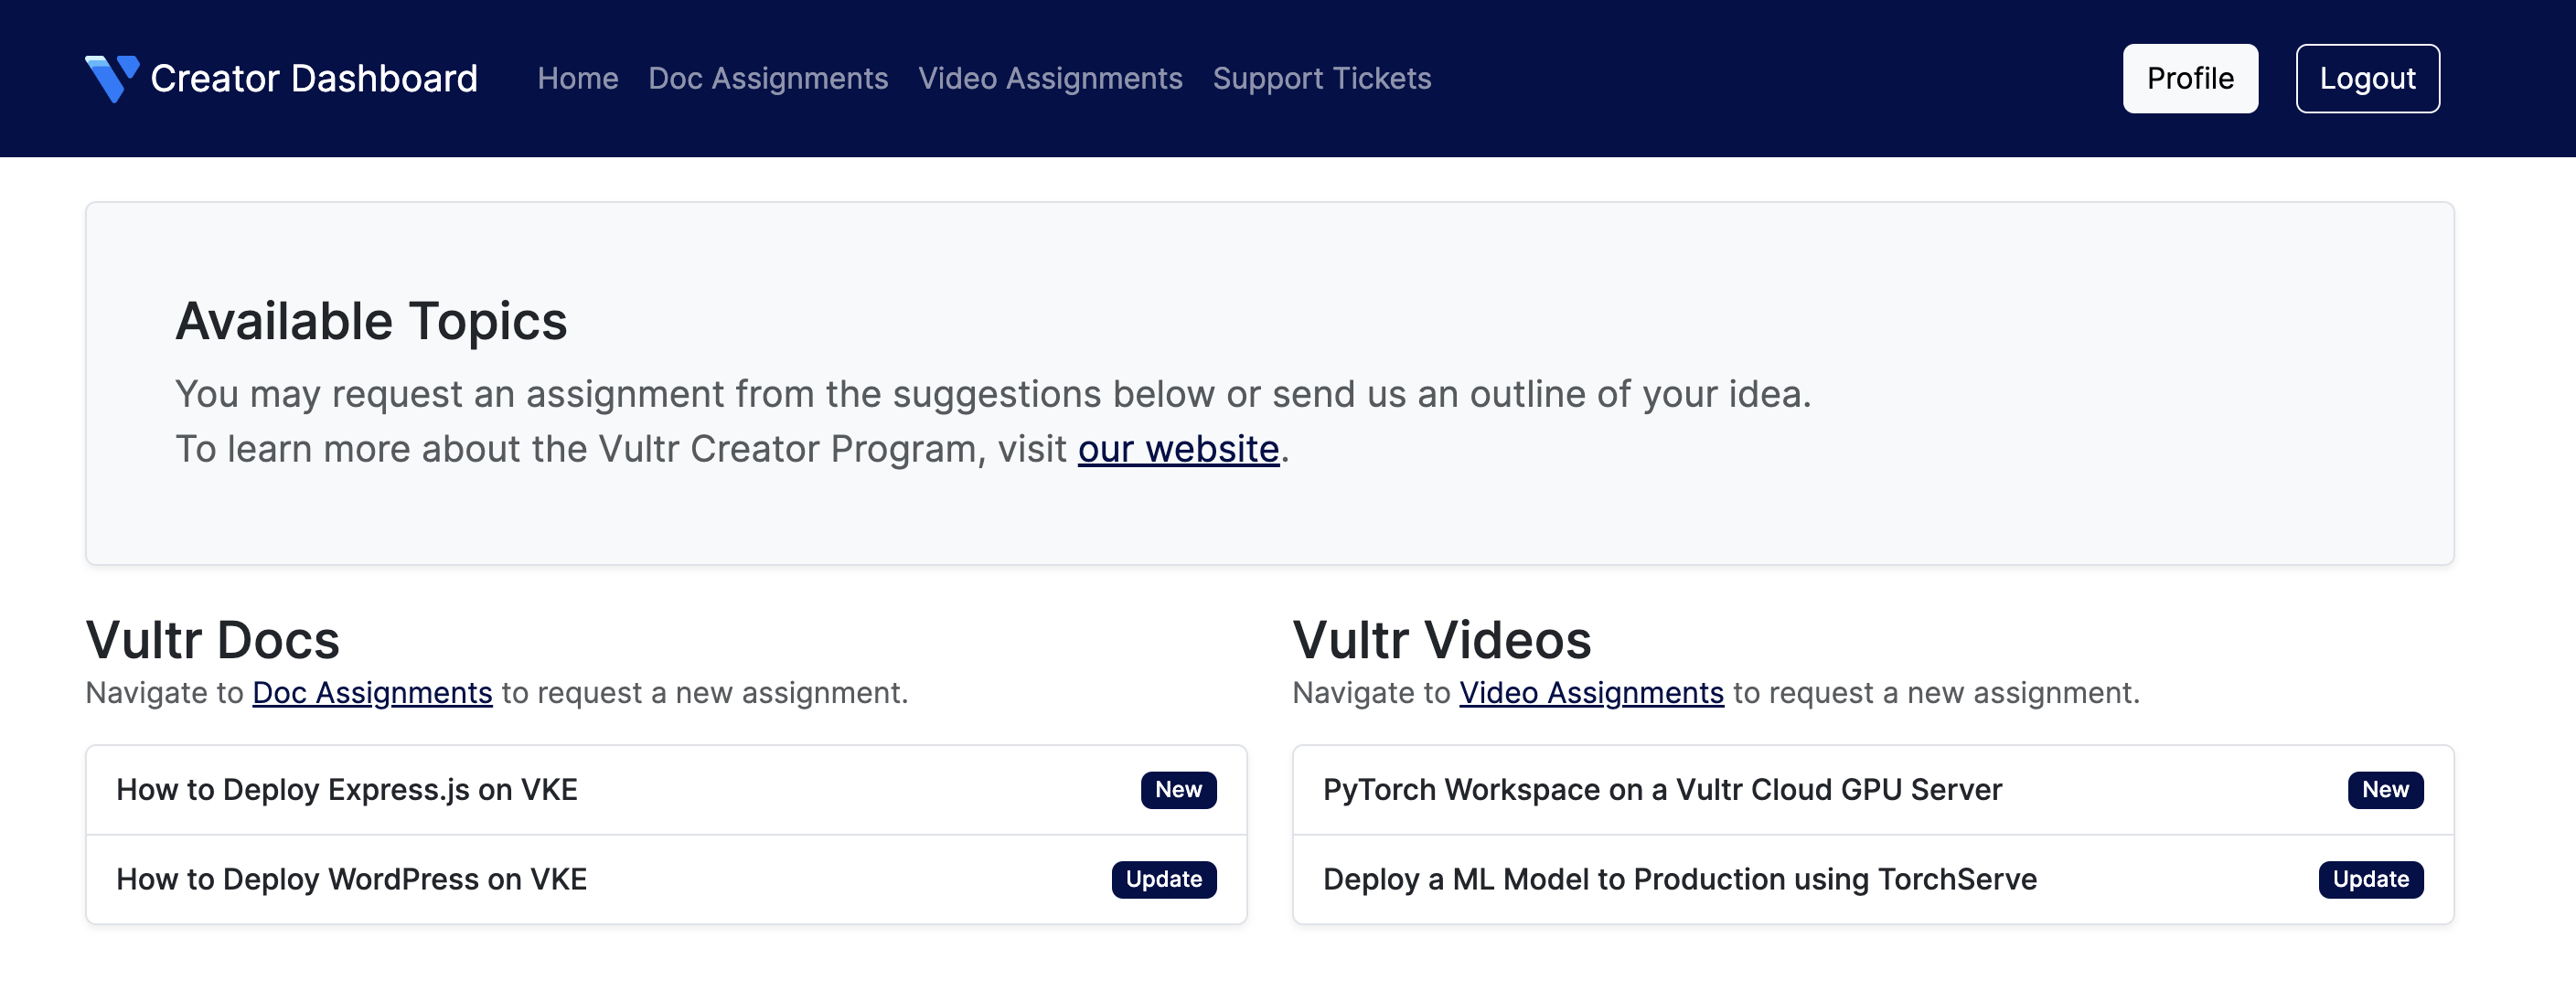
Click any of the available topics you are interested in.
In the pop up dialog, read the Assignment Notes and the Proposed Outline.
If you're confident with the topic, check the I am a subject matter expert on this topic box.
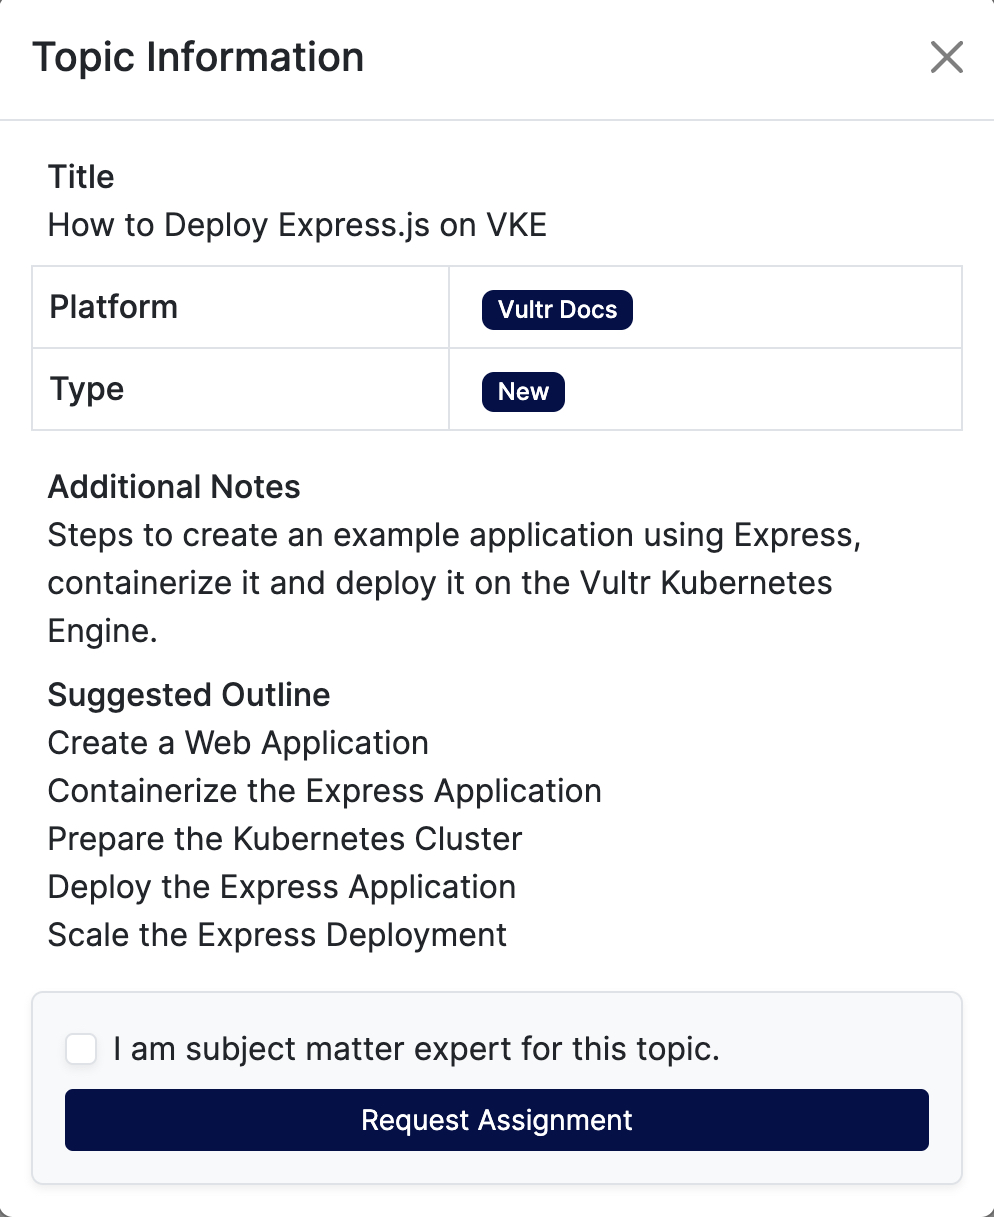
Click Request Assignment and wait for your request to be approved.
When the request is approved, your assignment state changes from Requested to Allocated.
Start writing your article.
How to Send Assignment Requests
If you have a new or update article idea that's not listed on the list of available topics. Send an assignment request as below:
Access the Vultr Creator Dashboard.
On the main navigation bar, click Doc Assignments or Video Assiggments.
Find and click the Request Assignment button above the Resources section.
In the popup dialog, fill in the Title, Notes, and Outline fields with your proposed article title, additional notes, and general outline respectively.
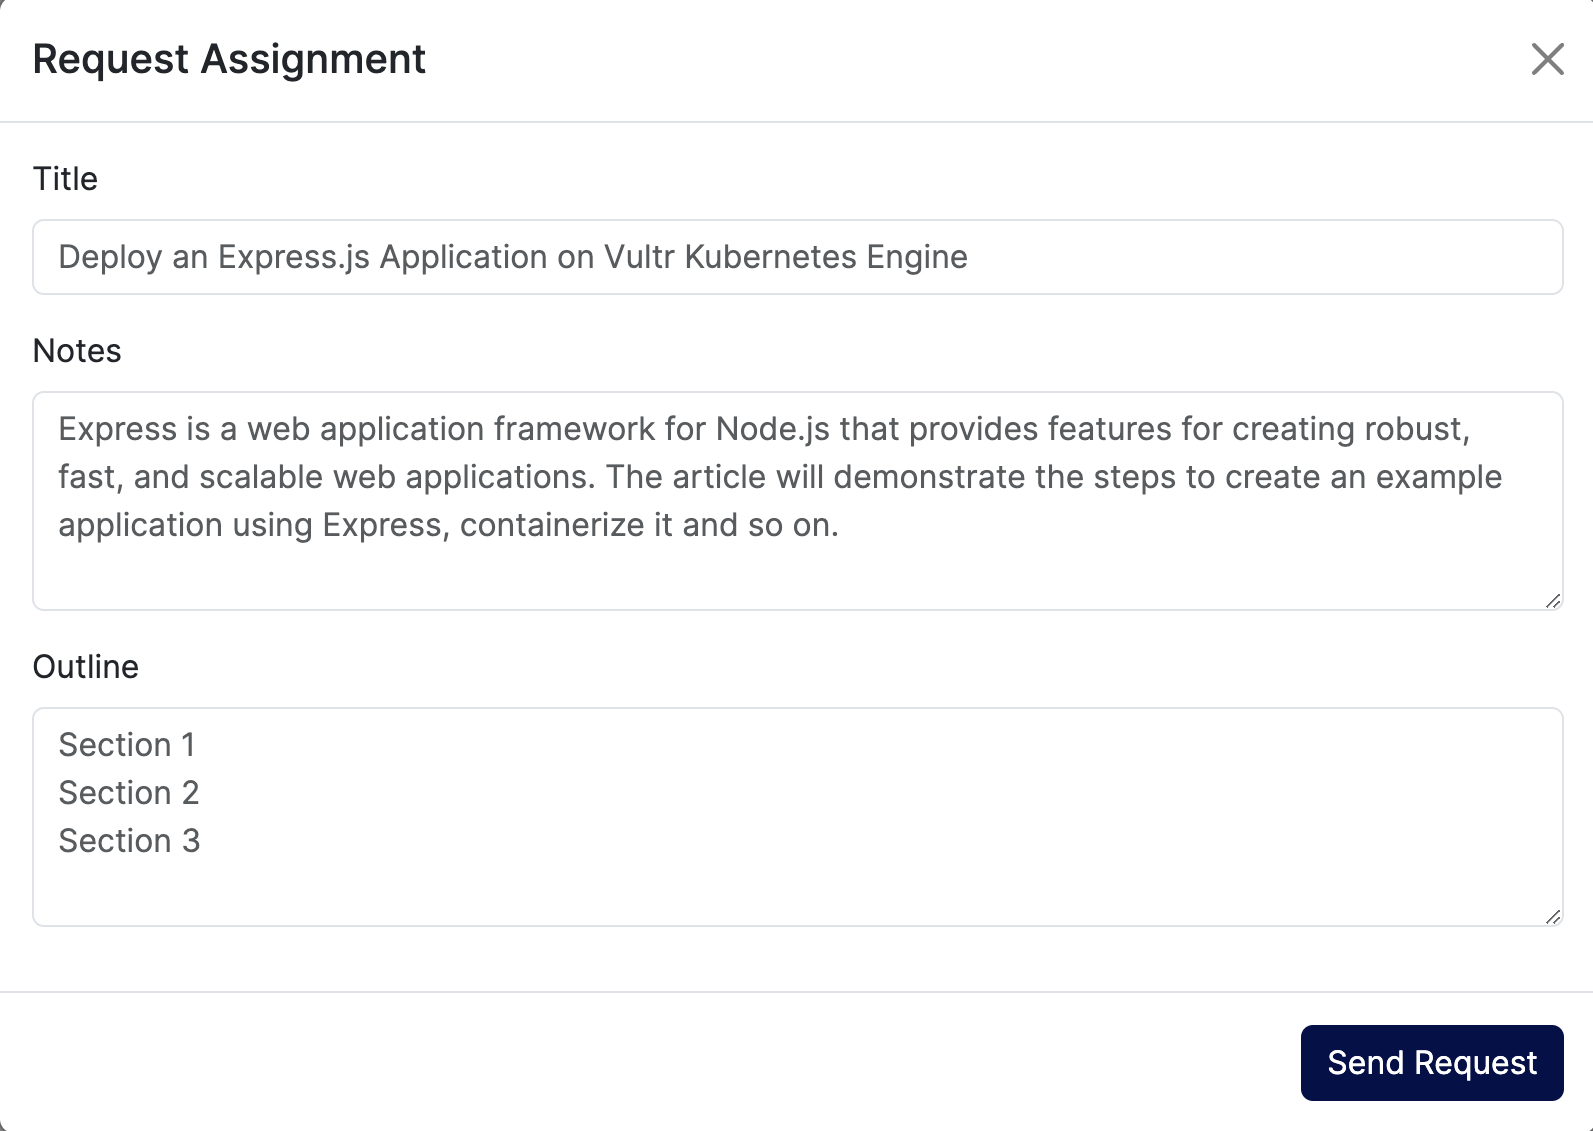
Click Send Request to create a new assignment and wait for your request to be approved.
When approved, you will receive an email alert, and your assignment state changes from Requested to Allocated.
Start working on your assignment.
How to Submit a Vultr Doc Assignment
Before submitting your assignment. Proofread, edit, and thoroughly test your article steps. When ready, submit your assignment as described in the steps below.
Access the Vultr Creator Dashboard.
Navigate to Doc Assignments.
Click the Assignment you intend to submit.
On the Assignment page, scroll down to the Submit Assignment section.
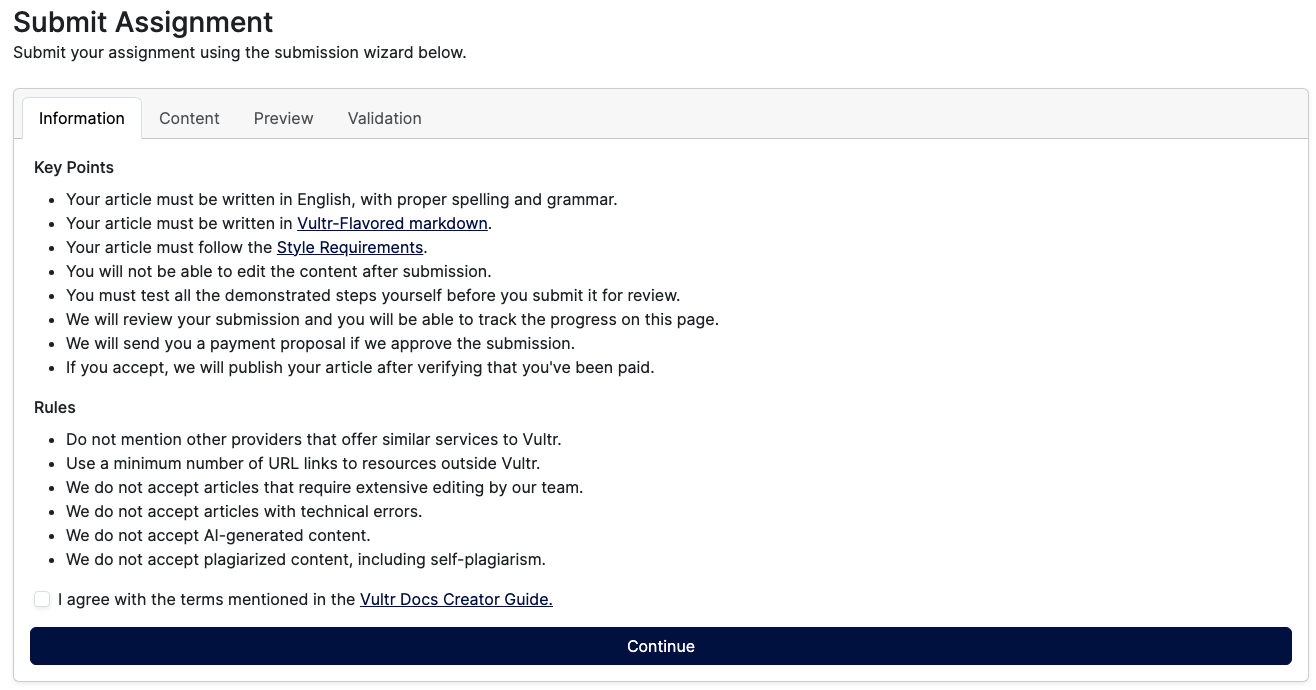
Read and understand the submission Key Points, and Rules.
Check the terms box to agree to the Vultr Docs Creator Guide, then click Continue to start the submission wizard.
In the Content section, copy the assignment from your markdown editor, and paste it to the Insert Content field.
Click Continue to preview your assignment.
Verify that your assignment Preview is okay, and exact as you intended it to appear.
Click Continue to start the validation process.
View and Fix any validation errors reported in your submission. Click Back to make changes in the Content section.
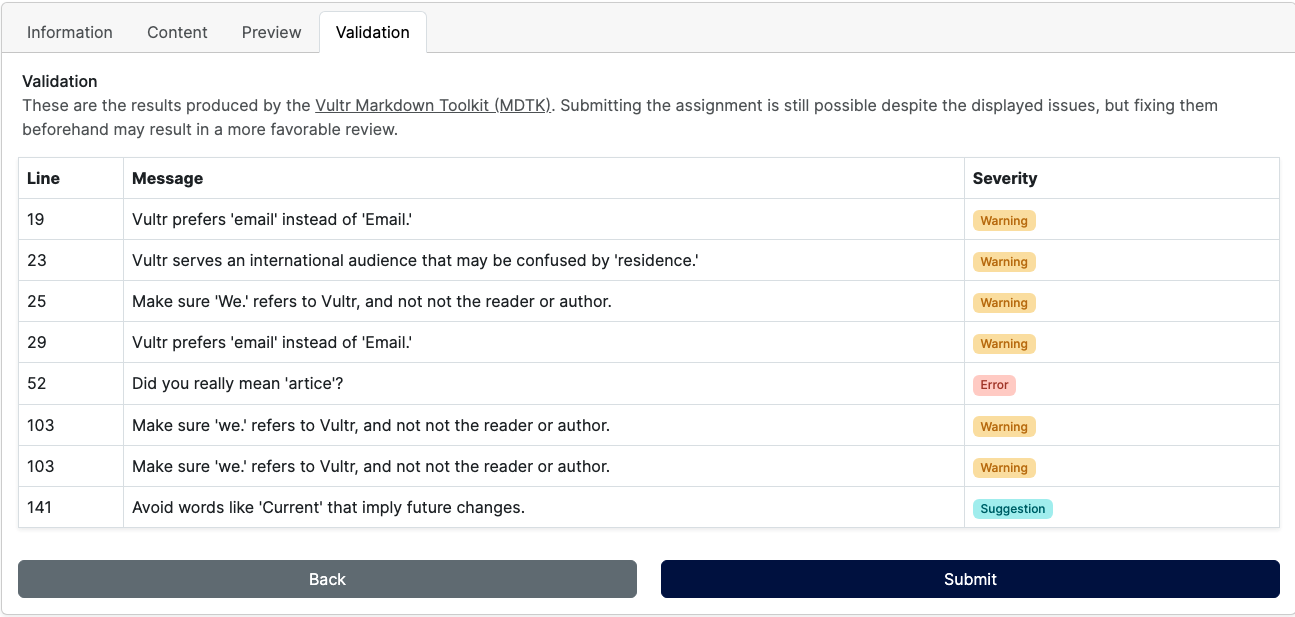
If the Validation returns no errors, your assignment is ready to submit.
Click Submit to send your assignment for review.
Wait for an email notification, and verify that your assignment state changes to In Review.
How to Submit a Vultr Video Assignment
Access the Vultr Creator Dashboard.
Navigate to Video Assignments.
Click the Assignment you intend to submit.
On the Assignment page, scroll down to the Submit Assignment section.

Read and understand the submission Key Points, and Rules.
Check the terms box to agree to the Vultr Video Creator Guide, then click Continue to start the submission wizard.
Click the file icon and select your video file from your local storage. You can also drag your video file into the box and click the Upload button to upload your video.
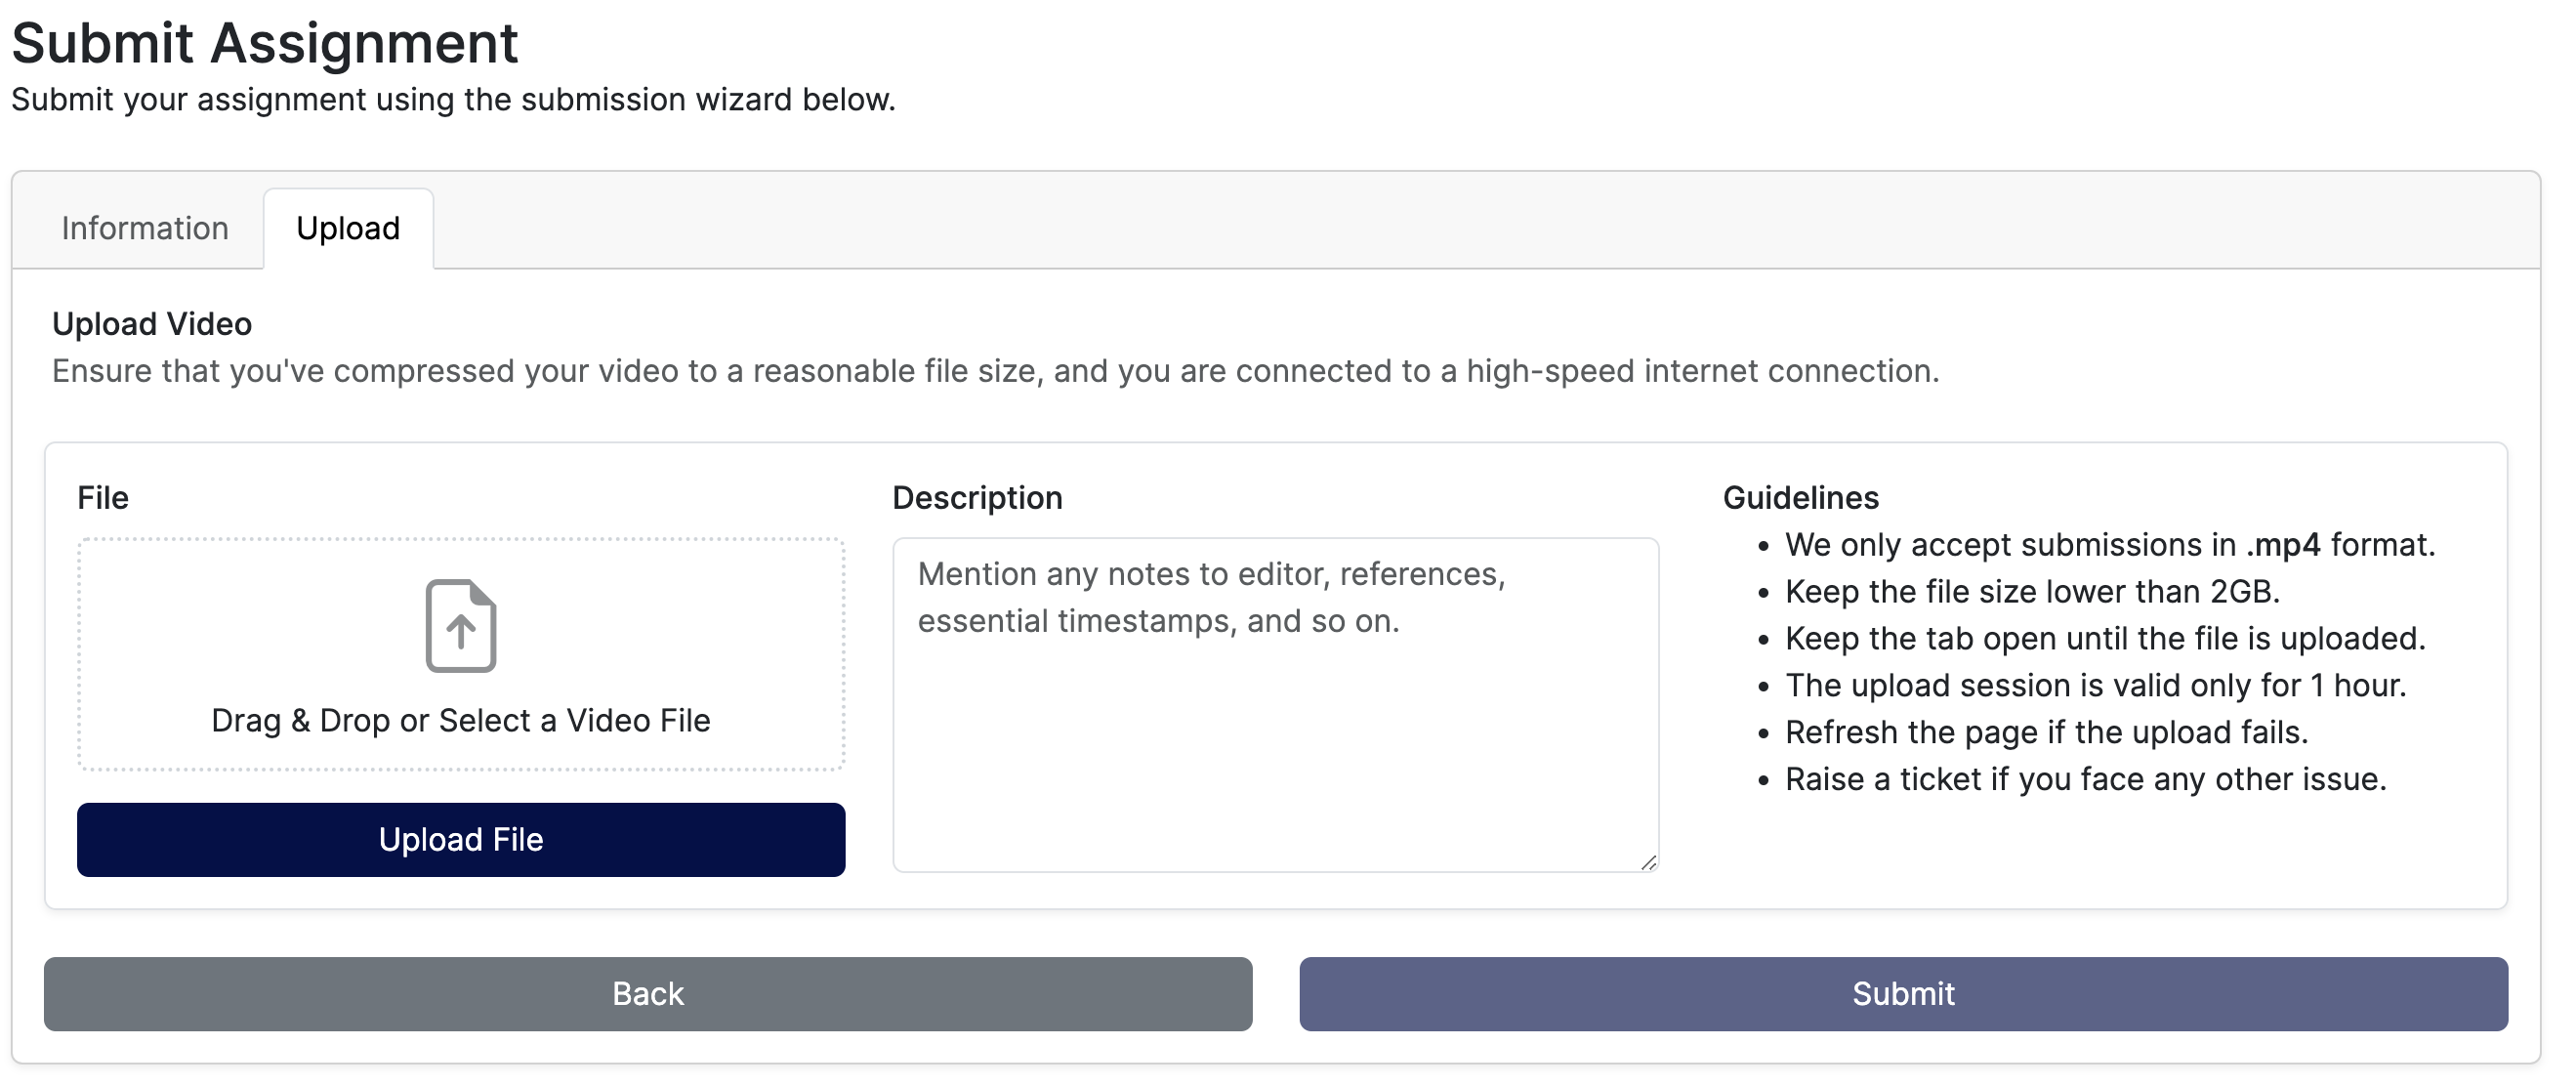
Fill the Description field with a short description of your video including brief introduction and any resources used for reference.
Wait for the video to upload and process.
Click Submit to send your assignment for review.
Wait for an email notification, and verify that your assignment state changes to In Review.
How to Accept a Payment Proposal
When your submission is received and accepted for publication, your assignment state changes from In Review to Approved, and you will receive a payment proposal in your account. Before accepting a proposal, verify that you added the correct PayPal address in your profile, then accept the proposal as below:
Access the Vultr Creator Dashboard.
Navigate to Doc Assignments.
Click the Approved assignment.
On the assignment details page, find the Editor Notes section.
View the proposed amount, and click Accept Payment Offer to approve the proposal.
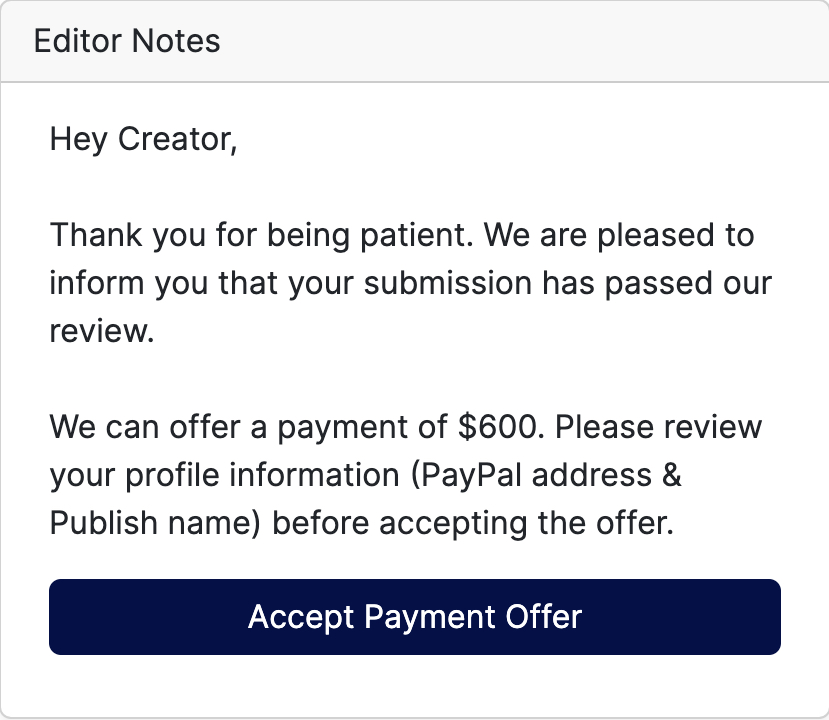
When approved, allow up to five business days to process the payment to your PayPal account.
Once we verify that you're paid, we will publish your article, and you can find your submission on Vultr Docs. Do not publish your article elsewhere.
How to Secure Your Vultr Creator Dashboard Account
Security is a very important aspect of your account. Make sure you protect your Vultr Creator Dashboard account with:
- A very strong password.
- 2-Factor Authentication.
To enable 2-factor authentication on your Vultr Creator Dashboard account. Download and install an Authenticator application on your mobile device, then follow the steps below.
Access the Vultr Creator Dashboard.
In the top right corner, click Profile.
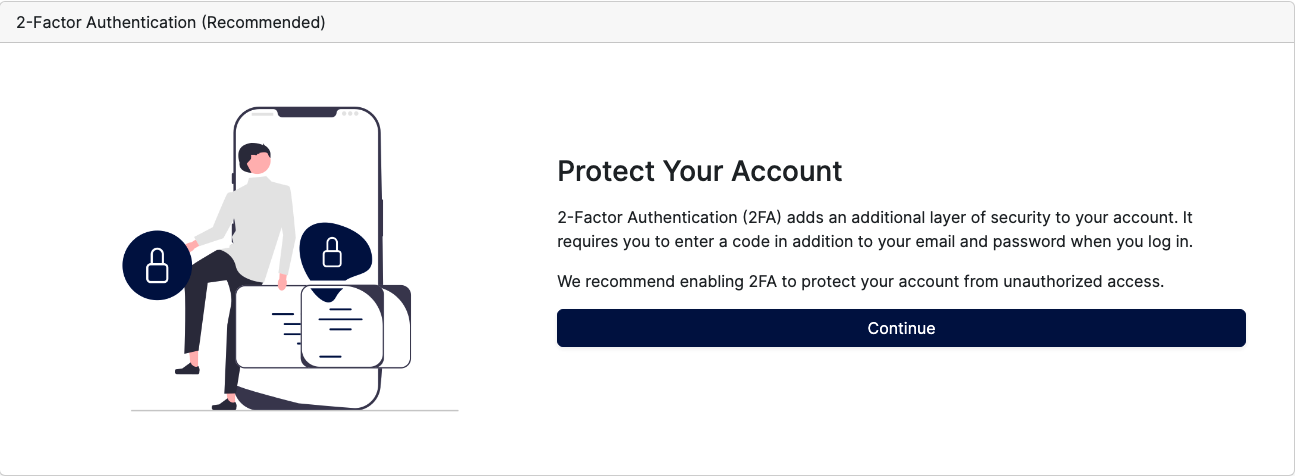
On your profile page, scroll down to the 2-Factor Authentication (Recommended) section.
Click Continue to reveal the Vultr Creator Dashboard QR code.
Scan the QR Code using the Authenticator application on your mobile device.
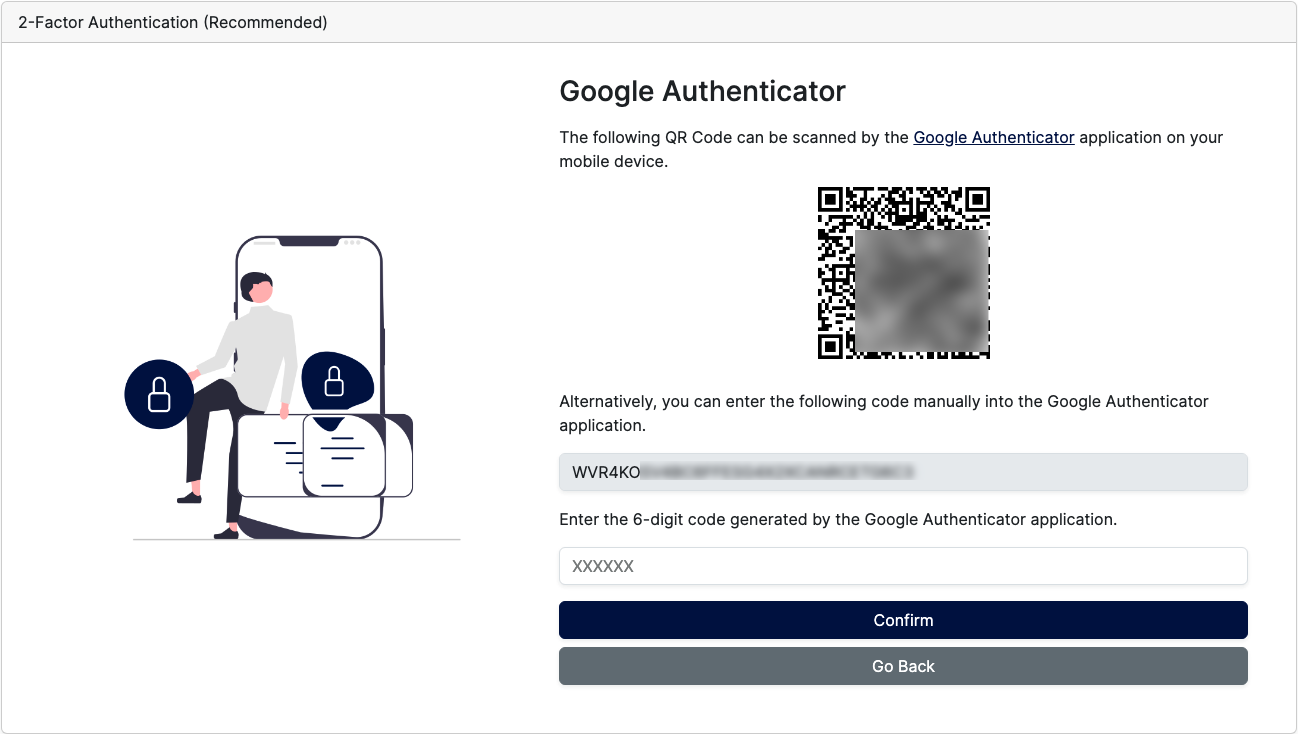
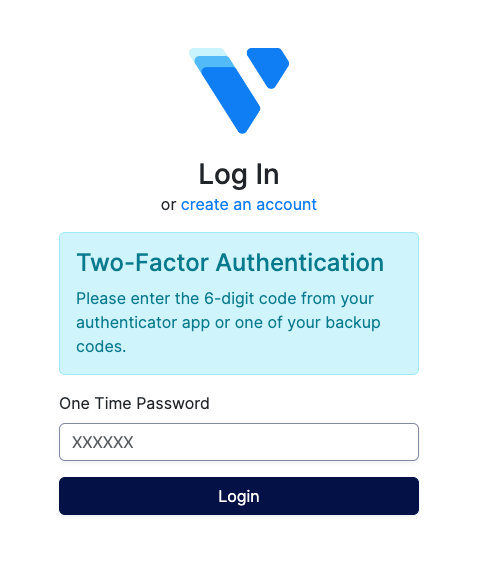
When Integrated on your device, enter the generated code on the 2FA page.
When the code is correct, backup codes are generated for your account, copy them to a secure location.
Check the
I have copied the backup codes in a safe placebox, and click Confirm & Enable 2FA to activate 2-Factor authentication.In case you lose access to the authenticator application, use the backup codes to regain access to your account. The next time you log in to your account, you are prompted for a 6-digit code generated by your authenticator app.
Update your account password
Access the Vultr Creator Dashboard.
Navigate to Profile.
Next to Edit Profile, find the Change Password section.
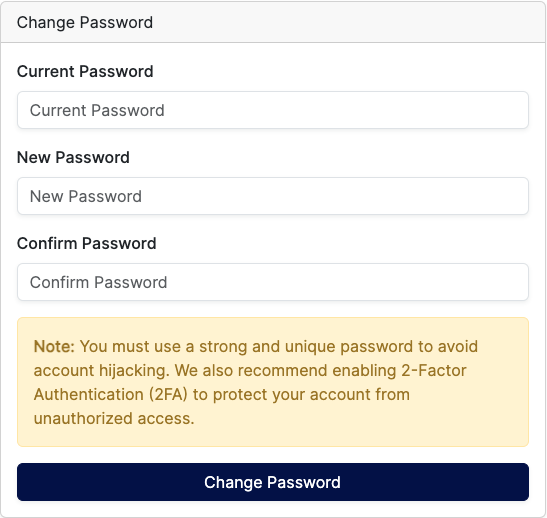
Enter your old password in the Current Password field.
Enter your fresh password in the New Password field.
Enter your new password again in the Confirm Password field.
Click the Change Password button to save changes and change your password.
In the open
change your passwordalert, click OK to proceed.You are logged out from the Vultr Creator Dashboard. Log in again to test your new account password.
How to Create a Support Ticket
Getting support for your assignments is a high priority to us. In cases when you have questions about your assignment, or appealing a rejected assignment, open a new support ticket to the Vultr Creator Program team as described below:
Access the Vultr Creator Dashboard.
On the main navigation bar, click Support Tickets.
Click the Create Ticket button.
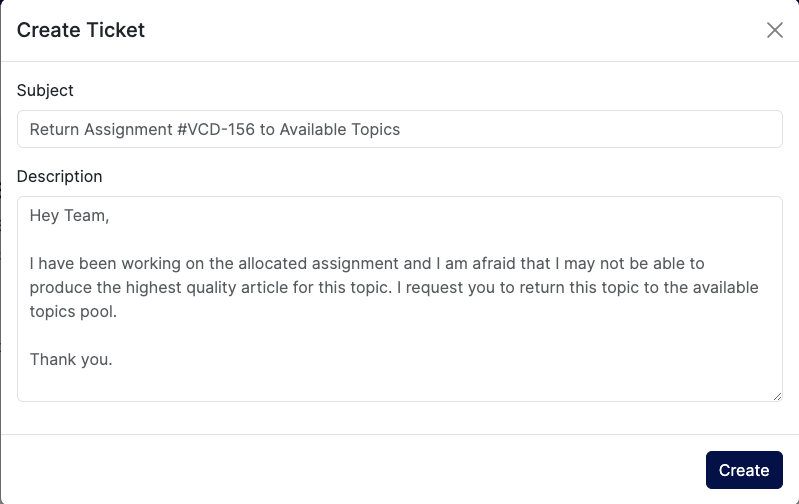
Enter your ticket query or title in the Subject field.
Enter details about your query in the Description field.
Click the Create button to submit your support ticket. Verify that you receive an email alert about your new ticket.
When a reply is added to your ticket, navigate to Support Tickets.
From the list of available Tickets, click to open your target ticket.
Go through the feedback on your ticket, and click New Reply to update your ticket with new information.
Thank you
Thank you for choosing the Vultr Creator program. Ensure to follow the Vultr Creator Guide, Vultr-Flavored Markdown, and use the Vultr MDTK when working on your assignments. If you have any questions, please raise a support ticket within the dashboard.