One-Click CentOS Web Panel

Introduction
CentOS Web Panel (CWP), also known as Control Web Panel, is a server control panel similar to cPanel. CWP is available for free, and a professional version is also available. CWP can migrate cPanel servers with a few clicks. The CWP Migration wizard imports all MySQL databases, MySQL users, and website files from cPanel.
One-Click Installation
Vultr's One-Click CentOS Web Panel is ready for use as soon as you deploy it. To get started, launch your server from Vultr's One-Click library now.
Prerequisites
- Reserve an IP address for CWP to ensure it doesn't change when you upgrade your server or restore backups. CWP requires a static IP address.
- CWP requires a fully-qualified domain name (FQDN) to assign the SSL Certificate. Select a domain name and make sure you know how to assign the IP address with your DNS provider.
1. Register Domain Name
For this tutorial, we use these examples:
- Example IP: 192.0.2.123
- Example FQDN: cwp.example.com
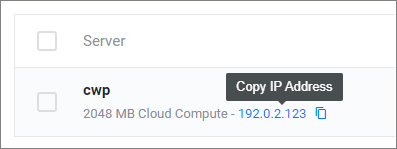
Once your CWP server has deployed, you'll see the server IP address in your customer portal.

Copy the IP address and assign it to a fully-qualified domain name (FQDN) at your DNS provider.

2. Log In
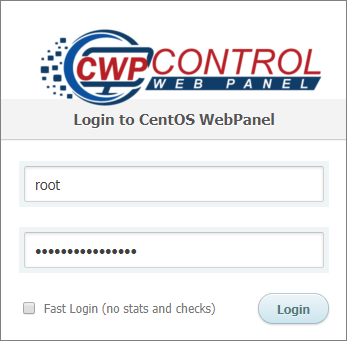
- Navigate to your server by IP address and port number 2031.
- Example: https://192.0.2.123:2031
- You’ll be greeted with a certificate warning. See our instructions to bypass the HTTPS warning for self-signed SSL/TLS certificates.
Sign in with username root and the password located on your server instance dashboard.

3. Clear the Log
On the first launch, Vultr's One-Click CentOS Web Panel will have some alerts and log entries generated during deployment. You can safely ignore these warnings.
- Navigate to your notification page.
- Delete all pending messages. Click the "x" on the right side of each message box to close it.
- If you have any pop-up alerts in the lower-right, click the "x" on each one to close it.

Click Dashboard in the left-hand navigation menu to return to the home screen.
4. Hostname and SSL Certificate
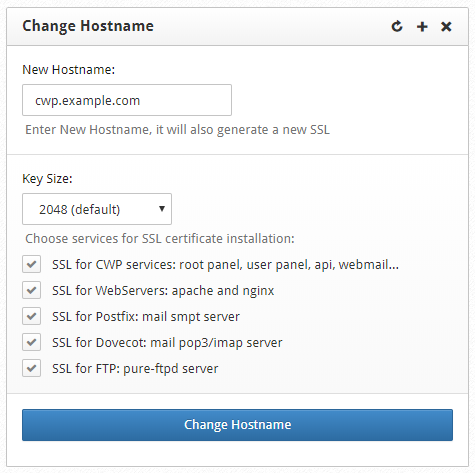
- Navigate to Server Settings > Change Hostname in the left-hand navigation menu.
- Enter your FQDN hostname.
- Leave the other fields at their default values.
- Click Change Hostname.

CentOS Web Panel will update the hostname and request a free Let's Encrypt certificate. When the page reloads, close the tab.
5. Log In with FQDN URL
- Open a new browser tab.
- Go to your CentOS Web Panel using the DNS name and port 2031.
- Example: https://cwp.example.com:2031/
- Sign in with username root and the password located on your server instance dashboard.
Next Steps
Your CentOS Web Panel is running on a static IP address with a valid FQDN and SSL certificate. If you would like to migrate an existing cPanel to CWP, see the new migration guide at https://docs.control-webpanel.com.
For more information about configuring CWP, please refer to the CentOS Web Panel Documentation.
About One-Click Apps
One-Click apps are updated regularly without notice. When launching a One-Click app, you'll receive our latest version. We do not update deployed instances, and you are responsible for keeping the instance up-to-date. If you design an infrastructure based on One-Click apps and need to ensure the same app version in the future, take a snapshot of the initial deployment and create new instances from the snapshot.