
Introduction
UTunnel VPN is a robust cloud-based VPN server software solution that allows you to set up and administer your own VPN network quickly and easily. Vultr's One-Click UTunnel VPN application makes setting up your own cloud VPN server a breeze.
You don't need any prior Linux experience to set up your VPN server with UTunnel. Anyone can set up the VPN server by following the basic instructions, and the rest can be controlled using UTunnel's web-based GUI. This VPN server is affordable, scalable, and suitable for both business and personal usage. It allows companies to set up secure remote access to their network resources for their employees with ease. It also works for anyone who prefers to use their own VPN rather than public VPN services to keep their data confidential.
UTunnel VPN supports multiple VPN protocols. Its simple yet intuitive dashboard allows you to manage network settings, users, and VPN network access. Site-to-site connectivity, secure 256-bit encryption, single sign-on integration, 2-factor authentication, and an embedded firewall are just a few of the features included in the solution. In addition, UTunnel's VPN client apps are available for Windows, macOS, Linux, Android, and iOS, allowing you to connect to your VPN server from any device you have.
UTunnel offers simple VPN server deployment with various major cloud providers, including Vultr. This article will assist you in configuring a UTunnel VPN server in Vultr. Please follow the instructions below for setting up your Vultr VPN Server:
1. Deploy your UTunnel VPN Server in Vultr
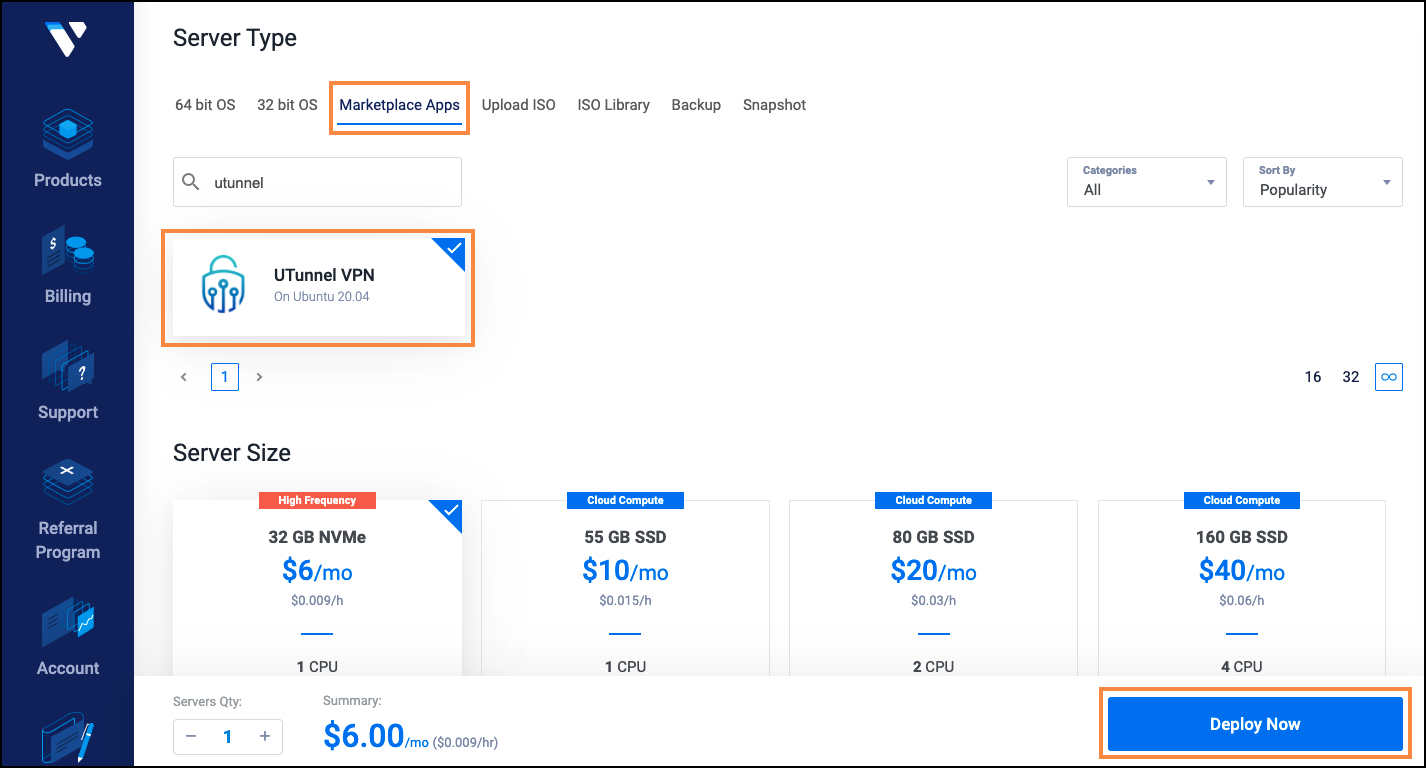
Log in to your Vultr account and deploy your server using the UTunnel VPN app from the Vultr marketplace.
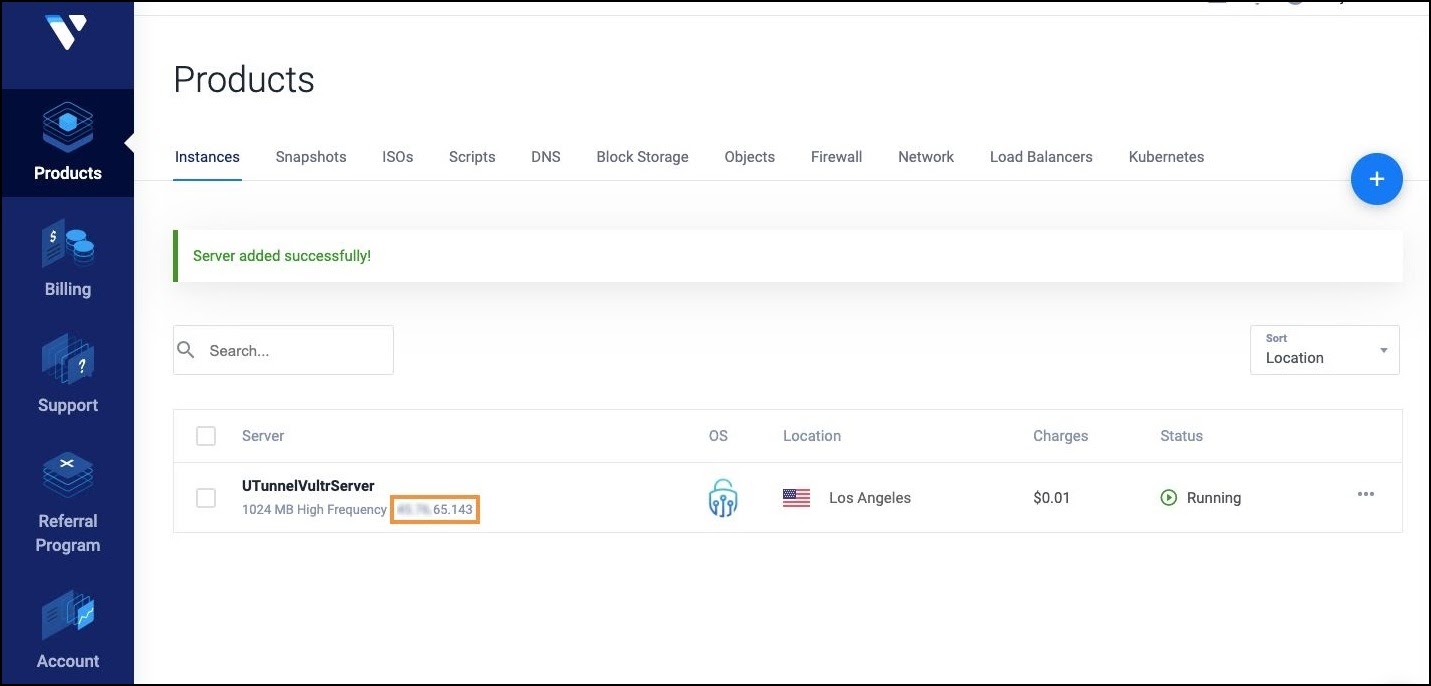
The instance will now be listed on your Vultr dashboard. When the server deployment is finished, note down the instance's IP address.
2. Subscribe to the UTunnel VPN service
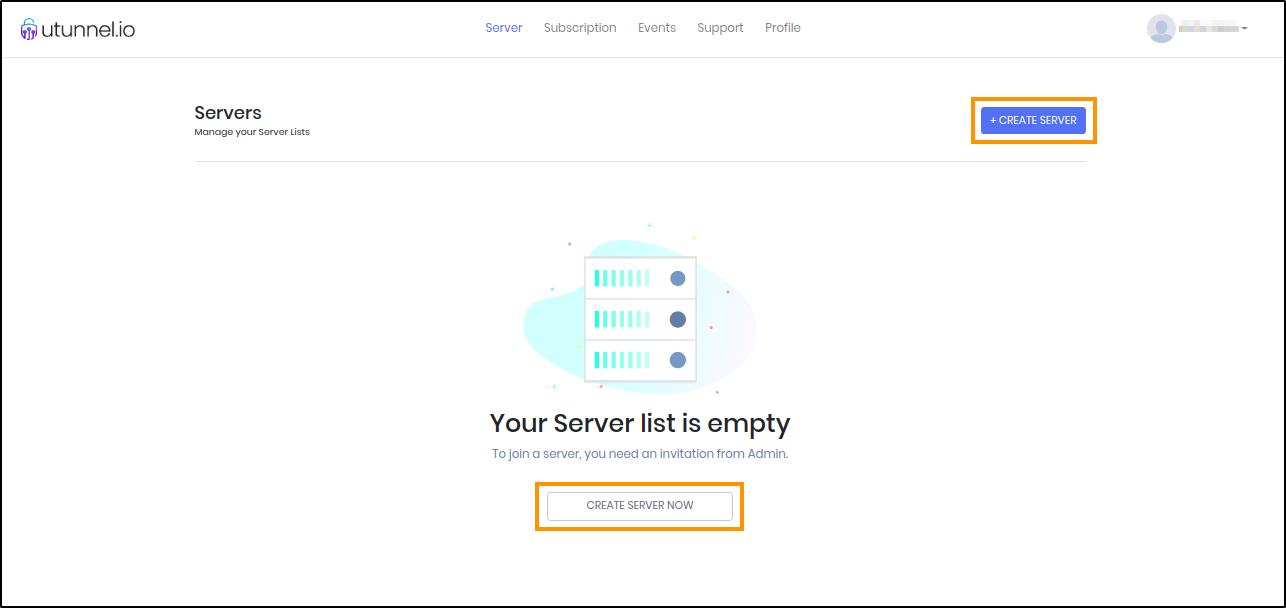
**Sign up for an Individual or *Organization*** account with UTunnel VPN based on your requirements. Then, log in to the UTunnel dashboard and click on either the Create Server Now or the Create Server button on the UTunnel dashboard.
Select your subscription and server type. You should choose the On-Premise option here and enter the server details as given below:
- Package: You can select either the Basic or Standard subscription plan
- Server Type: Select On-Premise
- Server Name: An easily identifiable name of your choice
- IP address: Enter your Vultr server IP address
- VPN accounts: Select the number of VPN users you want to allow access to this server
- Coupon: Enter the coupon code if you have any
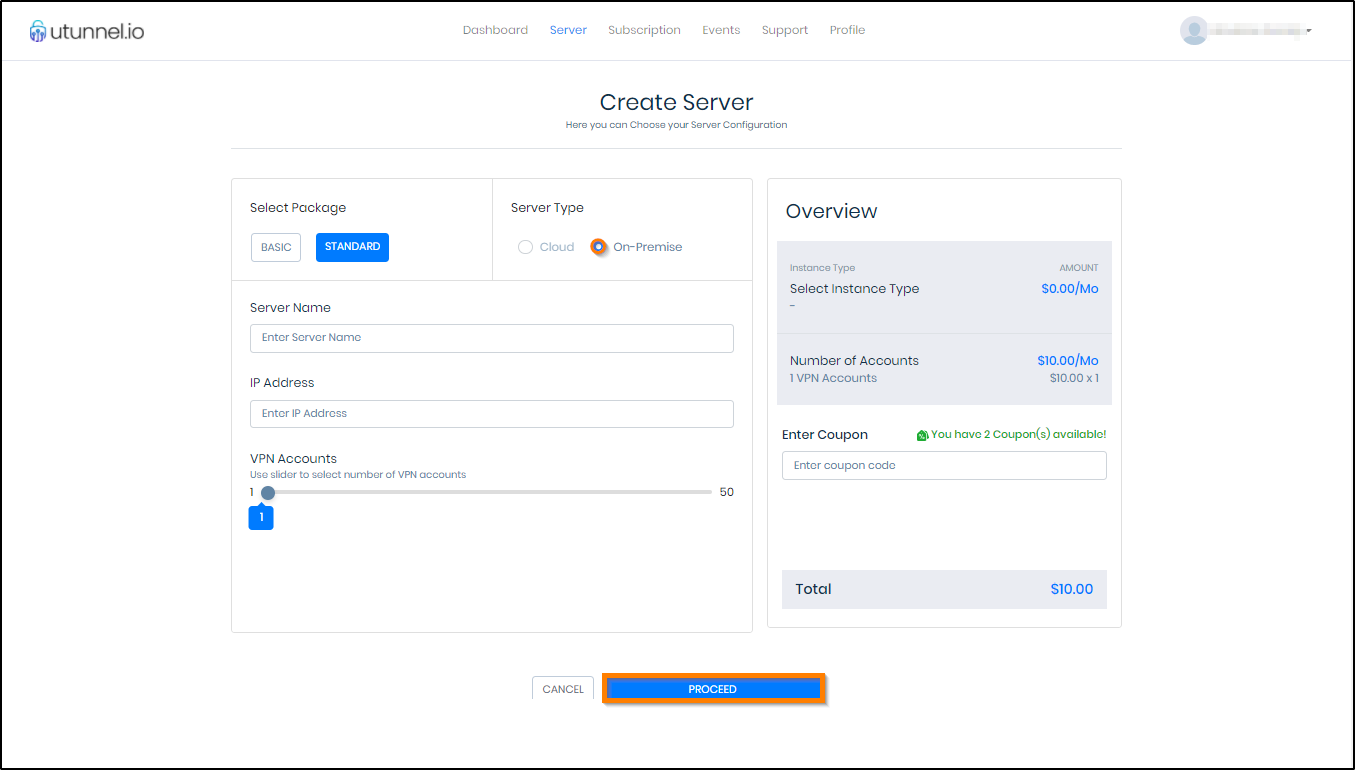
Click on the Proceed button toward the right bottom of the screen.
Complete the payment and then you will be redirected to the UTunnel dashboard, where you can see the status of server creation.
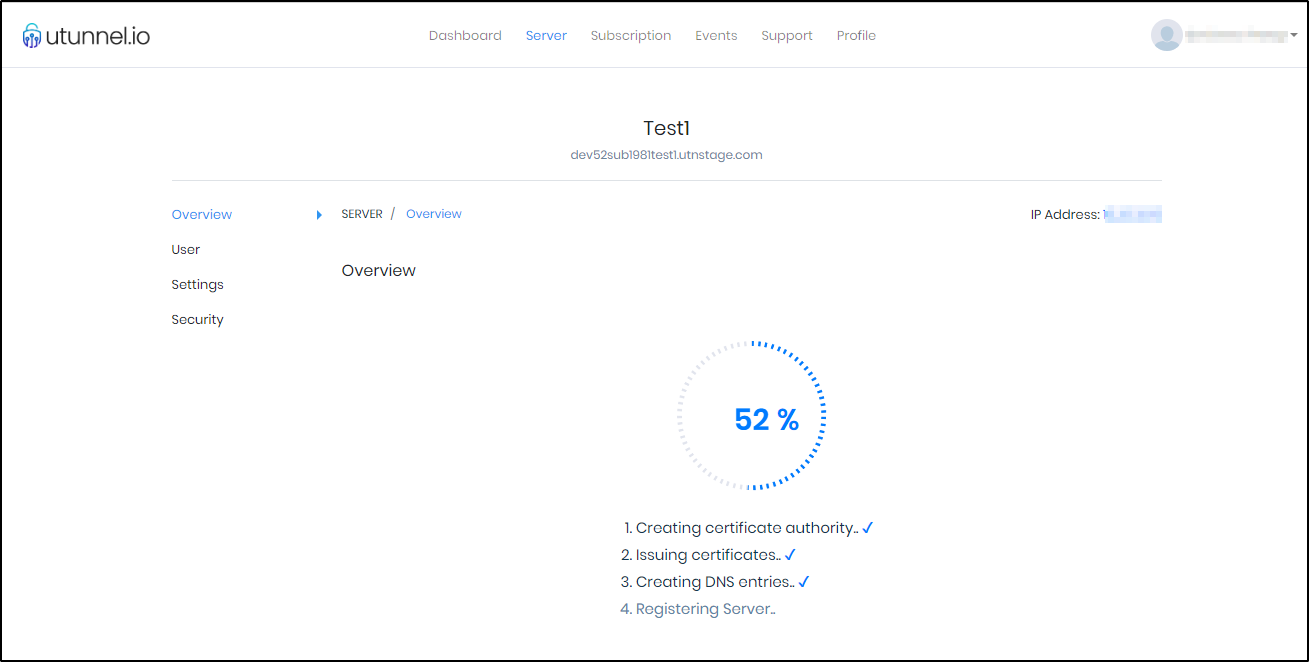
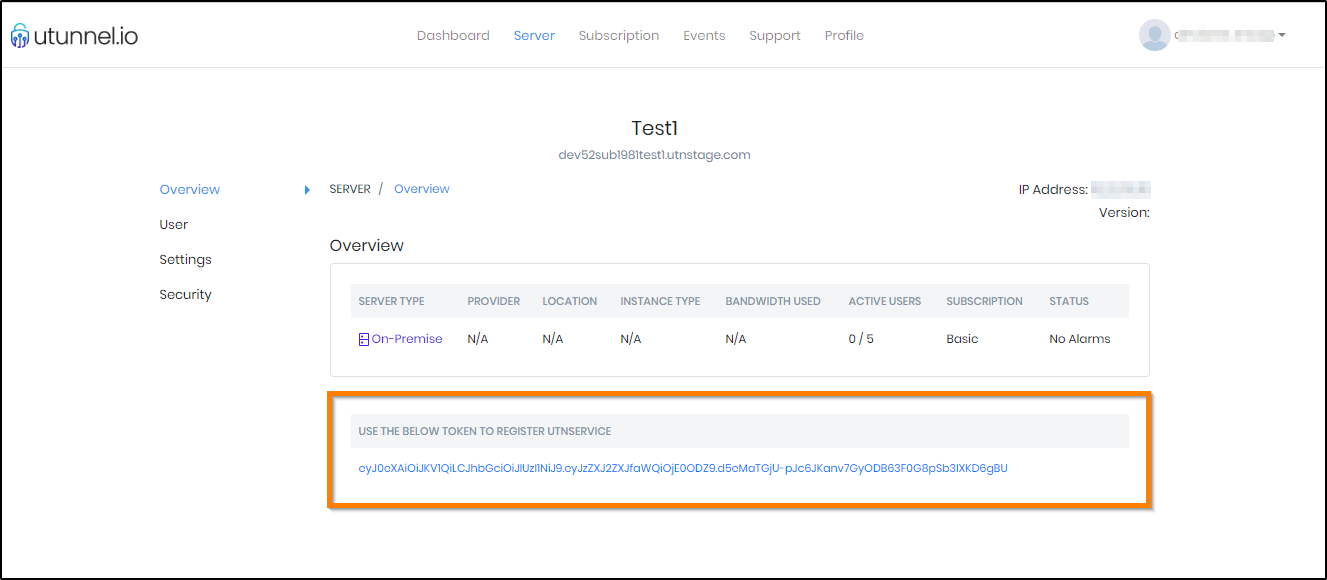
After that process is finished, you will be redirected to the Server Details screen where a registration token will be displayed. Copy this registration token.
3. Register your Vultr VPN Server with UTunnel
Connect to your Vultr server via SSH. You will need sudo access to complete the following steps. After the successful login, execute the commands given below. Replace the string 'REG_TOKEN' in the first command with the token you obtained in the above step.
sudo /utunnel/bin/utnservice register REG_TOKENNow, start the UTunnel Service on your server by running the following command.
sudo /utunnel/bin/utnservice start4. Open Ports to Allow VPN Connection
Make sure that inbound connections to the following ports are allowed to accept VPN connections.
Ports used for OpenVPN connections
- TCP 443
- UDP 443
- UDP 53 (if scramble VPN is enabled)
Ports used for IPSEC connections
- UDP 4500
- UDP 500
Now your server would be ready to accept VPN connections. Invite users into your server and start using the VPN.
5. Invite users to your VPN server from the UTunnel Dashboard
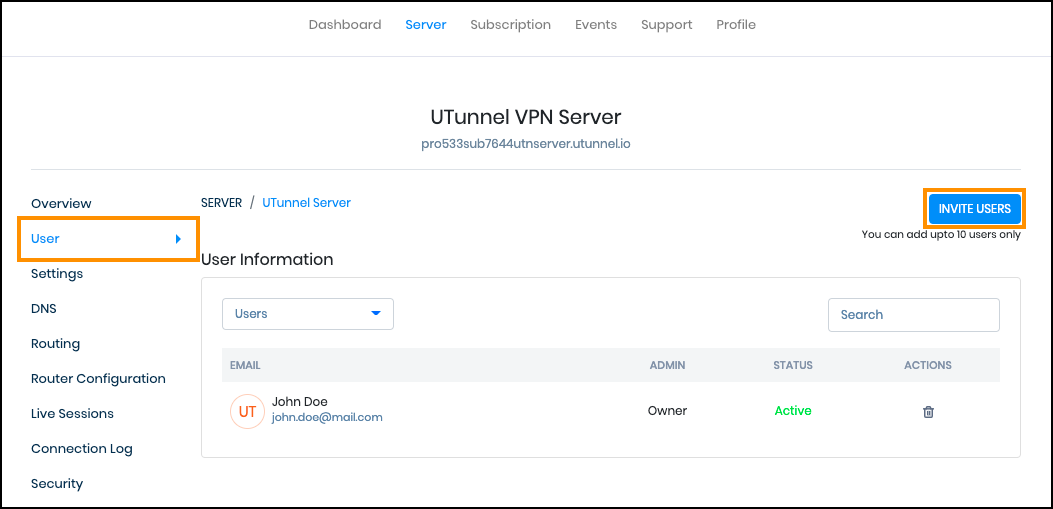
You can now login to your UTunnel account, and the newly created VPN server will be displayed on your user dashboard. Click on the server name to navigate to the server details page, go to the User section from the left sidebar, and click the Invite Users button to add users to your VPN server.
6. Install UTunnel VPN Client Apps and Connect to your VPN
UTunnel provides VPN Client apps for Android, iOS, Windows, macOS, and Linux operating systems. You can install and log in to the client apps using your UTunnel account credentials to connect to your VPN server. Newly invited users would have to sign up for a UTunnel account to log in and connect to the VPN using the UTunnel client apps.
Support
If you require any further assistance, you can open a support ticket with UTunnel VPN here or email the support team at support@utunnel.io