
Build a REST API in Go with Vultr Managed Databases for MySQL
Introduction
This article explains how to build a secure REST API in Go with Vultr Managed Databases for MySQL. By following this guide, you'll create a Vultr Managed Database for MySQL, connect to it securely using TLS, execute CRUD (Create, Read, Update, Delete) operations with the Go MySQL client, and use the Gin Web Framework to build a REST API.
MySQL client libraries
One of the most popular MySQL libraries is libmysqlclient, a C API that provides low-level access to MySQL for command-line clients, MySQL connectors, and third-party APIs. MySQL offers connectors (libraries or drivers) for other popular programming languages. These include JDBC (for Java applications), .NET, Python, Node.js, Ruby, PHP, and Perl, among others. These connectors/libraries/drivers are either built using the libmysqlclient (using C-binding provided by the programming language) or by implementing a native driver. Each approach has pros and cons.
Native drivers implement the MySQL network protocol entirely within the host language or environment. They are fast, can offer advanced functionality, and are easier for end users to build and deploy because no copy of the MySQL client libraries is needed to build the native driver components.
Using libmysqlclient offers complete compatibility with MySQL, but their feature set is limited to the interfaces exposed through libmysqlclient, and the performance may be lower (compared to native drivers) as data is copied between the native language and the MySQL API components.
MySQL Go client
Go MySQL Driver is a MySQL driver for the Go database/sql package. It is a native Go implementation that supports a rich feature set which includes:
- Connection pooling.
- Support for queries larger than 16 MB.
- Support for sql.RawBytes.
- Connectivity over TCP/IPv4, TCP/IPv6, Unix domain sockets or custom protocols.
Gin Web Framework
Gin is an HTTP high-performance web framework that uses the httprouter library. Some of its key features include:
- Gin provides an easy-to-use API for JSON, XML, and HTML rendering that provides utility methods to help parse and validate the JSON payload in an HTTP request and handle JSON for the HTTP response.
- You can use middleware to modify an incoming HTTP request and implement capabilities such as authorization, authentication, logging, and compression.
- Avoid server crashes because Gin can catch errors during an HTTP request and recover gracefully.
- You can manage the application HTTP routes efficiently. This is very useful for use cases such as handling different API versions. These HTTP route groups offer unlimited nesting without degrading performance.
Prerequisites
To follow the instructions in this article:
- Install a recent version of the Go programming language (version 1.18 or higher)
- Install curl, a popular command-line HTTP client.
Create Vultr MySQL Managed Database
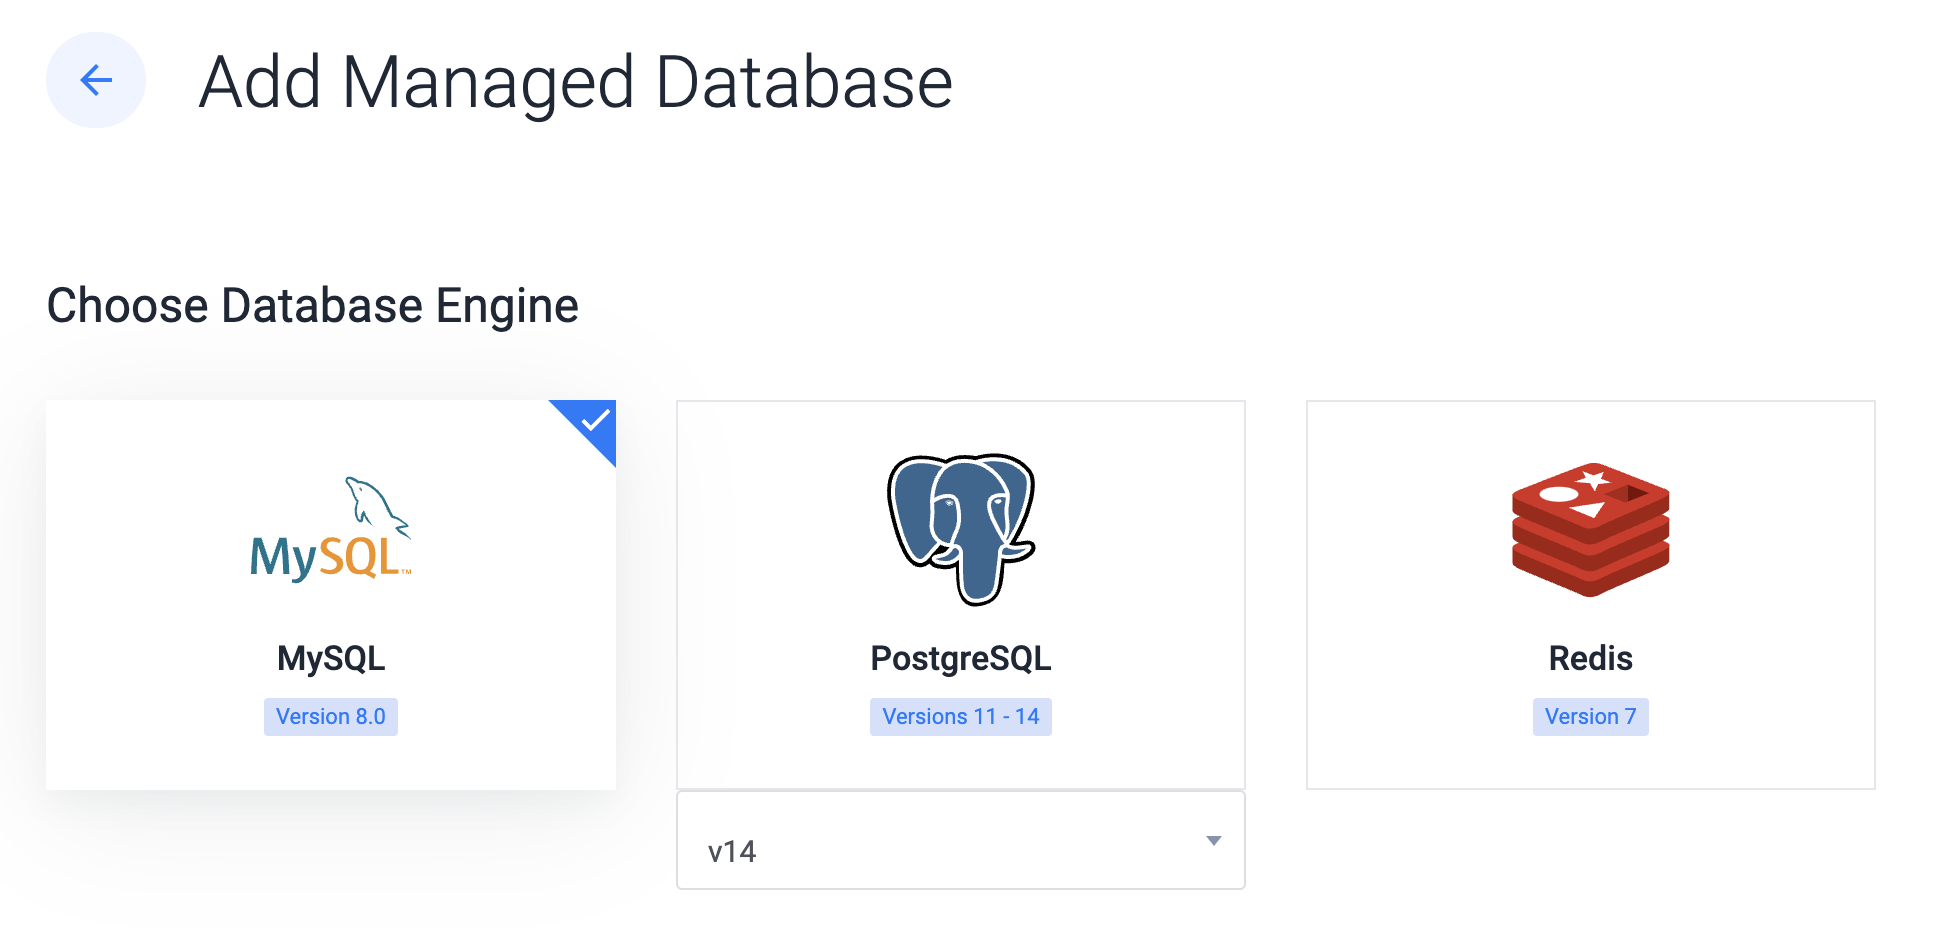
Log into your Vultr account, navigate to Add Managed Database and follow the below steps.
Choose the MySQL database engine.
You can choose from several options in the Server Type. This includes Cloud Compute, Cloud Compute High Performance - AMD or Intel, and Optimized Cloud Compute - General Purpose, Storage or Memory Optimized.
You should also select zero or more replica nodes and the cluster location. A replica node is the same server type and plan as the primary node.
This article uses a Cloud Compute server type without a replica node.
After you add a label for the database cluster, click Deploy Now to create the cluster. It will take a few minutes for the cluster to be available, and the Status should change to Running.
The Vultr MySQL Managed Database is ready for you to connect to it with a Go program.
Initialize the project
Create a directory and switch to it:
mkdir mysql-go-gin-api
cd mysql-go-gin-api
Create a new Go module:
go mod init mysql-go-gin-apiThis will create a new
go.modfile
Create a new file main.go:
touch main.goImport libraries
To import required Go modules, add the following to main.go file:
package main

import (
    "crypto/tls"
    "crypto/x509"
    "database/sql"
    "fmt"
    "io/ioutil"
    "log"
    "os"

    "github.com/gin-gonic/gin"
    "github.com/go-sql-driver/mysql"
    _ "github.com/go-sql-driver/mysql"
)
The following packages are imported:
database/sql- This package includes types and functions for connecting and working with a SQL database.github.com/go-sql-driver/mysql- Whiledatabase/sqlprovides a generic interface for SQL database, you need a driver for the specific database you want to use. In this case, you are using a MySQL database and its corresponding driver. The driver is loaded anonymously (the_alias is used in its package qualifier) and gets registered.github.com/gin-gonic/gin- Provides the Gin Web Framework support
Add global variables and constants
Add the below code to main.go file:
const urlTemplate = "%s:%s@tcp(%s:%s)/%s?tls=custom"

const createTable = `CREATE TABLE users (
    Userid int NOT NULL AUTO_INCREMENT,
    Email varchar(255) NOT NULL,
    Name varchar(255) NOT NULL,
    PRIMARY KEY (userid)
);
`

const dropTable = `DROP TABLE users;`

var username string
var password string
var host string
var port string
var dbname string
var certificateLocation string
var db *sql.DB- The constants
createTableanddropTableare queries for creating and deleting the MySQL table, respectively. - The variables are initialized in the
initfunction.
Add the init function
Add the code below to main.go file:
func init() {

    username = os.Getenv("MYSQL_USERNAME")
    if username == "" {
        log.Fatal("missing environment variable MYSQL_USERNAME")
    }

    password = os.Getenv("MYSQL_PASSWORD")
    if password == "" {
        log.Fatal("missing environment variable MYSQL_PASSWORD")
    }

    host = os.Getenv("MYSQL_HOST")
    if host == "" {
        log.Fatal("missing environment variable MYSQL_HOST")
    }

    port = os.Getenv("MYSQL_PORT")
    if port == "" {
        log.Fatal("missing environment variable MYSQL_PORT")
    }

    dbname = os.Getenv("MYSQL_DBNAME")
    if dbname == "" {
        log.Fatal("missing environment variable MYSQL_DBNAME")
    }

    certificateLocation = os.Getenv("MYSQL_TLS_CERT_LOCATION")
    if certificateLocation == "" {
        log.Fatal("missing environment variable MYSQL_TLS_CERT_LOCATION")
    }

    url := fmt.Sprintf(urlTemplate, username, password, host, port, dbname)

    rootCertPool := x509.NewCertPool()
    pem, err := ioutil.ReadFile(certificateLocation)
    if err != nil {
        log.Fatal(err)
    }
    if ok := rootCertPool.AppendCertsFromPEM(pem); !ok {
        log.Fatal("failed to append pem")
    }

    mysql.RegisterTLSConfig("custom", &tls.Config{
        RootCAs: rootCertPool,
    })

    db, err = sql.Open("mysql", url)

    if err != nil {
        log.Fatal("invalid mysql url", err)
    }

    err = db.Ping()
    if err != nil {
        log.Fatal("failed to connect with mysql", err)
    }

    fmt.Println("successfully connected to mysql")
}
The init function takes care of two important things:
- First one is retrieving connectivity information via environment variables. This includes Vultr MySQL Managed Database host, port, username, password, database name, certificate location (from
MYSQL_HOST,MYSQL_PORT,MYSQL_USERNAME,MYSQL_PASSWORD,MYSQL_DBNAMEandMYSQL_TLS_CERT_LOCATIONrespectively). - Secondly, the database connectivity is also established (using
sql.Open). It creates a pointer to asql.DBobject that represents a pool of zero or more connections to the underlying database.
Add the main function
Add the main function to main.go file:
func main() {

}
The main function has been left empty as our goal (in the next section) is to ensure that you are able to connect to the MySQL database. The main function will be updated later in the article as you add the rest of the application logic.
Connect to Vultr MySQL Managed Database
To establish a connection with the Vultr MySQL Managed Database using your Go program, you need to get the connection details. Before continuing, you need to do the following:
- Get the connection details for the database to connect to it.
- Download the TLS certificate.
Get the connection details:
- Click the Manage icon to open the Overview tab.
- From the Connection Details section, copy the following attributes:
username,password,host,host,port, anddatabase
To download the Signed certificate, click on Download Signed Certificate and save it to a location on your local machine.
Fetch the Go module dependencies for the program:
go mod tidyYou might get the following output:
go: finding module for package github.com/go-sql-driver/mysql
go: found github.com/go-sql-driver/mysql in github.com/go-sql-driver/mysql v1.7.0
To run the program:
export MYSQL_USERNAME=<enter the Vultr MySQL Managed Database username e.g. vultradmin>
export MYSQL_PASSWORD=<enter the Vultr MySQL Managed Database password>
export MYSQL_HOST=<enter the Vultr MySQL Managed Database hostname>
export MYSQL_PORT=<enter the Vultr MySQL Managed Database port e.g. 16751>
export MYSQL_DBNAME=<enter the Vultr MySQL Managed Database database name e.g. defaultdb>
export MYSQL_TLS_CERT_LOCATION=<enter the certificate location for Vultr MySQL Managed Database>

go run main.go
If the connectivity was established, you should see the following output:
successfully connected to mysqlNow, you can add the rest of the application logic.
Add data to the users table in MySQL
The createUser HTTP handler is used to add rows to the table.
Create a new file handler.go:
touch handler.goAdd imports
Add imports to the handler.go file:
package main

import (
    "database/sql"
    "errors"
    "fmt"
    "net/http"
    "strconv"

    "github.com/gin-gonic/gin"
)
Add HTTP handler
To add the HTTP handler to process requests, add the code below to handler.go file:
const insertQuery = `INSERT into users (Email, Name) VALUES (?, ?);`

func createUser(c *gin.Context) {
    fmt.Println("creating user")

    var req CreateUserRequest

    err := c.ShouldBind(&req)
    if err != nil {
        c.AbortWithError(http.StatusBadRequest, err)
        return
    }

    r, err := db.Exec(insertQuery, req.Email, req.Name)
    if err != nil {
        c.AbortWithError(http.StatusInternalServerError, err)
        return
    }

    id, err := r.LastInsertId()
    if err != nil {
        c.AbortWithError(http.StatusInternalServerError, err)
        return
    }

    fmt.Println("created user with id", id)

    c.Status(http.StatusCreated)
    c.Header("Location", "/"+strconv.Itoa(int(id)))
    fmt.Println("user created successfully")
}
Add create user request message
Create a new file model.go:
touch model.goAdd the below code to model.go file:
package main

type CreateUserRequest struct {
    Email string `json: "email"`
    Name  string `json: "name"`
}createUserfunction accepts agin.Contextobject.CreateUserRequestrepresents the payload that contains information about the user to be created (EmailandName).ShouldBindparses the request body as JSON (since you will use theapplication/jsonContent-Typeheader). It decodes the JSON payload into theCreateUserRequeststructspecified as a pointer.Execis used to execute the insert query (INSERT into users (Email, Name) VALUES (?, ?);query on the database with the user name and email that was retrieved from the HTTP payload body.- If the row is added successfully, you get the auto-generated row ID (primary key) and return that as a
Locationheader in the HTTP response (along with the 201 Created HTTP response).
Query a user by Userid
The getUserWithID HTTP handler is used to retrieve user information using its id.
Add the below code to handler.go file:
const getUserWithIdQuery = `SELECT * FROM users where Userid=?;`

func getUserWithID(c *gin.Context) {
    userid := c.Param("id")
    fmt.Println("getting user with id", userid)

    res := db.QueryRow(getUserWithIdQuery, userid)
    if res.Err() != nil {
        c.AbortWithError(http.StatusInternalServerError, res.Err())
        return
    }

    var id int
    var email string
    var name string

    err := res.Scan(&id, &email, &name)
    if err != nil {
        if errors.Is(err, sql.ErrNoRows) {
            fmt.Println("user with id", userid, "does not exist")
            c.AbortWithError(http.StatusNotFound, err)
            return
        }
        c.AbortWithError(http.StatusInternalServerError, err)
        return
    }

    user := GetUserResponse{UserID: id, Email: email, Name: name}

    c.JSON(http.StatusOK, user)
    fmt.Println("successfully retrieved details for user with id", userid)

}
Add the below code to model.go file:
type GetUserResponse struct {
    UserID int    `json: "userid"`
    Email  string `json: "email"`
    Name   string `json: "name"`
}getUserWithIDaccepts agin.Contextobject.- You use a named parameter to extract the user ID. It is passed in as a path parameter in the HTTP request URL and retrieved using
Paramfunction. QueryRowis used to execute theSELECT * FROM users where Userid=?;query on the database with the user ID that was retrieved earlier.- Once that's done, you use Scan to copy the columns from the matched query result (row).
- If you get back a
sql.ErrNoRowserror, respond with an HTTP 404 (StatusNotFound) - this means that the user ID that you tried to search for does not yet exist in the table. - In case of a valid response (user information), you represent that in the form of a
GetUserResponsestruct which contains the user ID, email, and name of the user that was queried. The JSON function is used to conveniently return this Gostructin the form of an HTTP response without having to do explicit JSON marshaling or decoding.
Get all users
The getAllUsers HTTP handler is used to retrieve all rows in the users table.
Add the below code to handler.go file:
const getAllUsersQuery = `SELECT * FROM users;`

func getAllUsers(c *gin.Context) {

    fmt.Println("getting all users")

    res, err := db.Query(getAllUsersQuery)
    if err != nil {
        c.AbortWithError(http.StatusInternalServerError, err)
        return
    }

    var users []GetUserResponse

    for res.Next() {
        var id int
        var email string
        var name string

        err := res.Scan(&id, &email, &name)
        if err != nil {
            c.AbortWithError(http.StatusInternalServerError, err)
            return
        }

        user := GetUserResponse{UserID: id, Email: email, Name: name}
        users = append(users, user)
    }

    if len(users) == 0 {
        fmt.Println("no users found")
        c.AbortWithStatus(http.StatusNotFound)
        return
    }

    c.JSON(http.StatusOK, users)
    fmt.Println("successfully retrieved details for all users")

}getAllUsersfunction accepts agin.Contextobject.Queryis used to execute theSELECT * FROM users;query on the database.- For each row returned from the query, use
Scanto copy the columns from the matched query result. - From this, create a
GetUserResponseobject and add that to a slice. - If the slice has no elements, you can be sure that there are currently no users in the table, and hence an HTTP 404 (NotFound) is returned as a response. In case of a successful query, the JSON function is used to conveniently return the slice of
GetUserResponsestructs in the form of an HTTP response without having to do explicit JSON marshaling or decoding.
Update user by Userid
The updateUser HTTP handler is used to update the user name given its id.
Add the below code to handler.go file:
const updateQuery = `UPDATE users SET Name = ? WHERE Userid = ?;`

func updateUser(c *gin.Context) {
    var req UpdateRequest

    err := c.ShouldBind(&req)
    if err == nil {
        fmt.Println("got user update request", req)
    }

    fmt.Println("updating user with id", req.UserID)

    res, err := db.Exec(updateQuery, req.NewName, req.UserID)

    if err != nil {
        c.AbortWithError(http.StatusInternalServerError, err)
        return
    }

    numRows, err := res.RowsAffected()
    if err != nil {
        c.AbortWithError(http.StatusInternalServerError, err)
        return
    }

    if numRows == 0 {
        fmt.Println("unable to find user with id", req.UserID)
        c.AbortWithStatus(http.StatusNotFound)
        return
    }

    fmt.Println("updated user with id", req.UserID)

    c.Status(http.StatusOK)
}
Add the below code to model.go file:
type UpdateRequest struct {
    UserID  string `json: "userid"`
    NewName string `json: "name"`
}getAllUsersfunction accepts agin.Contextobject.UpdateRequestrepresents the payload that contains information about the user to be updated (UserIDandNewName).ShouldBindparses the request body as JSON (because you will use theapplication/jsonContent-Typeheader). It decodes the JSON payload into theUpdateRequeststructspecified as a pointer.Execis used to execute the update query (UPDATE users SET Name = ? WHERE Userid = ?;query on the database with the new user name and user ID, which were retrieved from the HTTP payload body.- To verify whether the update operation was successful, execute
RowsAffectedon thesql.Resultobject to confirm that one row has been affected. - If not, you can be sure that the user ID you tried to update does not exist in the table, and hence an HTTP 404 (NotFound) is returned as a response. Otherwise, an HTTP 200 (Ok) is returned.
Delete user by Userid
The deleteUserWithID HTTP handler is used to update the user name given its id.
Add the below code to handler.go file:
const deleteWithIdQuery = `DELETE FROM users WHERE Userid = ?;`

func deleteUserWithID(c *gin.Context) {
    userid := c.Param("id")
    fmt.Println("deleting user with id", userid)

    r, err := db.Exec(deleteWithIdQuery, userid)
    if err != nil {
        c.AbortWithError(http.StatusInternalServerError, err)
        return
    }

    numRows, err := r.RowsAffected()
    if err != nil {
        c.AbortWithError(http.StatusInternalServerError, err)
        return
    }

    if numRows == 0 {
        fmt.Println("unable to find user with id", userid)
        c.AbortWithStatus(http.StatusNotFound)
        return
    }

    fmt.Println("successfully deleted user with id", userid)

    c.Status(http.StatusOK)
}deleteUserWithIDfunction accepts agin.Contextobject.- Use a named parameter to extract the user ID. It is passed in as a path parameter in the HTTP request URL and retrieved using
Paramfunction. Execis used to execute the delete query (DELETE FROM users WHERE Userid = ?;query on the database with the user ID that was retrieved earlier.- To verify whether the delete operation was successful, execute
RowsAffectedon thesql.Resultobject to confirm that one row has been affected. - If not, you can be sure that the user ID you tried to delete does not exist in the table, and hence an HTTP 404 (NotFound) is returned as a response. Otherwise, an HTTP 200 (Ok) is returned.
Initialize table in MySQL database
The dropAndCreateTable function deletes the users table and re-creates it.
Add the below code to main.go file:
func dropAndCreateTable() {
    _, err := db.Exec(dropTable)
    if err != nil {
        fmt.Println("could not drop table -", err)
    } else {
        fmt.Println("table dropped")
    }

    _, err = db.Exec(createTable)
    if err != nil {
        log.Fatal("could not create table", err)
    }
    fmt.Println("table created")
}
Update the init function to invoke the function (add to the end of the init function):
dropAndCreateTable()Exec is used to execute the DROP TABLE query on the database, followed by the CREATE TABLE query.
Add HTTP routes and start the HTTP server
The HTTP handlers you added earlier (in handler.go file) need to be configured as routes.
Add the below code to the main function (which was earlier empty) in the main.go file:
    r := gin.New()
    gin.SetMode(gin.ReleaseMode)

    r.POST("/", createUser)
    r.GET("/:id", getUserWithID)
    r.GET("/", getAllUsers)
    r.PUT("/", updateUser)
    r.DELETE("/:id", deleteUserWithID)

    r.Run("localhost:8080")
Also, add the Gin package to the imports section - " github.com/gin-gonic/gin".
Now you are ready to run the program and test the API.
Run and test the application
Fetch the Go module dependencies for the program:
go mod tidyYou should see output similar to this:
go: finding module for package github.com/gin-gonic/gin
go: found github.com/gin-gonic/gin in github.com/gin-gonic/gin v1.8.1
To run the program:
export MYSQL_USERNAME=<enter the Vultr MySQL Managed Database username e.g. vultradmin>
export MYSQL_PASSWORD=<enter the Vultr MySQL Managed Database password>
export MYSQL_HOST=<enter the Vultr MySQL Managed Database hostname>
export MYSQL_PORT=<enter the Vultr MySQL Managed Database port e.g. 16751>
export MYSQL_DBNAME=<enter the Vultr MySQL Managed Database database name e.g. defaultdb>
export MYSQL_TLS_CERT_LOCATION=<enter the certificate location for Vultr MySQL Managed Database>

go run *.go
You should see output logs similar to this:
successfully connected to mysql
could not drop table - Error 1051: Unknown table' defaultdb.users'
table created
[GIN-debug] [WARNING] Running in "debug" mode. Switch to "release" mode in production.
- using env:   export GIN_MODE=release
- using code: gin.SetMode(gin.ReleaseMode)Note: Don't worry about the log message could not drop table - Error 1051: Unknown table' defaultdb.users. This happens only when you run the program for the first time. If you re-run the program again, this will not occur because the users table will already exist in the Vultr MySQL Managed Database instance.
You can now use the HTTP endpoints to test the API's create, read, update and delete functionality.
Create a few users
To create a user (with username user1 and email address user1@foo.com), run the below command in a terminal:
curl -i -XPOST -H "Content-Type: application/json" -d '{"email": "user1@foo.com", "name": "user1"}' localhost:8080/You should get back an HTTP response similar to this:
HTTP/1.1 201 Created
Location: /1
Date: Mon, 01 Jan 2020 00:00:00 GMT
Content-Length: 0
To create a user (with username user2 and email address user2@foo.com), run the below command in a terminal:
curl -i -XPOST -H "Content-Type: application/json" -d '{"email": "user2@foo.com", "name": "user2"}' localhost:8080/You should get back an HTTP response similar to this:
HTTP/1.1 201 Created
Location: /2
Date: Mon, 01 Jan 2020 00:00:00 GMT
Content-Length: 0
Notice that the Location HTTP header contains the auto-generated User ID by MySQL.
Retrieve a user by ID
To get details for the user with ID 1, run the below command in a terminal:
curl -i localhost:8080/1You should get back an HTTP response similar to this:
HTTP/1.1 200 OK
Content-Type: application/json; charset=utf-8
Date: Mon, 01 Jan 2020 00:00:00 GMT
Content-Length: 51

{"userid":1,"email":"user1@foo.com","name":"user1"}
To get details for the user with ID 2, run the below command in a terminal:
curl -i localhost:8080/2You should get back an HTTP response similar to this:
HTTP/1.1 200 OK
Content-Type: application/json; charset=utf-8
Date: Mon, 01 Jan 2020 00:00:00 GMT
Content-Length: 51

{"userid":2, "email": "user2@foo.com", "name": "user2"}
You get the user information payload in JSON form, along with the HTTP response metadata.
To get details for the user with ID 42, run the below command in a terminal:
curl -i localhost:8080/42You should get back an HTTP response similar to this:
HTTP/1.1 404 Not Found
Date: Mon, 01 Jan 2020 00:00:00 GMT
Content-Length: 0
As expected, you got an HTTP 404 because the user with ID 42 does not exist in the database yet.
Fetch all users
To get all rows in the users table, run the below command in a terminal:
curl -i localhost:8080/You should get back an HTTP response similar to this:
HTTP/1.1 200 OK
Content-Type: application/json; charset=utf-8
Date: Mon, 01 Jan 2020 00:00:00 GMT
Content-Length: 105

[{"userid ":1, "email": "user1@foo.com", "name": "user1"},{"userid":2, "email": "user2@foo.com", "name": "user2"}]
You get the array of users in JSON form, along with the HTTP response metadata.
Update the user name for a user
To update the name for the user with ID 1, run the below command in a terminal:
curl -i -XPUT -H "Content-Type: application/json" -d '{"userid": "1", "name": "user1_new"}' localhost:8080/You should get back an HTTP response similar to this:
HTTP/1.1 200 OK
Date: Mon, 01 Jan 2020 00:00:00 GMT
Content-Length: 0
To verify that the user name was updated, fetch the details for the user with ID 1.
Run the below command in a terminal:
curl -i localhost:8080/1You should get back an HTTP response similar to this:
HTTP/1.1 200 OK
Content-Type: application/json; charset=utf-8
Date: Mon, 01 Jan 2020 00:00:00 GMT
Content-Length: 55

{"userid":1,"email":"user1@foo.com","name":"user1_new"}
You get the user information payload in JSON form (notice the update name user1_new), along with the HTTP response metadata.
To update the name for the user with ID 42, run the below command in a terminal:
curl -i -XPUT -H "Content-Type: application/json" -d '{"userid": "42", "name": "user1_new"}' localhost:8080/You should get back an HTTP response similar to this:
HTTP/1.1 404 Not Found
Date: Mon, 01 Jan 2020 00:00:00 GMT
Content-Length: 0
As expected, you got an HTTP 404 because the user with ID 42 does not exist in the database yet.
Retrieve a user by ID
To delete a user with ID 1, run the below command in a terminal:
curl -i -XDELETE localhost:8080/1You should get back an HTTP response similar to this:
HTTP/1.1 200 OK
Date: Mon, 01 Jan 2020 00:00:00 GMT
Content-Length: 0
Verify the contents of the users table and confirm that the deleted user does not exist. Run the below command in a terminal:
curl -i localhost:8080/You should get back an HTTP response similar to this:
HTTP/1.1 200 OK
Content-Type: application/json; charset=utf-8
Date: Mon, 01 Jan 2020 00:00:00 GMT
Content-Length: 53

[{"userid":2, "email": "user2@foo.com", "name": "user2"}]
As expected, you only see user2 in the response payload because user1 was just deleted.
To get details for the user with ID 1, run the below command in a terminal:
curl -i localhost:8080/1You should get back an HTTP response similar to this:
HTTP/1.1 404 Not Found
Date: Mon, 01 Jan 2020 00:00:00 GMT
Content-Length: 0
As expected, you got an HTTP 404 because the user with ID 1 does not exist in the database yet (it was just deleted).
Conclusion
In this article, you created a Vultr Managed Database for MySQL and used the MySQL Go client library to connect to it securely over TLS. Then you used Gin (a Go web framework) to build an application to expose data in MySQL table with a REST API.
To learn more about Vultr Managed Databases, you can refer to the following documentation: