
How to Deploy a JupyterLab Workspace on Vultr Cloud GPU Using AMD AI Workbench
AI Workspaces in the AMD AI Workbench provide isolated, ready-to-use environments designed for developing and running AI workloads. Each workspace includes preconfigured tools such as Jupyter Notebooks and essential command-line utilities. Each workspace is preconfigured with AMD GPU-accelerated frameworks such as PyTorch, TensorFlow, and ROCm to streamline experimentation.
This guide demonstrates how to deploy a JupyterLab workspace on Vultr Cloud GPU using AMD AI Workbench. It covers setting up a project, assigning the required secrets, and launching a GPU-optimized workspace for developing and testing AI workloads.
Prerequisites
Before you begin, ensure you:
- Have access to an AMD Instinct™ MI300X, MI325X, or MI355X GPU.
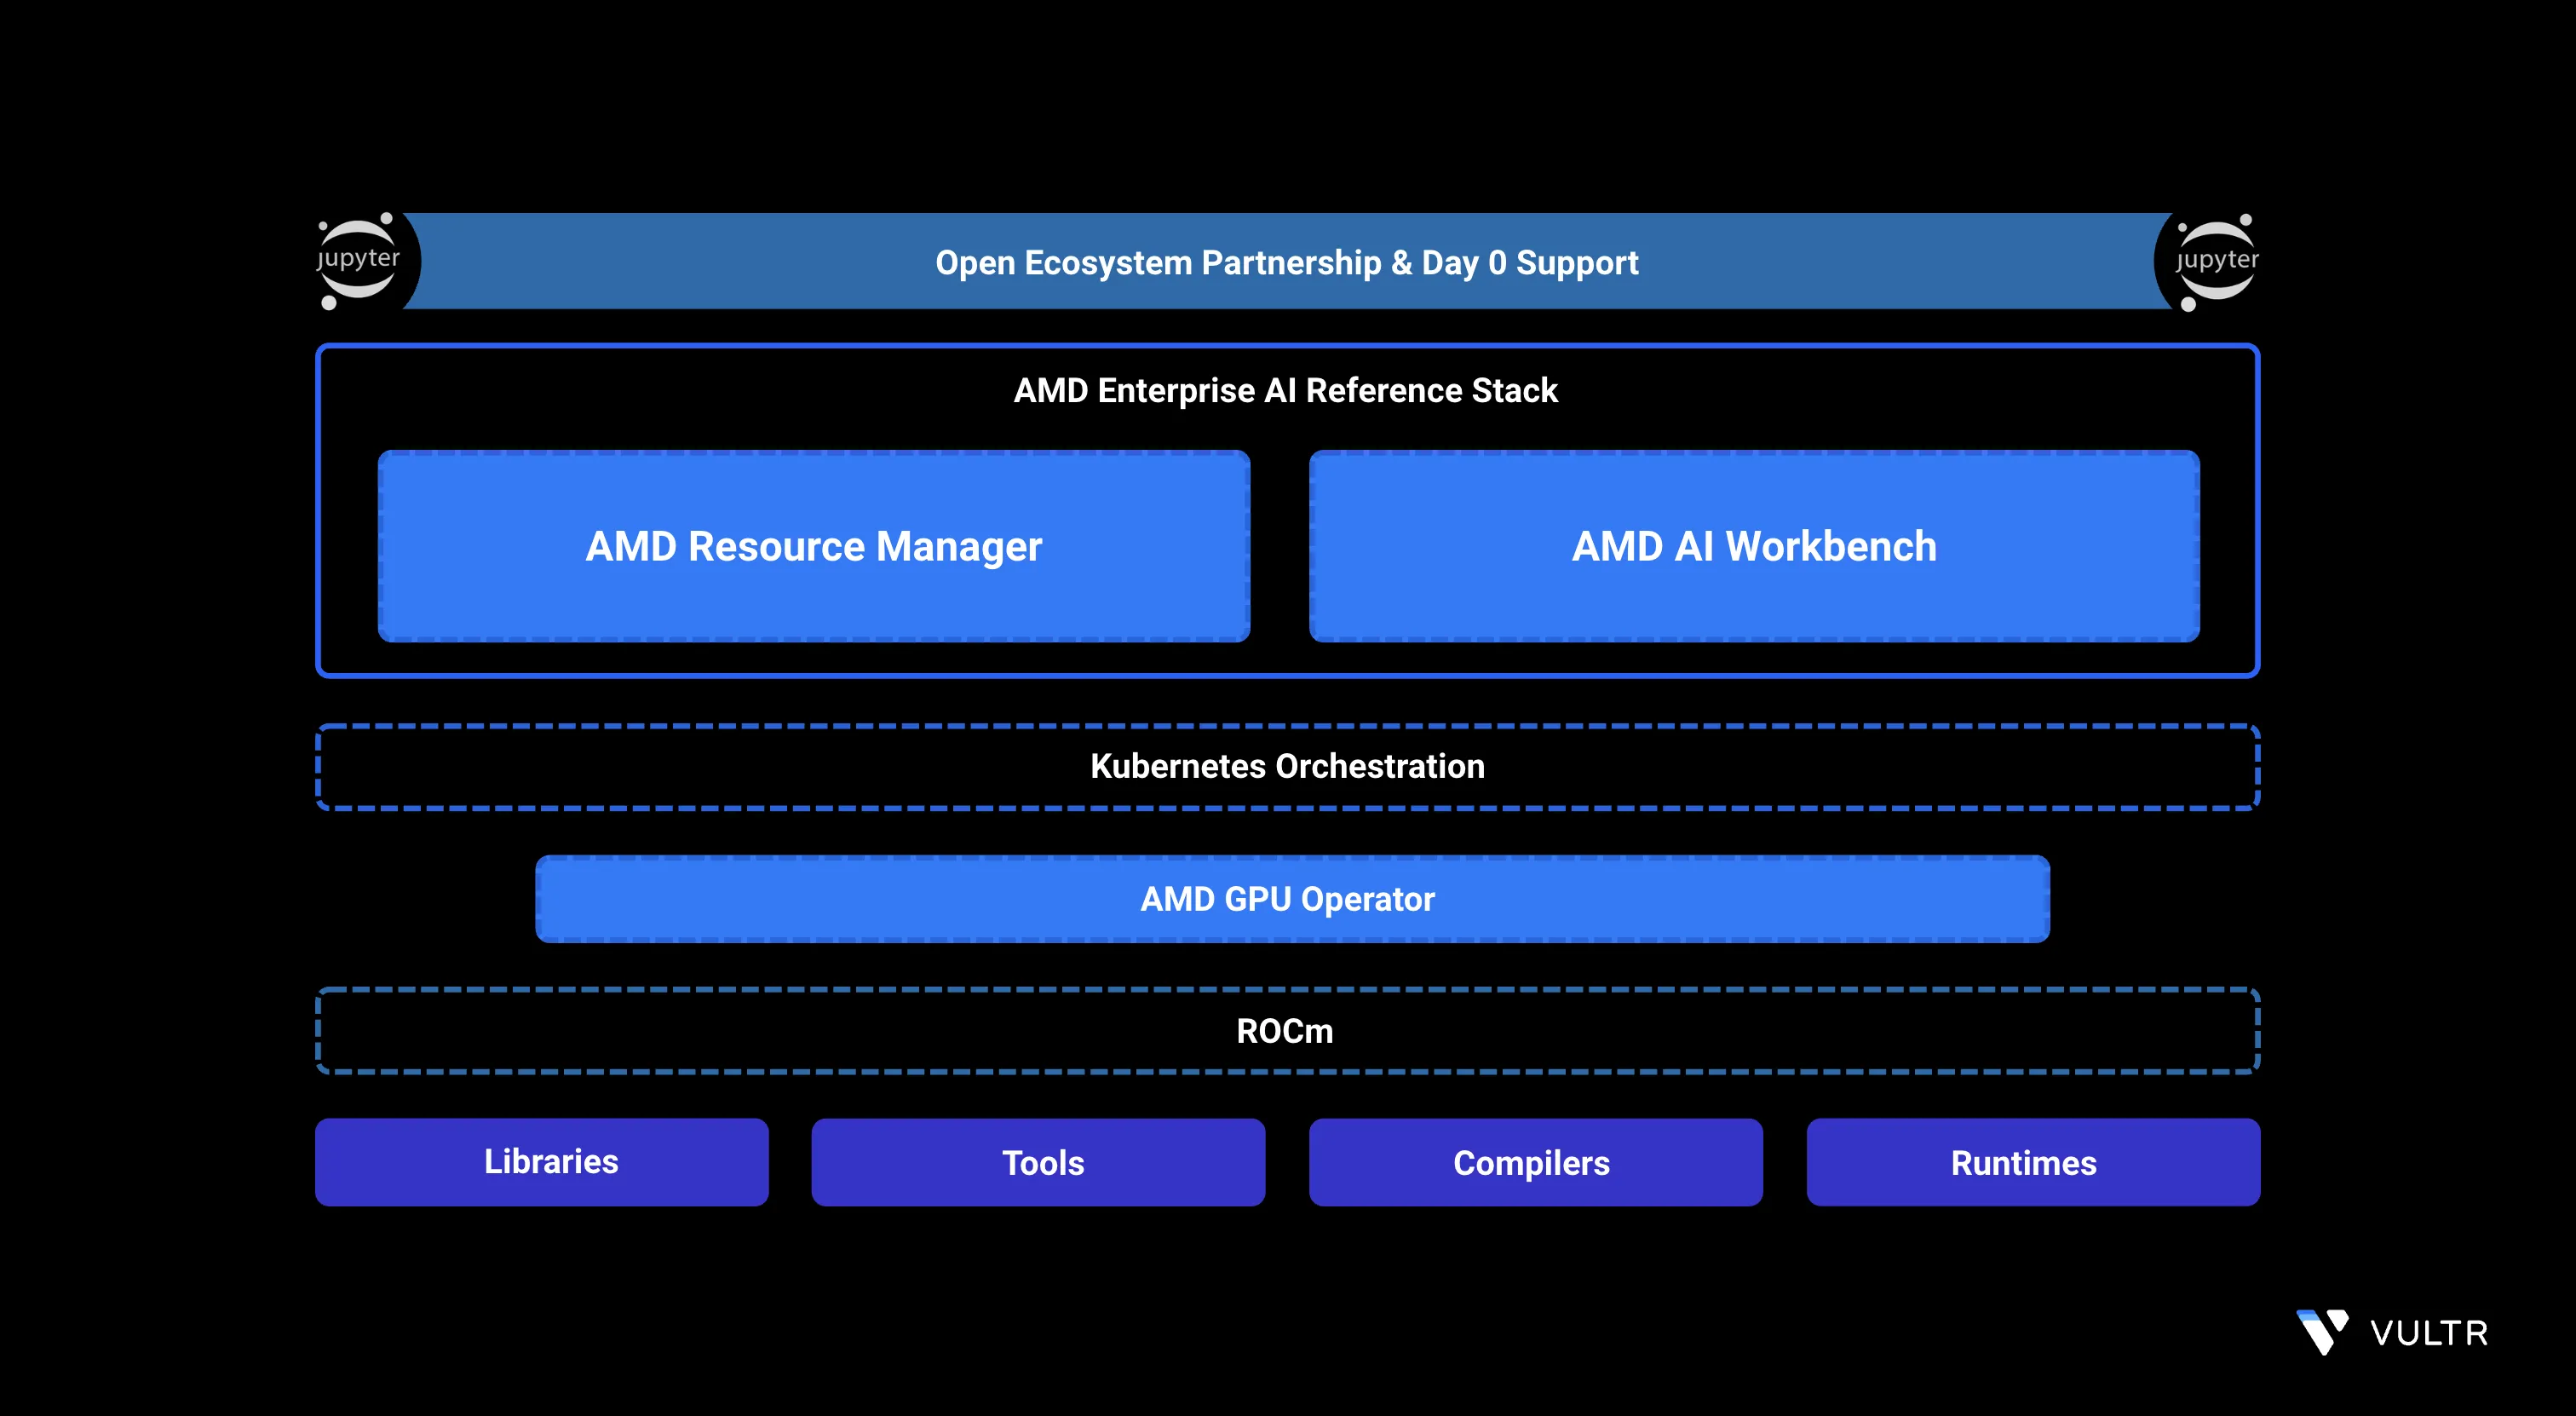
- Have deployed the AMD Enterprise AI Reference Stack.
Create a Project Using AMD Resource Manager
This section covers creating a new project in the AMD Resource Manager and configuring its essential settings, including authentication, project details, and guaranteed resource quotas for consistent workload performance.
Open
https://airmui.amd-ai-workbench.example.comin your browser. Replaceamd-ai-workbench.example.comwith your configured domain.Click Sign in with Keycloak and enter your credentials to log in to the AMD Resource Manager.
Select Projects in the left navigation panel.
Click Create project and enter the following details:
- Name: Enter a name for the project.
- Description: Add a brief description.
- Cluster: Choose the cluster where you want to create the project.
After creating the project, the UI redirects you to the Project settings page.
In the Quota tab, define the Guaranteed Resource Allocation for the project.
- GPUs: Specify the number of GPUs to allocate.
- CPU Cores: Specify the number of CPU cores to allocate.
- System Memory: Specify the amount of RAM to allocate.
- Ephemeral Disk: Specify the disk space to allocate.
When you allocate guaranteed resources to a project, you ensure that its workloads always receive the defined resources, even under heavy load or high-traffic conditions.NoteClick the Users tab and then click Add Member.
In the side panel, select the user you want to assign to the project, then click Add to project.
(Optional) You can also create secrets or configure S3 buckets. These tasks are outside the scope of this guide.
Assign Secrets to the Project
This section covers assigning the required MinIO credentials secret to your project in the AMD Resource Manager. Access the Secrets panel, edit the minio-credentials-fetcher secret, and assign it to the project to enable secure storage access.
- Navigate to the Secrets section in the left navigation panel.
- Click the three dots next to the
minio-credentials-fetchersecret. - Click Edit assignment then choose your project from the list.
- Click Save changes to apply the assignment.
Deploy JupyterLab Workspace Using AMD AI Workbench
This section covers deploying a JupyterLab workspace in the AMD AI Workbench. Select your project, choose the JupyterLab template, configure deployment settings, and launch the workspace. After deployment, track its progress and open JupyterLab using the provided external URL structure.
Click the AI Workbench menu on the left navigation panel to expand its options.
Click Workspaces, then select your project from the project selector in the top-right corner.
From the available workspace templates, select JupyterLab and click View and deploy.
A deployment panel opens on the right. Under Deployment Settings, configure the following:
- Workload name: Enter a descriptive name for the workspace.
- Container image: A default JupyterLab image is preselected. Update it if you require a specific version.
- Image pull secrets: Select a secret if your container image requires authentication.
- Customize Resource Allocation: Toggle this ON if you want to define custom resources for the workload.
- Number of GPUs: Specify how many GPUs the workspace should use.
- Amount of system memory (RAM) per GPU: Define the RAM allocated per GPU.
- Number of CPU Cores per GPU: Define the CPU resources per GPU.
After configuring the settings, click Quick deploy to launch the workspace.
The deployment may take 5–10 minutes, depending on the container image size.NoteNavigate to the Workloads section to track the deployment progress.
Click the three dots on the right side of the workload to open action options:
- Open details: Shows detailed information about the workload.
- Open workspace: Opens the JupyterLab interface.
- View logs: Displays deployment logs to help identify issues.
- Delete: Removes the workload from the project.
Click Open details to view detailed workload information.
- Basic information: Displays general workload metadata.
- Timeline: Shows when the workload was created and updated.
- Cluster and resources: Shows allocated resources.
- Output: Displays access endpoints for the workload.
- External host: URL for accessing the workspace externally.
- Internal host: URL for accessing it within the cluster.
Copy the External host URL and paste it in your browser, or click Open workspace to launch JupyterLab directly.
The workspace URL follows this structure:
https://workloads.amd-ai-workbench.example.com/NAMESPACE/USER-IDENTIFIER/WORKLOAD-ID/labReplace:
- NAMESPACE: The project namespace where the workspace is deployed.
- USER-IDENTIFIER: A slug derived from your username.
- WORKLOAD-ID: The unique identifier of the workload, visible in the workload details.
Verify that the JupyterLab page displays.

Click Python 3 under Notebook to create a new Python notebook.
Run the following code snippet in your JupyterLab notebook to verify that the environment is functional and that your AMD Instinct GPU is detected correctly.
pythonimport torch print("Hello from JupyterLab running on Vultr Cloud GPU with AMD Instinct MI3xx Series.") print("ROCm available:", torch.version.hip is not None) print("Number of detected GPUs:", torch.cuda.device_count()) if torch.cuda.device_count() > 0: for i in range(torch.cuda.device_count()): print(f"GPU {i}:", torch.cuda.get_device_name(i)) else: print("No AMD GPUs detected. Check your GPU allocation and environment.")
Confirm that the GPU information appears in the output.

Conclusion
By following this guide, you successfully deployed a JupyterLab workspace on Vultr Cloud GPU using AMD AI Workbench. The workspace provides a functional environment for building, testing, and accelerating your workloads on AMD Instinct™ GPUs. To serve models through an API, see How to Deploy an AMD Inference Microservice on Vultr Cloud GPU Using AMD AI Workbench. For more information, visit the official AI Workspaces documentation.