
How to Deploy Claude Code Projects on Vultr Using Coolify
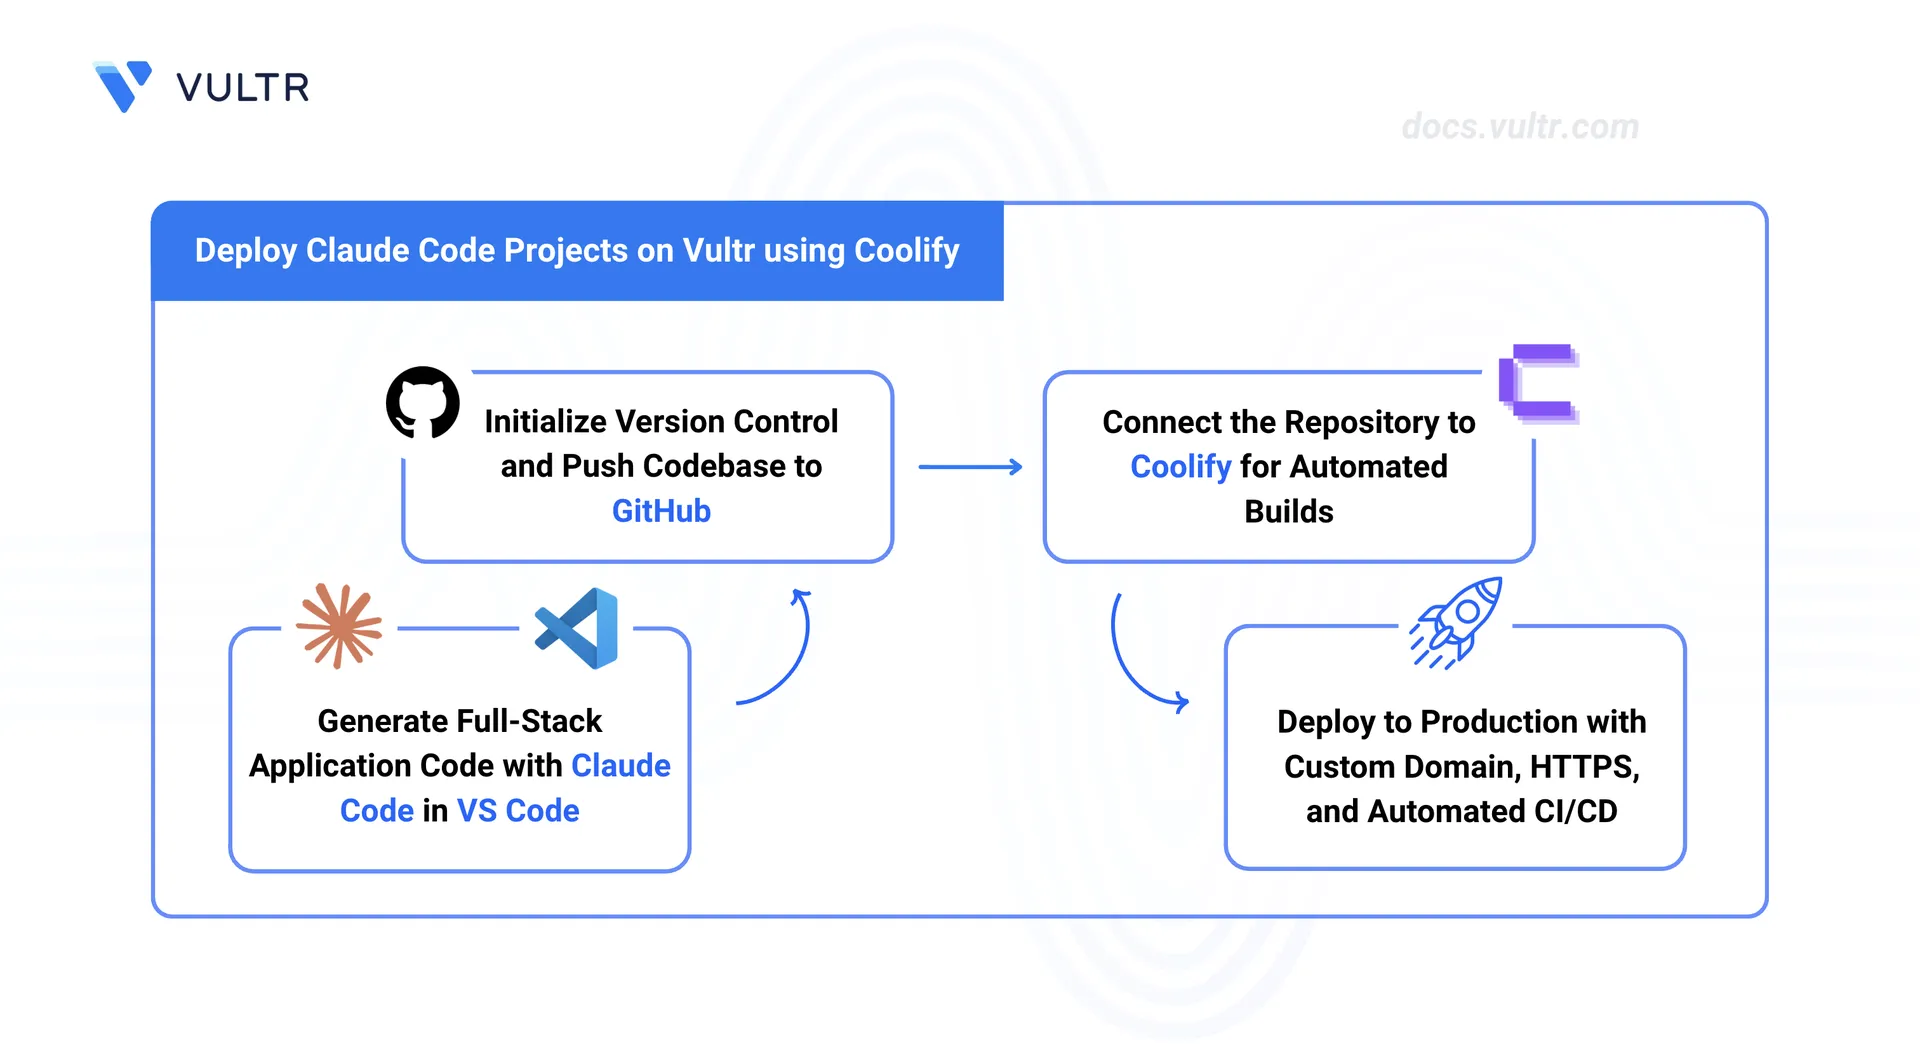
Claude Code is an interactive CLI tool that generates full-stack applications through conversational AI assistance, producing production-ready code repositories with Docker configurations. Coolify provides a self-hosted platform-as-a-service that simplifies deployment by automating Docker orchestration, reverse proxy configuration, and TLS certificate management.
This guide covers installing Claude Code, generating a full-stack application using AI, pushing the code to a GitHub repository, and deploying it with Coolify. The guide uses VS Code, but the steps are the same when using the Claude Code from a terminal.
Prerequisites
Before you begin, you need to:
- Have an Anthropic account with an API key, or a Claude subscription.
- Have a GitHub account.
- Deploy the Vultr Marketplace Application for Coolify with at least 2 GB RAM and 1 CPU core.
- Configure a domain name, such as
app.example.com, to point to your server's public IP address.
Set Up Claude Code with VS Code
Install the Claude Code extension in VS Code to generate and iterate on application code. The extension includes the Claude Code CLI, so no separate installation is required.
Download and install VS Code.
Open the Extensions view. Press Ctrl + Shift + X on Windows or Linux, or Cmd + Shift + X on macOS. Search for Claude Code and click Install.
Open a file or folder in VS Code. Click the Spark icon in the Editor Toolbar (top-right corner of the editor) to open the Claude Code panel. You are prompted to sign in on first use. Sign in using a Claude subscription or an Anthropic Console account. Refer to the Claude Code setup documentation for additional authentication options.
Open the integrated terminal. Press Ctrl +
`on Windows or Linux, or Cmd +`on macOS.Create a project directory.
console$ mkdir my-claude-app
Navigate into the project directory.
console$ cd my-claude-app
Initialize a Git repository.
console$ git init
Create an Application Using AI
Use Claude Code to generate a full-stack application with container support. At minimum, the application requires a Dockerfile for Coolify to build and deploy. If your application uses multiple services such as a database, you can also request a docker-compose.yml file.
Open the Claude Code panel in VS Code. Click the Spark icon in the Editor Toolbar, or press Ctrl + Esc on Windows or Linux, or Cmd + Esc on macOS.
Describe your application to Claude Code. Include your preferred technology stack, the features you need, and request a Dockerfile for containerized deployment. If your application requires multiple services, also ask for a docker-compose.yml file. Claude Code generates the source code, project structure, and container configurations based on your description.
Review the generated files in VS Code to verify the project structure and Docker configuration.
Optionally, test the application locally using the generated Docker configuration. Refer to the generated README for local setup and run instructions.
Stage all generated files.
console$ git add .
Commit the files to your local repository.
console$ git commit -m "Initial application generated with Claude Code"
Create a new repository on GitHub.
Add the GitHub repository as a remote. Replace
YOUR_USERNAMEandmy-claude-appwith your GitHub username and repository name.console$ git remote add origin https://github.com/YOUR_USERNAME/my-claude-app.git
Set the default branch to main.
console$ git branch -M main
Push the code to your GitHub repository.
console$ git push -u origin main
Your application is now in a GitHub repository. The following sections deploy this repository using Coolify. Alternatively, you can integrate the repository with platforms such as Supabase for managed database and backend hosting.
Access the Coolify Dashboard
After the marketplace instance finishes provisioning, access the Coolify web interface to complete the initial configuration.
Navigate to your instance's Management Page in the Vultr Console. Scroll down to App Instructions to find the Coolify endpoint URL. The format resembles
http://SERVER_IP:8000.Open the URL in your browser. The setup wizard prompts for an email address and password. Enter your credentials for the administrator account.
Coolify displays the dashboard after successful registration. This account has full control over deployments, team management, and server configuration.
Connect GitHub Repository
Coolify integrates with GitHub to deploy applications directly from source code repositories. Configure OAuth authentication to authorize repository access.
Click Sources in the Coolify dashboard.
Click Add Source and select GitHub.
Coolify redirects to GitHub for OAuth authorization. Click Authorize to grant access.
GitHub redirects back to Coolify after successful authorization. Coolify displays your GitHub account in the Sources list.
Create a New Project
Projects organize applications and resources within Coolify. Create a project for your Claude Code-generated application.
Click Projects in the Coolify dashboard.
Click Add Project.
Enter a project name, such as
my-claude-app.Click Create. Coolify displays the project details page.
Deploy the Application
Configure Coolify to build and deploy your application from the GitHub repository. Coolify detects Docker Compose configurations automatically.
Click Add Resource in the project details page.
Select Application as the resource type.
Choose GitHub as the source.
Select your Claude Code application repository from the dropdown.
Enter the branch name, typically
main.Coolify analyzes the repository and detects the Docker Compose configuration. Select Docker Compose as the build pack for multi-container applications.
Click Continue.
Coolify generates a temporary domain in the format
RANDOM_ID.SERVER_IP.sslip.iofor immediate testing. Configure a custom domain later for production use.Click Save. Coolify redirects to the application configuration page.
Configure Environment Variables
Claude Code applications often require environment variables for API keys, database credentials, or feature flags. Coolify provides a secure interface for managing secrets.
Navigate to the application details page.
Click Environment Variables.
Click +Add to create a new variable.
Enter the variable name and value. Common variables for Claude Code applications include:
DATABASE_URL- PostgreSQL connection string, such aspostgresql://user:pass@db:5432/dbnameAPI_KEY- External service API key, such assk_live_abc123NODE_ENV- Runtime environment, such asproductionREACT_APP_API_URL- Frontend API endpoint, such ashttps://api.example.com
Click Save after adding all required variables.
Start the Deployment
Initiate the build and deployment process to make your application live.
Click Deploy to trigger the deployment process.
Coolify initiates the deployment. Click Logs to monitor build progress.
The deployment process includes:
- Cloning the repository
- Building Docker images for each service
- Starting containers
- Configuring Traefik routing rules
- Requesting TLS certificates
The entire process completes in 3-5 minutes for typical applications.
When deployment completes successfully, the application status changes to Running.
Verify Deployment
Access your application through the temporary domain to confirm successful deployment.
Click Links in the application details page to view accessible URLs.
Click the Coolify-generated domain link to open your application.
Your application loads at
http://RANDOM_ID.SERVER_IP.sslip.io. Verify that all features function correctly.
Configure Custom Domain with HTTPS
Replace the temporary sslip.io domain with your custom domain for production use. Coolify automatically provisions Let's Encrypt TLS certificates.
Navigate to the application details page.
Click Configuration in the left sidebar.
Locate the Domains field and replace the Coolify-generated domain with your custom domain. Enter
https://app.example.comin the field.Enable Automatic HTTPS to provision Let's Encrypt certificates.
Click Save.
Click Redeploy to apply the domain configuration.
Coolify rebuilds the application with the new domain and requests an TLS certificate. This process takes 2-3 minutes.
Open your custom domain in a browser. Verify that the browser displays a padlock icon next to the URL, indicating a valid TLS certificate.
Add a Database
Claude Code applications typically require a PostgreSQL or MySQL database for persistent data storage. Coolify provides managed database containers.
Return to the project details page.
Click Add Resource.
Select Database.
Choose PostgreSQL as the database type.
Enter a database name, such as
app-db.Click Create. Coolify generates secure credentials automatically.
Copy the connection string from the database details page.
Navigate to your application's Environment Variables section.
Add or update the
DATABASE_URLvariable with the connection string.Click Restart to establish the database connection.
Configure CI/CD Pipeline
Coolify provides continuous deployment capabilities through GitHub webhooks. Configure automatic deployments to rebuild and redeploy your application whenever you push changes to the repository.
Enable Automatic Deployments
Navigate to the application details page.
Click Settings.
Enable Automatic Deployment.
Coolify displays a webhook URL. Copy the URL.
Open your GitHub repository settings.
Navigate to Webhooks and click Add webhook.
Paste the Coolify webhook URL in the Payload URL field.
Select application/json as the content type.
Choose Just the push event.
Click Add webhook.
GitHub sends a test payload to Coolify. Verify that the webhook shows a green checkmark.
Test the CI/CD Pipeline
Make a change to your application code.
Stage the changes.
console$ git add .
Commit the changes.
console$ git commit -m "Update application feature"
Push to GitHub.
console$ git push origin main
Coolify automatically detects the push event and initiates a new deployment.
Navigate to the application details page in Coolify.
Click Deployments to view the deployment history.
The most recent deployment appears at the top with a Building status.
Click Logs to monitor the build process in real time.
When the build completes successfully, the deployment status changes to Finished and the application restarts with the new code.
Configure GitHub Actions for Testing
Integrate GitHub Actions to run tests before Coolify deploys your application. This ensures only passing builds reach production.
Create the GitHub Actions workflow directory.
console$ mkdir -p .github/workflows
Open the workflow file in a text editor.
console$ nano .github/workflows/ci.yaml
Add the following configuration. Adjust test commands for your application stack.
yamlname: CI on: push: branches: [ main ] pull_request: branches: [ main ] jobs: test: runs-on: ubuntu-latest steps: - uses: actions/checkout@v4 - name: Run tests run: | # Add your test commands here # Example for Node.js: # npm install && npm test # Example for Go: # go test ./... echo "Tests passed"
Save and close the file.
Stage the workflow file.
console$ git add .github/workflows/ci.yaml
Commit the changes.
console$ git commit -m "Add CI workflow"
Push to GitHub.
console$ git push origin main
GitHub Actions runs the tests automatically on every push. Coolify deploys the application only after the workflow completes successfully.
Conclusion
You have successfully deployed a Claude Code-generated application using Vultr's Coolify Marketplace Application, configured environment variables, and secured the deployment with a custom domain and TLS certificate. For more information, refer to the official Coolify documentation.