How to Deploy JetBrains Junie Projects on Vultr Using Dokploy
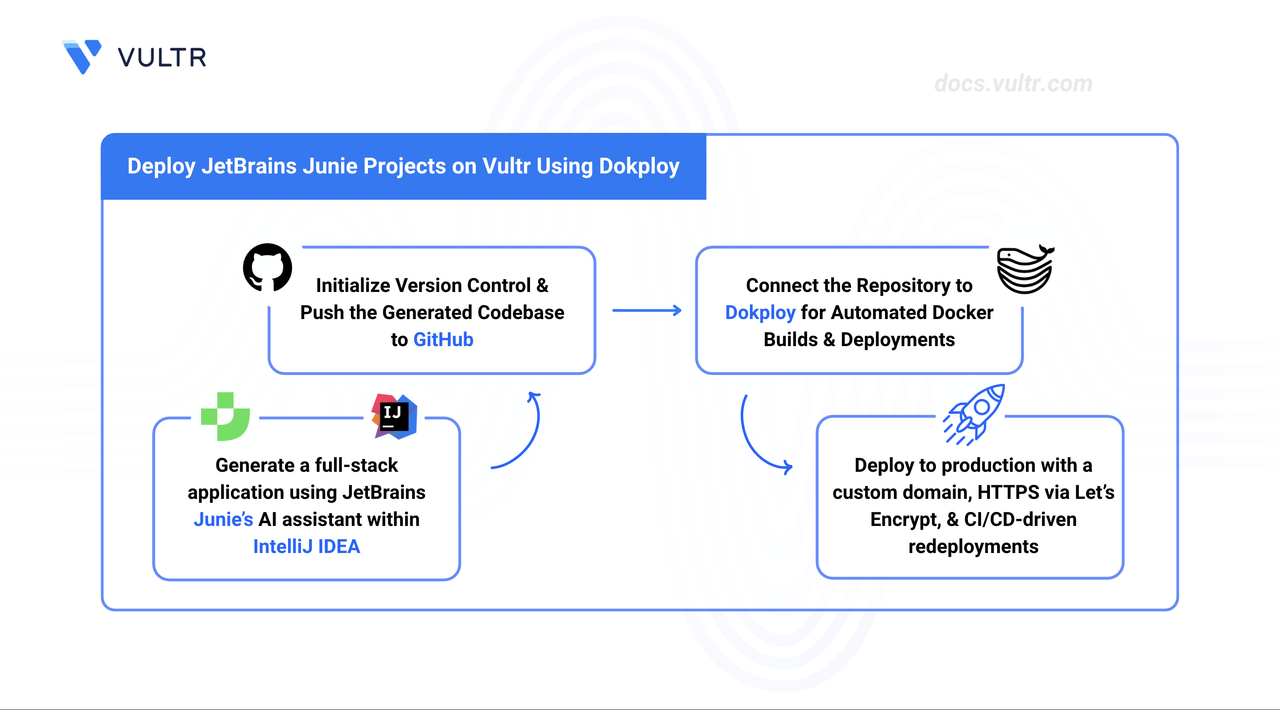
Junie is an agentic AI assistant integrated with JetBrains IntelliJ IDEA that automates modern application development by generating full-stack application code from a prompt. Dokploy is an open-source platform-as-a-service that offers a stable environment for hosting Docker-based deployments, with support for database and SSL certificate management.
This guide explains how to install Intellij IDEA with Junie, generate a full-stack application, and deploy the resulting code to a Vultr instance with Dokploy.
Prerequisites
Before you begin, you need to:
- Have an active JetBrains account.
- Have a GitHub account.
- Have access to an Ubuntu 24.04 server as a non-root user with sudo privileges.
- Install Dokploy and create your administrator account.
Set Up Junie in a JetBrains IDE
Prepare your development environment by installing the IDE (Integrated Development Environment) and the required AI plugins.
- Download and install IntelliJ IDEA.
- Open the application and create a new project.
- Set the project type to Empty Project or select your preferred framework configuration.
- Click the Junie icon in the right toolbar.
- Log in to your JetBrains account when prompted.
Create an Application Using AI
Use natural language prompts to generate application code and Docker configuration files.
- Provide a detailed description of your application in the chat prompt field. Specify your technology stack and instruct the agent to make the application compatible with Dokploy. Request a Dockerfile or a
docker-compose.yamlfile to ensure the application is ready for containerization. - Click Install and Continue to allow Junie to generate the codebase.
Push the Project to GitHub
Initialize a local Git repository and link it to GitHub to prepare for the Dokploy deployment pipeline.
Open the integrated terminal by pressing Alt + F12 on Windows/Linux or Opt + F12 on macOS.
Create a new repository on GitHub via the web interface.
Initialize the local repository.
CONSOLEStage the generated files for commit.
CONSOLECommit the files to your local repository.
CONSOLESet the default branch to main.
CONSOLEAdd your GitHub repository as a remote. Replace
YOUR_REPOSITORY_URLwith your repository's URL.CONSOLEPush the source code to GitHub.
CONSOLE
Connect GitHub Repository
Connect your GitHub account with Dokploy to grant it access to pull code from your repositories.
- Open the Dokploy dashboard in a web browser. If you have a domain configured for your Dokploy instance, navigate to it directly. Otherwise, use your instance’s IP address on port
3000(like192.0.2.1:3000). - Log in to the administrator account.
- Select Git under Settings in the left sidebar.
- Click GitHub, then click Create GitHub App.
- Follow the GitHub OAuth prompts to authorize the app and select the repositories Dokploy can access.
Create a New Project
Projects in Dokploy isolate different application environments.
- Click Projects in the left sidebar.
- Click Create Project, enter a project name, and click Create.
- Click on the newly created project to open it.
Connect the Code Repository
Deploy the application by specifying the source repository and creating a new Docker Compose service.
On your project page, click Create Service and select Compose.
Enter a name for your service and click Create.
Open your new Compose service.
Locate the GitHub configuration section.
Select your GitHub account and repository.
Set the correct Branch.
Click Save to apply the repository settings.
Open the
docker-compose.yamlfile in your local repository and make the following two adjustments to the web service before deploying:- Remove any
ports:mappings. Dokploy routes traffic through Traefik, and the web service does not need to bind a port on the host. - Add
dokploy-networkto the service's networks so Traefik can reach the container:
YAMLReplace
webwith the actual service name from your compose file.- Remove any
Commit and push the changes to your repository.
Configure Environment Variables
Environment variables securely provide sensitive values, such as API keys or secret tokens, to the container without hardcoding them.
In your application’s configuration page, click the Environment tab.
Each line defines a new environment variable as a key-value pair (
KEY=VALUE). Environment variable examples include:NODE_ENV: Specifies the deployment environment, such as development or production.API_SECRET_KEY: A secure key for accessing an API.DATABASE_URL: The connection string for database access.NEXT_PUBLIC_ANALYTICS_ID: A variable accessible by the browser/client code.
Enter your variables and click Save.
Start the Deployment
Dokploy automatically fetches the source code and creates the required Docker containers upon deploying your application.
- Switch to the General settings tab.
- Click Deploy, then click Confirm.
- Click View to monitor the real-time deployment logs.
Verify Deployment
Connect your domain for a production-ready URL and encrypted traffic. Dokploy provisions a Let’s Encrypt SSL certificate through Traefik when you enable HTTPS.
- Navigate to the Domains tab and click Add Domain.
- Select the name of your web service container in the Service Name field, for example
web. - Type your custom domain into the Host field.
- Enable the HTTPS toggle.
- Select Let’s Encrypt from the Certificate Provider dropdown.
- Click Create.
- Click Validate DNS to verify your domain’s DNS configuration.
Add a Database
Dokploy supports deploying managed database containers within the same project. The internal connection URL connects the database directly to your application over Docker’s internal network without exposing it to the internet.
- Navigate to your project page.
- Click Create Service and select Database.
- Select the database type that matches your application’s requirements.
- Enter a name for the database and click Create.
- Open the database service page and click Deploy.
- Copy the Internal Connection URL.
- Go to the Environment tab in your application’s configuration page.
- Create or update the
DATABASE_URLvariable and paste the copied connection URL as the value. - Click Save.
Configure CI/CD Pipeline
Dokploy automatically redeploys applications whenever you push new code to the GitHub repository. Verify that automatic deployments work.
Test the CI/CD Pipeline
Make a small change to your code and push it.
Make a small, visible change to your application's code.
Stage the modified files.
CONSOLECommit the change.
CONSOLEPush the change to your GitHub repository.
CONSOLEClick the Deployments tab in the top navigation bar of your Dokploy application’s configuration page.
Verify that a new deployment process is running at the top of the list.
Conclusion
You have successfully generated a full-stack application using Junie, pushed it to GitHub, and deployed it to a Vultr instance using Dokploy with HTTPS and an automated CI/CD pipeline. For more information and advanced configuration options, visit the official Dokploy documentation.
Tags:Dokploy


0 Comments
Be the first to comment and share your perspective with the community.