
How to Deploy Mattermost – An Open-Source Slack Alternative
Mattermost is an open-source messaging and collaboration platform that enables teams to communicate through real-time messaging, voice calls, and screen sharing. It is an alternative to platforms such as Slack, with support for file sharing, notifications, webhooks, and bot integrations.
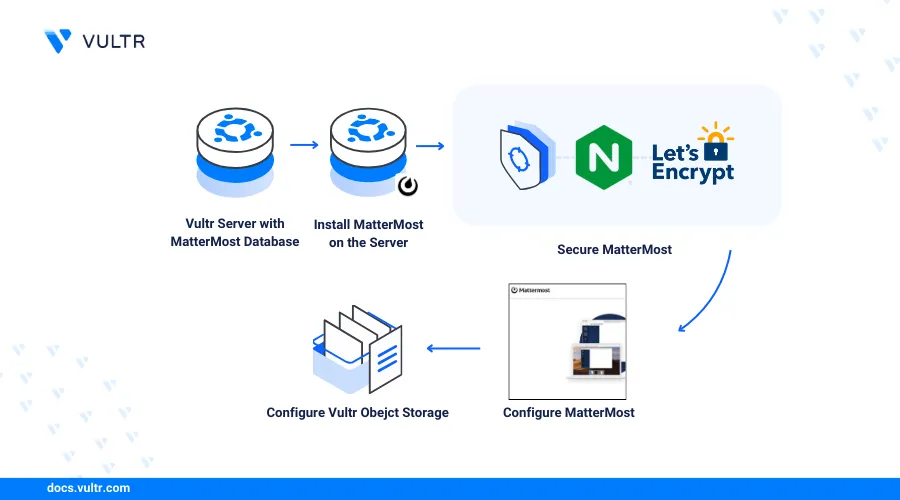
This article explains how to deploy Mattermost on an Ubuntu server and configure it with a domain name. It covers integration with a Vultr Managed Database for PostgreSQL for high availability, Nginx as a reverse proxy with TLS certificates, Postfix for email notifications, and Vultr Object Storage for file storage.
Prerequisites
Before you begin:
- Have access to a Ubuntu 22.04 server with at least 4 GB of RAM as a non-root user with sudo privileges.
- Deploy a Vultr Managed Database for PostgreSQL to use with Mattermost.
- Create a Vultr Object Storage subscription and a bucket to store your Mattermost files. For example,
mattermost-data. - Create a DNS A record pointing to the server IP address. For example,
mattermost.example.com.
Set Up the Mattermost Database
Mattermost stores user accounts, application data, and runtime configurations in a PostgreSQL database. Using a Vultr Managed Database offloads storage and backups from your server and provides automatic failover.
Install the PostgreSQL client package on your server.
console$ sudo apt install postgresql-client
Connect to your Vultr Managed Database for PostgreSQL cluster using the
psqlutility. ReplaceDB_HOSTwith your cluster hostname andDB_PORTwith the connection port found in the Vultr Console.console$ psql -h DB_HOST -U vultradmin -p DB_PORT -d defaultdb
Enter your Vultr Managed Database password when prompted.
Create a new database for Mattermost. For example,
mattermostdb.sqldefaultdb=> CREATE DATABASE mattermostdb;
Create a new PostgreSQL user role for the database. For example,
mmadmin.sqldefaultdb=> CREATE USER mmadmin WITH PASSWORD 'your-password';
Grant the user full privileges on the Mattermost database.
sqldefaultdb=> GRANT ALL PRIVILEGES ON DATABASE mattermostdb to mmadmin;
Grant the user access to all objects in the
publicschema.sqldefaultdb=> GRANT USAGE, CREATE ON SCHEMA PUBLIC TO mmadmin;
Transfer ownership of the
mattermostdbdatabase to the new user.sqldefaultdb=> ALTER DATABASE mattermostdb OWNER TO mmadmin;
Exit the PostgreSQL console.
sqldefaultdb=> \q
Connect to the cluster using the Mattermost database and user. Replace
DB_HOSTandDB_PORTwith your cluster connection details.console$ psql -h DB_HOST -U mmadmin -p DB_PORT -d mattermostdb
Enter the
mmadminpassword when prompted.List all databases to verify that
mattermostdbappears withmmadminas the owner.sqlmattermostdb=> \l
Verify that
mattermostdbappears in the list withmmadminas the owner.List of databases Name | Owner | Encoding | Collate | Ctype | Access privileges ------------+----------+----------+-------------+-------------+----------------------- _dodb | postgres | UTF8 | en_US.UTF-8 | en_US.UTF-8 | =T/postgres + | | | | | postgres=CTc/postgres defaultdb | vultradmin | UTF8 | en_US.UTF-8 | en_US.UTF-8 | mattermostdb | mmadmin | UTF8 | en_US.UTF-8 | en_US.UTF-8 | =Tc/mmadmin + | | | | | mmadmin=CTc/mmadmin template0 | postgres | UTF8 | en_US.UTF-8 | en_US.UTF-8 | =c/postgres + | | | | | postgres=CTc/postgres template1 | postgres | UTF8 | en_US.UTF-8 | en_US.UTF-8 | =c/postgres + | | | | | postgres=CTc/postgres (5 rows)Exit the PostgreSQL console.
sqlmattermostdb=> \q
Install Mattermost
Mattermost distributes packages through its own apt repository. Adding the repository GPG key and running the setup script imports all repository metadata and ensures package authenticity.
Add the Mattermost GPG public key to the server keyring.
console$ curl -sL -o- https://deb.packages.mattermost.com/pubkey.gpg | gpg --dearmor | sudo tee /usr/share/keyrings/mattermost-archive-keyring.gpg > /dev/null
Download and run the Mattermost repository setup script.
console$ curl -o- https://deb.packages.mattermost.com/repo-setup.sh | sudo bash -s mattermost
The script imports the Mattermost repository information on your server.
Update the server package index.
console$ sudo apt update
Install Mattermost.
console$ sudo apt install mattermost -y
Check the Mattermost service status to verify that the package is installed.
console$ sudo systemctl status mattermost
The service is installed but not running. The next section configures the database connection and domain before the service starts.
Configure Mattermost
Mattermost creates the /opt/mattermost directory on your server containing the full application and configuration files. The config/config.json file within that directory controls the database connection, site URL, and all other runtime settings.
Navigate to the Mattermost configuration directory.
console$ cd /opt/mattermost/config/
Copy the default configuration file and rename it to
config.json.console$ cp config.defaults.json config.json
Transfer ownership of
config.jsonto the Mattermost system user.console$ sudo chown mattermost:mattermost config.json
Set the file permissions to
600to prevent other system users and processes from reading the file.console$ sudo chmod 600 config.json
List the directory contents to verify the permission changes.
console$ ls -l
The
rw-------permissions onconfig.jsonconfirm that only the Mattermost user can read or write the file.Open
config.jsonin a text editor.console$ sudo nano config.json
Find the
ServiceSettingssection and setSiteURLto your domain. Replacemattermost.example.comwith your actual domain.json"SiteURL": "https://mattermost.example.com",
Find the
SqlSettingssection and replace theDataSourcevalue with your Vultr Managed Database connection string. Replacemmadmin,your-password,DB_HOST,DB_PORT, andmattermostdbwith your actual values. Also changesslmodefromdisabletorequire.json"DataSource": "postgres://mmadmin:your-password@DB_HOST:DB_PORT/mattermostdb?sslmode=require&connect_timeout=10&binary_parameters=yes",
Save and close the file.
Start the Mattermost service to validate and apply the configuration.
console$ sudo systemctl start mattermost
Wait at least 5 minutes for Mattermost to apply all configurations and write the initial data to the PostgreSQL database. If the service fails to start, check the logs to identify the error.
console$ sudo tail -n 20 /var/log/syslog
Check the Mattermost service status to verify that it is running.
console$ sudo systemctl status mattermost
Verify that the output shows
Active: active (running).
Set Up Nginx as a Reverse Proxy
Mattermost listens on port 8065 by default and is not directly exposed to the internet. Nginx acts as a reverse proxy, accepting public connections on ports 80 and 443 and forwarding them to the Mattermost backend.
Update the server package index.
console$ sudo apt update
Install Nginx.
console$ sudo apt install nginx -y
Remove the default Nginx configuration to avoid conflicts on port 80.
console$ sudo rm /etc/nginx/sites-enabled/default
Create a new Nginx configuration file for Mattermost. Replace
mattermost.example.comwith your domain.console$ sudo nano /etc/nginx/sites-available/mattermost.example.com
Add the following configuration, replacing
mattermost.example.comwith your actual domain.iniupstream mattermost { server 127.0.0.1:8065; keepalive 32; } server { listen 80 default_server; server_name mattermost.example.com; return 301 https://$server_name$request_uri; } server { listen 443 ssl http2; listen [::]:443 ssl http2; server_name mattermost.example.com; http2_push_preload on; ssl_certificate /etc/letsencrypt/live/mattermost.example.com/fullchain.pem; ssl_certificate_key /etc/letsencrypt/live/mattermost.example.com/privkey.pem; ssl_session_timeout 1d; ssl_protocols TLSv1.2 TLSv1.3; ssl_early_data on; ssl_ciphers 'ECDHE-ECDSA-AES256-GCM-SHA384:ECDHE-RSA-AES256-GCM-SHA384:ECDHE-ECDSA-CHACHA20-POLY1305:ECDHE-RSA-CHACHA20-POLY1305:ECDHE-ECDSA-AES256-SHA384:ECDHE-RSA-AES256-SHA384'; ssl_prefer_server_ciphers on; ssl_session_cache shared:SSL:50m; add_header Strict-Transport-Security max-age=15768000; ssl_stapling on; ssl_stapling_verify on; add_header X-Early-Data $tls1_3_early_data; location ~ /api/v[0-9]+/(users/)?websocket$ { proxy_set_header Upgrade $http_upgrade; proxy_set_header Connection "upgrade"; client_max_body_size 50M; proxy_set_header Host $http_host; proxy_set_header X-Real-IP $remote_addr; proxy_set_header X-Forwarded-For $proxy_add_x_forwarded_for; proxy_set_header X-Forwarded-Proto $scheme; proxy_set_header X-Frame-Options SAMEORIGIN; proxy_buffers 256 16k; proxy_buffer_size 16k; client_body_timeout 60s; send_timeout 300s; lingering_timeout 5s; proxy_connect_timeout 90s; proxy_send_timeout 300s; proxy_read_timeout 90s; proxy_http_version 1.1; proxy_pass http://mattermost; } location / { client_max_body_size 100M; proxy_set_header Connection ""; proxy_set_header Host $http_host; proxy_set_header X-Real-IP $remote_addr; proxy_set_header X-Forwarded-For $proxy_add_x_forwarded_for; proxy_set_header X-Forwarded-Proto $scheme; proxy_set_header X-Frame-Options SAMEORIGIN; proxy_buffers 256 16k; proxy_buffer_size 16k; proxy_read_timeout 600s; proxy_http_version 1.1; proxy_pass http://mattermost; } } map $ssl_early_data $tls1_3_early_data { "~." $ssl_early_data; default ""; }
Save and close the file.
The configuration redirects all HTTP connections to HTTPS and forwards both standard requests and WebSocket connections to Mattermost on port
8065.Link the configuration file to the
sites-enableddirectory. Replacemattermost.example.comwith your actual domain name.console$ sudo ln -s /etc/nginx/sites-available/mattermost.example.com /etc/nginx/sites-enabled/
Do not restart Nginx yet. TLS certificates must exist at the paths referenced in the configuration before Nginx can start without errors.
Secure the Mattermost Server
Ubuntu's Uncomplicated Firewall (UFW) restricts incoming connections by default. Open ports 80 and 443 to allow Let's Encrypt domain validation and HTTPS access, then generate TLS certificates for your domain.
Allow HTTP traffic on port 80 for Let's Encrypt domain validation.
console$ sudo ufw allow 80 comment 'mattermost http'
Allow HTTPS traffic on port 443 for secure client access.
console$ sudo ufw allow 443 comment 'mattermost https'
Reload UFW to apply the changes.
console$ sudo ufw reload
Check the firewall rules to verify that ports 80 and 443 are open.
console$ sudo ufw status
Generate TLS Certificates
Install the Certbot plugin for Nginx.
console$ sudo apt install python3-certbot-nginx -y
Generate TLS certificates for your domain using the
certonlyoption to avoid Certbot modifying the Nginx configuration. Replacemattermost.example.comwith your actual domain.console$ sudo certbot --standalone certonly -d mattermost.example.com --agree-tos
Enter your email address when prompted. Verify that the output confirms that the certificate files are saved at
/etc/letsencrypt/live/mattermost.example.com/.Test the Nginx configuration for syntax errors.
console$ sudo nginx -t
Expected output:
nginx: the configuration file /etc/nginx/nginx.conf syntax is ok
nginx: configuration file /etc/nginx/nginx.conf test is successful
Restart Nginx to apply the Mattermost configuration.
console$ sudo systemctl restart nginx
Access Mattermost
Mattermost displays a setup wizard on first access to create the administrator account and configure the workspace.
Open a web browser and navigate to your Mattermost domain.
https://mattermost.example.comVerify that the Mattermost setup interface loads in your browser.
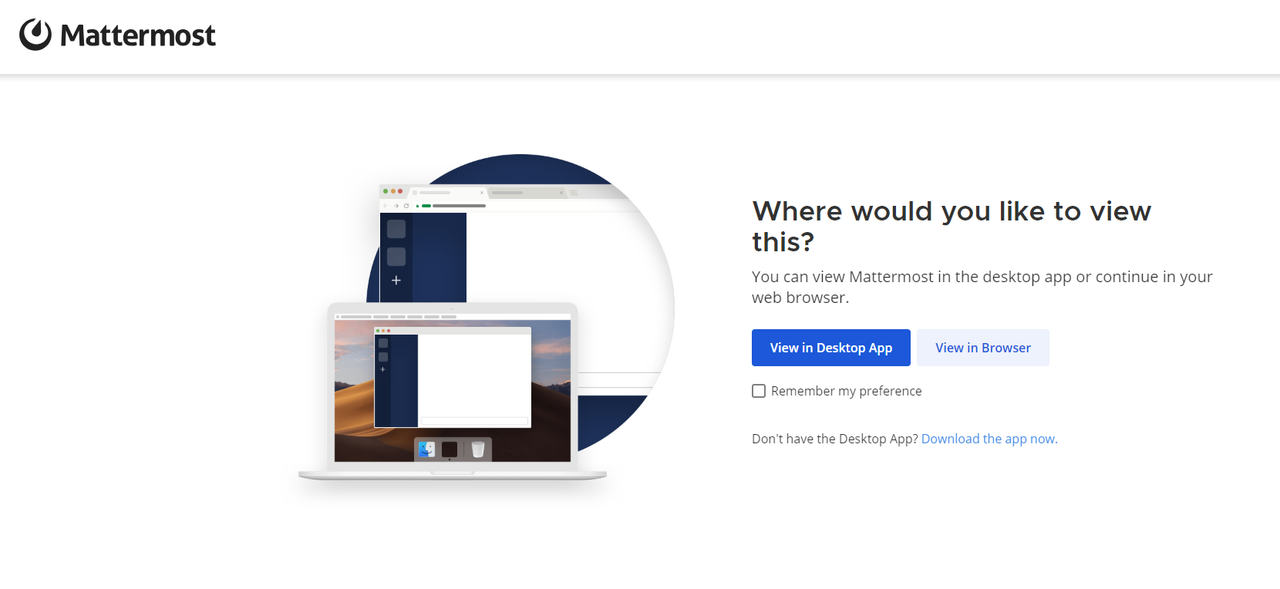
Click View in Browser to access the account setup options.
Enter your email address in the Email address field within the Create your account form.
Enter your administrator username in the Choose a Username field, then enter a strong password.
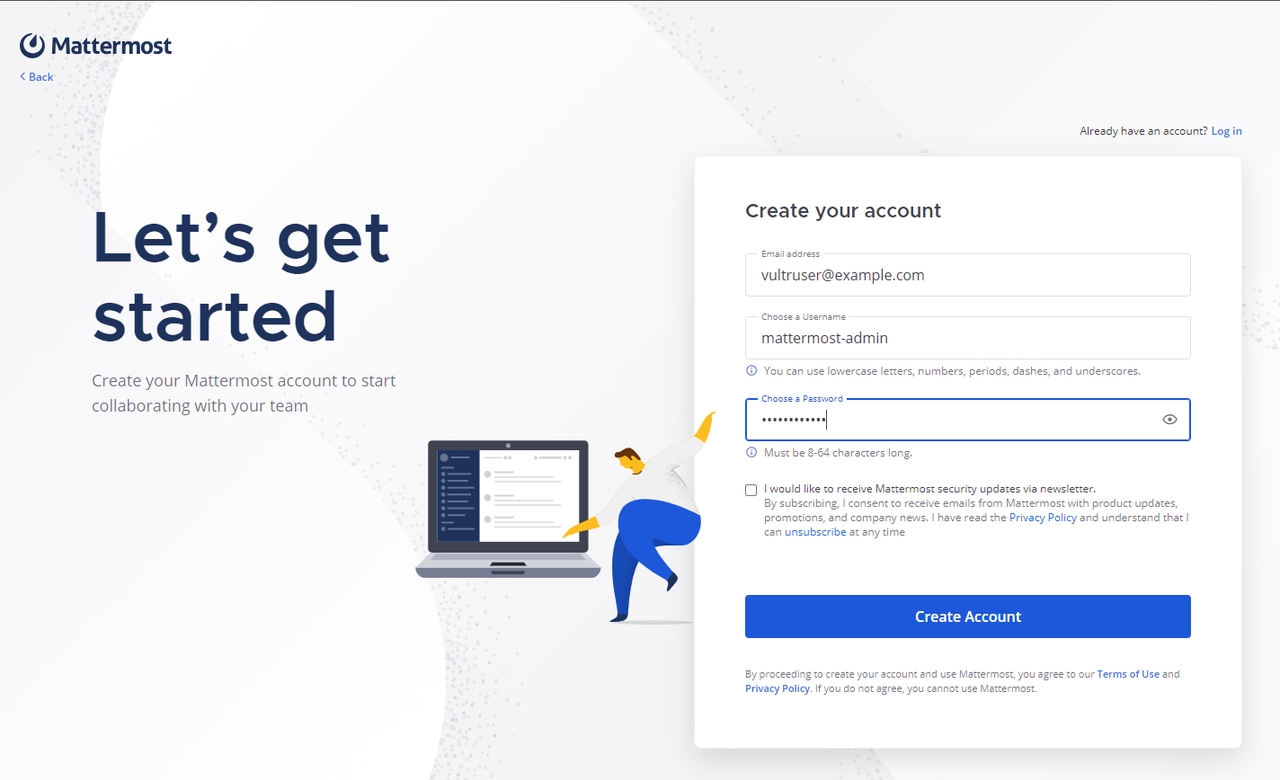
Click Create Account to create the administrator account.
Enter your workspace name in the Organization name field.
Select the external tools to activate in your Mattermost workspace and click Continue to save the selection. For example, select
GitHubandZoom.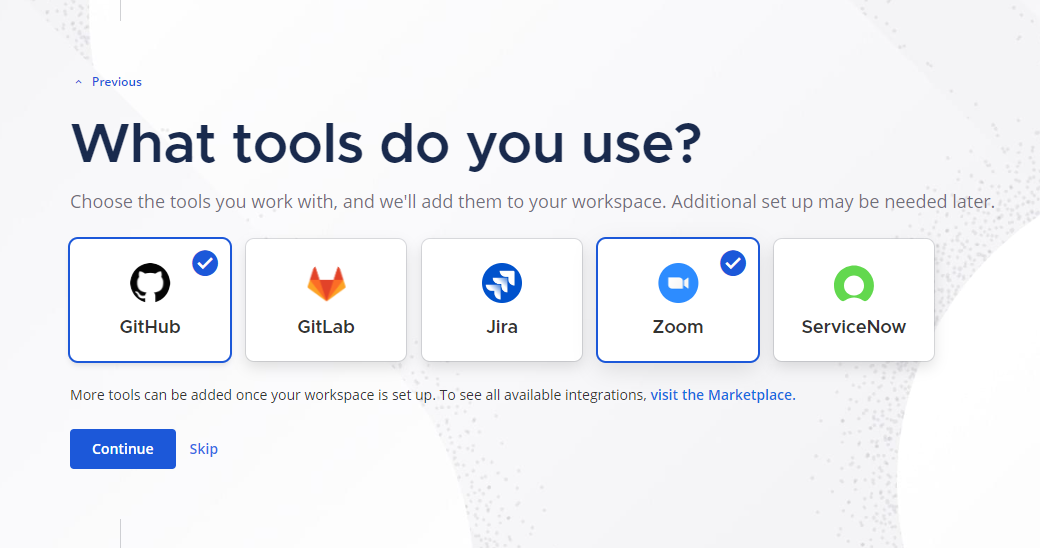
Click Copy Link to copy and share your Mattermost invite link with your target users.
Click Finish setup to apply the configuration and open the Mattermost workspace.
Click Browse or Create Channels next to your Mattermost team name to set up a new channel.
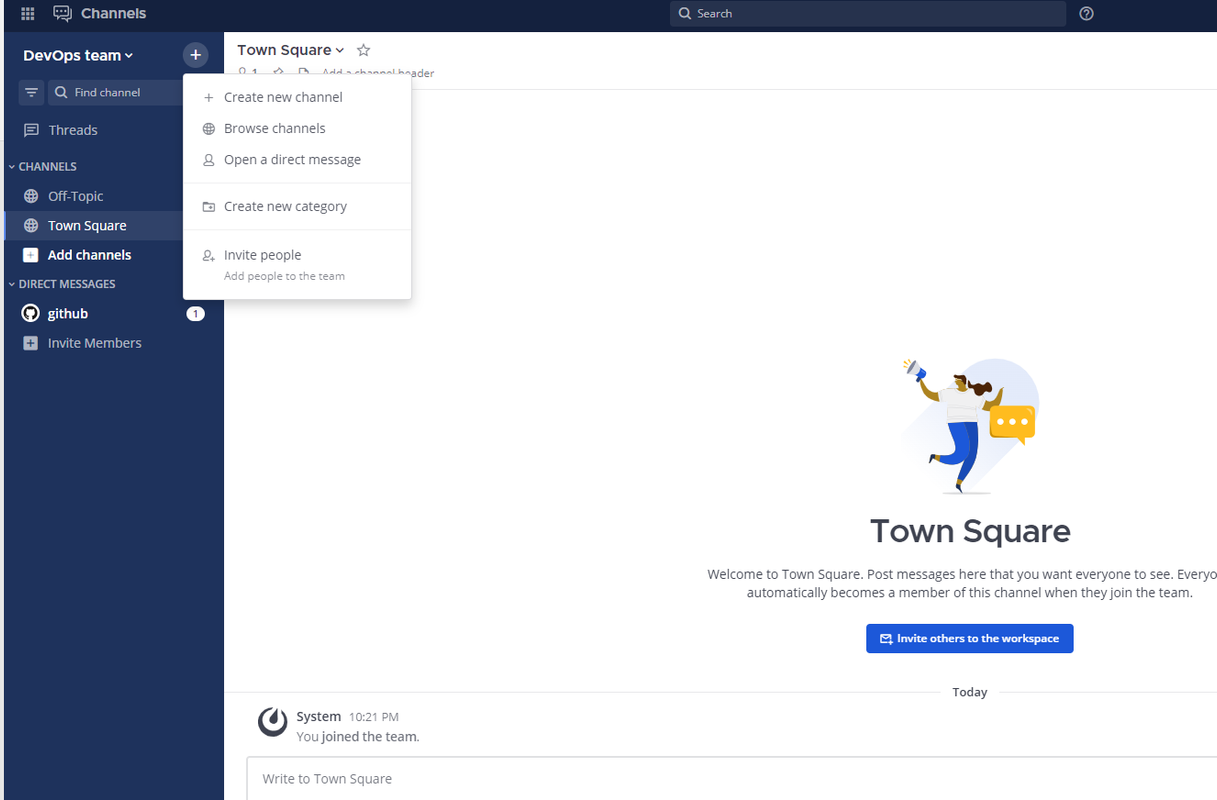
Select Create new channel from the list of options.
Enter a channel name and set your visibility options. For example, enter
mynewteamand select Public Channel to allow all workspace users to access the channel.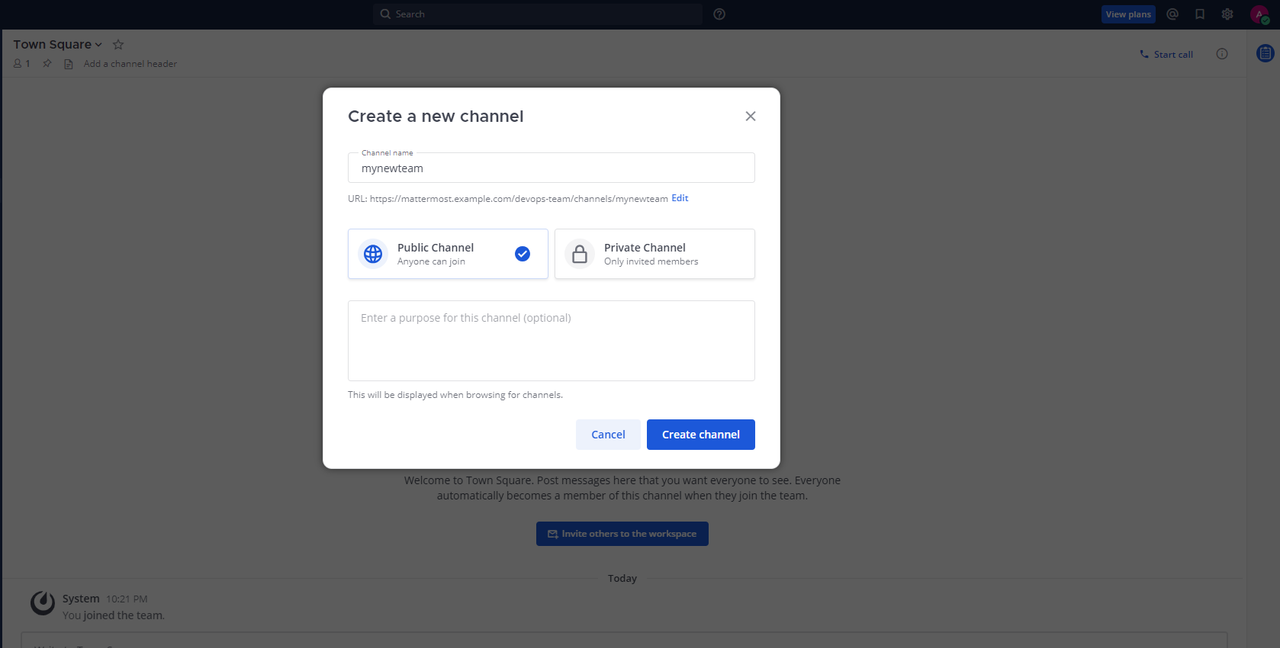
Enter a channel description and click Create channel.
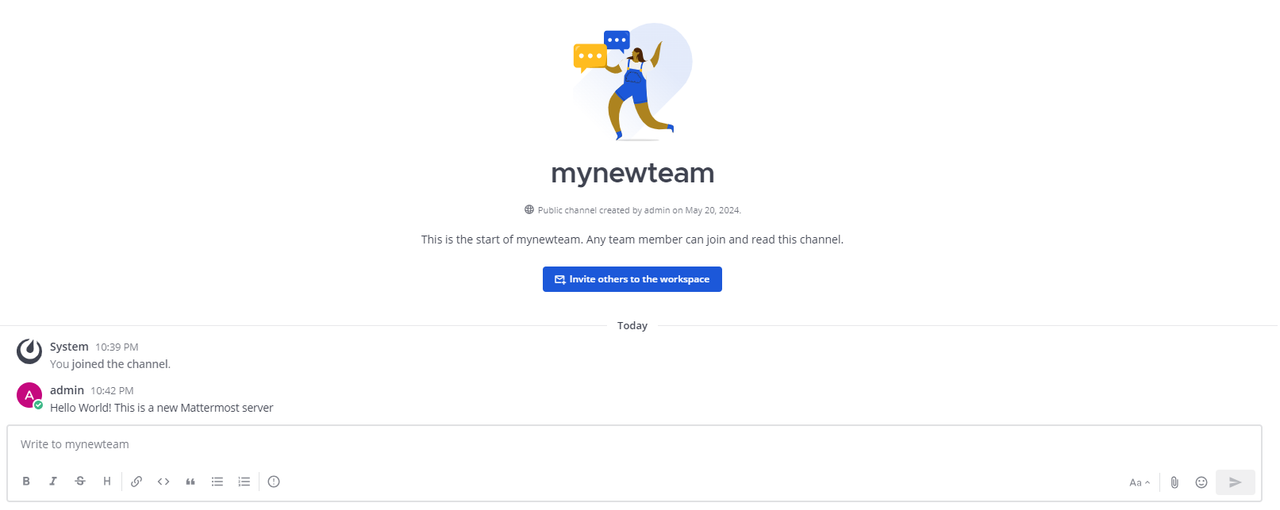
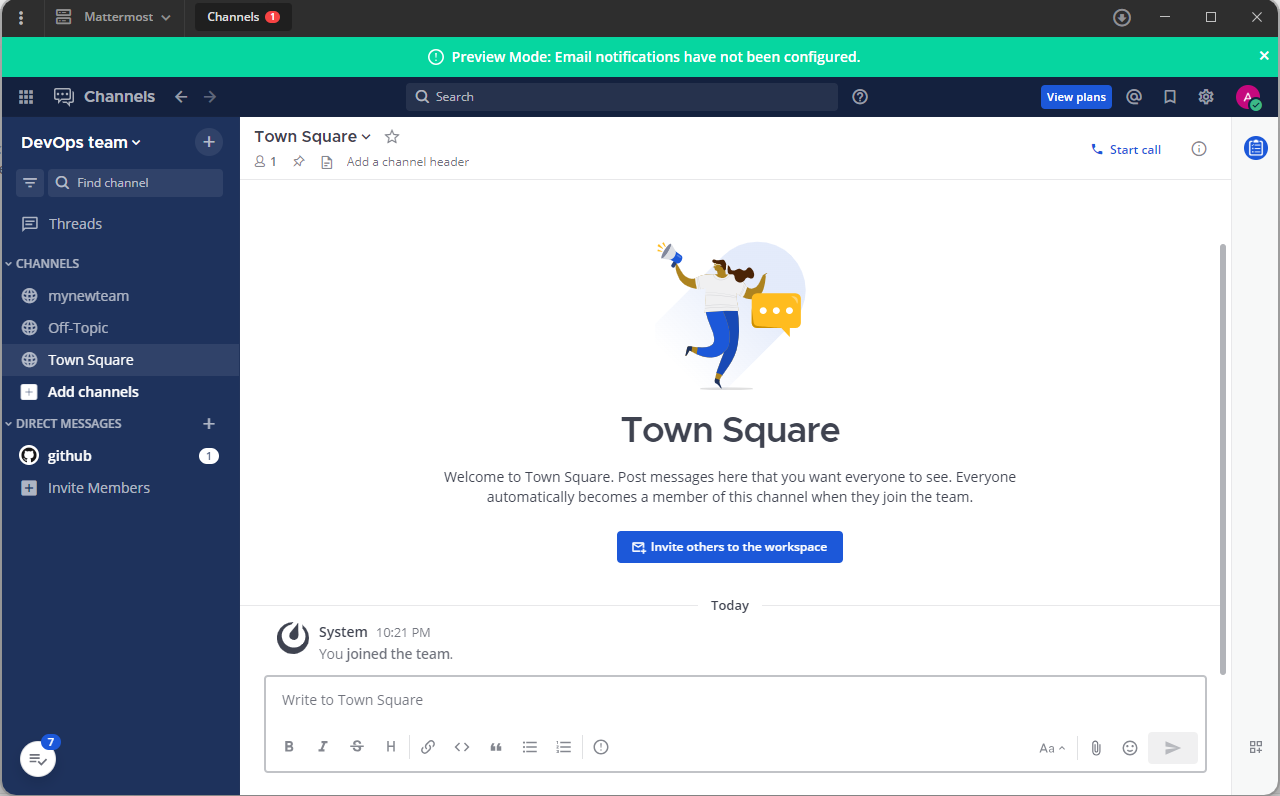
Verify that the channel appears in the Channels list.
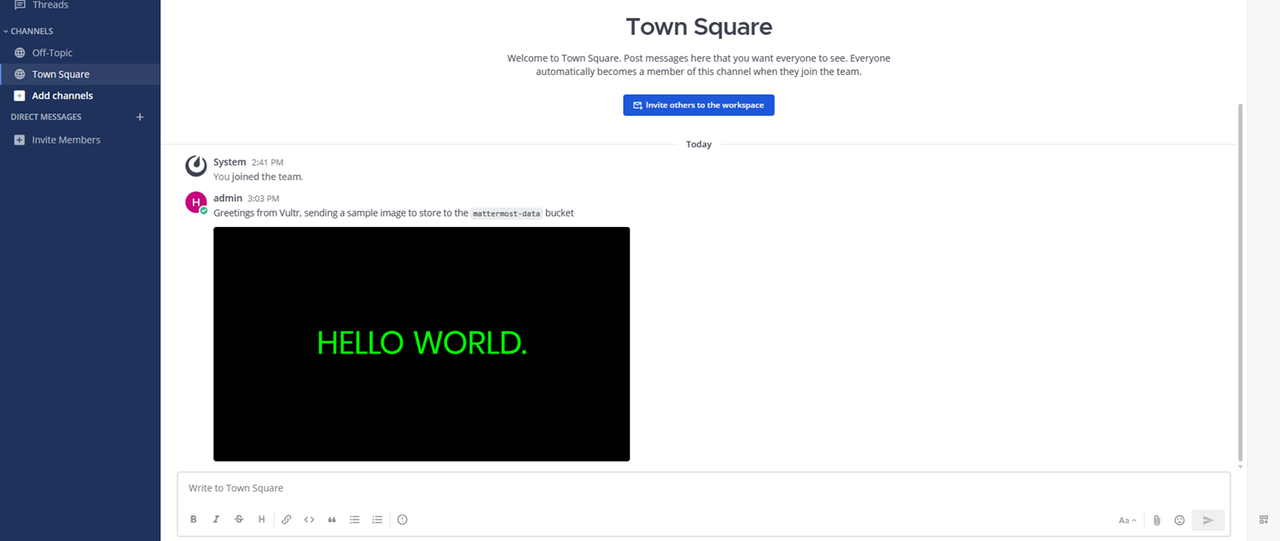
Enter a sample message in the channel to verify that the server is working correctly. For example, enter
Hello World! This is a new Mattermost serverand press Enter to send the message.Verify that the message appears in the channel.
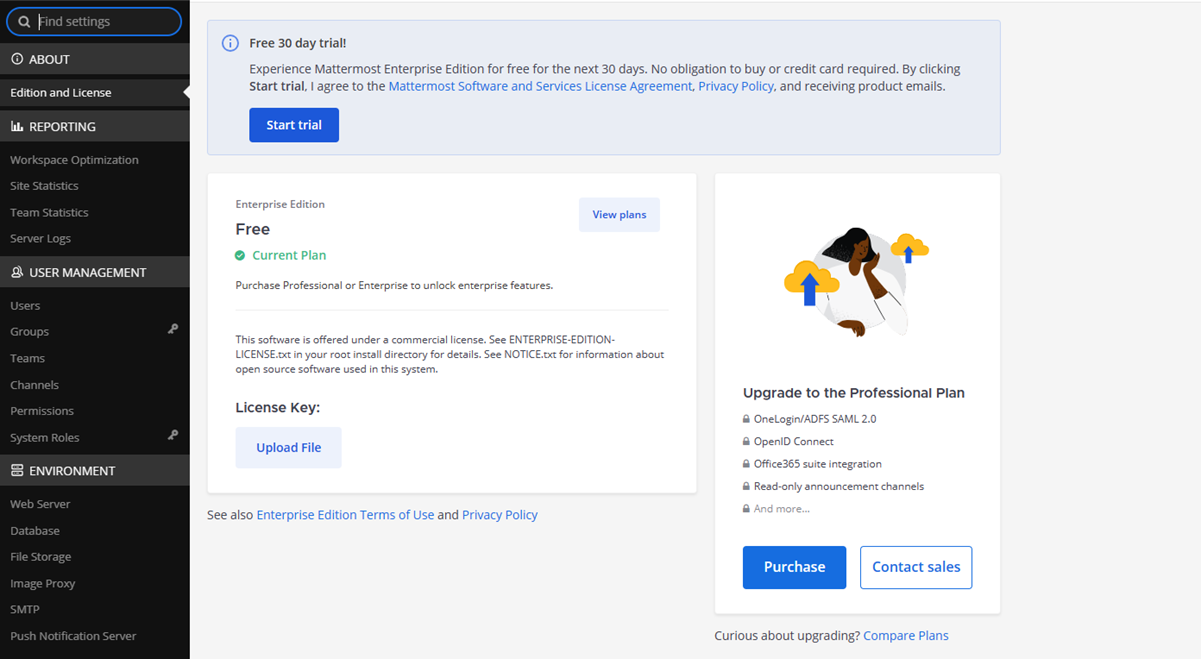
Open the main Mattermost menu next to Channels on the top navigation bar and select System Console to open the administrator console. Alternatively, navigate to
/admin_consoleon your domain.https://mattermost.example.com/admin_consoleVerify that the Mattermost administrator console loads and displays the edition and license version installed on your server.
Find the USER MANAGEMENT section in the main navigation menu and click Users to view the list of workspace users.
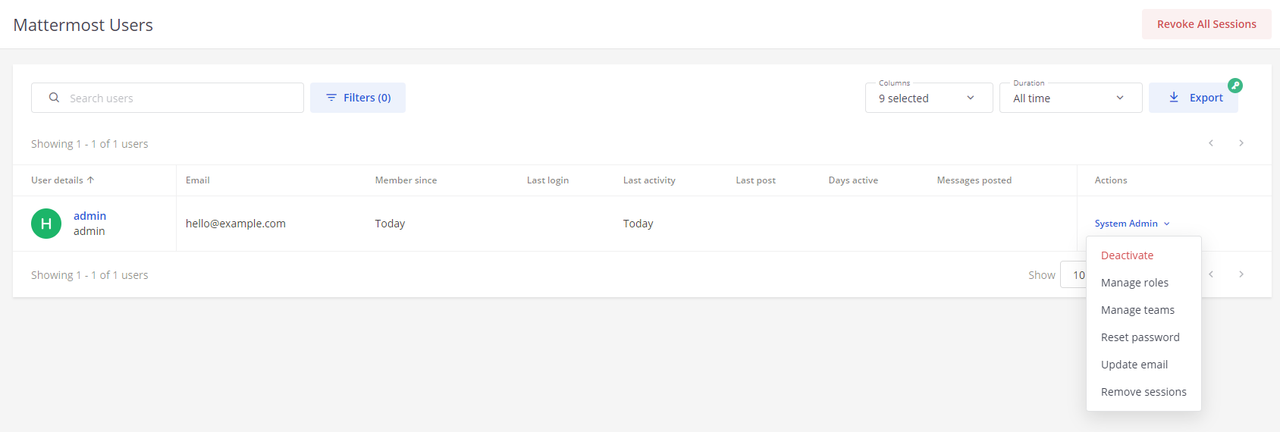
Verify the user list and click the Actions menu to modify user roles.
Click Save to apply your changes.
Find the AUTHENTICATION section in the main navigation menu and click Signup to configure how users register.
Enter a comma-separated list of domain names in the Restrict new system and team members…. field to limit registration to specific email domains. For example, enter
example.com,example.net.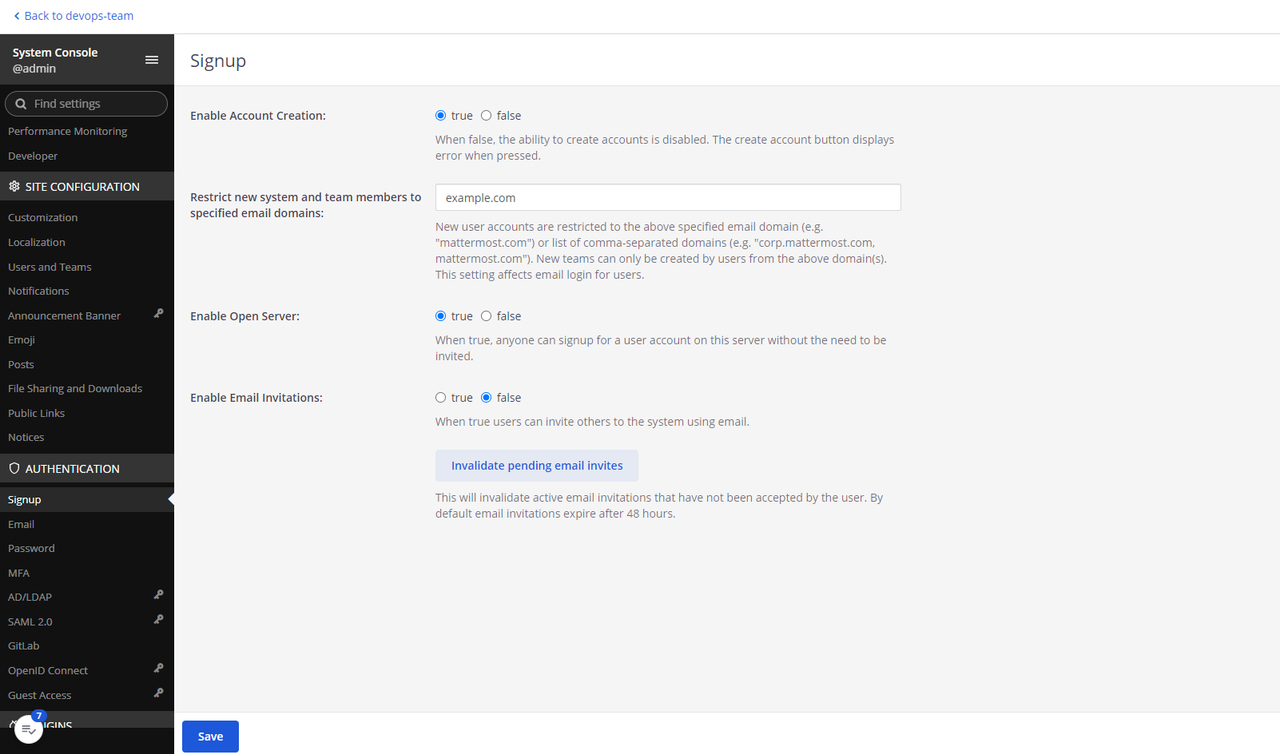
Set Enable Open Server to true to allow new users with matching email domains to create accounts. Keep it set to false to disable self-registration and accept only invited users.
Click Save to apply the workspace configuration.
Enable Email Notifications
Mattermost sends notifications through an SMTP server. A Preview Mode: Email notifications have not been configured. alert displays in the interface when email is not configured. These steps install and configure Postfix as a send-only SMTP server for outgoing notifications.
Update the server package index.
console$ sudo apt update
Set the server hostname to your Mattermost domain. Replace
mattermost.example.comwith your actual domain.console$ sudo hostnamectl set-hostname mattermost.example.com
Install the Postfix
mailutilspackage.console$ sudo apt install mailutils -y
When prompted, select Internet Site and enter your domain as the system mail name.
Back up the original Postfix configuration file.
console$ sudo cp /etc/postfix/main.cf /etc/postfix/main.ORIG
Open the Postfix configuration file.
console$ sudo nano /etc/postfix/main.cf
Find the
inet_interfacesdirective and change its value fromalltoloopback-only.iniinet_interfaces = loopback-only
Find the
mydestinationdirective and replace its value with the following.inimydestination = localhost.$mydomain,localhost,$myhostname
Save and close the file.
Restart Postfix to apply the configuration changes.
console$ sudo systemctl restart postfix
Send a test email to verify that Postfix is working. Replace
johndoe@example.comwith your email address.console$ echo "The Mattermost SMTP Server is ready to use" | mail -s "Hello from the Mattermost Server" johndoe@example.com
Check the server logs to verify that the email was sent.
console$ sudo tail -n 10 /var/log/syslog
Output:
mattermost postfix/smtp[3869]: 0316A1FEBED: to=<johndoe@example.com>, relay=mail.example.com[192.0.2.200]:25, delay=2, delays=0/0/1/1, dsn=2.0.0, status=sent (250 OK id=1s99jD-005ocG-6w)Check your inbox to verify that an email from
server-username@your-mattermostdomainarrived. Emails sent to domains such asgmail.commay bounce due to missing MX and SPF DNS records on your domain.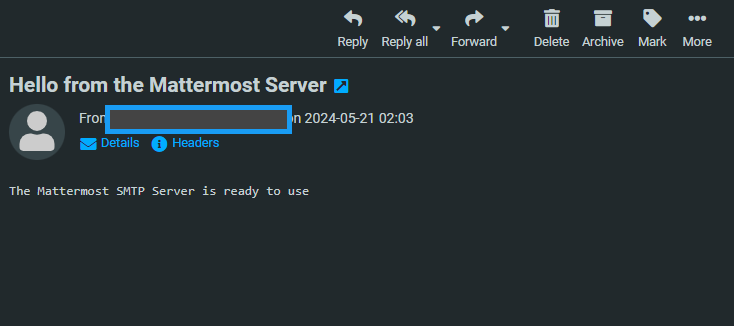
Configure Mattermost to Use Postfix
Open the Mattermost administrator console.
https://mattermost.example.com/admin_consoleFind the ENVIRONMENT section in the main navigation menu and click SMTP to modify the email configuration.
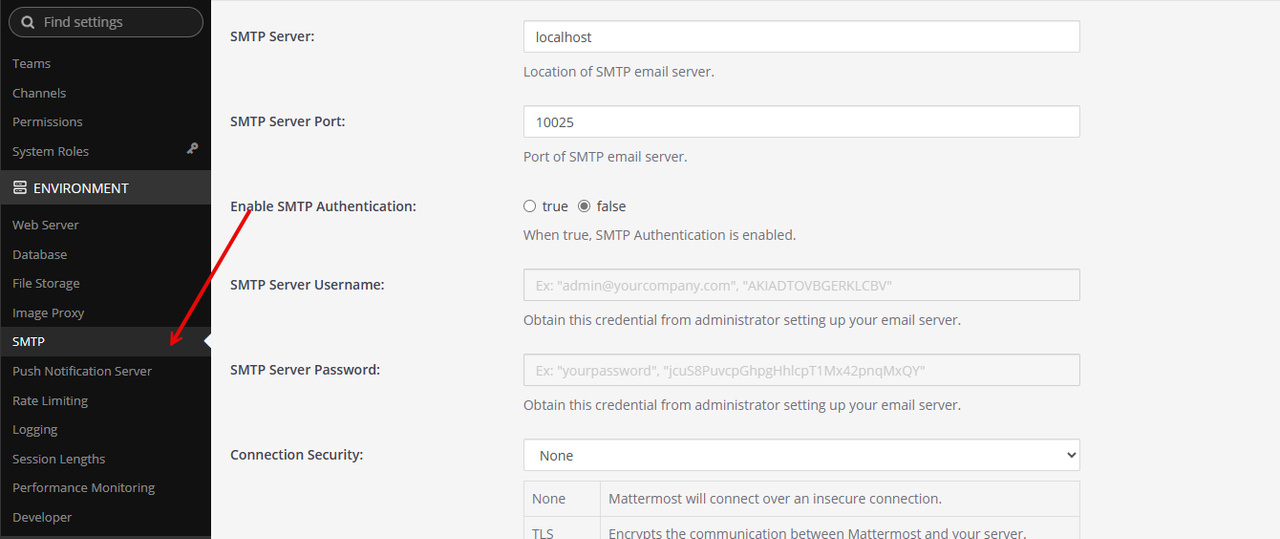
Keep
localhostas the SMTP Server value.Replace the default value
10025with25in the SMTP Server Port field.Set Skip Server Certificate Verification to true to disable verification of the Postfix certificate.
Click Save to apply the SMTP configuration.
Click Test Connection to validate the SMTP connection. Verify that a
No errors were reported while sending an email. Please check your inbox to make sure.message appears.
Enable Vultr Object Storage
By default, Mattermost stores file and image attachments in /opt/mattermost/data. Vultr Object Storage provides an S3-compatible endpoint that Mattermost can use instead, keeping attachments off the server disk.
Open the Mattermost administrator console.
https://mattermost.example.com/admin_consoleFind the ENVIRONMENT section in the main navigation menu and click File Storage.
Click the File Storage System dropdown and select Amazon S3.
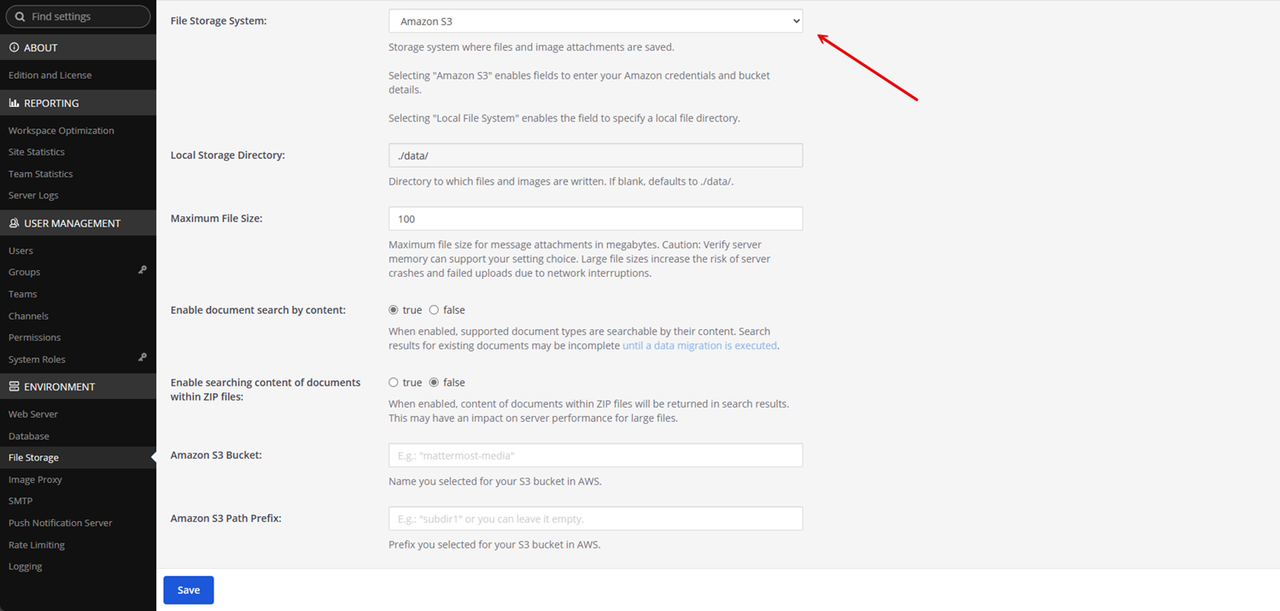
Enter your Vultr Object Storage bucket name in the Amazon S3 Bucket field.
Leave the Amazon S3 Path Prefix and Amazon S3 Region fields empty.
Enter your Vultr Object Storage access key in the Amazon S3 Access Key ID field.
Enter your Vultr Object Storage hostname in the Amazon S3 Endpoint field.
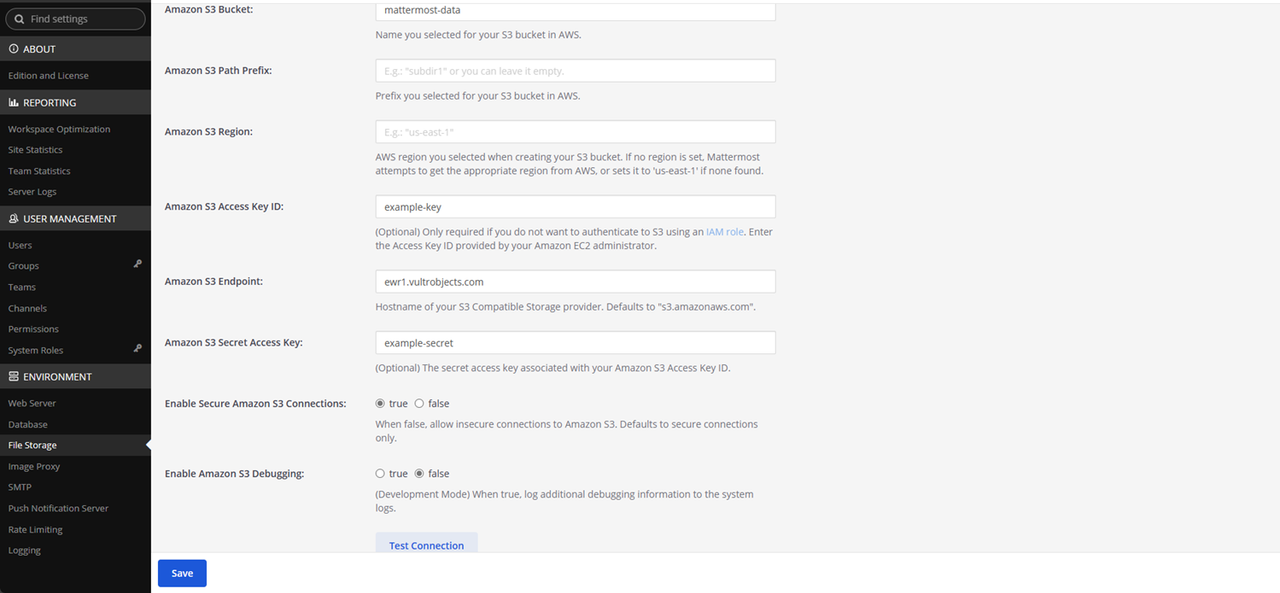
Enter your Vultr Object Storage secret key in the Amazon S3 Secret Access Key field.
Keep Enable Secure Amazon S3 Connections set to
true.Click Save to apply the file storage configuration.
Click Test Connection to validate the credentials. Verify that a
Connection was successfulmessage appears.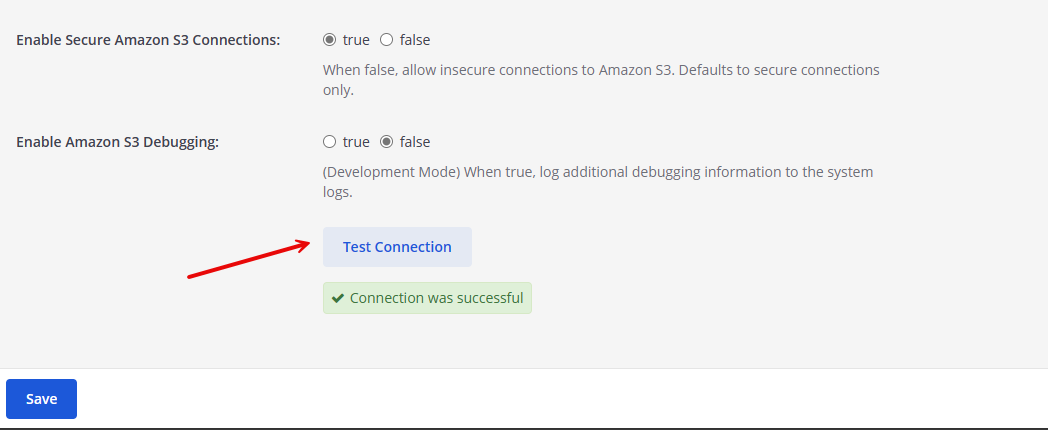
Connect Client Applications
Mattermost provides client applications for Android, iOS, and desktop. Each client connects to your self-hosted server using the server URL and your workspace credentials.
Download and install the Mattermost application for your device. For example, Mattermost for Android.
Open the Mattermost application on your device.
Click Get Started.

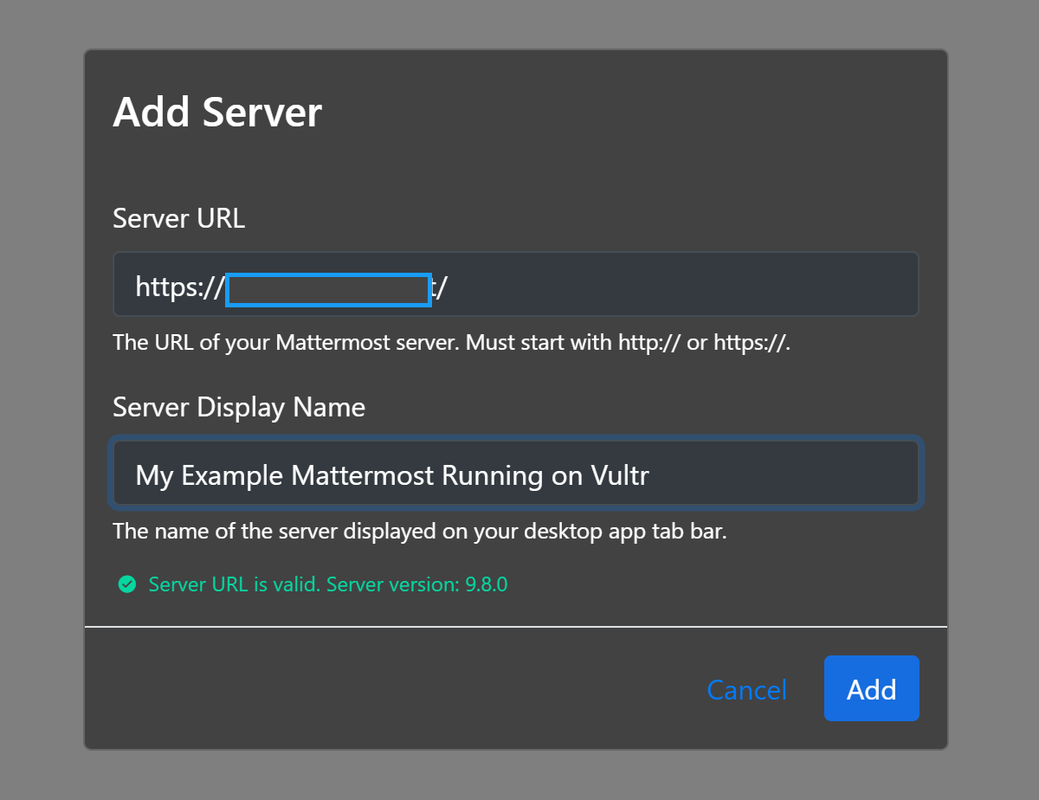
Enter your Mattermost domain URL in the Server URL field.
Enter a display name in the Server display name field to identify your Mattermost workspace on the device.
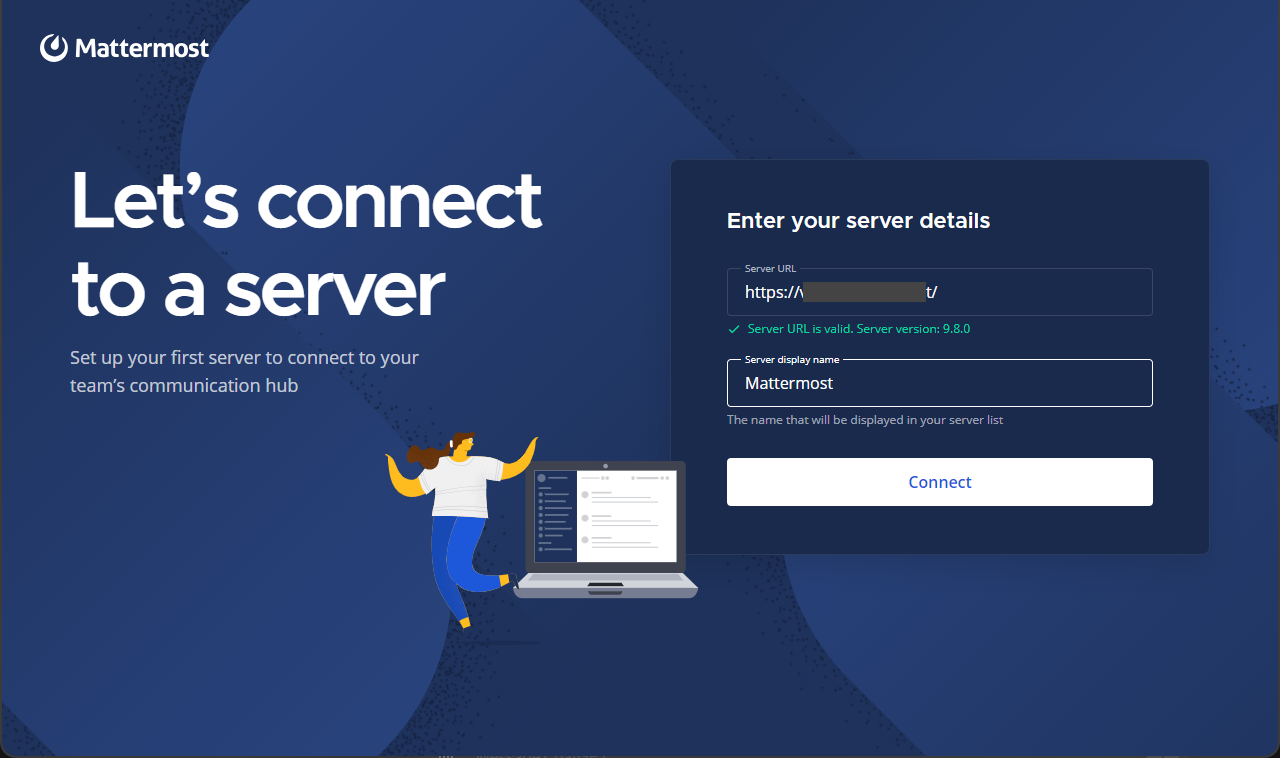
Verify that a
Server URL is valid. Server version:prompt appears below the URL field and click Connect.Enter your workspace email and password to log in.
To create a new user account, click Don't have an account to access the signup form. When the account is created, open your invite link in a browser and log in to join a Mattermost channel.
Verify that the client application can access all enabled channels on the server.
Conclusion
You have deployed Mattermost on an Ubuntu server with a managed PostgreSQL database, Nginx reverse proxy with TLS, Postfix for email notifications, and Vultr Object Storage for file attachments. For more information, visit the Mattermost documentation.