
How to Deploy OnlyOffice – An Opensource Office Suite
Introduction
OnlyOffice is an open-source office suite that enables word processing, spreadsheets, presentations, forms, and portable document format file creation tools on a server. OnlyOffice offers collaboration tools such as external user invitations and integrates with real-time chat plugins such as Zoom to improve file sharing and management.
OnlyOffice is available in multiple editions such as OnlyOffice DocSpace, Docs, Groups, and OnlyOffice Workspace. This article explains how to deploy OnlyOffice DocSpace using Docker on a production Ubuntu server. You will enable the OnlyOffice server to integrate and support external service applications such as desktop editors, WordPress, Mattermost and NextCloud to enable document creation functionalities.
Prerequisites
Before you start:
- Deploy a One-Click Docker instance using the Vultr marketplace application with at least
8GBRAM. - Create a new subdomain DNS record that points to the server IP address.
- Access the server using SSH as a non-root user with sudo privileges.
- Update the server.
Install OnlyOffice
You can install OnlyOffice as a standalone package for your server distribution or a Docker image that runs on your server with all required environment packages. Follow the steps below to install OnlyOffice using Docker to run with all necessary dependencies on your server to ensure improved performance and document creation.
Download the latest OnlyOffice installation script.
console$ wget -O onlyoffice.sh http://download.onlyoffice.com/docspace/docspace-install.sh
Run the OnlyOffice installation script using Bash.
console$ sudo bash onlyoffice.sh
Enter Y to accept the Install with Docker installation option, then press Enter to pull and deploy the OnlyOffice Docker image on your server.
Select 'Y' to install ONLYOFFICE docspace using Docker (recommended). Select 'N' to install it using RPM/DEB packages.
Install with Docker [Y/N/C]?
If you receive a domain error, enter Y to accept your server hostname and install OnlyOffice.
A problem was detected for my-server domains when using a loopback IP address or when using NAT.
Select 'Y' to continue installing with configuring the use of external IP in Docker via Google Public DNS.
Select 'N' to cancel ONLYOFFICE DocSpace installation.
Continue installation [Y/N]? y
When the process is complete, your output should be similar to the one below.
[+] Running 1/1
 ✔ Container onlyoffice-notify  Started                                                                                         0.5s
[+] Running 12/12
 ✔ onlyoffice-health-checks-ui Pulled                                                                                           6.8s
   ✔ b0a0cf830b12 Already exists                                                                                                0.0s
   ✔ 1919504653f5 Already exists                                                                                                0.0s
   ✔ 1045f08c42c1 Already exists                                                                                                0.0s
   ✔ f5bf012875da Already exists                                                                                                0.0s
   ✔ 5f678ea9f2e2 Already exists                                                                                                0.0s
   ✔ ed17c50184b1 Already exists                                                                                                0.0s
   ✔ 6581186fb4ff Already exists                                                                                                0.0s
   ✔ 792f5afb4254 Already exists                                                                                                0.0s
   ✔ 071be69a9adc Pull complete                                                                                                 0.8s
   ✔ 0b96d9634371 Pull complete                                                                                                 0.8s
   ✔ b36d9abbe593 Pull complete                                                                                                 3.6s
[+] Running 1/1
 ✔ Container onlyoffice-healthchecks  Started                                                                                   0.3s
View the list of Docker processes and verify that all OnlyOffice containers are active and healthy.
console$ docker ps
Your output should be similar to the one below.
CONTAINER ID   IMAGE                                           COMMAND                  CREATED          STATUS                     PORTS                                                                      NAMES
f3374a779bb5   onlyoffice/docspace-files:2.5.0.1               "python3 docker-entr…"   6 minutes ago    Up 6 minutes (healthy)     5050/tcp                                                                   onlyoffice-filestcp
8b6aa18e9a7d   onlyoffice/docspace-studio:2.5.0.1              "python3 docker-entr…"   8 minutes ago    Up 8 minutes (healthy)     5050/tcp                                                                   onlyoffice-studio
fb9c94cf564f   onlyoffice/documentserver:8.0.1.1               "/app/ds/run-documen…"   9 minutes ago    Up 9 minutes               80/tcp, 443/tcp                                                            onlyoffice-document-server
eaff448642e4   redis:7                                         "docker-entrypoint.s…"   9 minutes ago    Up 9 minutes               6379/tcp                                                                   onlyoffice-redis
b3723faedc2c   rabbitmq:3                                      "docker-entrypoint.s…"   10 minutes ago   Up 9 minutes               80/tcp, 4369/tcp, 5671-5672/tcp, 15691-15692/tcp, 25672/tcp                onlyoffice-rabbitmq
58f926809bbb   mysql:8.3.0                                     "docker-entrypoint.s…"   10 minutes ago   Up 10 minutes              33060/tcp, 0.0.0.0:33060->3306/tcp, :::33060->3306/tcp                     onlyoffice-mysql-server
List files in the
/app/onlyoffice/directory to verify that all OnlyOffice host files are available on your server.console$ ls /app/onlyoffice/
Output:
build.yml       db.yml                 docspace.profiles.yml  healthchecks.yml      opensearch.yml  rabbitmq.yml
config          dnsmasq.yml            docspace.yml           migration-runner.yml  proxy-ssl.yml   redis.yml
dashboards.yml  docspace.overcome.yml  ds.yml                 notify.yml            proxy.yml
The above director files allow you to manage or modify the OnlyOffice installation on your server. The
configdirectory contains executable scripts and log files you can use with multiple tasks such as SSL certificates on your server.
Generate OnlyOffice Let's Encrypt SSL Certificates
OnlyOffice runs and listens for connection requests on the host HTTP port 80 on your server. Configure OnlyOffice with your domain name and generate SSL certificates to encrypt all connections to the server and enable HTTPS connections on the host port 443. Follow the steps below to enable firewall rules and secure the OnlyOffice server with SSL certificates.
View the Uncomplicated Firewall (UFW) status and verify that the firewall application is active on your server.
console$ sudo ufw status
Output:
Status: active

To                         Action      From
--                         ------      ----
22/tcp                     ALLOW       Anywhere
22/tcp (v6)                ALLOW       Anywhere (v6)
Allow connections to the OnlyOffice HTTP port
80.console$ sudo ufw allow 80 comment 'onlyoffice-http'
Allow the HTTPS port
443.console$ sudo ufw allow 443 comment 'onlyoffice-https'
Restart UFW to apply the configuration changes.
console$ sudo ufw reload
Navigate to the OnlyOffice configuration files directory
/app/onlyoffice/config.console$ cd /app/onlyoffice/config
Run the OnlyOffice Let’s Encrypt SSL script
docspace-ssl-setupand generate new trusted certificates using your domain. Replaceonlyoffice.example.comandonlyoffice@example.comwith your actual details.console$ sudo bash docspace-ssl-setup onlyoffice@example.com onlyoffice.example.com
When successful, your output should be similar to the one below.
Successfully received certificate.
Certificate is saved at: /etc/letsencrypt/live/docspace/fullchain.pem
Key is saved at:         /etc/letsencrypt/live/docspace/privkey.pem
This certificate expires on 2024-08-14.
These files will be updated when the certificate renews.

NEXT STEPS:
- The certificate will need to be renewed before it expires. Certbot can automatically renew the certificate in the background, but you may need to take steps to enable that functionality. See https://certbot.org/renewal-setup for instructions.

- - - - - - - - - - - - - - - - - - - - - - - - - - - - - - - - - - - - - - - -
If you like Certbot, please consider supporting our work by:
 * Donating to ISRG / Let's Encrypt:   https://letsencrypt.org/donate
 * Donating to EFF:                    https://eff.org/donate-le
- - - - - - - - - - - - - - - - - - - - - - - - - - - - - - - - - - - - - - - -
Generating DH parameters, 2048 bit long safe prime, generator 2
This is going to take a long time
@weekly root /app/onlyoffice/config/docspace-renew-letsencrypt
[+] Running 1/1
 ✔ Container onlyoffice-proxy  Started                                                                                          0.5s
[+] Running 1/1
 ✔ Container onlyoffice-files  Started                                                                                         10.5s
OK
List the directory files and verify that a new
docspace-renew-letsencryptfile is available.console$ lsOutput:
docspace-renew-letsencrypt docspace-ssl-setup fluent-bit.conf mysql nginxYou have generated Let's Encrypt SSL certificates to secure the OnlyOffice server. The
docspace-renew-letsencryptfile runs every90 daysto automatically renew the Let's Encrypt certificate before expiry.
Access OnlyOffice
Access your OnlyOffice domain using a web browser such as Chrome.
https://onlyoffice.example.comVerify that the OnlyOffice setup interface displays in your web browser.
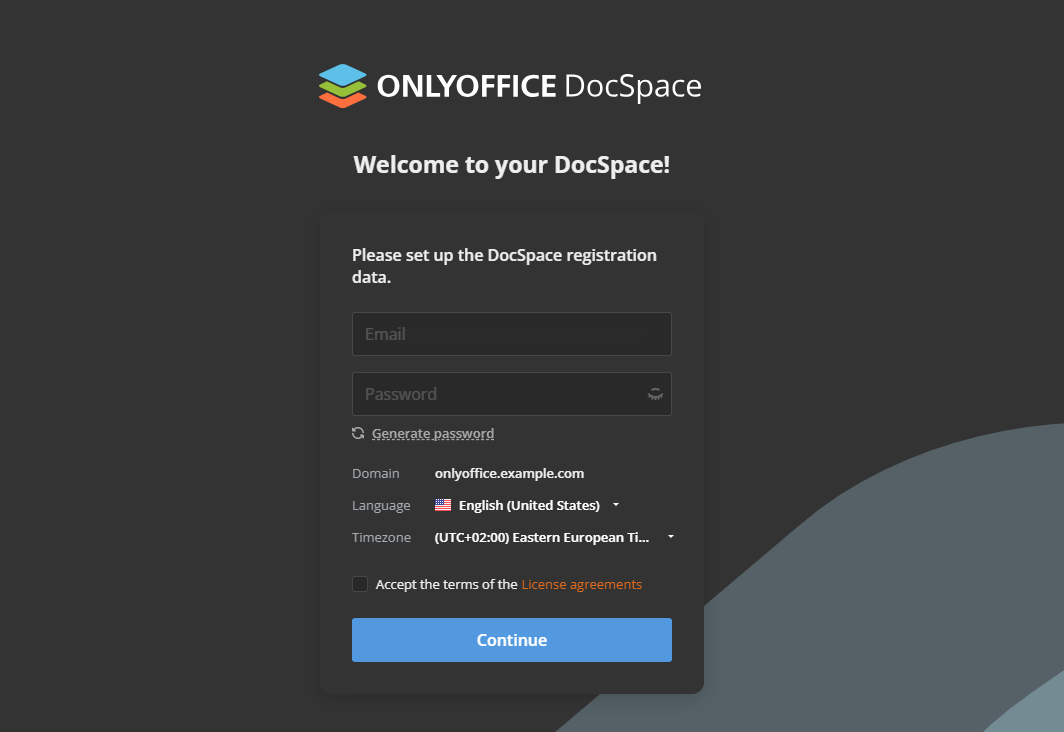
Enter your administrative user email address in the Email field for use with OnlyOffice.
Enter a strong password in the Password field or click
Generate passwordto create a new random password.Select your language and click Timezone to set a new timezone to use with the OnlyOffice server.
Accept the OnlyOffice license terms.
Click Continue to create the new administrative user and redirect to the main OnlyOffice dashboard.
Verify that the OnlyOffice interface displays correctly in your web browser to set up new rooms.
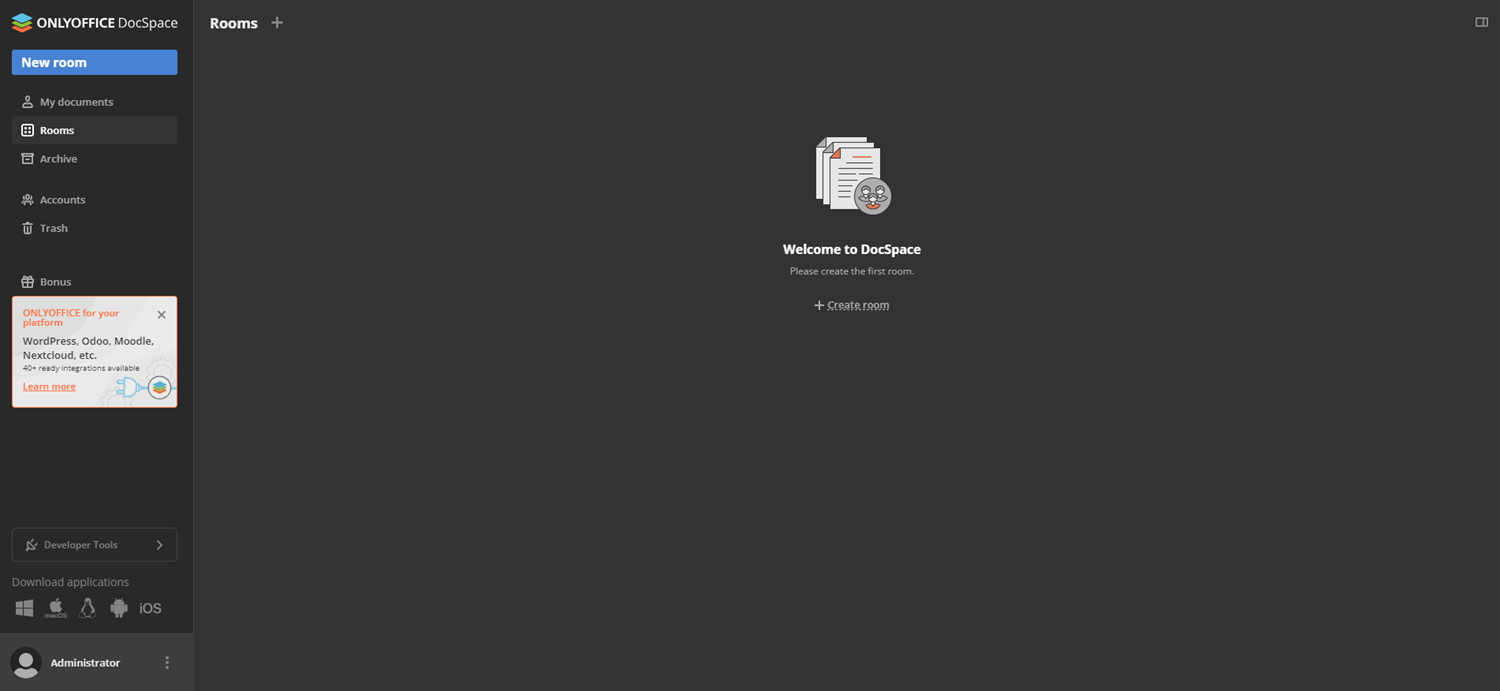
Click the + symbol next to Rooms to create a new OnlyOffice room.
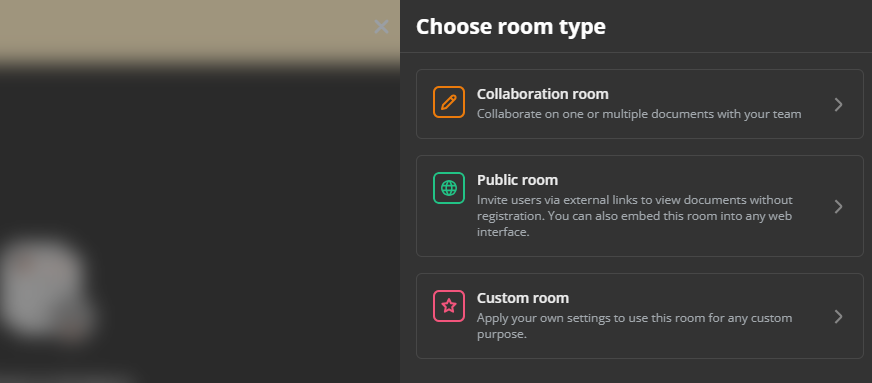
Select your desired OnlyOffice room type depending on the privacy and access type. OnlyOffice supports the following rooms with different user privileges.
- Collaboration room: Enables multiple user access and document collaboration on your server.
- Custom room: Enables customization options and user access permissions on the server. Available user privileges include Editor, Power user, Room admin, Reviewer, Viewer, and Commentor.
- Public room: Enables public access to your OnlyOffice servers and enables users to access files using external links.
For example, click
Public roomto set up a new public room that allows external users to access shared documents on your server.Enter your new OnlyOffice room in the Name field.
Enter a new tag, click Create tag, and upload a new image to customize your new public room information.
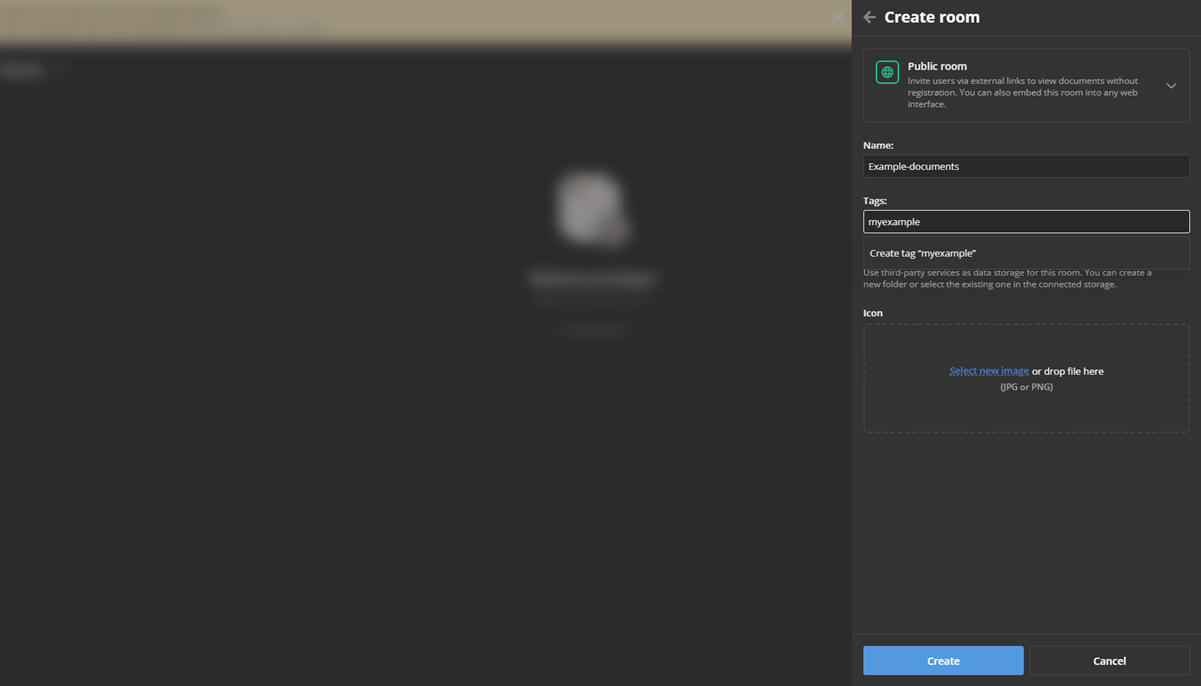
Click Create to apply the new OnlyOffice room on your server.
Click + next to the room name and select a new document type to create on your server. For example, New document to set up a word document.
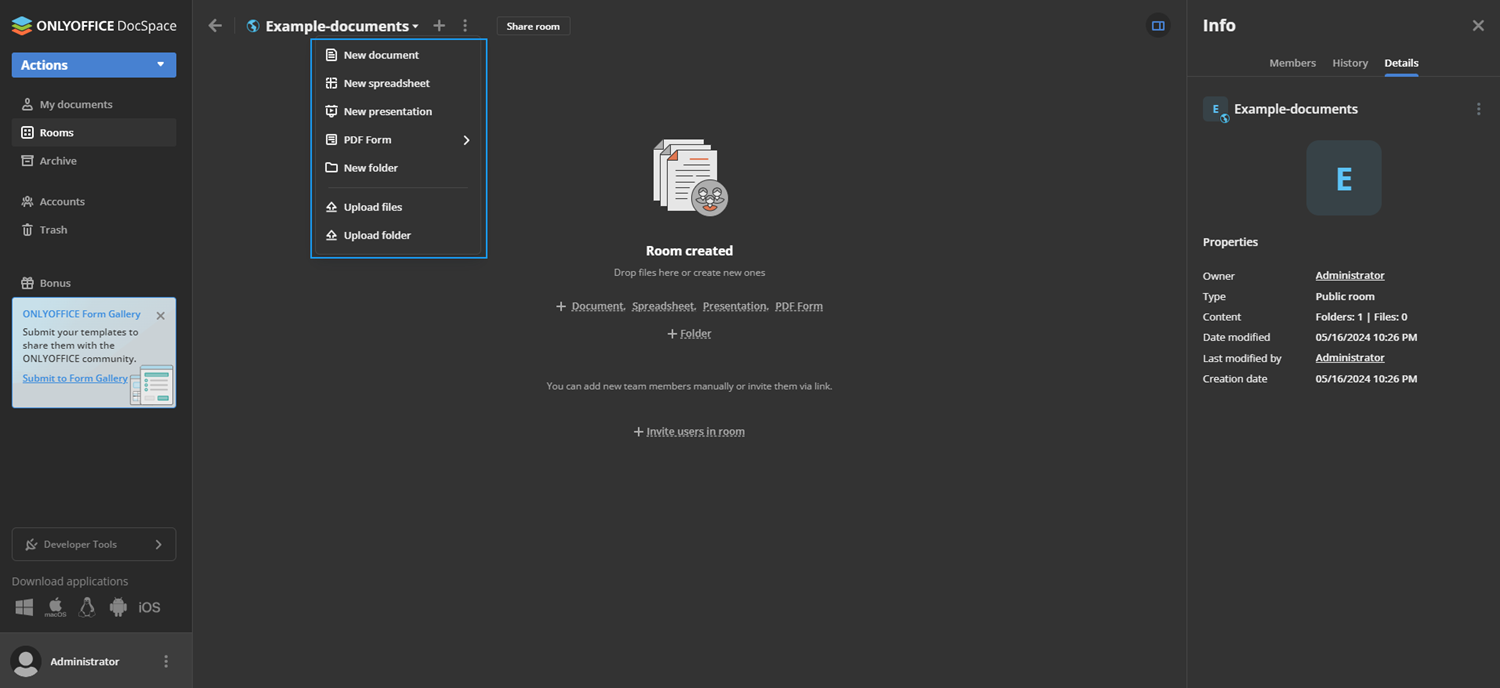
Enter your new document name and click Create to open the new OnlyOffice document.
Verify that the new document loads in your web browser and enter sample text to test write privileges on the file. For example,
Hello World! This test on Vultr works!!.
Click File on the main navigation menu.
Select Save to apply the file changes and save the new document on your server.
Integrate OnlyOffice with External Applications
OnlyOffice is compatible with most team collaboration applications such as Zoom, Mattermost, NextCloud, and ownCloud using connector plugins. Some applications may be incompatible with DocSpace and require a standalone Docs document server installation. Follow the sections below to integrate and connect external services to your OnlyOffice DocSpace server.
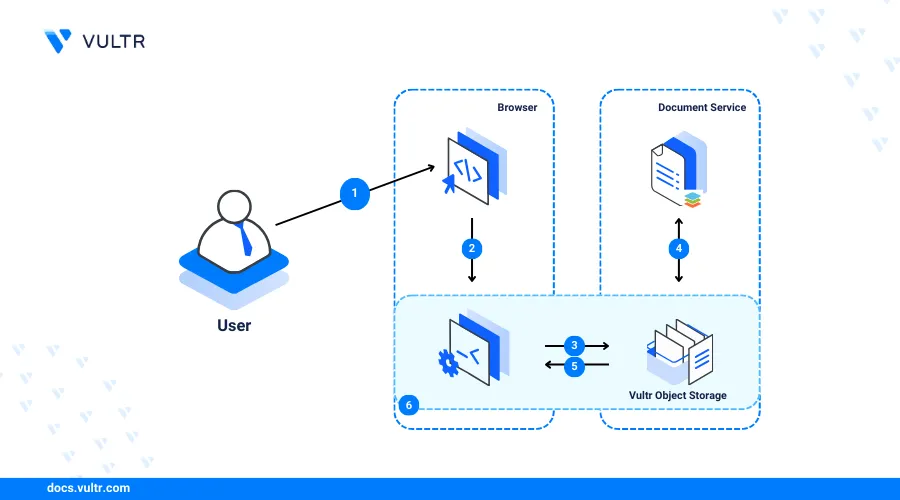
Back Up OnlyOffice to Vultr Object Storage
Access the OnlyOffice web interface.
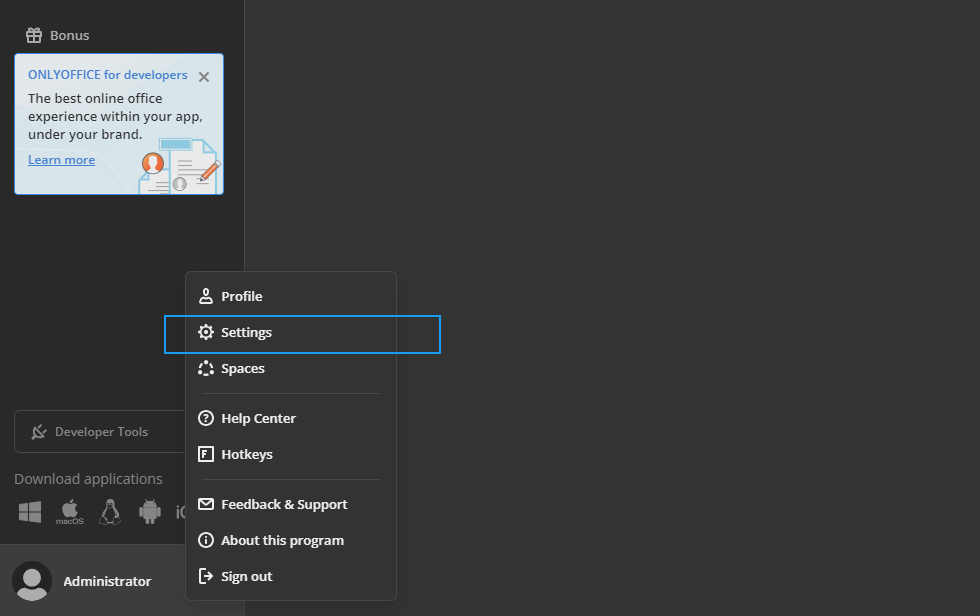
Click options next to the Administrator user card and select Settings from the list of options.
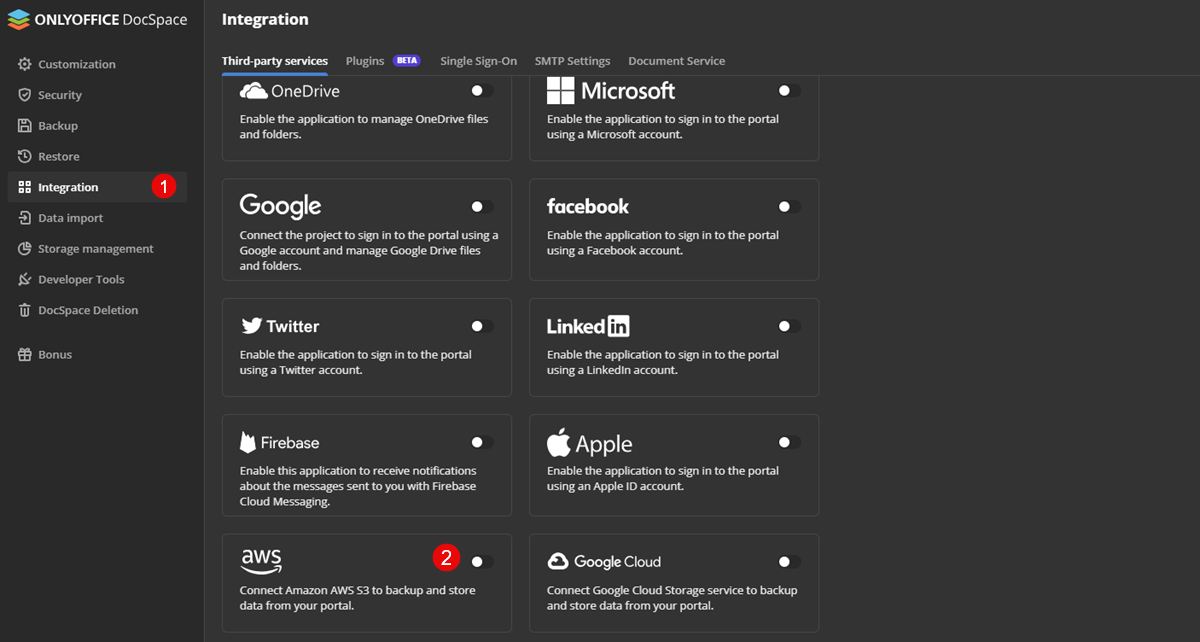
Click Integration on the settings navigation menu to install new plugins.
Within the Third-party services, scroll and click the AWS activation button to access the configuration page.
Enter your Vultr Object Storage credentials in the S3 accesskey and S3 secret access key fields respectively.
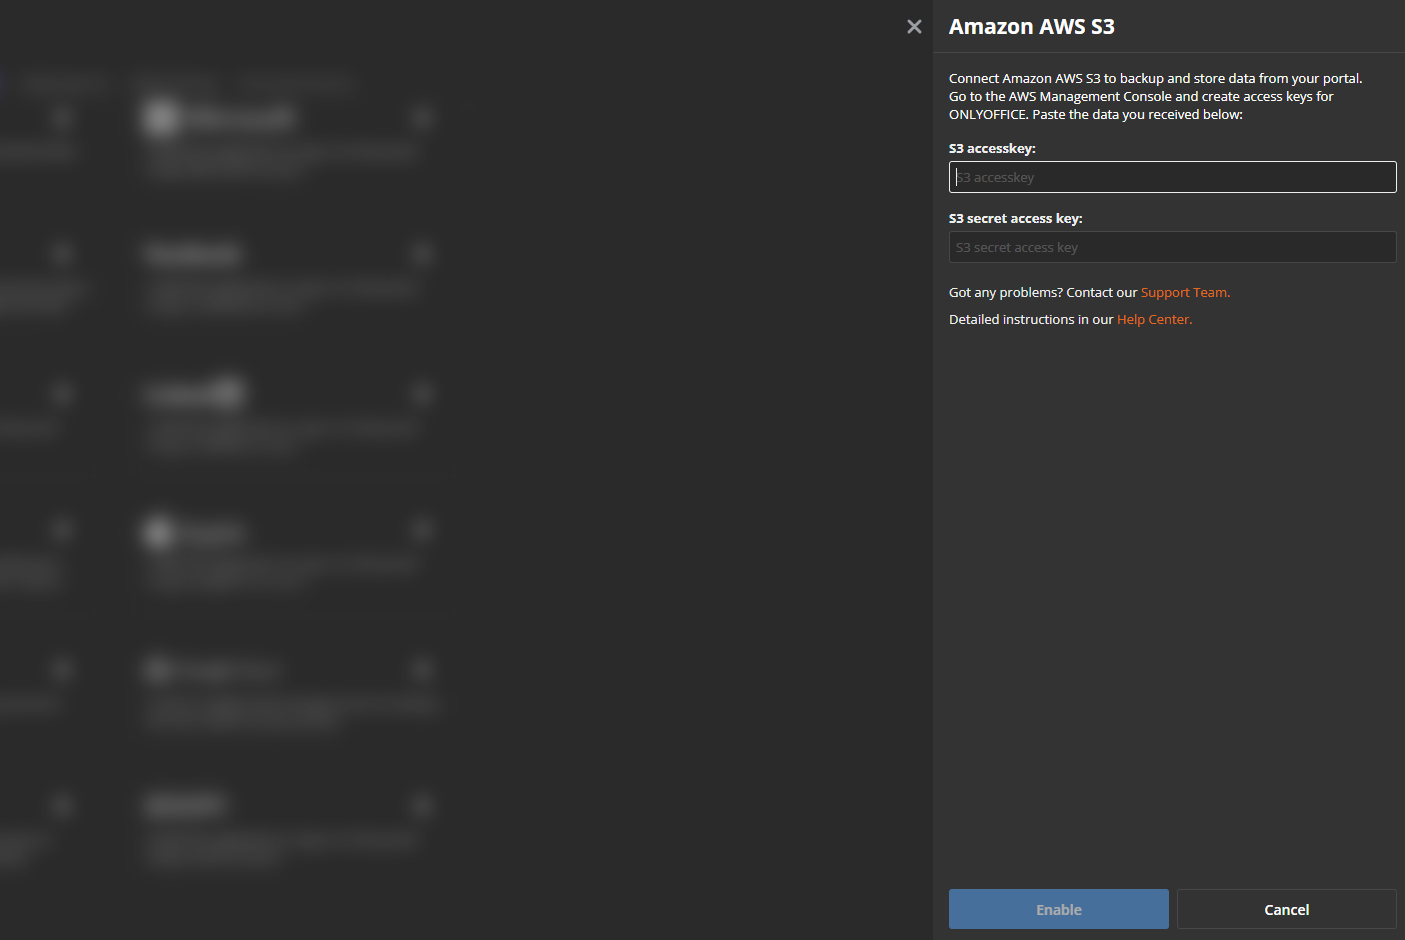
Click Enable to apply your credentials and activate Vultr Object Storage as the active S3 storage service on your server.
Navigate to Backup on the main navigation list.
Click Third-party storage in the Data backup section to back up OnlyOffice to Vultr Object Storage.
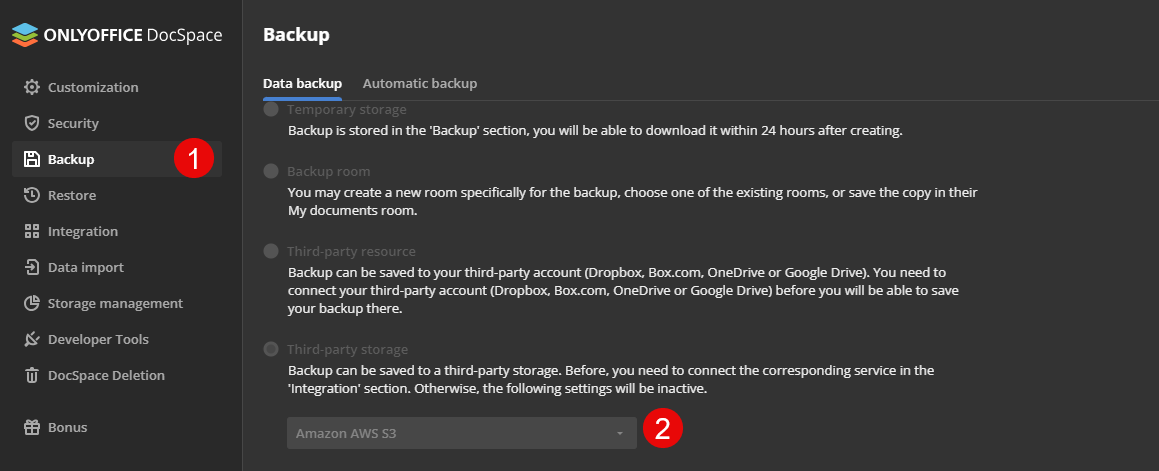
Select Amazon AWS S3 from the list of storage options and enter your Vultr Object Storage bucket in the Bucket field.
Click the region drop-down and select the closest location to your Vultr Object Storage region.
Enter your Vultr Object Storage hostname URL in the Service URL field.
Click Create Copy to create your first OnlyOffice backup copy.
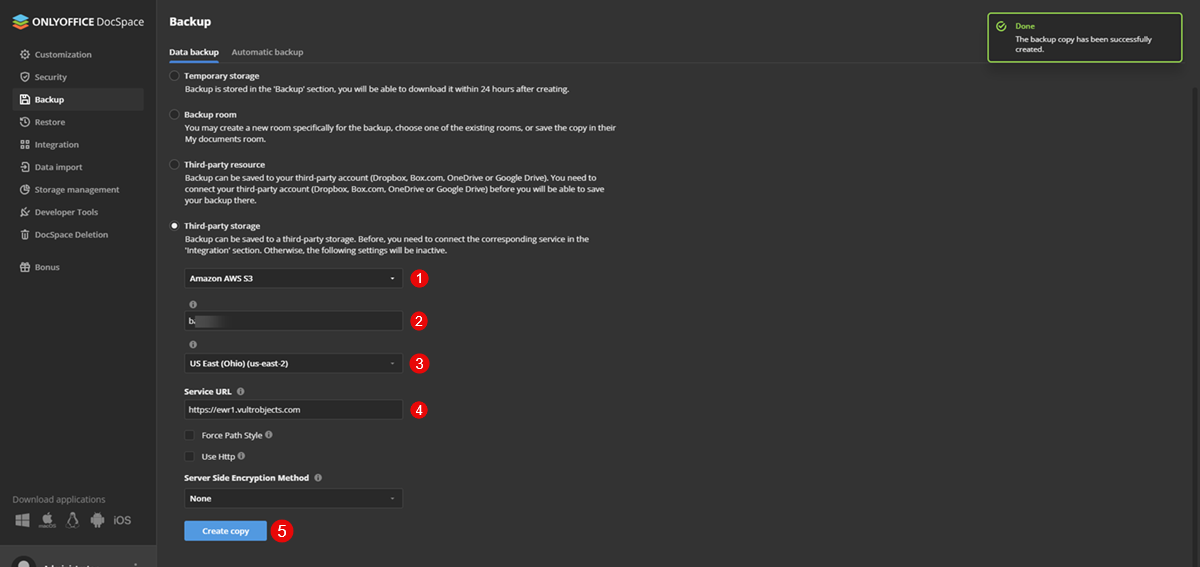
Verify that the OnlyOffice backup is successful and a new popup message displays in your dashboard.
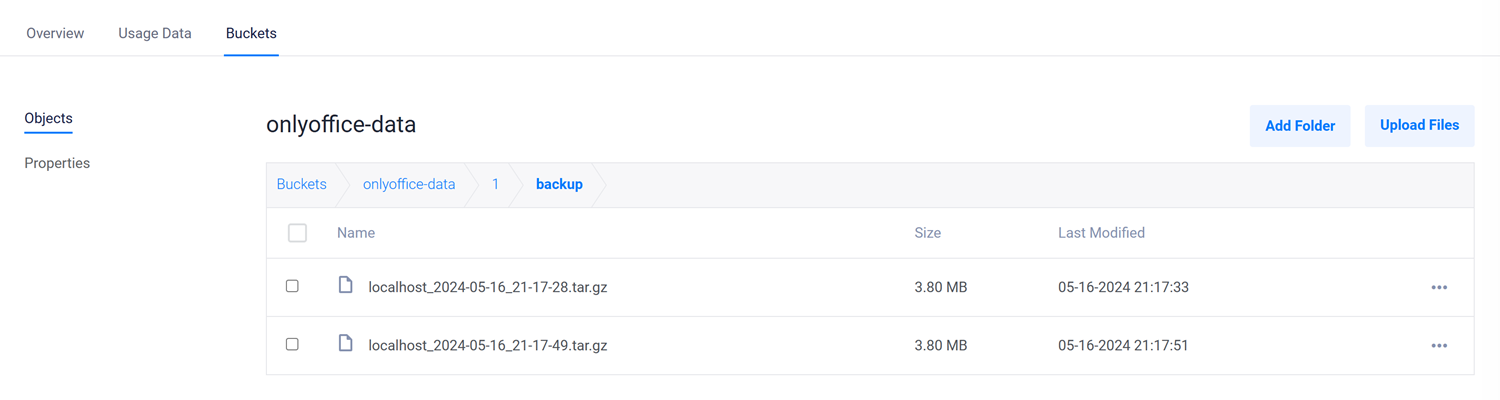
The backup copy has been successfully created.Access your Vultr Object Storage bucket and verify that the new OnlyOffice backup objects are available.
Connect the OnlyOffice Desktop Application to OnlyOffice DocSpace
Download and Install the latest OnlyOffice desktop editors application on your device.
Open OnlyOffice from your main applications menu to access the new application interface.
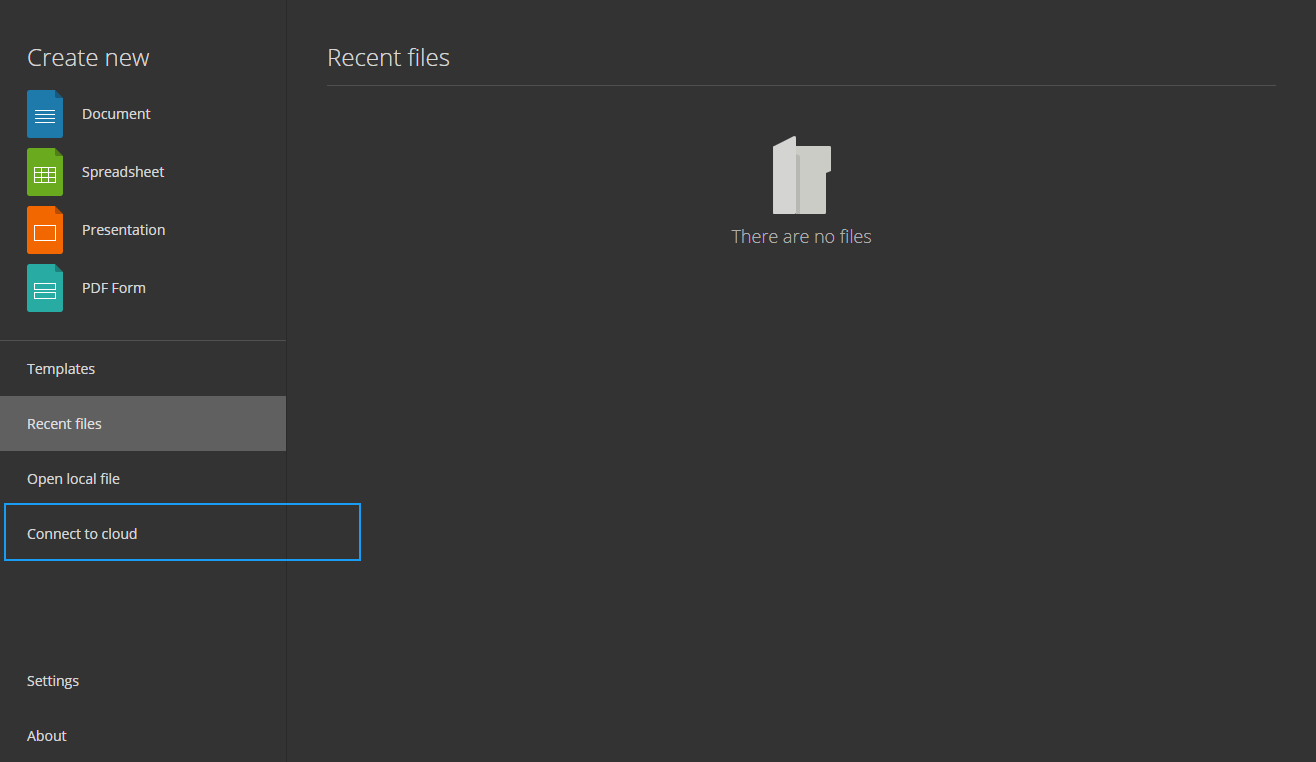
Click Connect to cloud with the OnlyOffice interface.
Click Connect now below the Create an ONLYOFFICE cloud button to set up a new connection to your DocSpace server.
Enter your OnlyOffice server URL in the Cloud office URL field. For example,
https://onlyoffice.example.com.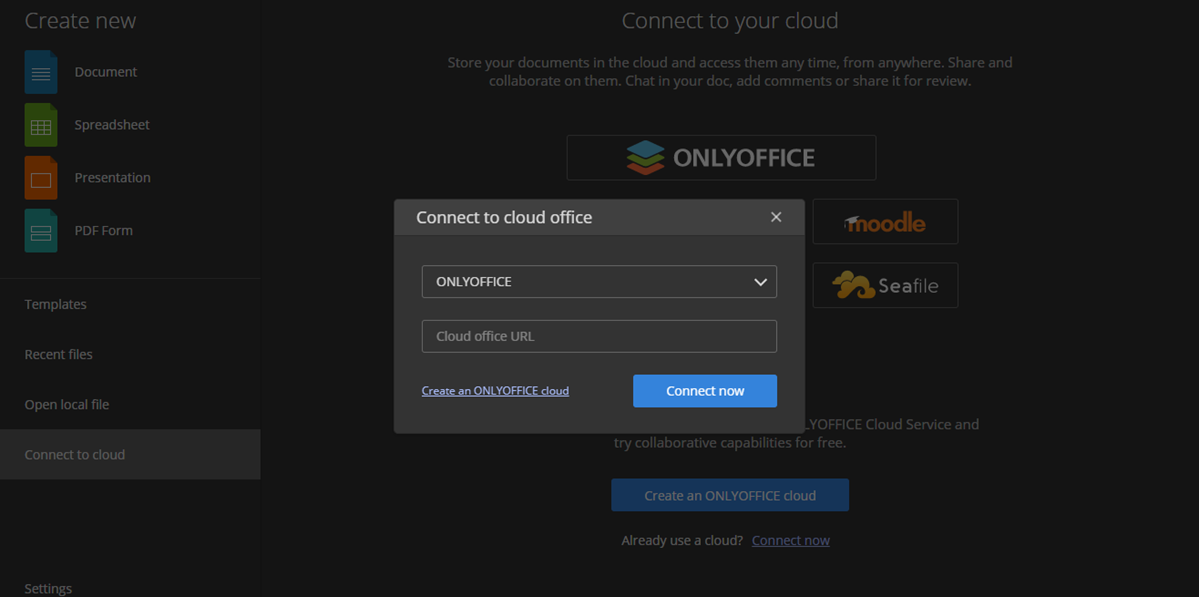
Enter your OnlyOffice user email address and password respectively to authenticate with the server.
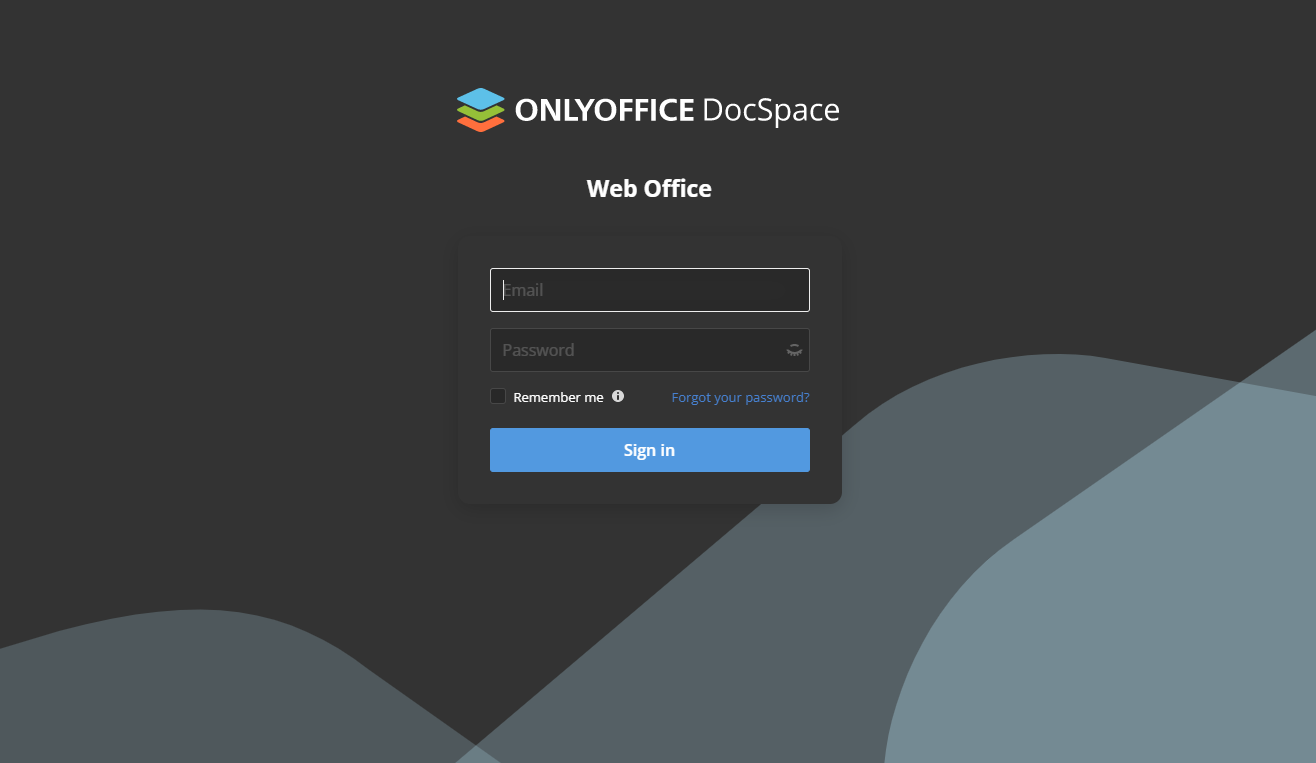
Click Sign in to validate the user details and connect to your OnlyOffice document server.
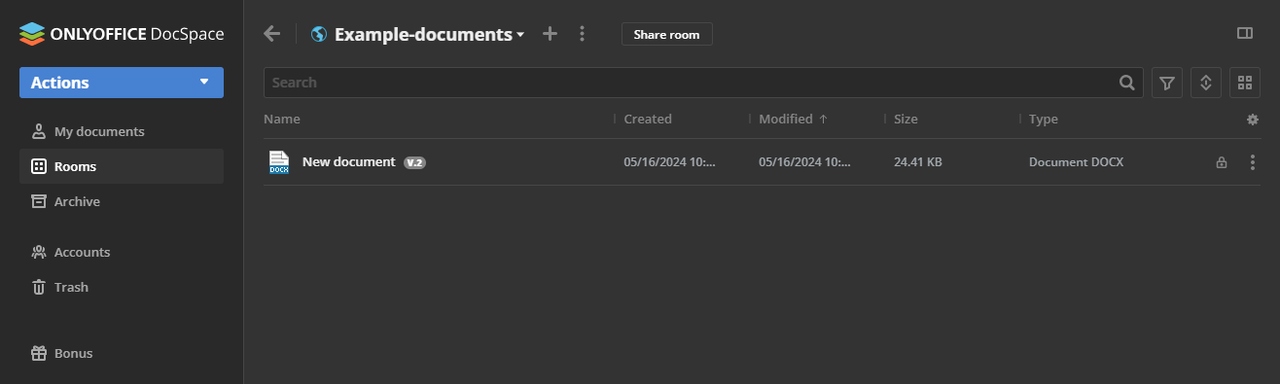
Open your OnlyOffice rooms to view and create new documents on your server using the desktop application.
Conclusion
You have deployed OnlyOffice on your server and configured the application to integrate with external services to enable document creation. OnlyOffice rooms enable team collaborations to create, edit and manage multiple files on your server. Integrating OnlyOffice with storage platforms such as block storage and Vultr Object Storage, you can process multiple files with efficient storage on your server.