
How to Deploy Services with dstack on Vultr
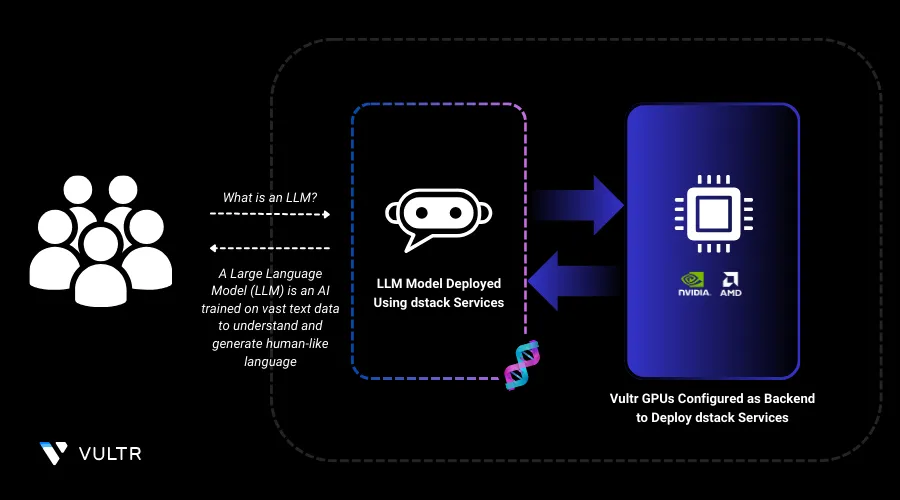
dstack services simplify the deployment of long-running applications like APIs, ML models, and web apps. They ensure scalability, reliability, and efficient resource management across cloud and on-premise environments. With easy YAML-based configuration, developers can deploy, scale, and update services seamlessly without complex infrastructure overhead.
In this guide, you'll deploy the Deepseek R1 LLM using dstack service on L40S Vultr Cloud GPUs. This setup combines dstack’s streamlined AI deployment with SGLang’s optimized inference for efficient, high-performance model serving. By leveraging Vultr’s L40S GPUs, you’ll achieve fast, scalable inference with minimal setup.
Create a Virtual Environment
In this section, you are going to create virtual environment on your machine and prepare the environment for the dstack dev environment deployment.
Install the
venvpackage.console$ apt install python3-venv -y
Create a virtual environment.
console$ python3 -m venv dstack-env
Activate the virtual environment.
console$ source dstack-env/bin/activate
Install dstack
In this section, you are going to install all the necessary dependencies for dstack and activate the dstack server for the dev environment deployment in the later section.
Create a directory and navigate into it to store the backend file.
console$ mkdir -p ~/.dstack/server
Create a backend
ymlfile to declare Vultr as the provider.console$ nano ~/.dstack/server/config.yml
Copy and paste the below configuration.
YAMLprojects: - name: main backends: - type: vultr creds: type: api_key api_key: <vultr-account-api-key>
Save and close the file.
Install dstack.
console$ pip install "dstack[all]" -U
Activate the dstack server.
console$ dstack server
Note down the URL on which the dstack server is running and token provided in the output.
Point the CLI to the dstack server.
console$ dstack config --url <URL> \ --project main \ --token <TOKEN>
Deploy dstack SGLang Service
Continue in the
dstack-envvirtual environment, and create a directory and navigate into it.console$ mkdir quickstart && cd quickstart
Initialize the directory.
console$ dstack init
Create a YAML file to define the dstack dev environment configuration.
console$ nano .dstack.yaml
Copy and paste the below configuration.
YAMLtype: service name: deepseek-r1-nvidia image: lmsysorg/sglang:latest env: - MODEL_ID=deepseek-ai/DeepSeek-R1-Distill-Llama-8B commands: - python3 -m sglang.launch_server --model-path $MODEL_ID --port 8000 --trust-remote-code port: 8000 model: deepseek-ai/DeepSeek-R1-Distill-Llama-8B resources: gpu: l40s:48GB
Save and close the file.
The above YAML file defines a dstack service to deploy the Deepseek R1 Distill LLaMA 8B model using sglang for inference. It pulls the
lmsysorg/sglang:latestimage and sets theMODEL_IDenvironment variable to specify the model. The command runs sglang.launch_server on port8000with--trust-remote-codefor execution. The service requests a 48GB NVIDIA L40S GPU for efficient inference. This setup enables seamless, GPU-accelerated model serving on dstack. Learn more about defining GPU resources in dstack services.Apply the configuration.
console$ dstack apply -f .dstack.yaml
The configuration may take up to 10 minutes to execute. You can monitor its progress by visiting the Vultr Console and checking the status of the server provisioning, which is automatically initiated when you apply the configuration.
Navigate to
http://<URL>/projects/main/modelsin any web browser to interact with the model.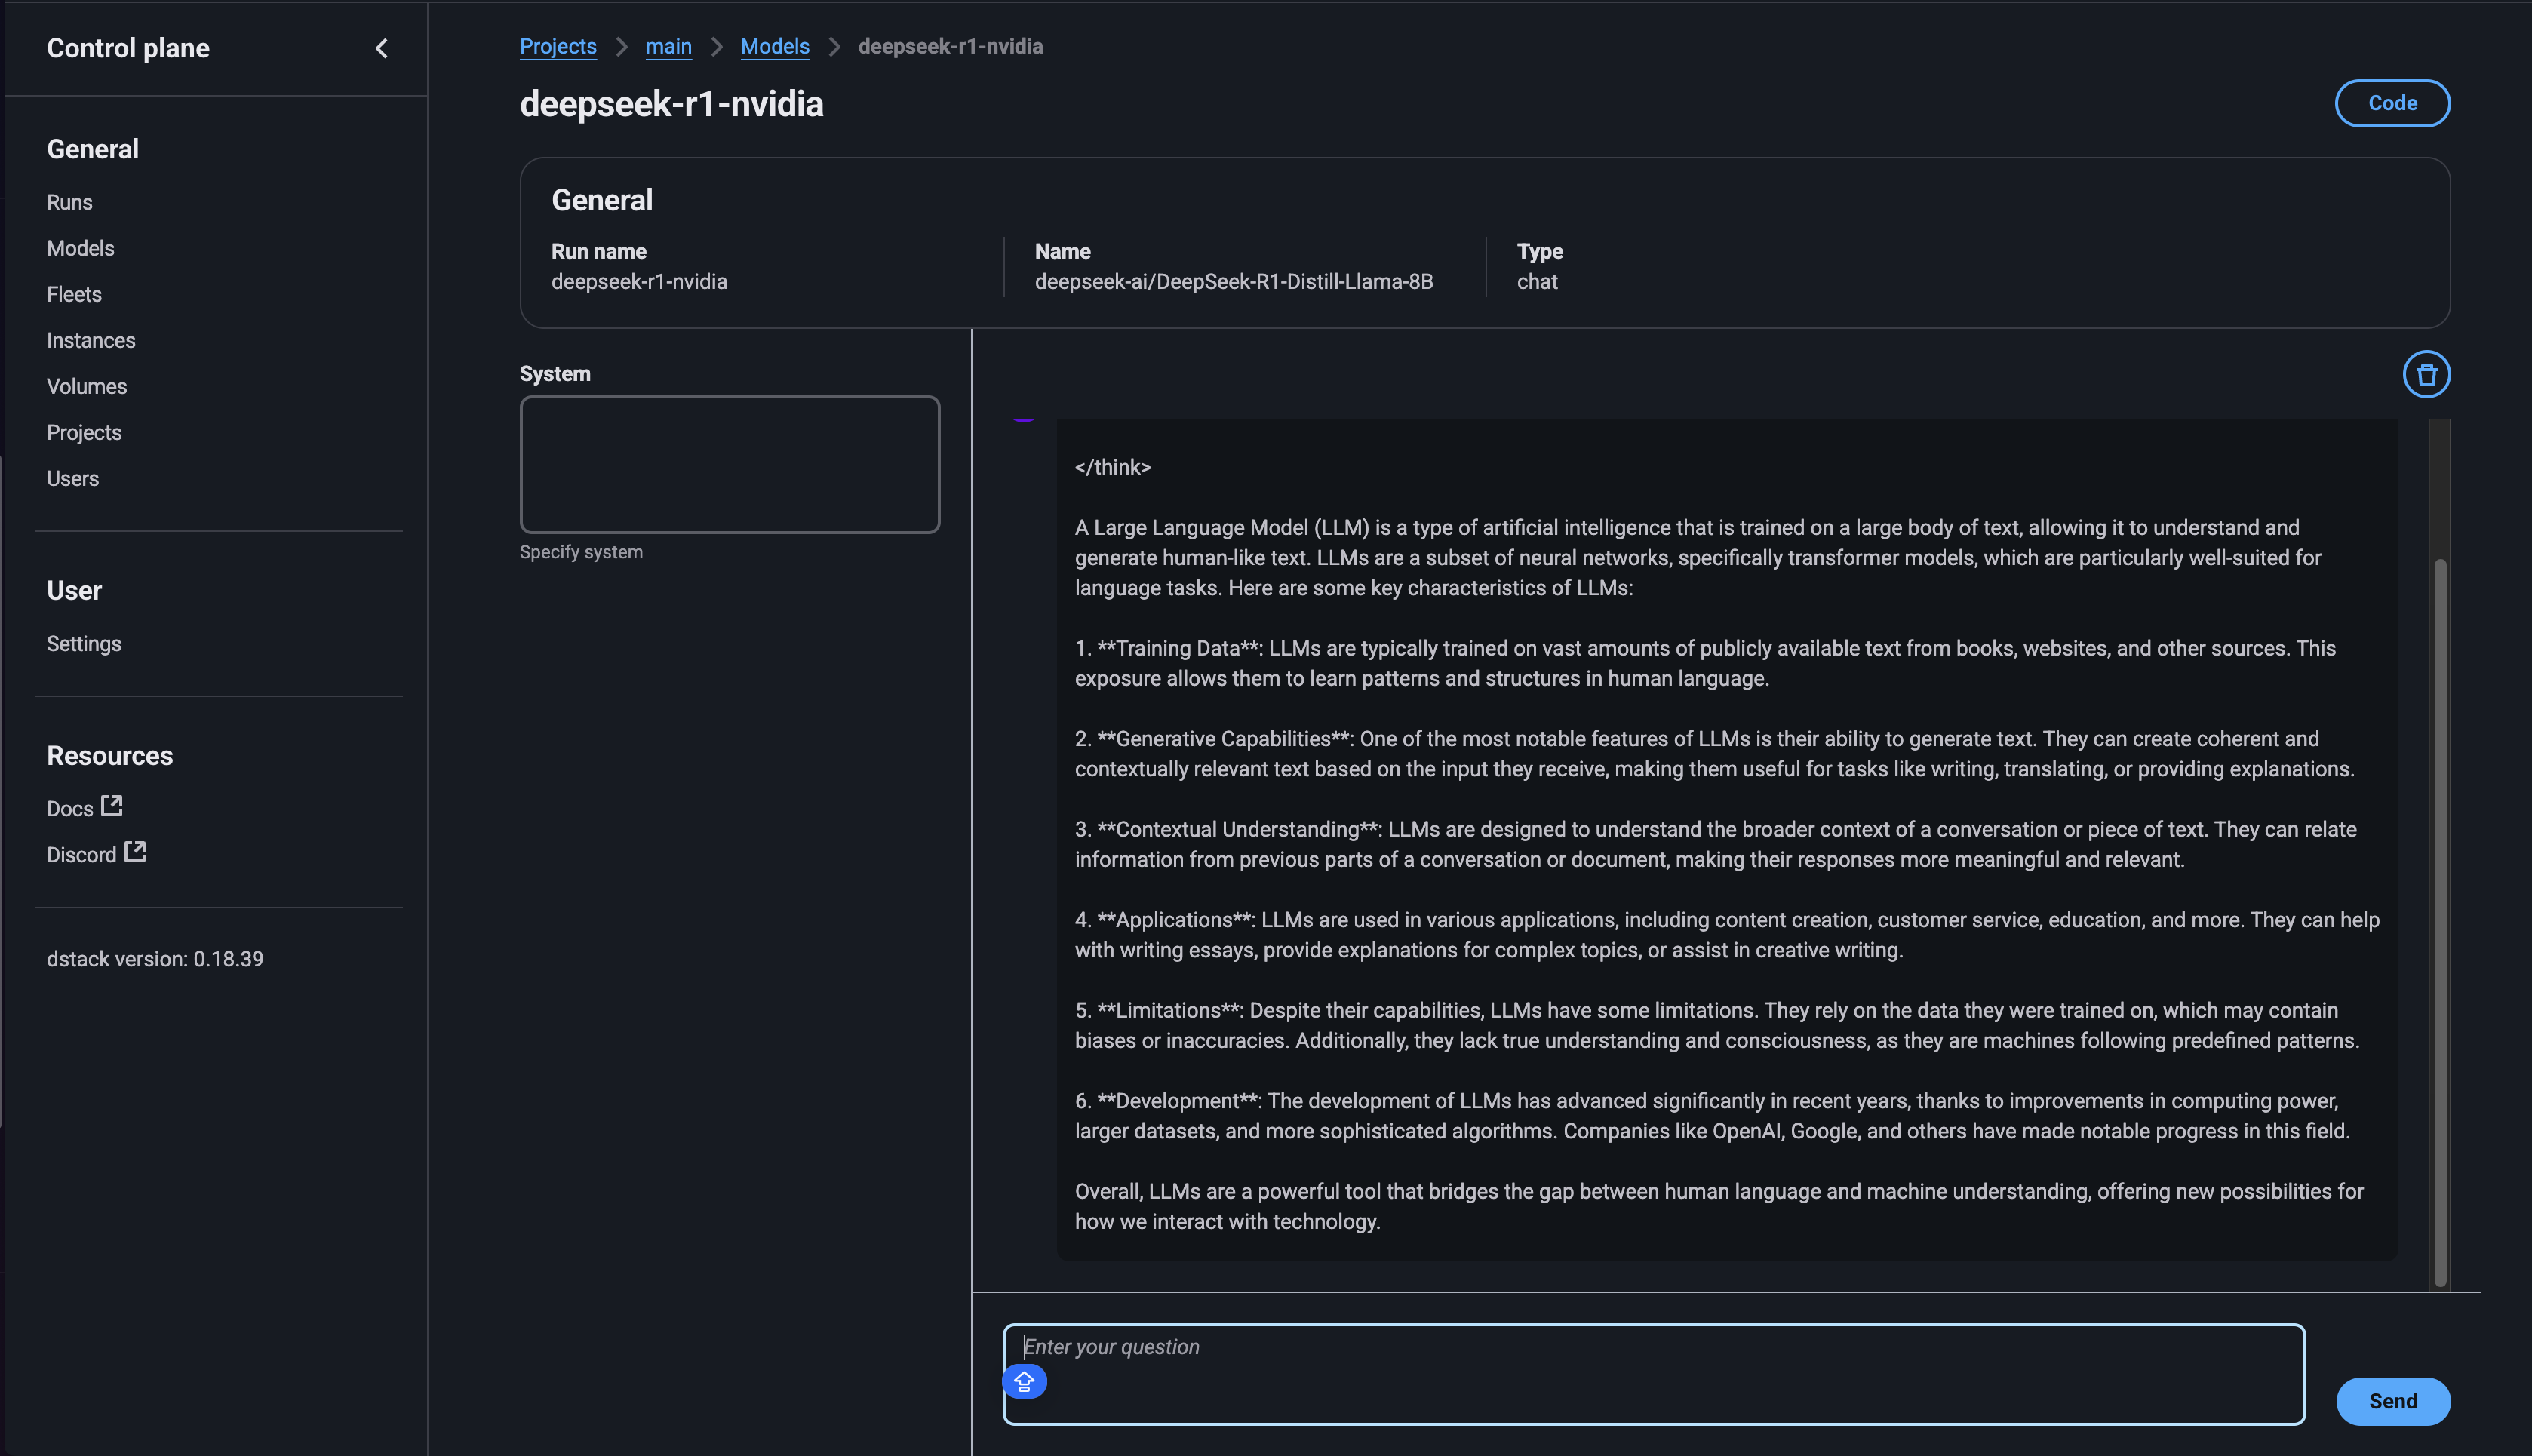
Conclusion
In this guide, you successfully deployed a dstack service on L40S Vultr Cloud GPUs. You also set up a virtual environment, installed dstack, and configured Vultr as your cloud provider, ensuring a smooth and scalable deployment process. With this setup, you can now efficiently serve large language models on the cloud, enabling fast, reliable AI applications.
For more information, refer to the following documentation: