
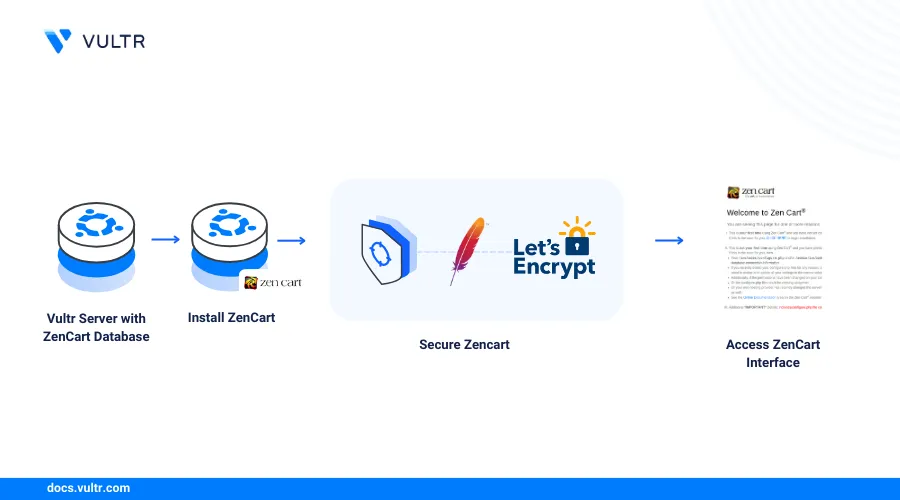
Introduction
Zen Cart is an open-source e-commerce platform used to set up and manage online store applications. It's highly customizable and allows you to build an online store based on your needs. Zen Cart also supports additional features and extensions you can integrate to ease the publication of products or services for sale online.
This article explains how to deploy Zen Cart on a Ubuntu 22.04 server and secure it for public use.
Prerequisites
Before you begin:
- Deploy a Ubuntu 22.04 server on Vultr.
- Deploy a Vultr Managed Database for MySQL to use as the database backend.
- Access the server using SSH as a non-root user with sudo privileges.
- Update the server.
- Install the Apache, MySQL, and PHP (LAMP) stack
Set Up the Zen Cart Database
Zen Cart uses a MySQL database server as the backend. Follow the steps below to create a new Zen Cart database using your Vultr Managed Database for MySQL to improve the application performance and reliability.
Log in to your Vultr Managed Database for MySQL cluster. Replace
example.vultrdb.com, and16751with your actual database details.console$ mysql -h example.vultrdb.com -P 16751 -u vultradmin
Enter your Vultr Managed Database for MySQL when prompted.
Create a new Zen Cart database
zencart.consolemysql> CREATE DATABASE zencart;Create a new MySQL user with a secure password to use with the Zen Cart database.
consolemysql> CREATE USER 'zencart'@'localhost' IDENTIFIED BY 'securepassword';Grant the user full privileges to the database.
consolemysql> GRANT ALL PRIVILEGES ON zencart.* TO 'zencart'@'localhost';Refresh the MySQL privileges table to apply changes.
consolemysql> FLUSH PRIVILEGES;Exit the MySQL shell.
consolemysql> EXIT;
Download Zen Cart
Install all required PHP modules on your server.
console$ sudo apt install php-mysqli php-mbstring php-json php-gd php-xml
Download the latest Zen Cart release file using
wget.console$ wget https://github.com/zencart/zencart/archive/refs/tags/v2.0.0.zip --no-check-certificate
The above command installs the Zen Cart version
2.0.0, visit the official website to verify the latest version to download on your server.Extract files from the Zen Cart archive using the Unzip utility.
console$ unzip v2.0.0.zip
Move the extracted files to your web root directory
/var/www/html.console$ sudo mv zencart-2.0.0 /var/www/html/zencart
Copy the Zen Cart sample configuration file
dist-configure.phpasconfigure.php.console$ sudo cp /var/www/html/zencart/includes/dist-configure.php /var/www/html/zencart/includes/configure.php
Grant the Apache web server user and group
www-dataownership privileges to the Zen Cart directory.console$ sudo chown -R www-data:www-data /var/www/html/zencart
Change the Zen Cart directory permissions to
755.console$ sudo find /var/www/html/zencart/ -type d -exec chmod 755 {} \;
Change the Zen Cart file permissions to
644.console$ sudo find /var/www/html/zencart/ -type f -exec chmod 644 {} \;
Configure the Apache Web Server
Create a new Apache virtual host configuration file to use with Zen Cart
console$ sudo nano /etc/apache2/sites-available/zencart.conf
Add the following configurations to the file.
apacheconf<VirtualHost *:80> ServerAdmin admin@example.com DocumentRoot /var/www/html/zencart/ ServerName zencart.example.com <Directory /var/www/html/zencart/> Options FollowSymLinks AllowOverride All Order allow,deny Allow from all </Directory> ErrorLog /var/log/apache2/zencart-error_log CustomLog /var/log/apache2/zencart-access_log common </VirtualHost>
Save and close the file.
The above configuration creates a new Zen Cart profile using the
/var/www/html/zencartweb root directory.Enable the Zen Cart virtual host configuration.
console$ sudo a2ensite zencart.conf
Enable the Apache rewrite module to allow Zen Cart to rewrite URL rules.
console$ sudo a2enmod rewrite
Restart Apache to apply changes.
console$ sudo systemctl restart apache2
Secure Zen Cart with Trusted SSL Certificates
Secure Zen Cart with HTTPS traffic by generating trusted SSL certificates that are essential when protecting customer data, search engine presence, online store compliance requirements and customer experience. Follow the steps below to secure Zen Cart with trusted SSL certificates.
Allow the HTTP port
80through the default UFW firewall.console$ sudo ufw allow 80/tcp
Allow the HTTPS port
443.console$ sudo ufw allow 443/tcp
Reload the Firewall table to apply changes.
console$ sudo ufw reload
Install the Certbot Let's Encrypt client using Snap.
console$ sudo snap install certbot --classic
Generate a new SSL certificate for your Zen Cart domain. Replace
zencart.example.comandhello@example.comwith your actual details.console$ sudo certbot --apache --redirect -d zencart.example.com -m hello@example.com --agree-tos
When successful, your output should look like the one below:
Deploying certificate
Successfully deployed certificate for zencart.example.com to /etc/apache2/sites-available/zencart-le-ssl.conf
Congratulations! You have successfully enabled HTTPS on https://zencart.example.com
Test the Certbot automatic certificate renewal process.
console$ sudo certbot renew --dry-run
When successful, your output should look like the one below:
Account registered.
Simulating renewal of an existing certificate for zencart.example.com

Congratulations, all simulated renewals succeeded:
  /etc/letsencrypt/live/zencart.example.com/fullchain.pem (success)
Access Zen Cart
Visit your Zen Cart domain using a web browser such as Chrome.
https://zencart.example.comVerify that the Zen Cart splash screen displays in your browser.
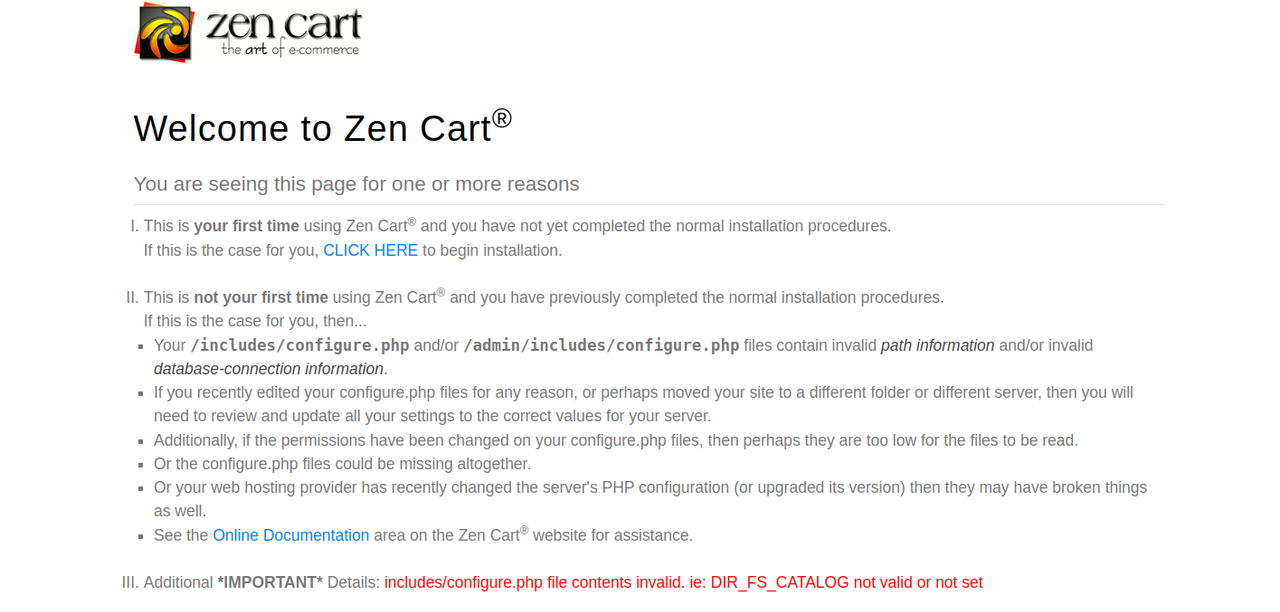
Click the CLICK HERE option to start the Zen Cart configuration process.
Verify that the System Inspection includes little or no dependency errors.
Click Continue to perform a requirements check on your server and click Continue to access the System Setup page.
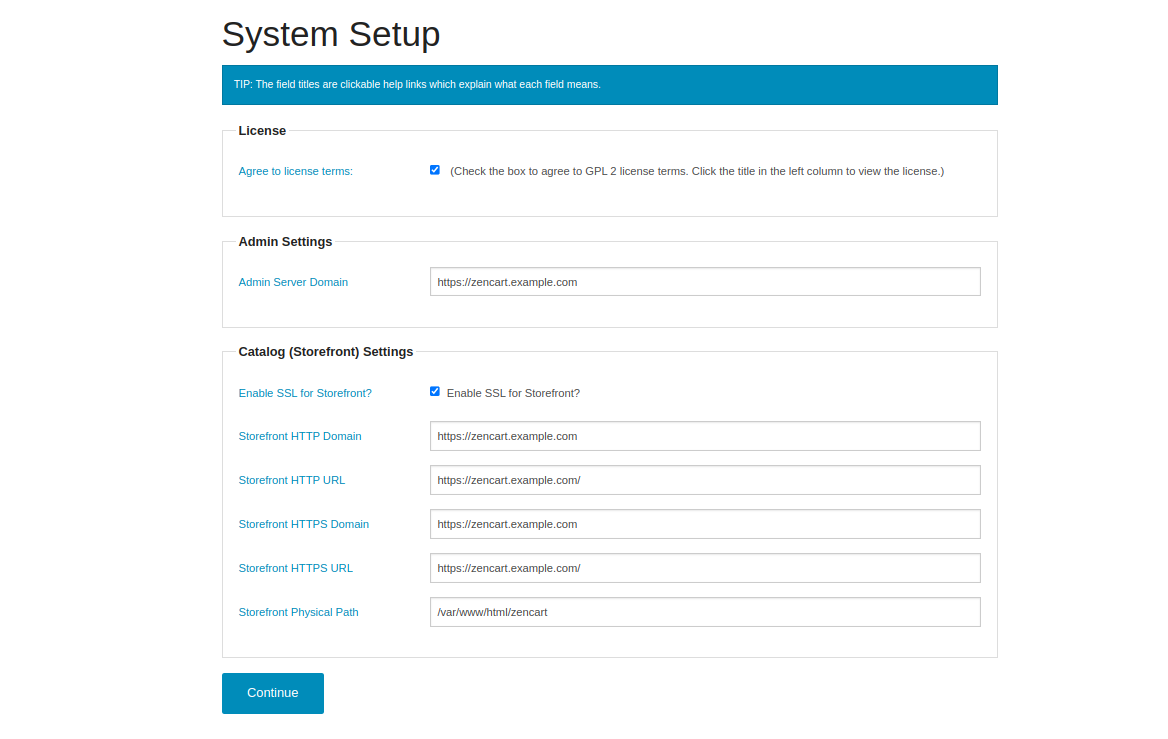
Agree to the application license terms, and enter your domain in the Admin Server Domain field. Then, click enable SSL for a storefront and set up your additional domain paths.
Click Continue to save changes and access the Database Setup page.
Enter your Vultr Managed Database for MySQL URL in the Database Host field. Then, enter your Zen Cart database details and the user you created earlier.
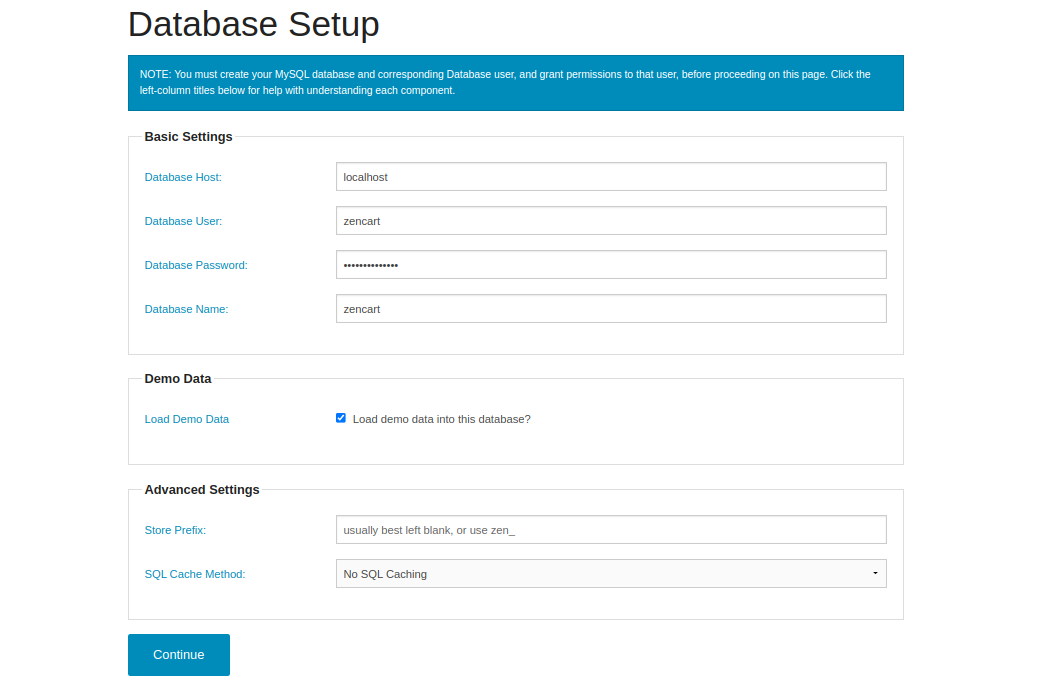
Click Continue to save your database configurations and access the Admin Setup page.
Enter your administrator username, and email. Then, copy the generated temporary user password to your clipboard.

Click Continue to start the Zen Cart installation process on your server.
Verify the Zen Cart Admin Backed dashboard and Storefront links in your Zen Cart Set Up Complete.
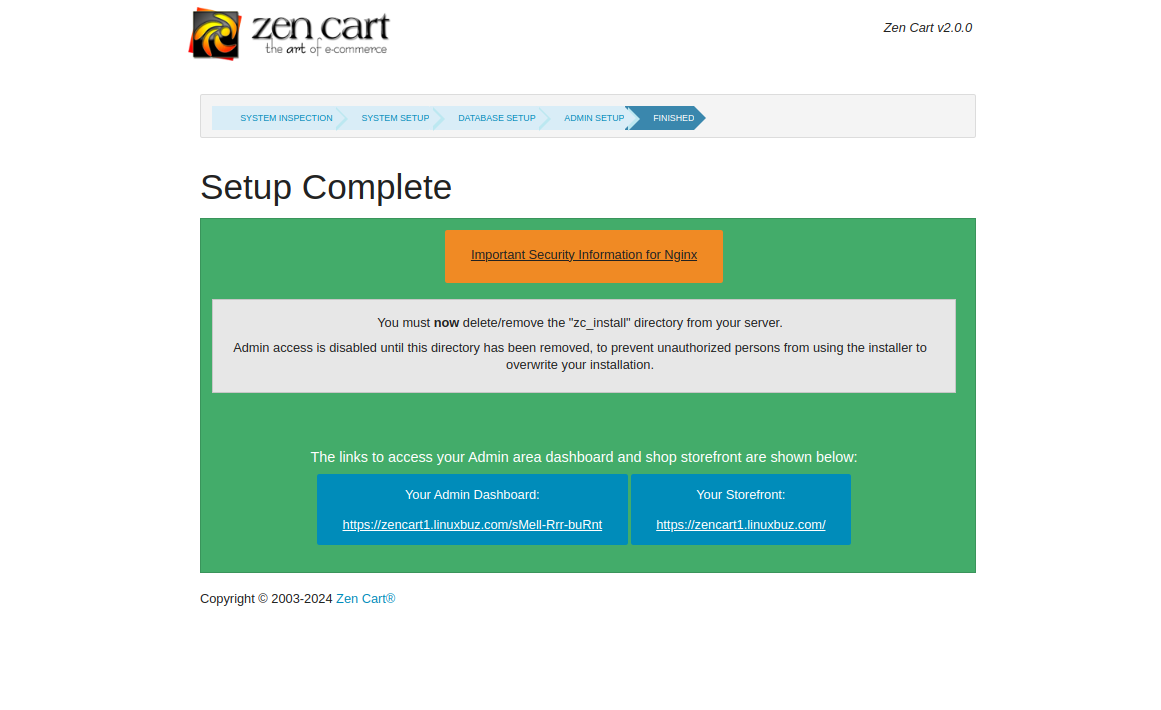
Click the Admin backend link to access the Zen Cart login page.
Enter your Zen Cart administrator username and temporary password to log in. Then, click Submit to access the initial setup wizard.
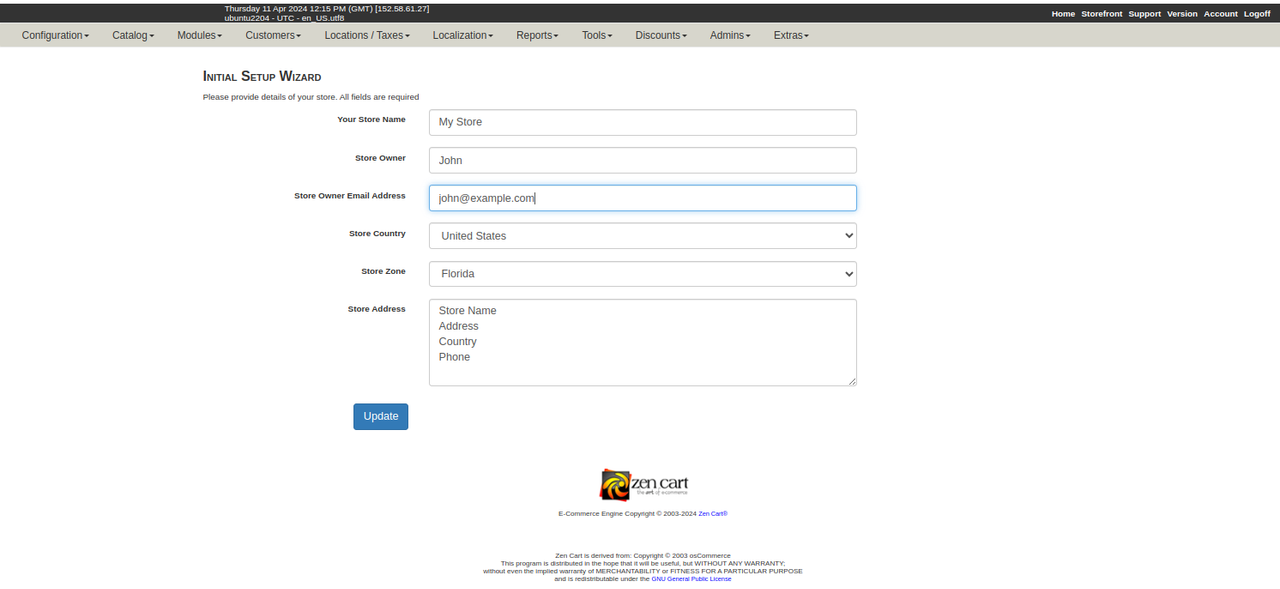
Enter your store name, owner, store owner email address, store country, store zone and store address details in the respective fields. Then, click Update to save changes.
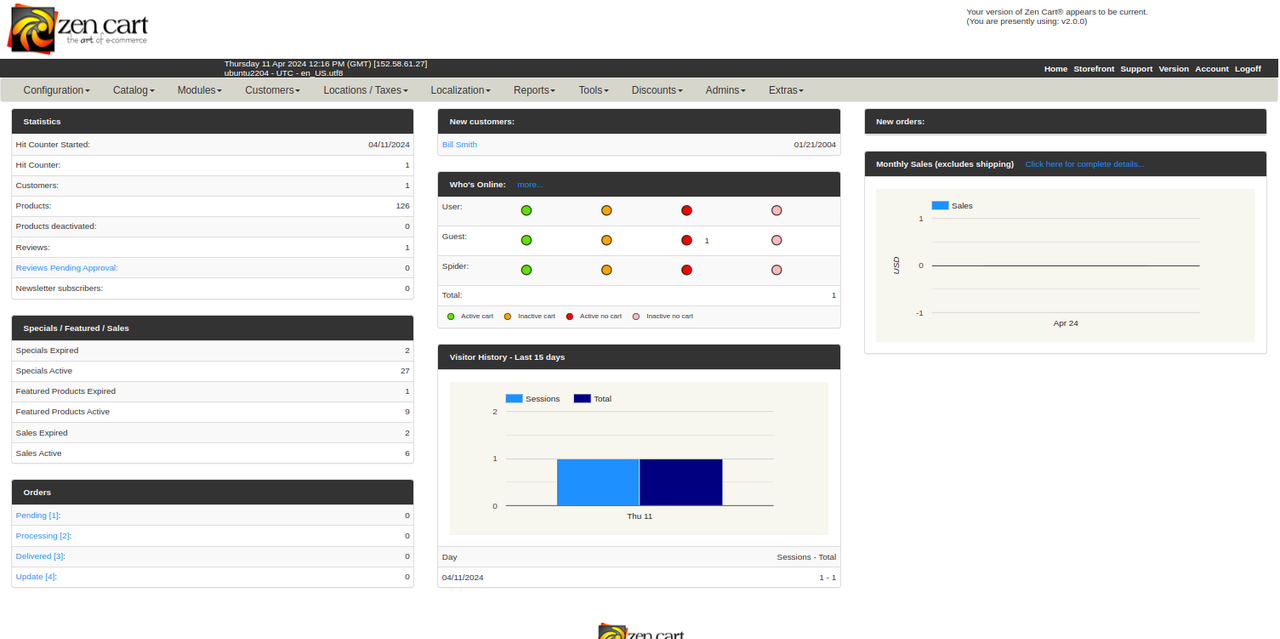
You can now manage your online store, add new products and store information in your Zen Cart dashboard.
Visit your Zen Cart frontend store and verify that the default demo products are available on your store's front page.
https://zencart.example.com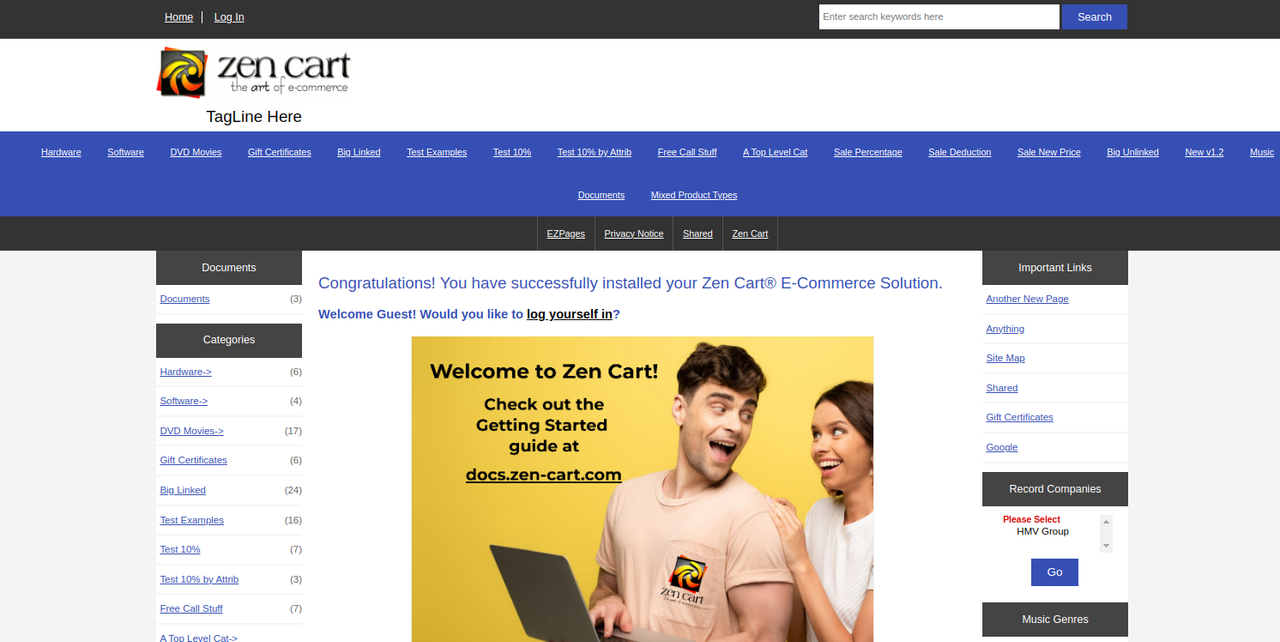
Delete the Zen Cart installation directory from your web root directory to secure your application.
console$ sudo rm -rf /var/www/html/zencart/zc_install
Conclusion
You have deployed Zen Cart on a Ubuntu 22.04 server and secured the application with trusted Let's Encrypt SSL certifications. Configure your Zen Cart application to showcase and display your products or services for sale using your domain. For more configuration options, visit the Zen Cart documentation.
No comments yet.