
How to Install GPT4ALL - An Opensource Chatbot Application for Running Large Language Models (LLMs)
GPT4All is an open-source graphical desktop application running large language models (LLMs) locally. GPT4All supports most desktop operating systems including macOS, Windows, and Linux to run LLMs without an active internet connection. It supports GGUF format models from sources including Hugging Face and integrates with API-based providers including Groq, OpenAI, and Mistral to run models privately.
This guide covers how to install GPT4All, download, run, and chat with LLMs locally. You will install the latest GPT4All version, set up API-based access, and chat with LLMs using local documents like spreadsheets, PDFs, text documents, notes, and configuration files.
Prerequisites
Before you begin:
- Have access to a Vultr Cloud GPU or CPU-powered computer running Windows, or a macOS system, or an Ubuntu (with GUI) based Linux server as a non-root user with sudo privileges.
- Create a domain A record for your domain name, pointing to the workstation's IP address. This guide uses
gpt4all.example.comdomain for demonstration purposes.
Install GPT4All
You can install GPT4All on Windows, macOS, or Linux. Follow the installation steps for your operating system in the sections below.
GPT4All is available only for Ubuntu and Debian-based desktop workstations. You can install it using the latest installation binary or Flatpak. Follow the steps below to download and install the latest installation binary on an Ubuntu 24.04 desktop workstation.
Log in to your Ubuntu desktop workstation using VNC, Nomachine, or a remote desktop client.
Open a new terminal or press
CTRL+ALT+T.Use
wgetto download the latest GPT4All.runinstallation binary for Linux from the official website.console$ wget https://gpt4all.io/installers/gpt4all-installer-linux.run
Enable execute permissions on the downloaded
gpt4all-installer-linux.runfile.console$ chmod +x gpt4all-installer-linux.run
Execute the
gpt4all-installer-linux.runfile to open the GPT4All installation wizard.console$ ./gpt4all-installer-linux.runYou need a full desktop environment to run the application.NoteClick
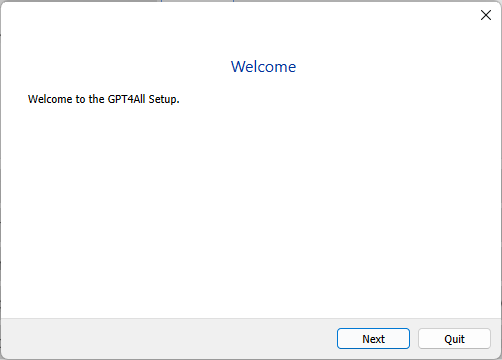
Next >to start the installation.
Verify the installation path and click
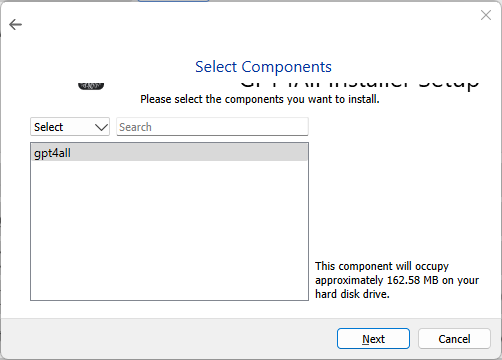
Next >to install GPT4All.Select all components to install and click
Next >.Click I accept the license to agree to the GPT4All license.
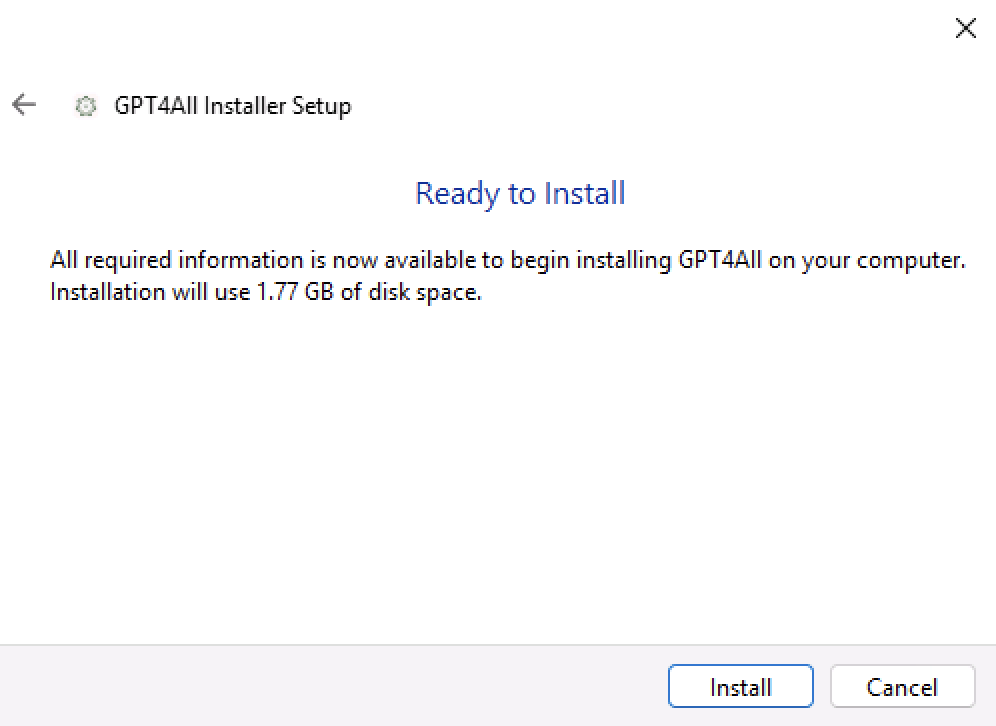
Click Install to install GPT4All.
Monitor the installation process and click Finish to close the installer.
List the files in the GPT4All installation directory
~/gpt4all, and verify that all application files are available.console$ ls ~/gpt4all
Output:
bin             InstallationLog.txt  Licenses             network.xml  share
components.xml  installer.dat        maintenancetool      plugins
gpt4all-32.png  installerResources   maintenancetool.dat  qml
gpt4all-48.png  lib                  maintenancetool.ini  resources
List the files in your
Desktoppath and verify that aGPT4All.desktopfile is available in your output.console$ ls ~/Desktop
Output:
GPT4All.desktopCreate an applications directory for your user.
console$ mkdir -p ~/.local/share/applications
Move the
GPT4All.desktopfile to./local/share/applications/in your user home directory.console$ mv ~/Desktop/GPT4All.desktop ~/.local/share/applications/
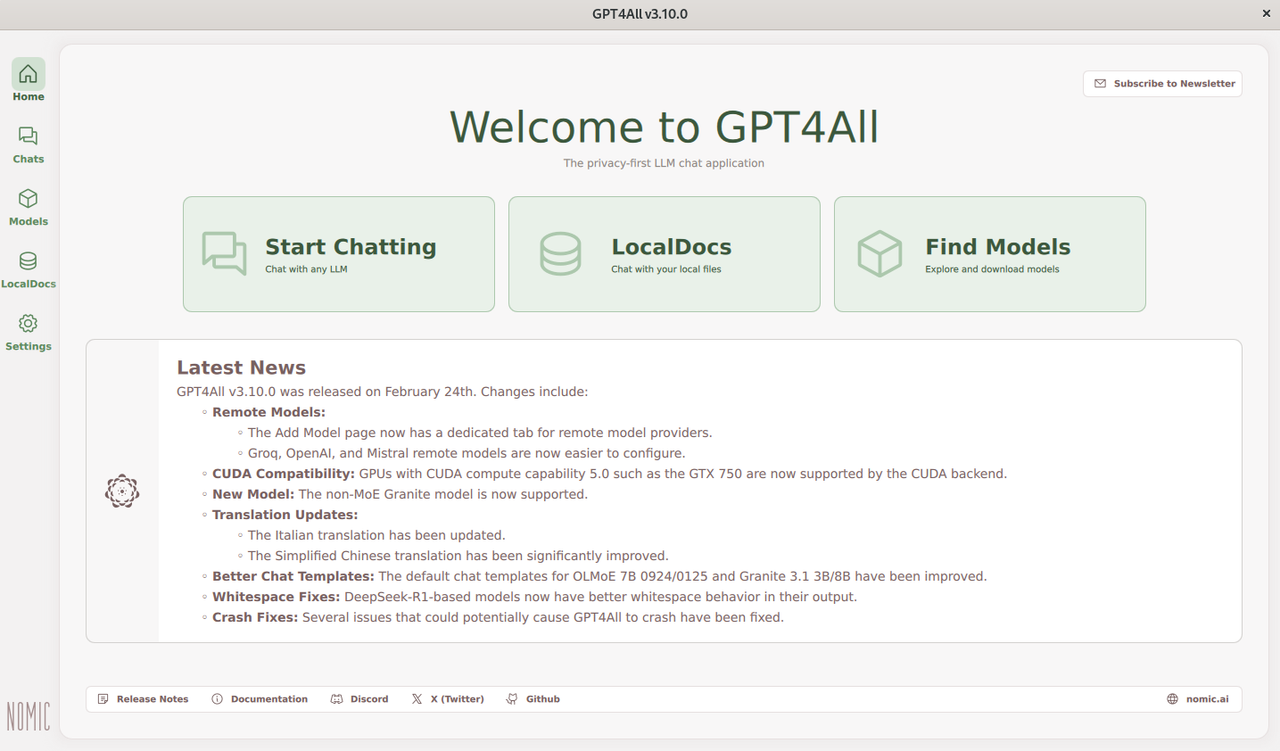
Open your applications menu and search for GPT4All.
Verify that the GPT4All application icon is available. Click the icon to launch the GPT4All chat interface.
GPT4All supports x86 and ARM-based processors for Windows workstations. You can install GPT4All using the latest installation binary with CPU or GPU support. Follow the steps below to install GPT4All on your Windows workstation.
Download the latest GPT4All
.exeinstallation binary from the official website.Open the downloaded
.exefile to launch the GPT4All installer.Click Next in the open installation wizard.
Verify the installation path and click Next to install GPT4All.
Select the components to install and click Next.
Click I accept the license to agree to the GPT4All license.
Click Next to enable the default start menu shortcut.
Click Install to install GPT4All.
Monitor the installation process and click Finish to close the installer.
Open the Windows start menu, search, and open GPT4All from the list of installed applications.

Follow the steps below to install GPT4All on a Mac with an M-series processor.
Download the latest GPT4All
.dmginstallation binary from the official website.Open the downloaded GPT4All installer package.
Double-click the
gpt4all-installer-darwinfile to open the GPT4All Installation wizard.Click
Next >to go to the Installation Folder page. You can keep the default path and proceed.
Click
Next >. You'll see the selected components to install. There is only one to install:gpt4all.Click
Next >and accept the License Agreement.Click
Installto start the installation.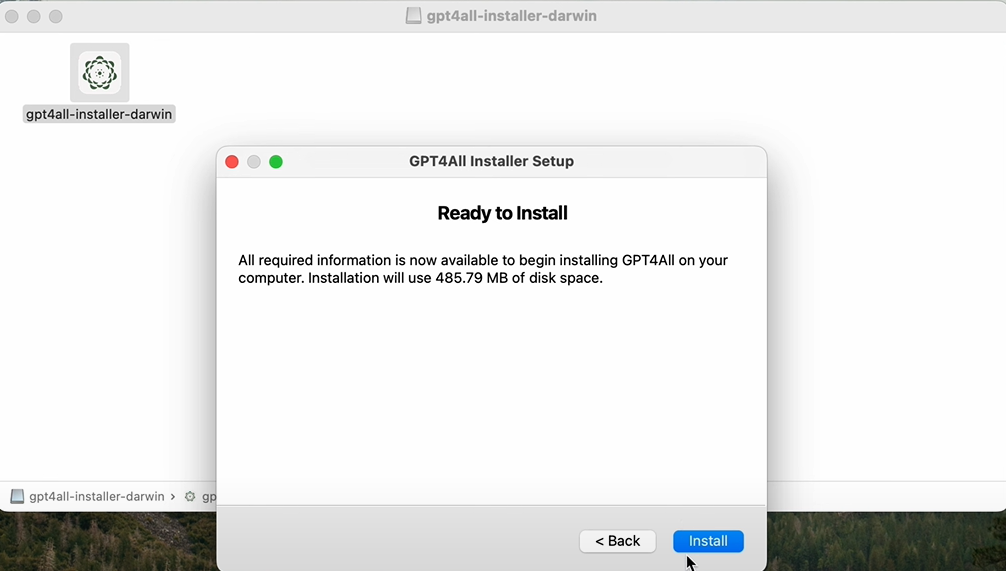
Monitor the installation process and click Finish to close the installer.
Open the Launchpad to view all installed applications.
Search and open GPT4All from the list of applications to launch the GPT4All chat interface.
Configure GPT4All to Run LLMs
GPT4All does not include any models by default. You can download models from the GPT4All built-in repository or external sources such as Hugging Face. GPT4All supports distilled, instruct, reasoning, uncensored, and censored models that you can download and add to GPT4All. Follow the steps below to add new models, manage all downloaded models, and create a new chat to interact with the installed models.
Open GPT4All from your applications menu.
Click Models on the main navigation menu.

Click Add Model to explore the available models. Choose from any of the following options on the Explore Models page:

- GPT4All: Provides models hosted in the built-in GPT4All repository depending on your installed version. Models in the GPT4All category are tested and compatible with GPT4All.
- Remote Providers: Links to remote model providers, including Groq, OpenAI, and Mistral, which require an Internet connection for model inference.
- Hugging Face: Includes GGUF format models hosted on Hugging Face. You can search and download new models from Hugging Face using keywords to run with GPT4All.
Scroll or search for a specific model, such as
Llama3.2 1B Instruct, and verify the model requirements, including: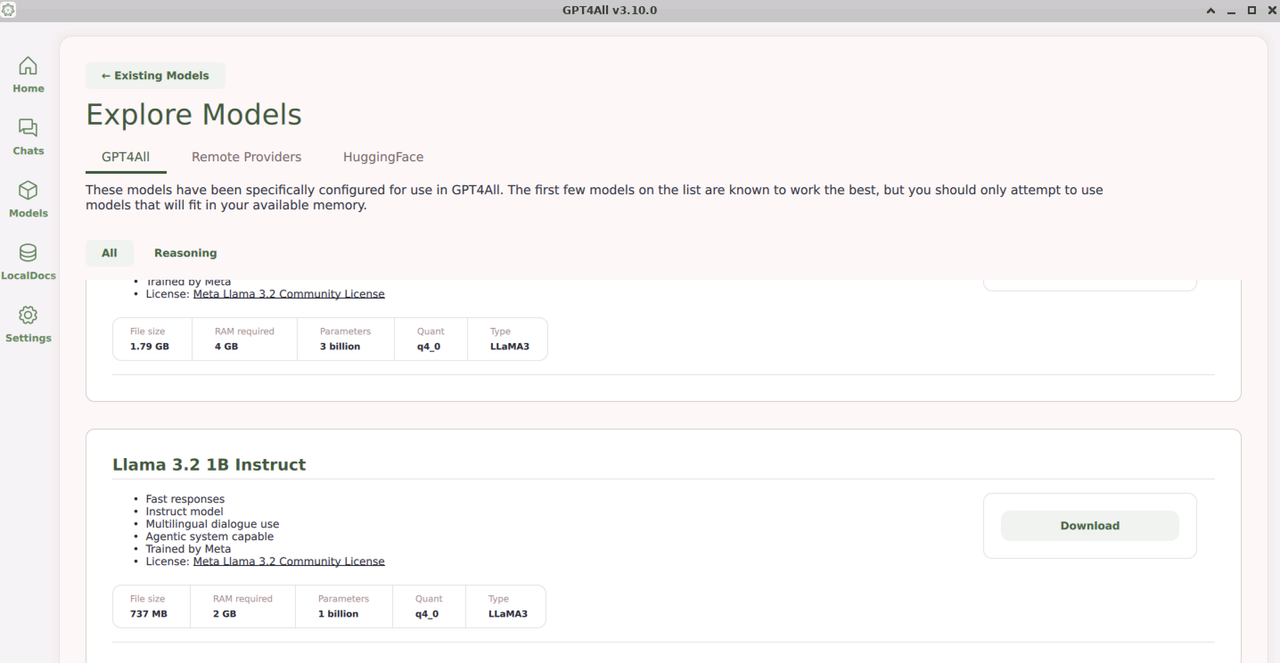
- File Size: The total size of the model files should be available as free space on your workstation.
- RAM Required: The total required memory to run the model within the GPT4All application interface.
- Parameters: The model's total parameters on which it's trained.
- Quant: The quantization type of the model, indicating how the model’s weights are compressed to reduce memory usage and improve inference speed.
- Type: The model's architecture or the base model family.
Click Download to download the model.
Click Models on the navigation menu.
Verify that the model is downloaded and available in GPT4All.
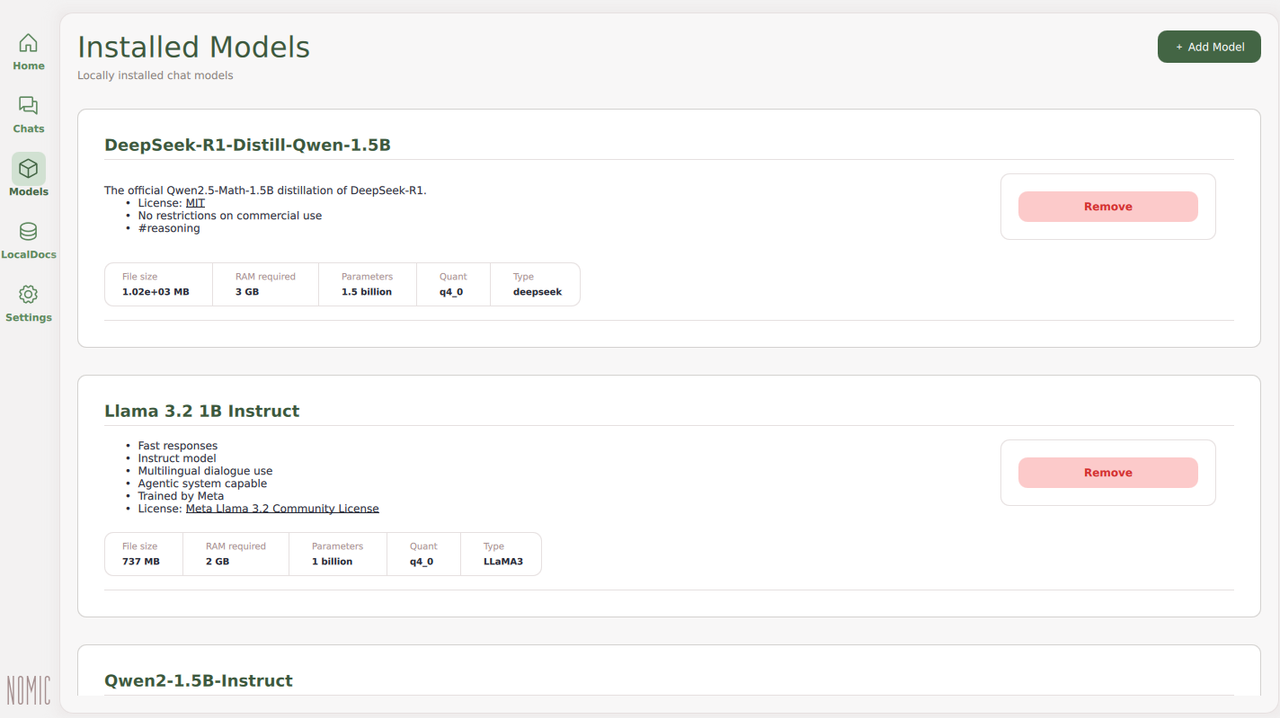
You have downloaded a model from the existing sources in GPT4All. You can browse all existing models and invoke each model independently on the Chats page.
Use GPT4All to Chat with LLMs Locally
Downloaded models are available in GPT4All on the Chats tab. All chats are private and local on your workstation. Follow the steps below to chat with the downloaded models locally available on your system without using the Internet.
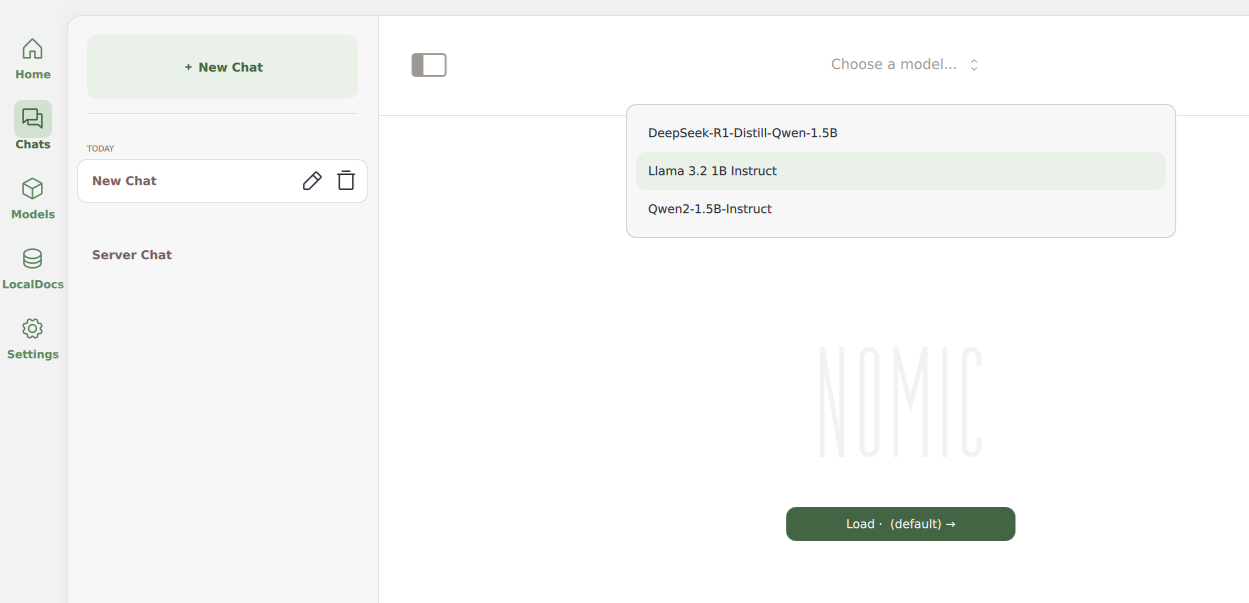
Click Chats on the main navigation menu.
Click Select a Model and choose the model.
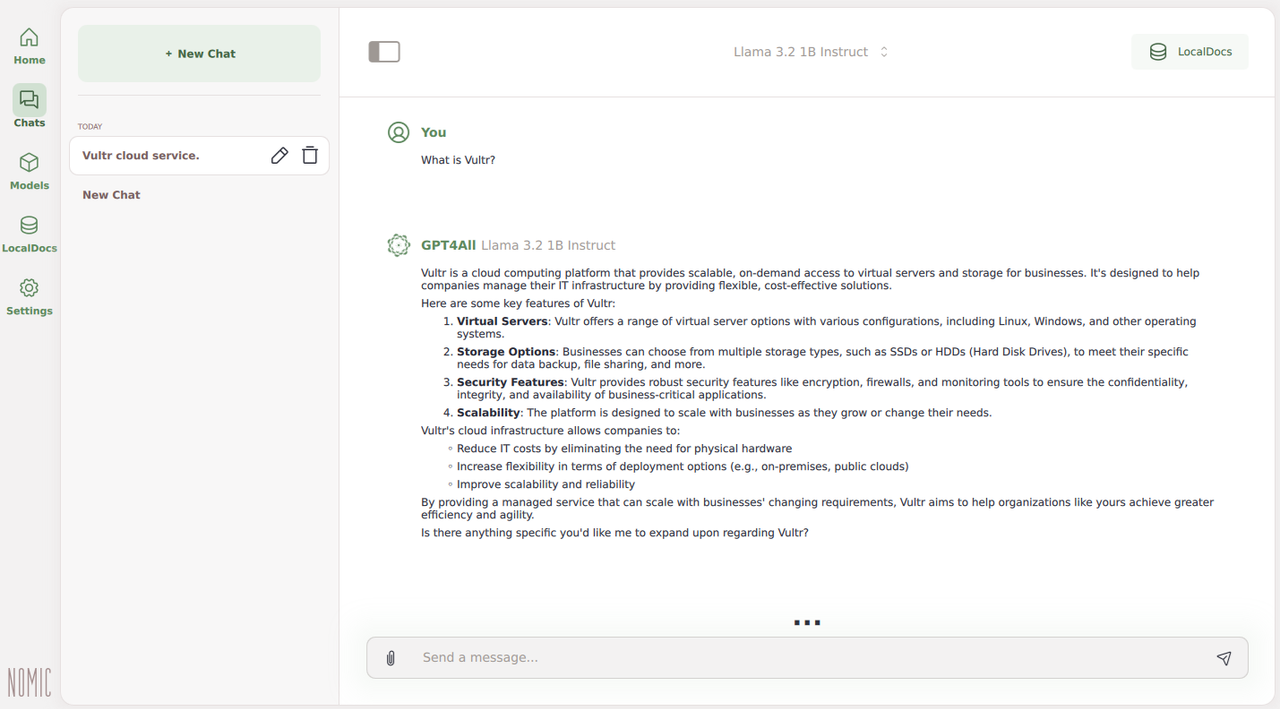
Enter a prompt in the
Send a messagefield and press Enter to start the chat.Monitor the number of tokens and the model response rate.
Verify that the model responds with a result that matches your input text prompt.
Enter another prompt in the
Send a messagefield and press Enter to continue chatting with the model referencing the original prompt to fine-tune the generated results.Click Delete next to a chat in the history pane to delete it.
Click Edit to modify the chat title, or click New Chat to start a new chat.
RAG: Reference Local Documents Using GPT4All
GPT4All supports Retrieval-Augmented Generation (RAG) by default with the LocalDocs menu option. You can upload multiple documents and chat with LLM using your uploaded documents to enhance the quality of the generated text. Follow the steps below to create a new collection and chat with local documents in GPT4All.
Click Settings and select LocalDocs.

Verify the list of supported file extensions.
Click the Embeddings Device option and select CUDA if available to use your GPU device for embedding the local documents.
Click LocalDocs on the main navigation menu.
Click Add Doc Collection to create a new collection of local documents.
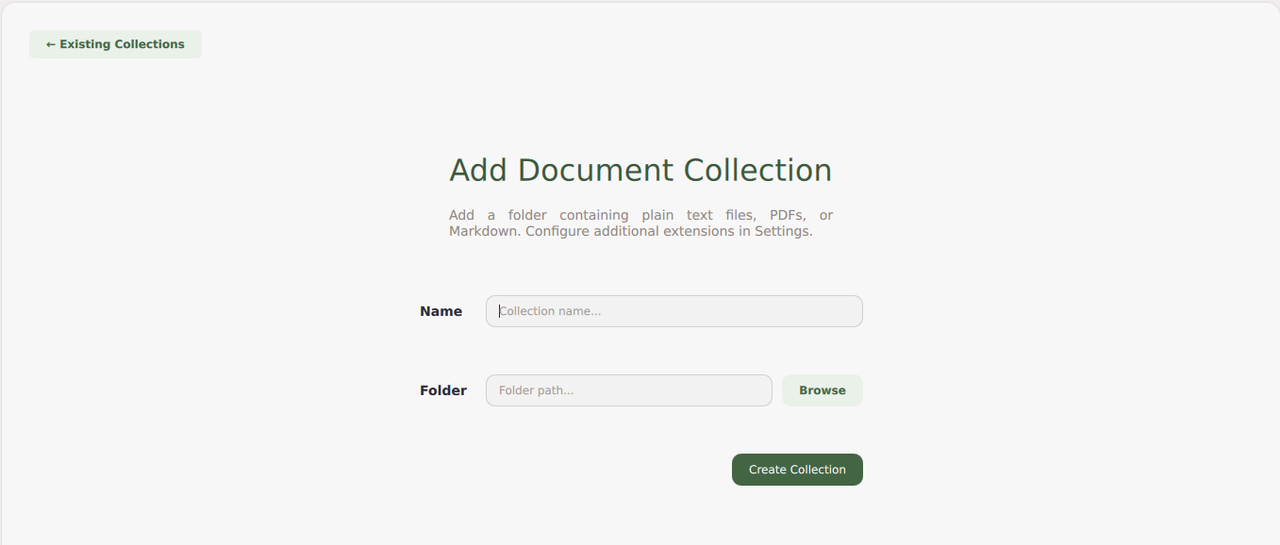
Enter the collection name and click Browse to select the path containing your documents.
Click Create Collection to scan all documents in your specified source directory.
Verify the embeddings count and the model in use,
nomic-embed-text-v1.5by default, and monitor progress for each document in the path.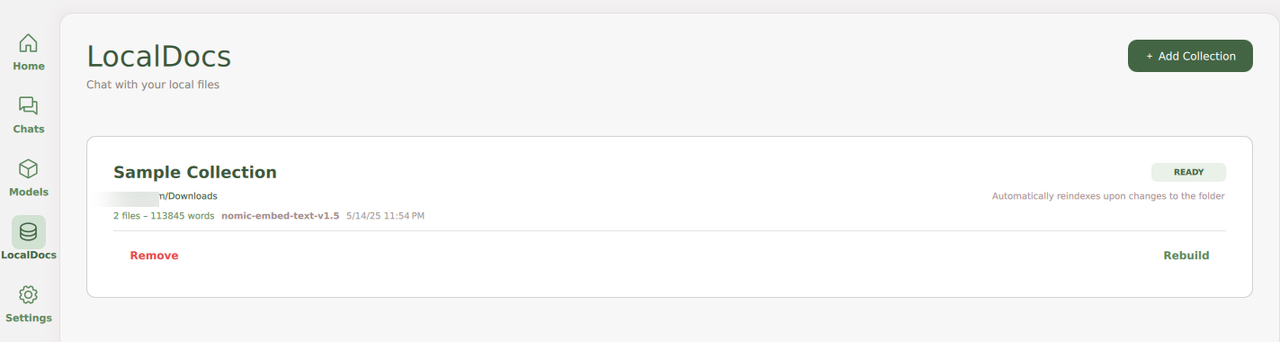
Verify that the Collection includes the documents you uploaded to use with GPT4All.
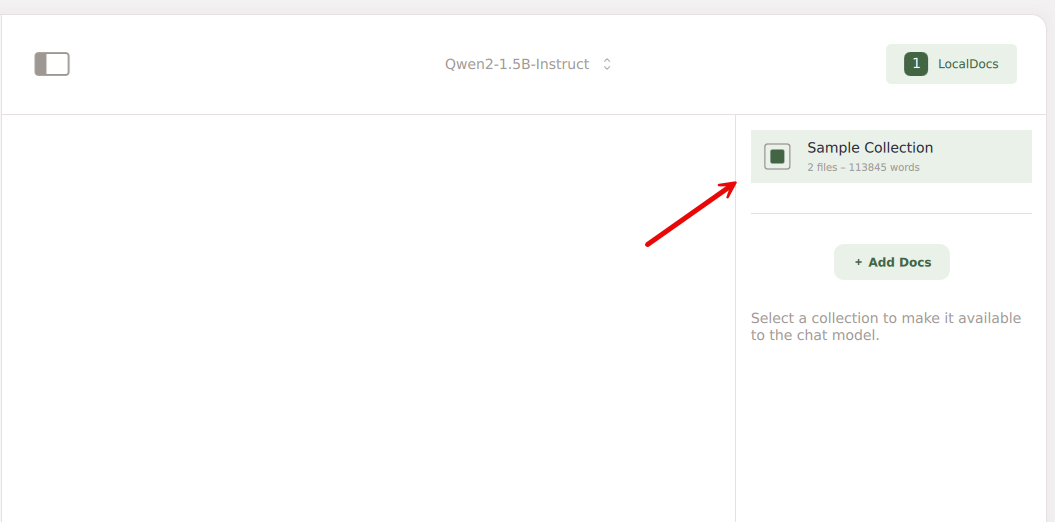
Click Chats.
Start a new chat and click LocalDocs in the top-right to select the documents collection in your chat to perform RAG operations referencing your uploaded documents.
Download and Use GGUF-Format Models with GPT4All
GGUF (GPT-Generated Unified Format) is a model format designed to store, load, and infer large language models efficiently. It's optimized for memory usage and fast loading times, making it suitable for applications that require high performance and low latency. You can download .gguf format models from platforms like Hugging Face and manually add the model to GPT4All for use within the application interface. Follow the steps below to download and use .gguf format models from Hugging Face with GPT4All.
Open a web browser, such as Firefox.
Visit Hugging Face and search for a model to download.
For example, enter
Mistral GGUFin the search bar to browse the available models.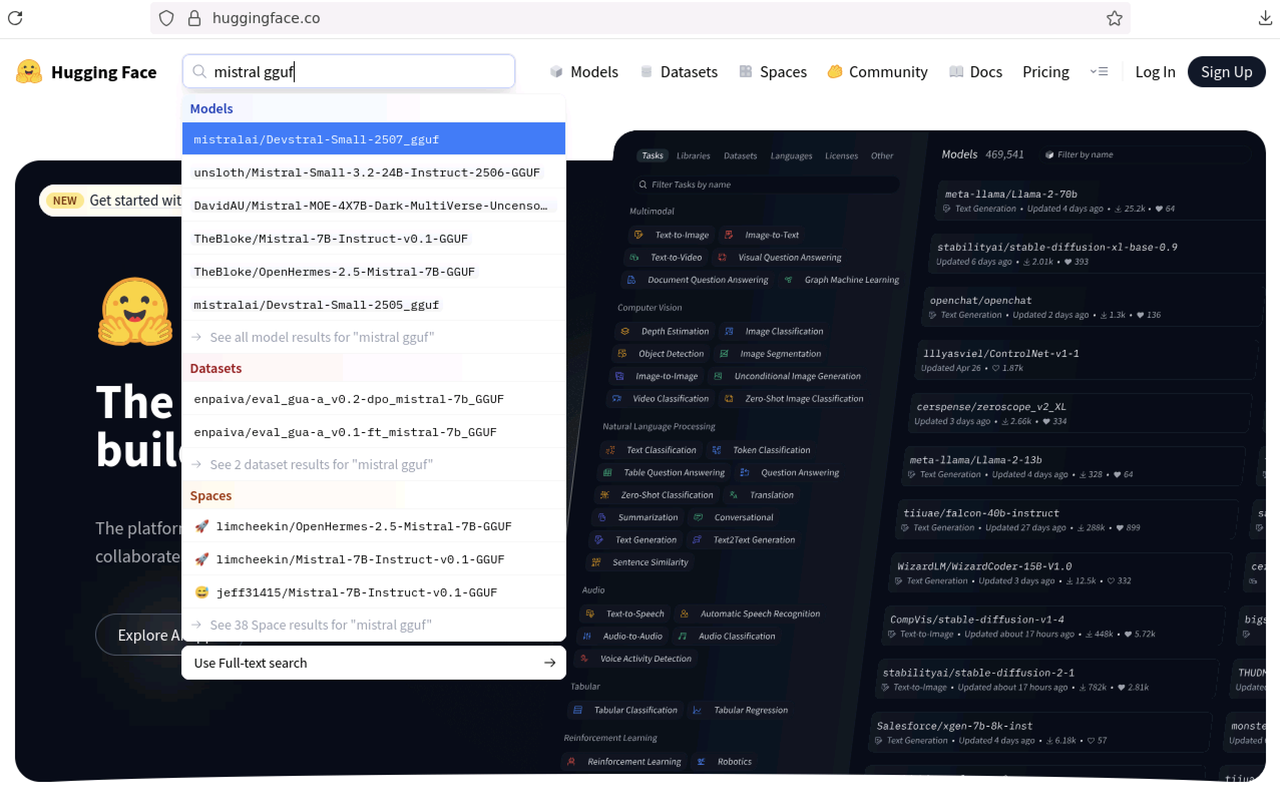
Select your desired model from the list, such as
mistralai/Devstral-Small-2507_gguf.Click Files and Versions to browse the available version files.
Select the quantization version to browse the available
.gguffiles. For instance, you can select theDevstral-Small-2507-Q4_K_M.ggufVerify the file size of the specific quantised model.
Open a new terminal window.
Check the disk usage on your workstation and verify that it has enough space to store the model files.
console$ df -h
In your browser, click on the download icon of your model version.
Once the download is complete, navigate to the Downloads folder in your terminal session.
console$ cd ~/Downloads
Move the downloaded
.gguffile to the.local/share/nomic.ai/GPT4All/directory in your user's home directory.console$ mv Devstral-Small-2507-Q4_K_M.gguf ~/.local/share/nomic.ai/GPT4All/
List the
.local/share/nomic.ai/GPT4All/directory and verify the available.ggufmodel files.console$ ls ~/.local/share/nomic.ai/GPT4All/
Output:
Devstral-Small-2507-Q4_K_M.gguf Llama-3.2-1B-Instruct-Q4_0.gguf localdocs_v3.db test_write.txtClose GPT4All if it's open on your workstation.
Open GPT4All again to load the newly added models.
Navigate to the Models tab and verify that the newly added model is available.
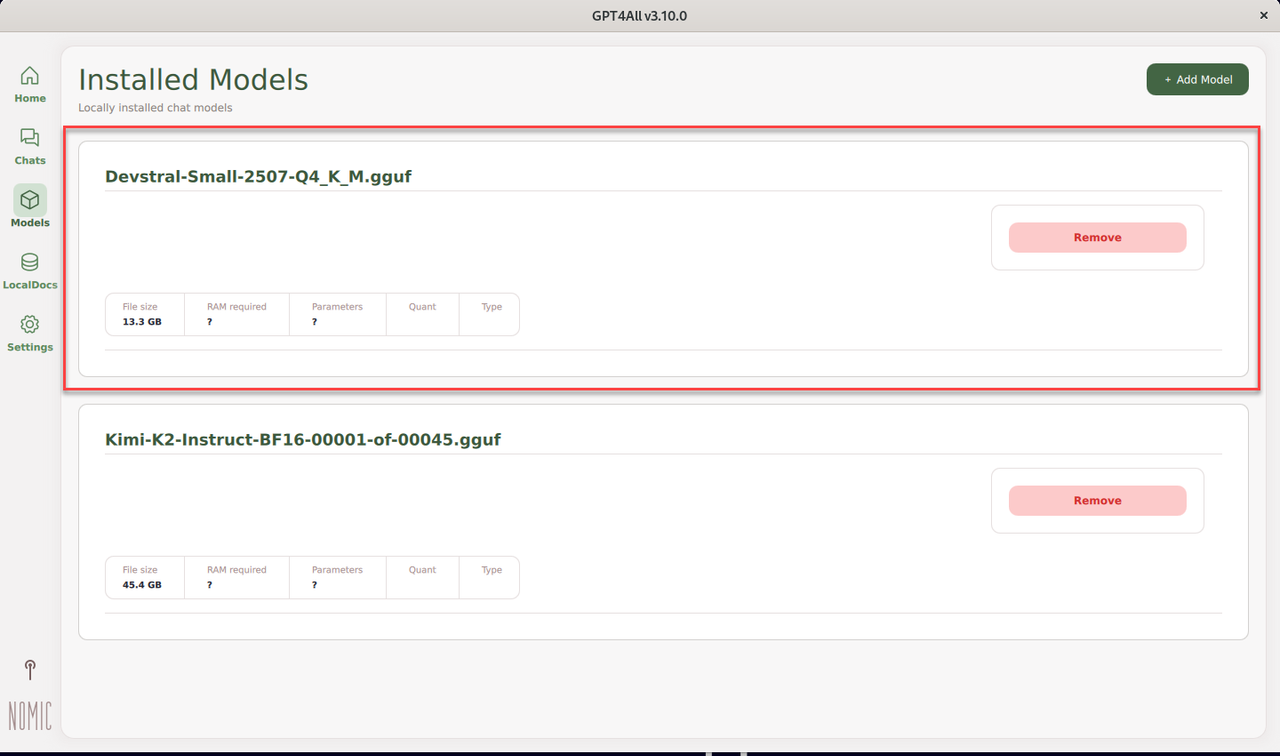
Navigate to Chats, click New Chat, and select the new model.
Enter a new text prompt like
write a short story about a robot learning to code, with a focus on arraysin the message field, and press Enter to generate a response using the model.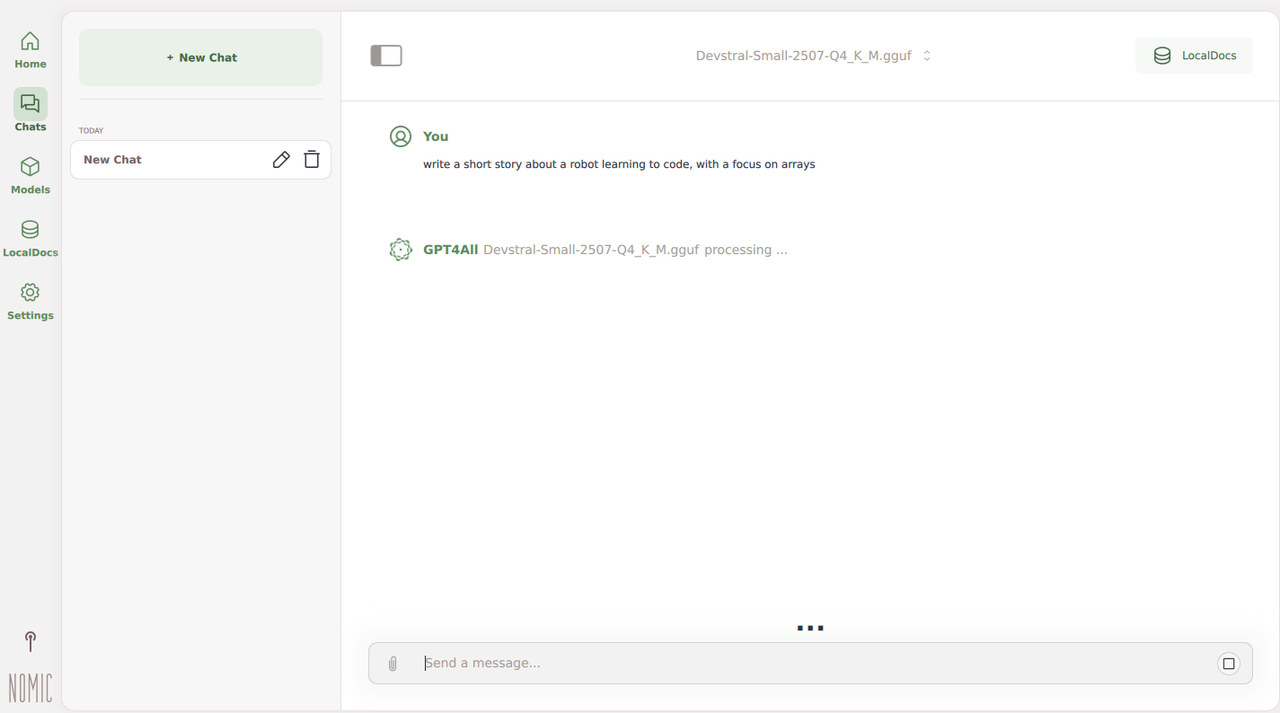
Enable the GPT4All API Server
GPT4All includes a built-in API server that lets you interact with models using REST API endpoints. The API allows you to list and run available models, allowing you to integrate GPT4All into your existing applications. Follow the steps below to configure the local API server and enable connections to the GPT4All port.
Click Settings on the main navigation menu.
Navigate to the Advanced section within the application options.
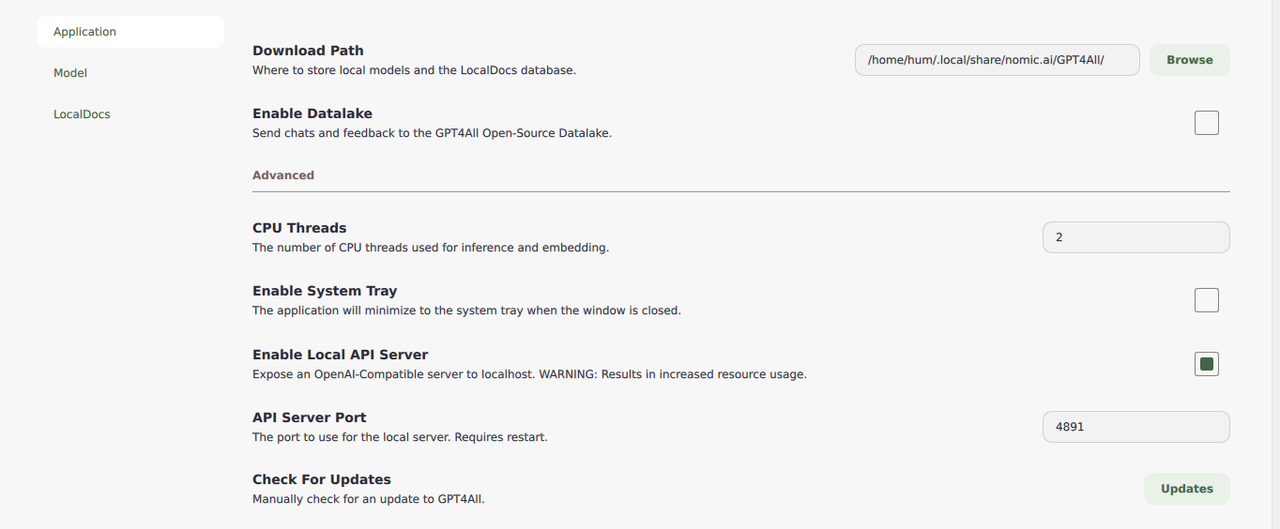
Click Enable Local API Server to enable API access on your server.
Verify the default API Server Port for accessing the GPT4All API.
Open a new terminal window.
Send a
GETrequest to the/v1/modelsendpoint using the GPT4All localhost port to list all available models on the server.console$ curl http://localhost:4891/v1/models
The API returns a JSON output containing the list of available AI models.
Send a
GETrequest to the/v1/models/<model-name>endpoint to get details of a specific model. ReplaceDevstral-Small-2507-Q4_K_M.ggufwith a model available on your GPT4All server.console$ curl http://localhost:4891/v1/models/Devstral-Small-2507-Q4_K_M.gguf
Send a
POSTrequest to the/v1/completionsendpoint to generate text completions.console$ curl -X POST http://localhost:4891/v1/completions \ -H "Content-Type: application/json" \ -d '{ "model": "Devstral-Small-2507-Q4_K_M.gguf", "prompt": "What is the sum of 8, 5, and negative 200?", "max_tokens": 500 }'
The API returns a response to the prompt in JSON format and a few other details.
Configure Nginx as a Reverse Proxy to Forward API Requests on Linux
GPT4All listens for API requests using the 127.0.0.1 localhost address, which limits all connection requests to your local system. Installing and configuring Nginx as a reverse proxy enables secure network connections to the GPT4All API server by forwarding all requests to the localhost network address.
Update the APT package information index.
console$ sudo apt update
Install Nginx web server.
console$ sudo apt install nginx -y
Create a new
gpt4all.confvirtual host configuration in the/etc/nginx/sites-availabledirectory.console$ sudo nano /etc/nginx/sites-available/gpt4all.conf
Add the following configurations to the
gpt4all.conffile. Replacegpt4all.example.comwith your domain name.iniserver { listen 80; server_name gpt4all.example.com; location / { proxy_pass http://127.0.0.1:4891; proxy_http_version 1.1; proxy_set_header Upgrade $http_upgrade; proxy_set_header Connection 'upgrade'; proxy_set_header Host $host; proxy_cache_bypass $http_upgrade; } }
Save the file and exit the text editor.
In the above configuration, Nginx forwards all connection requests from the
gpt4all.example.comdomain to the GPT4All API server port4891, allowing you to send API requests to the server remotely.To enable it, link the
gpt4all.confconfiguration to the/etc/nginx/sites-enableddirectory.console$ sudo ln -s /etc/nginx/sites-available/gpt4all.conf /etc/nginx/sites-enabled/gpt4all.conf
Remove the default Nginx virtual host configuration.
console$ sudo rm /etc/nginx/sites-enabled/default
Test the Nginx configuration for syntax errors.
console$ sudo nginx -t
Output:
nginx: the configuration file /etc/nginx/nginx.conf syntax is ok
nginx: configuration file /etc/nginx/nginx.conf test is successful
Restart Nginx to apply the configuration changes.
console$ sudo systemctl restart nginx
Allow network connections to Nginx through the default firewall.
console$ sudo ufw allow "Nginx Full"
Reload UFW to apply the firewall configuration changes.
console$ sudo ufw reload
Install Certbot to generate Let's Encrypt certificates for all connections to the
gpt4all.example.comdomain.console$ sudo apt install -y certbot python3-certbot-nginx
Generate a new SSL certificate for the
gpt4all.example.comdomain. Replaceadmin@example.comwith your email address.console$ sudo certbot --nginx -d gpt4all.example.com -m admin@example.com --agree-tos
Restart Nginx to apply the Let's Encrypt certificate changes.
console$ sudo systemctl restart nginx
Send API Requests to the GPT4All API Server
GPT4All now accepts remote API requests from a reverse proxy that forwards connections to the localhost API server port. Follow the steps below to send remote API requests to GPT4All using your gpt4all.example.com domain and run models on the server.
Send a
GETrequest to the/v1/modelsendpoint using yourgpt4all.example.comdomain to list all available models.console$ curl https://gpt4all.example.com/v1/models
Send a
GETrequest to the/v1/models/<model-name>endpoint to get the details of a specific model.console$ curl https://gpt4all.example.com/v1/models/Qwen2-1.5B-Instruct
Troubleshooting
Running GPT4All may return multiple errors after installation due to resource limitations or improper configurations. Depending on your base operating system, follow the recommendations below to troubleshoot common GPT4All errors on your workstation.
GPT4All may not open on Windows because the firewall may automatically block all outgoing and incoming connections to the application. Follow the steps below to open connections to GPT4All and access the default chat interface.
Open the Windows start menu and select Settings.
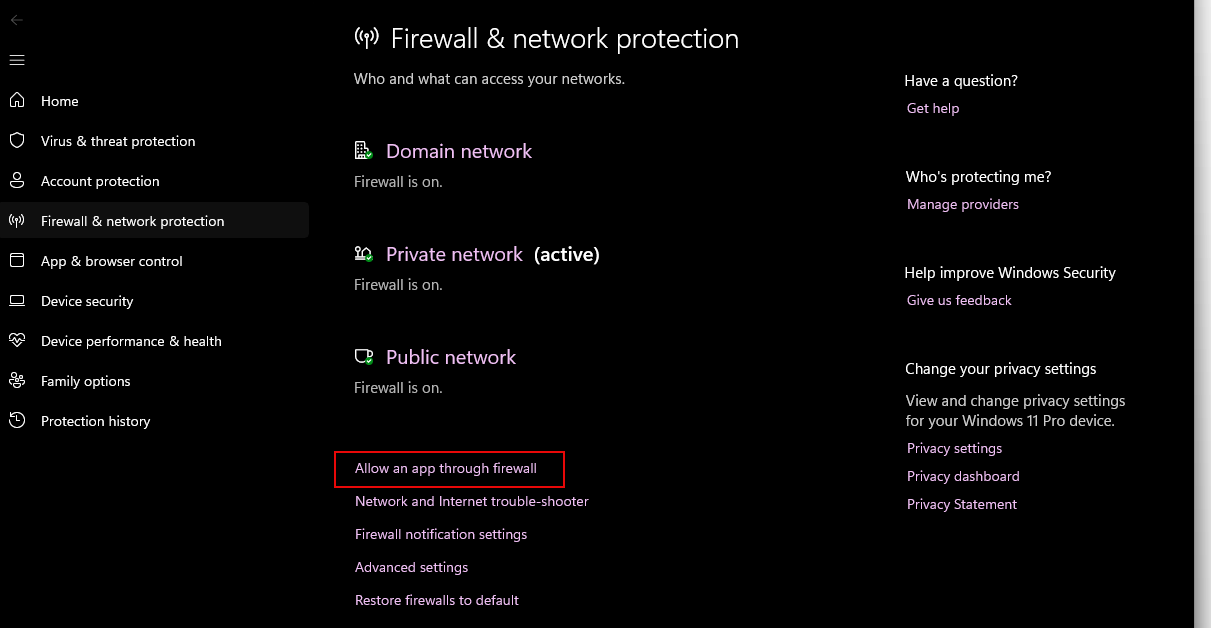
Navigate to Privacy & Security → Windows Security → Firewall and Network Protection.
Click Allow an app through firewall.
Click Change Settings.
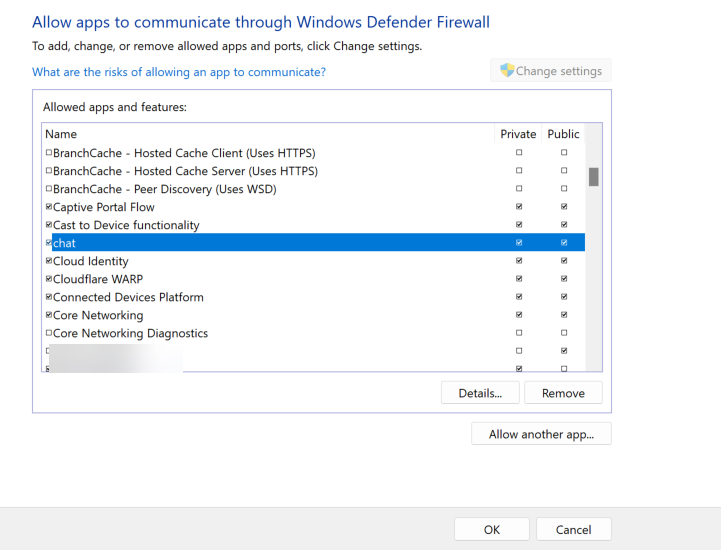
Click Allow another app, click Browse and open the
chatbinary in theC:\Users\<your-user>\gpt4all\binpath.Click Add to enable GPT4All in your applications list.
Enable private and public connections for GPT4All and click OK to save the changes.
Open GPT4All and run the locally available models on your workstation.
GPT4All includes a GPT4All.desktop file by default. Move the file from your Desktop path to the ./local/share/applications directory in your user's home directory to enable GPT4All on your applications list.
When running the installer on a minimal Linux server installation, you may encounter a series of errors, such as error while loading shared libraries: libxkbcommon.so.0: cannot open shared object file. This indicates that your system lacks some graphical libraries required to run the application.
To fix this issue, you can install a full desktop environment such as ubuntu-desktop.
$ sudo apt install ubuntu-desktop -y
After the installation, reboot your server. You can then run the GPT4All installer without encountering these errors.
If a model gets stuck on the loading screen or causes the GPT4All application to crash, it is likely because your system does not have enough RAM to run it.
To avoid this, check the model's RAM Required value in the Models tab of the GPT4All application and use the models with RAM requirements that your server can fulfill.
Conclusion
In this guide, you have installed GPT4All and run large language models (LLMs) on your workstation. GPT4All supports multiple types of models, including open-source models and API-provided models from providers like OpenAI. All chats and model interactions are private, allowing you to perform inference and run LLMs locally. For more information and application configurations, visit the GPT4All documentation.