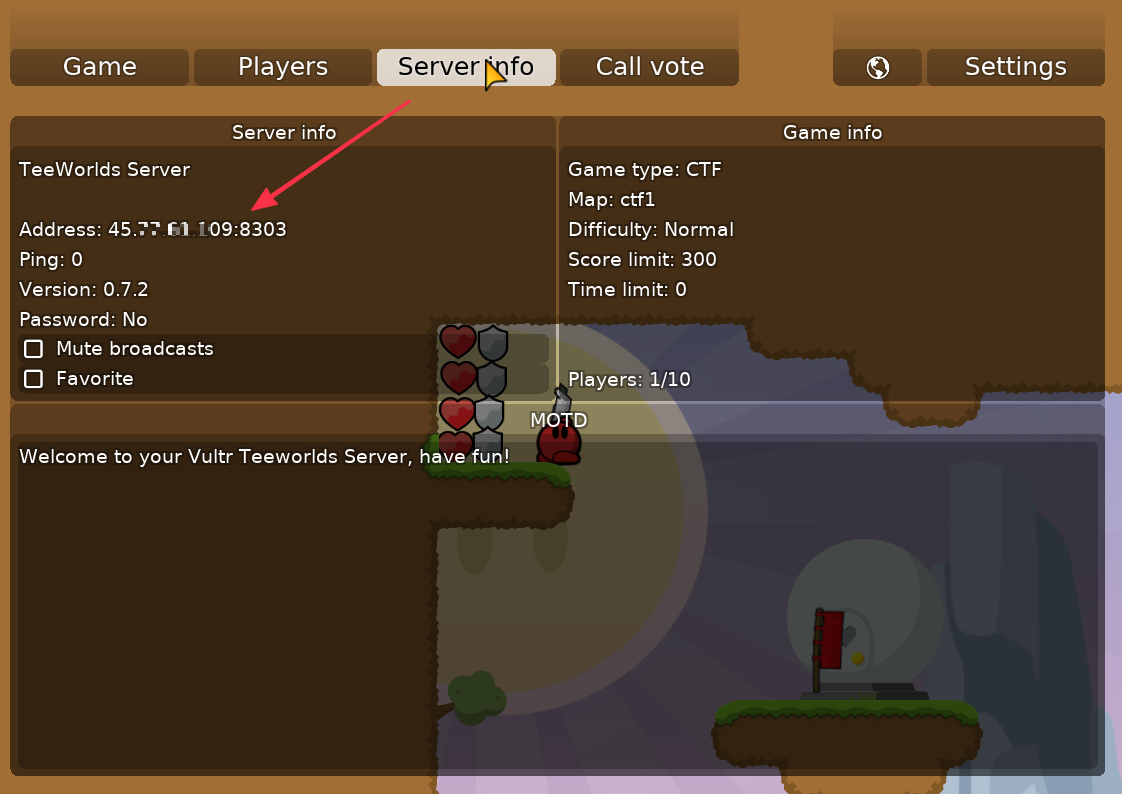
TeeWorlds is a free, open-source 2D online multiple-player shooter game. It uses a client-server architecture where users can connect to a central server and start game sessions in real-time. In this write-up, you can install TeeWorlds on a Vultr Cloud Server running a Debian or Redhat Enterprise Linux (RHEL) based server distribution.
Prerequisites
Installation
Ubuntu/Debian users can install TeeWorlds by running the following commands:
$ sudo apt install teeworlds-serverCentOS/RockyLinux users can install TeeWorlds by running the following commands:
$ sudo dnf install teeworlds-server
Configure TeeWorlds Server
Backup the default TeeWorlds server configuration file.
$ sudo mv /etc/teeworlds/server.cfg /etc/teeworlds/server.cfg.ORIGCreate a new configuration file in a text editor.
$ sudo nano /etc/teeworlds/server.cfgAdd the following configurations to the file.
 sv_name TeeWorlds Server
 bindaddr *
 sv_motd Welcome to your Vultr Teeworlds Server, have fun!
 sv_port 8303
 sv_max_clients 10
 sv_map ctf1
 sv_rcon_password Your-Password-here
 sv_scorelimit 300
 sv_gametype ctf
Below is what each configuration line does:
sv_name:A custom name for the game server.bindaddr:The network address TeeWorlds should use.sv_motd:Description or welcome message for your game server.sv_port:Network port to listen on, by default, port 8303.sv_max_clients:Maximum number of player on server (max is 16).sv_map:Default map for the game.sc_rcon_password:A strong password for accessing server settingssv_scorelimit:Top score players can reach before restarting the game.sv_gametype:Type of game, either dm, tdm, or ctf.
Save and close the file.
Configure the firewall to allow the TeeWorlds server port
8303.Ubuntu (UFW):
$ sudo ufw allow 8303CentOS (FirewallD):
$ sudo firewall-cmd --zone=public --add-port=8303/tcp
To correct user permissions, edit the TeeWorlds systemd file.
$ sudo nano /lib/systemd/system/teeworlds-server.serviceChange the listening user from
_teeworldsto a valid system user account. Your edited file should look like the one below:[Unit] Description=Teeworlds multiplayer server Documentation=man:teeworlds-server(6) After=network.target [Service] Restart=on-failure User=example ExecStart=/bin/sh -c "/usr/games/teeworlds-server -f /etc/teeworlds/server.cfg | /usr/share/games/teeworlds/teeworlds_datetime.sh" StandardOutput=syslog StandardError=syslog SyslogIdentifier=teeworlds [Install] WantedBy=multi-user.targetSave and close the file.
Restart systemd to load changes.
$ sudo systemctl daemon-reloadEnable the TeeWorlds server.
$ sudo systemctl enable teeworlds-serverStart TeeWorlds server.
$ sudo systemctl start teeworlds-serverVerify that TeeWorlds is up and running with no errors:
$ sudo systemctl status teeworlds-server
Ready to play?
Start a TeeWorlds game session on your desktop computer.
Connect to the TeeWorlds server by replacing
localhostwith your server address.
Conclusion
You have successfully installed TeeWorlds on a Vultr Cloud Server. You can connect multiple players on the server as listed in your configuration file with the installation. For more configuration options, visit the TeeWorlds Server Settings page.
No comments yet.