
How to Migrate DigitalOcean Container Registry to Vultr Container Registry
The Vultr Container Registry (VCR) is a managed container image repository that supports the Open Container Initiative (OCI) format. It provides a secure and scalable platform for storing and distributing container images across global infrastructure. Compared to DigitalOcean Container Registry (DOCR), VCR offers enhanced performance, competitive pricing, and improved integration with Kubernetes environments.
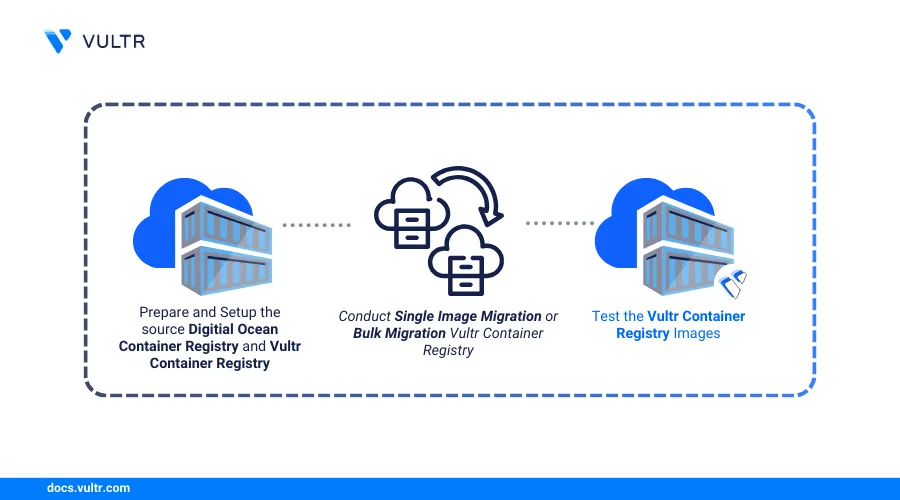
In this guide, you will migrate container images from DigitalOcean to the Vultr Container Registry. You will use both Docker and skopeo to perform single-image and bulk transfers between registries. The process includes authentication, tagging, pushing, and verifying your migrated images.
Prerequisites
Before you begin:
- Have access to an existing DigitalOcean Container Registry with a valid API token.
- Deploy a Docker App Instance to use as the migration workstation.
- Set up a Vultr Container Registry and enable push access.
- Connect to the Docker instance using SSH.
Prepare the Source DigitalOcean Container Registry
Follow the steps below to authenticate with DigitalOcean, list available images in your container registry, and prepare for migration.
Log in to your migration workstation via SSH.
Install the DigitalOcean CLI (
doctl):console$ sudo snap install doctl
Authenticate
doctlusing your API token:console$ doctl auth init
Generate your API token from the DigitalOcean dashboard and paste it when prompted.
Allow
doctlto interact with Docker (required if installed via Snap):console$ sudo snap connect doctl:dot-docker
Log in to your DigitalOcean Container Registry.
console$ doctl registry login
List all repositories and images available in your registry.
console$ doctl registry repository list
Identify the images you want to migrate and note their names and tags.
Set Up the Vultr Container Registry
Before migrating, ensure your Vultr Container Registry is set up with push access.
- Log in to the Vultr Console.
- Navigate to Products > Container Registry, and open your registry dashboard.
- Ensure that:
- Push access is enabled under the Docker / Kubernetes tab
- You’ve retrieved the registry URL, username, and API key
For a full walkthrough of VCR configuration, refer to the Vultr Container Registry Product Documentation.
Single Image Migration
This section shows how to migrate one container image from DigitalOcean Container Registry to Vultr Container Registry using Docker commands.
Pull an image (for example,
ubuntu) from your DigitalOcean registry. Replace<your-docr>with your actual registry name:console$ docker pull registry.digitalocean.com/<your-docr>/ubuntu:latest
This command downloads the
ubuntuimage from the DigitalOcean registry to your migration workstation.Verify that the image exists locally.
console$ docker images
Tag the image for the Vultr registry.
console$ docker tag registry.digitalocean.com/<your-docr>/ubuntu:latest \ <your-vcr>/ubuntu:latest
Replace
<your-vcr>with your actual Vultr registry URL.Verify that the new tag was applied.
console$ docker images
Output.
REPOSITORY                                            TAG       IMAGE ID       CREATED       SIZE
<your-vcr>/ubuntu                                     latest    a04dc4851cbc   2 weeks ago   78.1MB
registry.digitalocean.com/<your-docr>/ubuntu          latest    a04dc4851cbc   2 weeks ago   78.1MB
Log in to Vultr Container Registry.
console$ docker login https://<your-vcr> -u <vcr-username> -p <vcr-api-key>
Push the image to the Vultr registry.
console$ docker push <your-vcr>/ubuntu:latest
Remove the local copy to save disk space (optional).
console$ docker rmi <your-vcr>/ubuntu:latest
Pull the image from Vultr to verify it's available.
console$ docker pull <your-vcr>/ubuntu:latest
Run the container to verify the image works.
console$ docker run -dit --name ubuntu-test <your-vcr>/ubuntu:latest
Verify the running container:
console$ docker ps
Output.
CONTAINER ID   IMAGE                          STATUS         NAMES
abcd12345678   <your-vcr>/ubuntu:latest       Up 5 seconds   ubuntu-test
This confirms that the image was successfully migrated and runs correctly from the Vultr Container Registry.
Bulk Migration
Automate multi-image migrations by fetching image names from DigitalOcean Container Registry using doctl and looping through them in a Bash script. This approach reduces manual effort when transferring multiple repositories.
Log in to your Vultr Container Registry.
console$ docker login https://<your-vcr> -u <vcr-username> -p <vcr-api-key>
Replace
<your-vcr>and<credentials>with your actual registry URL and credentials.Create a migration shell script to automate the migration process.
console$ nano migration.sh
Add the following content to the script.
bash#!/bin/bash DOCR="registry.digitalocean.com/<your-docr>" VCR="<your-vcr>" # Fetch repository names from DOCR. Assumes you are authenticated via `doctl`. IMAGES=($(doctl registry repository list | awk 'NR > 1 {print $1}')) if [ ${#IMAGES[@]} -eq 0 ]; then echo "No images found in DigitalOcean registry." exit 1 fi echo "Found the following images to process:" printf "%s\n" "${IMAGES[@]}" echo "-------------------------------------" for IMAGE in "${IMAGES[@]}" do FULL_IMAGE_NAME="${IMAGE}:latest" echo "Processing image: $FULL_IMAGE_NAME" # Pull image from DigitalOcean docker pull $DOCR/$FULL_IMAGE_NAME # Tag image for Vultr docker tag $DOCR/$FULL_IMAGE_NAME $VCR/$FULL_IMAGE_NAME # Push image to Vultr docker push $VCR/$FULL_IMAGE_NAME echo "Successfully migrated: $FULL_IMAGE_NAME" echo "-------------------------------------" done echo "Image migration completed for:" printf "%s\n" "${IMAGES[@]}"
Replace
<your-docr>and<your-vcr>with your actual DigitalOcean and Vultr registry names.This script retrieves all image names from your DigitalOcean Container Registry using
doctl, then loops through each image to:- Pull it from DigitalOcean
- Tag it for the Vultr Container Registry
- Push it to Vultr
Save and run the script.
console$ bash migration.sh
Verify that all images are available in your Vultr Container Registry.
console$ docker images <your-vcr>/*
Output:
REPOSITORY                          TAG       IMAGE ID       CREATED        SIZE
<your-vcr>/node                    latest    b1e1dcf10eb9   2 weeks ago    1.12GB
<your-vcr>/php                     latest    cd0e124311ea   2 weeks ago    547MB
<your-vcr>/nginx                   latest    53a18edff809   7 weeks ago    192MB
<your-vcr>/python                  latest    e6c8fe2e1108   7 weeks ago    1.02GB
<your-vcr>/ubuntu                  latest    a04dc4851cbc   2 months ago   78.1MB
<your-vcr>/httpd                   latest    83d938198316   2 months ago   148MB
Use skopeo for Direct Registry Transfers
skopeo is an efficient alternative to Docker for registry-to-registry transfers. Use it when you want to avoid local disk usage or integrate into CI/CD pipelines.
skopeo is a command-line utility that allows you to copy container images directly between registries without pulling them to your local machine. This method is faster and more efficient for bulk transfers or automated CI/CD workflows.
You can use skopeo to copy images from the DigitalOcean Container Registry (DOCR) to the Vultr Container Registry (VCR) with a single command.
Requirements
Install skopeo on your migration workstation.
Update the package index.
console$ sudo apt update
Install the
skopeopackage.console$ sudo apt install skopeo -y
Make sure you have:
- Your Vultr registry username and API key.
- The DOCR and VCR image URLs in the format:
- DOCR: registry.digitalocean.com/<your-docr>/<image>:<tag>
- VCR: region.vultrcr.com/<your-vcr>/<image>:<tag>
Copy a Single Image
Use the following command to copy an image directly between registries. Replace all placeholder values with your actual credentials and registry paths.
$ skopeo copy \
  --src-creds "<docr-email>:<docr-token>" \
  --dest-creds "<vcr-username>:<vcr-api-key>" \
  docker://registry.digitalocean.com/<your-docr>/ubuntu:latest \
  docker://<your-vcr-region>.vultrcr.com/<your-vcr>/ubuntu:latest
Automate Multiple Image Transfers with skopeo
skopeo does not support wildcard transfers or full repository syncs. However, you can automate multiple image transfers by looping over a list of repositories using a shell script.
Create a file named
skopeo-migrate.sh.console$ nano skopeo-migrate.sh
Add the following script.
bash#!/bin/bash DOCR="registry.digitalocean.com/<your-docr>" VCR="blr.vultrcr.com/<your-vcr>" DOCR_USER="<docr-email>" DOCR_TOKEN="<docr-token>" VCR_USER="<vcr-username>" VCR_API_KEY="<vcr-api-key>" # Add image names here if you want a fixed list DEFAULT_IMAGES=("ubuntu" "nginx" "node" "php" "python" "httpd") # Read images from file or command-line arguments if [[ -f "$1" ]]; then mapfile -t IMAGES < "$1" shift elif [ $# -gt 0 ]; then IMAGES=("$@") else IMAGES=("${DEFAULT_IMAGES[@]}") fi for IMAGE in "${IMAGES[@]}"; do echo "Migrating $IMAGE" skopeo copy \ --src-creds "$DOCR_USER:$DOCR_TOKEN" \ --dest-creds "$VCR_USER:$VCR_API_KEY" \ docker://$DOCR/$IMAGE \ docker://$VCR/$IMAGE echo "Successfully migrated $IMAGE" echo "----------------------------------" done
Replace all
<...>placeholders with your actual registry URLs and credentials.Save and run the script.
To use the built-in default list:
console$ bash skopeo-migrate.sh
To provide images as arguments (e.g., with specific tags):
console$ bash skopeo-migrate.sh ubuntu:22.04 nginx:latest php:8.2
To read images from a file (one per line):
console$ bash skopeo-migrate.sh images.txt
This approach allows you to migrate multiple images directly between registries without downloading them locally. You can also integrate this logic into CI/CD pipelines for repeatable deployments.
When to Use skopeo
Use skopeo when:
- You want to avoid local disk I/O during migration.
- You’re working with large images or many repositories.
- You want to automate registry-to-registry syncs in CI/CD pipelines.
skopeo supports additional use cases such as signing, inspecting, and deleting remote images. For advanced usage, refer to the skopeo GitHub repository.
Verify and Test the Vultr Container Registry Images
After migrating your images, verify their availability and functionality to ensure a successful transition.
Pull the image from the Vultr Container Registry.
console$ docker pull <your-vcr>/ubuntu:latest
Run a container from the pulled image to verify it works.
console$ docker run -dit --name ubuntu-test <your-vcr>/ubuntu:latest
Verify that the container is running.
console$ docker ps
Output.
CONTAINER ID   IMAGE                          STATUS         NAMES
f5ebf8a3ca94   <your-vcr>/ubuntu:latest       Up 3 seconds   ubuntu-test
This confirms that the image was pushed successfully and runs as expected from the Vultr Container Registry.
Cutover to the Vultr Container Registry
After confirming that your images work on Vultr, update your Kubernetes, Docker Compose, and CI/CD configurations to use the new image paths.
Update your Kubernetes manifests to use the Vultr Container Registry.
yamlcontainers: - name: my-app image: <your-vcr>/example-image:latest
Update your Docker Compose files.
yamlservices: app: image: <your-vcr>/example-image:latest
Update your CI/CD pipelines (e.g., GitHub Actions, GitLab CI) to pull images from the new registry.
Remove or deprecate the old DigitalOcean Container Registry if it's no longer needed.
Monitor your application's performance and logs to ensure services operate normally.
Periodically pull and run images from Vultr to validate that they remain functional and uncorrupted.
Conclusion
You've successfully migrated container images from the DigitalOcean Container Registry to the Vultr Container Registry using Docker or skopeo. Always test your images after migration and update your deployments accordingly. To learn more about managing your container images on Vultr, see the Vultr Container Registry Reference Guide.