
How to Migrate Google Cloud SQL for MySQL to Vultr Managed Databases for MySQL
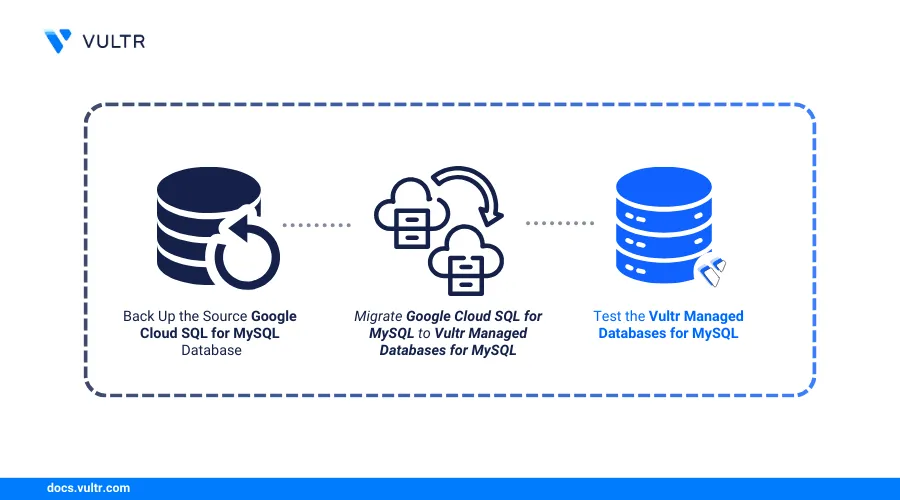
Vultr Managed Databases for MySQL is a high-performance, fully managed database solution offering scalability, reliability, and ease of use for your applications. With automatic backups, enhanced security features, and seamless scalability, Vultr ensures your database performs at its best while minimizing the management overhead. You can migrate an existing Google Cloud SQL for MySQL instance to a Vultr Managed Databases for MySQL cluster to transfer specific databases and cut over applications with new performance improvements.
Follow this guide to migrate from Google Cloud SQL for MySQL to Vultr Managed Databases for MySQL. You will set up a migration environment, transfer your data, and verify the integrity of the migrated database with minimal downtime for any linked applications.
Prerequisites
Before you begin, you need to:
- Have access to an existing Google Cloud SQL for MySQL instance.
- Configure your source Google Cloud SQL for MySQL Database to accept connections from all sources (
0.0.0.0/0). - Back up your source Google Cloud SQL for MySQL database to ensure a recovery option is available.
- Provision a Vultr Managed Databases for MySQL cluster with the same MySQL version, and a similar or higher size as your source Cloud SQL for MySQL database.
- Install MySQL Workbench or the
mysqlclient tool on your workstation.
Migrate Google Cloud SQL for MySQL to Vultr Managed Databases for MySQL
You can migrate your databases from your Google Cloud SQL instance to Vultr Managed Dabatabase for MySQL cluster using two methods, live replication or backup and restore. Follow the step below to migrate your Cloud SQL for MySQL instance to a Vultr Managed Databases for MySQL cluster.
Log in to the Vultr Console.
Click Products and select Databases.
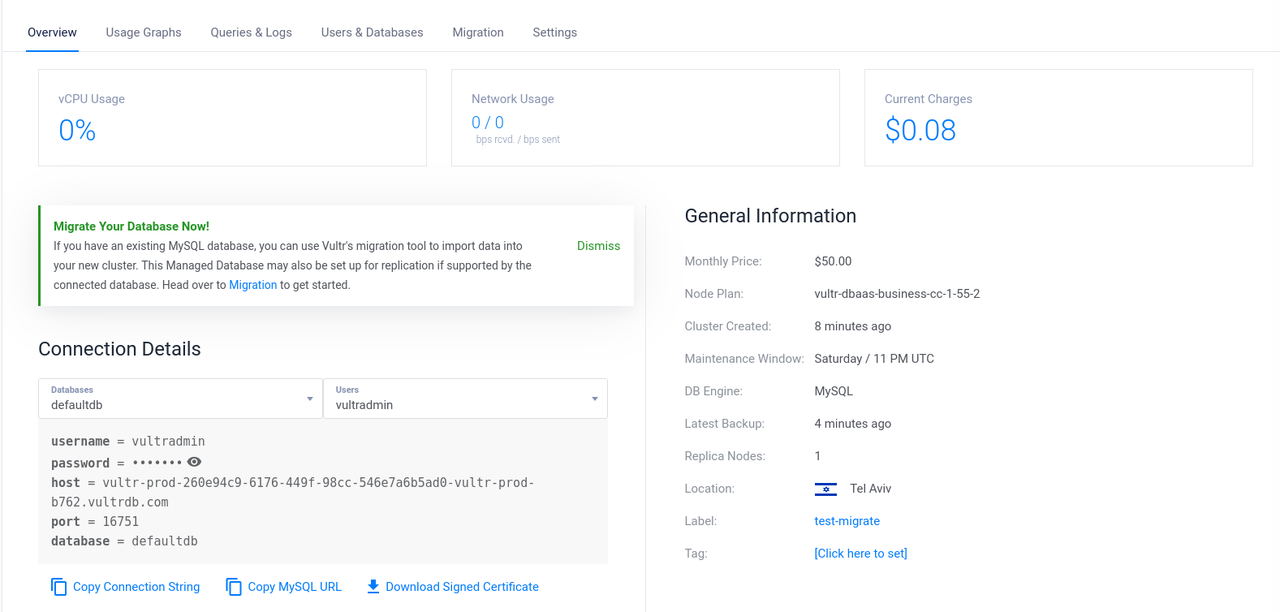
Click your target Vultr Managed Databases for MySQL to open its management page.
Verify the access credentials within the Connection Details section to use when migrating to the Vultr Managed Databases for MySQL cluster.
 This guide uses theNote
example_dbdatabase with auserstable that contains multiple records to test the migration process. Replace the values with your actual database and table names.
Follow the steps below to migrate from Google Cloud SQL for MySQL to Vultr Managed Databases for MySQL using the MySQL Workbench application.
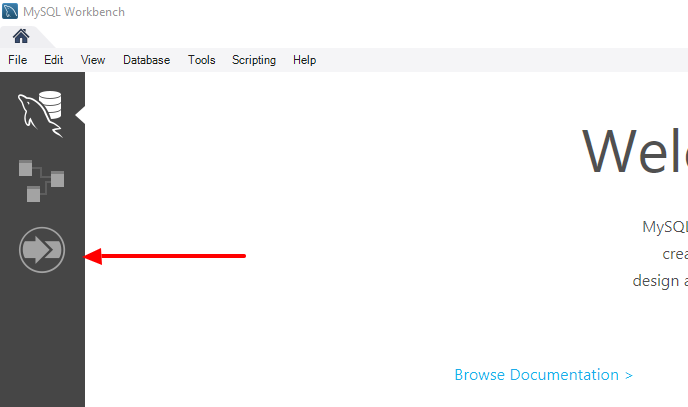
Download and install MySQL Workbench if its not installed on your workstation.
Open MySQL Workbench.
Click Migration on the left navigation menu.
Click Start Migration at the bottom of the Overview section.
Enter the following details on the Source Selection page in MySQL Workbench.
Keep
MySQLas the database system,Standard (TCP/IP)as the connection method.Enter your source Cloud SQL database details in the respective fields within the parameters section.
Click Store in Vault, enter your Cloud SQL database password and click OK to save it.
Click Test Connection to test the connection to your Cloud SQL instance.
Click Next to proceed to target selection.
Keep
Standard (TCP/IP)as the connection method and enter your destination Vultr Managed Databases for MySQL credentials in the respective fields.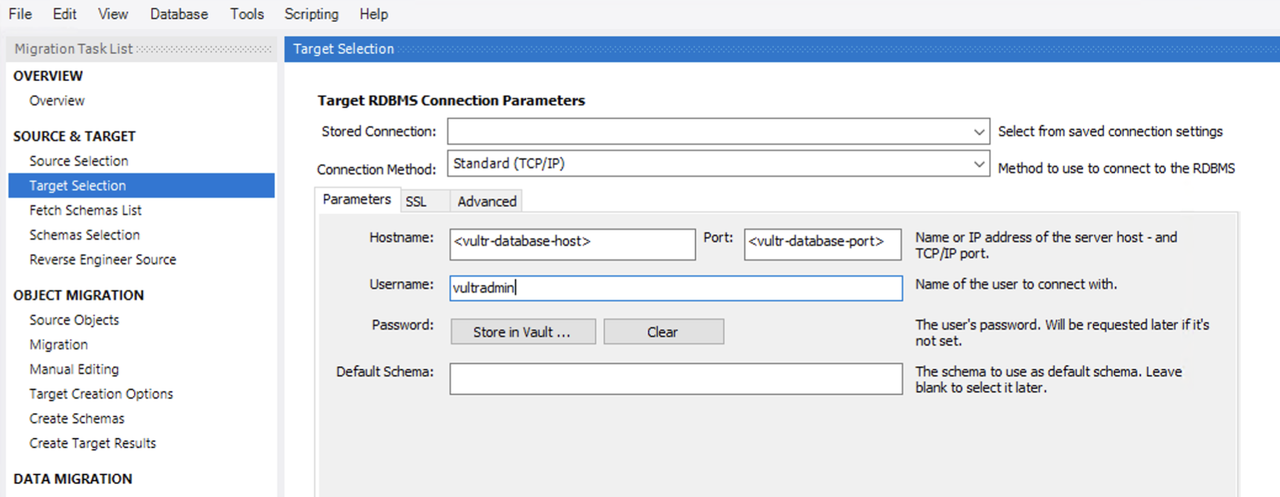
Click Store in Vault, enter your Vultr Managed Databases for MySQL password and click OK to save it.
Click Test Connection to test the connection to your Vultr Managed Databases for MySQL.
Click Next when the test connection is successful.
Select all your target databases from the
Schemas Selectionlist to migrate.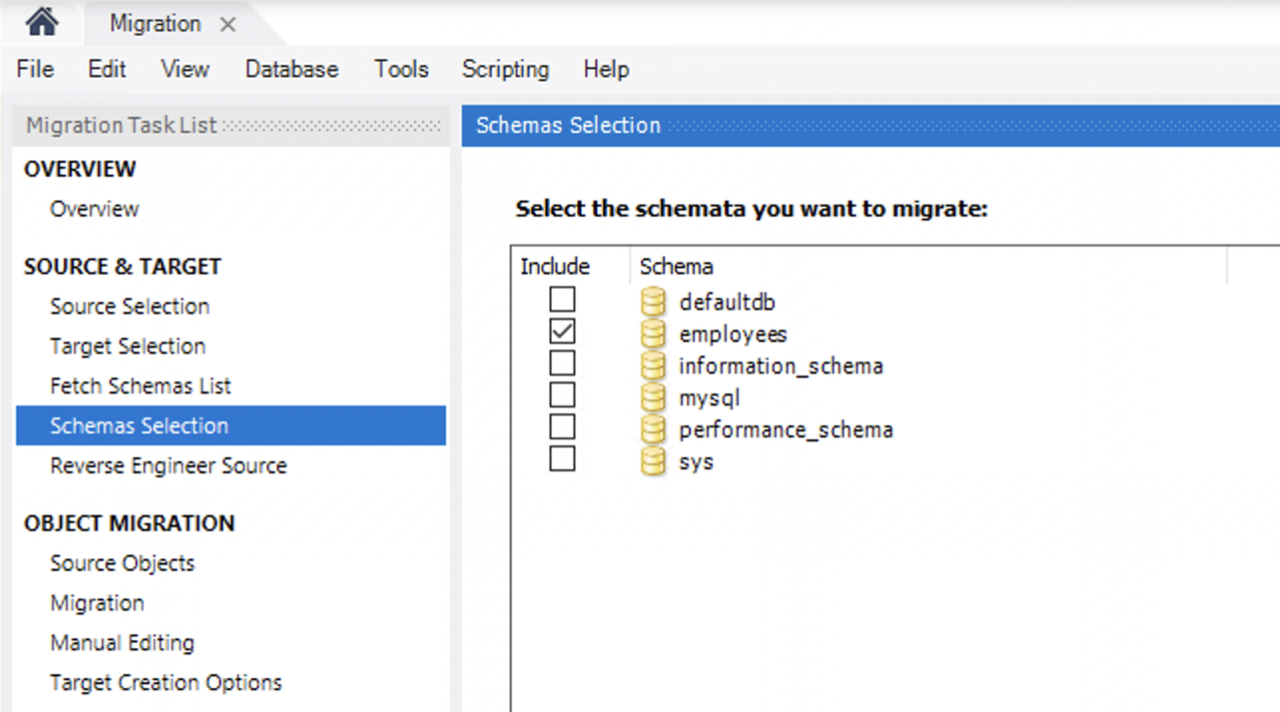
Click Next to map the tables, columns, constraints, and relationships for documentation and migration planning.
Keep the default selections in the Object Migration section and keep
Migrate Table Objectsselected.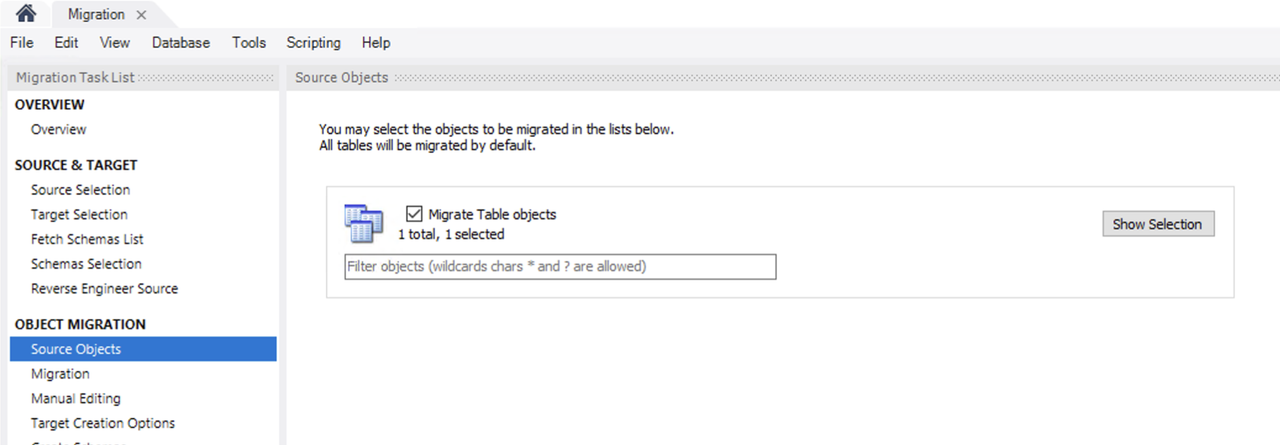
Click Next to navigate to the Manual Editing options and verify any migration issues.
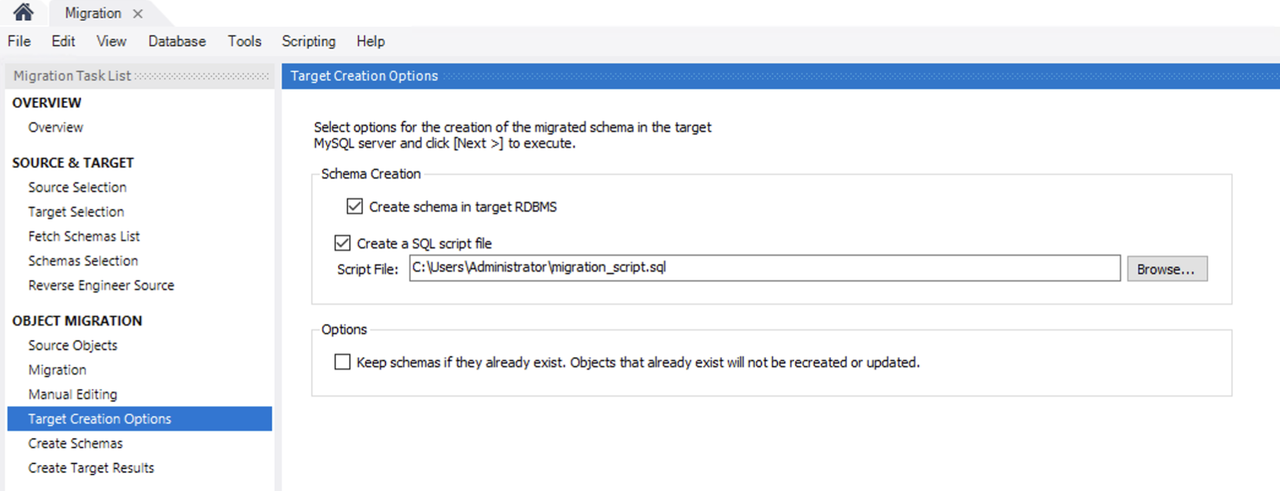
Click Next to access the Target Creation Options.
Check the Create schema in target RDMS and Create a SQL script file options to create an SQL script file.
Check the Keep schemas if they already exist option and click Next to start the migration process.
When the migration is successful, click Next to specify the data transfer options.
Keep the Online copy of table data to target RDMS checked and click Next to keep a copy of the migration in your Vultr Managed Databases for MySQL cluster.
Verify the migration report and click Finish to close the migration window.
Mysqldump is a MySQL command-line tool for creating database backups. Follow the steps below to backup your Cloud SQL for MySQL databases and import the backup to your Vultr Managed Databases for MySQL cluster to migrate the target databases.
Verify that
mysqldumpis available on your system.console$ mysqldump --version
Output:
mysqldump Ver 8.0.41-0ubuntu0.24.04.1 for Linux on x86_64 ((Ubuntu))Install the MySQL client tool if
mysqldumpis not installed on your workstation.Use the
mysqldumpto export all databases in your source Cloud SQL for MySQL Managed Databases cluster into a singlemigratetovultr.sqlfile. Replace192.0.2.1with your actual Cloud SQL database's IP address, andexample_userwith your target user.console$ mysqldump --host=192.0.2.1 --user=example_user --set-gtid-purged=OFF --password=example-password --all-databases > migratetovultr.sql
Export a specific Cloud SQL for MySQL database. Replace
example_DBwith your target database.console$ mysqldump --host=192.0.2.1 --user=example_user --set-gtid-purged=OFF --password=example-password example_db > db_backup.sql
The
--set-gtid-purged=OFFoption in the above command prevents MySQL from including Global Transaction Identifiers (GTIDs) in the backup to avoid issues when importing the data to the source database later. GTIDs are system-level identifiers used for tracking replication transactions and are not part of user data. Excluding does not impact your actual data during migration.Verify that the backup file exists in your working directory after backup.
console$ lsLog in to your Vultr Managed Databases for MySQL cluster and enter your user password when prompted.
console$ mysql --host=vultr-prod.vultrdb.com --port=18140 --user=vultradmin --password
Create the target database such as
example_db.sqlmysql> CREATE DATABASE example_db;
Exit the MySQL console.
sqlmysql> EXIT;
Import the exported database to your Vultr Managed Database for MySQL cluster to migrate it and all tables.
console$ mysql --host=vultr-prod.vultrdb.com --port=1671 --user=vultradmin --database=example_db --password < db_backup.sql
Repeat the above process for all databases that require migration.
Test the Vultr Managed Databases for MySQL
Follow the steps below to test your Vultr Managed Databases for MySQL cluster and verify that the migration from your source Cloud SQL for MySQL instance is successful.
Log in to the Vultr Managed Databases for MySQL cluster. Replace
vultr-prod.vultrdb.com,18140andvultradminwith your actual details.console$ mysql --host=vultr-prod.vultrdb.com --port=18140 --user=vultradmin --password
List all available databases and verify that your source databases are migrated.
sqlmysql> SHOW DATABASES;
Your output should be similar to the one below.
+--------------------+
| Database           |
+--------------------+
| defaultdb          |
| information_schema |
| mysql              |
| performance_schema |
| example_db         |
| sys                |
+--------------------+
6 rows in set (0.03 sec)
Switch to a migrated database such as
example_db.sqlmysql> USE example_db;
List all tables in the database and verify that the records match with your source database.
sqlmysql> SHOW TABLES;
Your output should be similar to the one below.
+----------------------+
| Tables_in_example_db |
+----------------------+
| users                |
+----------------------+
1 row in set (0.01 sec)
List all rows in the
userstable and verify that they match with your source table.sqlmysql> SELECT * FROM users;
Your output should be similar to the one below.
+----+---------+---------------------+
| id | name    | email               |
+----+---------+---------------------+
|  1 | Alice   | alice@example.com   |
|  2 | Bob     | bob@example.com     |
|  3 | Charlie | charlie@example.com |
|  4 | Santa   | santa@example.com   |
|  5 | Sophie  | sophie@example.com  |
+----+---------+---------------------+
5 rows in set (0.00 sec)
Cutover Applications to Vultr Managed Databases for MySQL
Follow the recommendations below to cutover applications to your Vultr Managed Databases for MySQL when the migration is successful.
Update your application's configurations with your Vultr Managed Database for MySQL cluster's credentials. For example, follow the steps below to cutover WordPress applications to the Vultr Managed Databases for MySQL.
Navigate to the WordPress installation directory.
console$ cd /path/to/wordpress/directory/
Create a backup of the configuration file to ensure safe rollback in case of any issues.
console$ sudo cp wp-config.php wp-config.ORIG
Open the configuration file using a text editor such as
nano.console$ sudo nano wp-config.php
Update database credentials. Locate the following section and replace the values with your Vultr Managed Databases for MySQL credentials.
php/** The name of the database for WordPress */ define('DB_NAME', '<example-wordpress-db>'); /** MySQL database username */ define('DB_USER', '<example-user>'); /** MySQL database password */ define('DB_PASSWORD', '<example-password>'); /** MySQL hostname */ define( 'DB_HOST', '<vultr-database-host>'); /** MySQL port */ define( 'DB_PORT', '<vultr-database-port>');
Replace the following:
<example-wordpress-db>with the database name in your Vultr Managed Databases cluster.<example-user>with the appropriate database username.<example-password>with the password of your database user.<vultr-database-host>with the host of your Vultr Managed Databases for MySQL cluster.<vultr-database-port>with the Vultr Managed Databases for MySQL cluster port.
Save and close the file.
Restart the web server to apply the configuration changes. The command may vary depending on the web server and Linux distribution you are using.
For Apache:
On Debian-based systems (Ubuntu, Debian):
console$ sudo systemctl restart apache2
On RHEL-based systems (CentOS, Rocky Linux, AlmaLinux):
console$ sudo systemctl restart httpd
For Nginx:
On all major distributions:
console$ sudo systemctl restart nginx
If your system uses an alternative init system, such as SysVinit or OpenRC, use the appropriate restart command. Refer to your distribution’s documentation for details.
Delete the source Google Cloud SQL for MySQL instance after verifying that the migration is successful.
Conclusion
You have migrated from Google Cloud SQL for MySQL to Vultr Managed Databases for MySQL using back up and restore methods with mysqldump and MySQL Workbench. You exported your database from the Google Cloud SQL instance, imported it to the Vultr Managed Database for MySQL cluster, and verified the data integrity by retrieving and checking data. This process ensures that your applications run with minimal downtime as a result of the migration. Visit the Vultr Managed Databases for MySQL documentation for more information.