
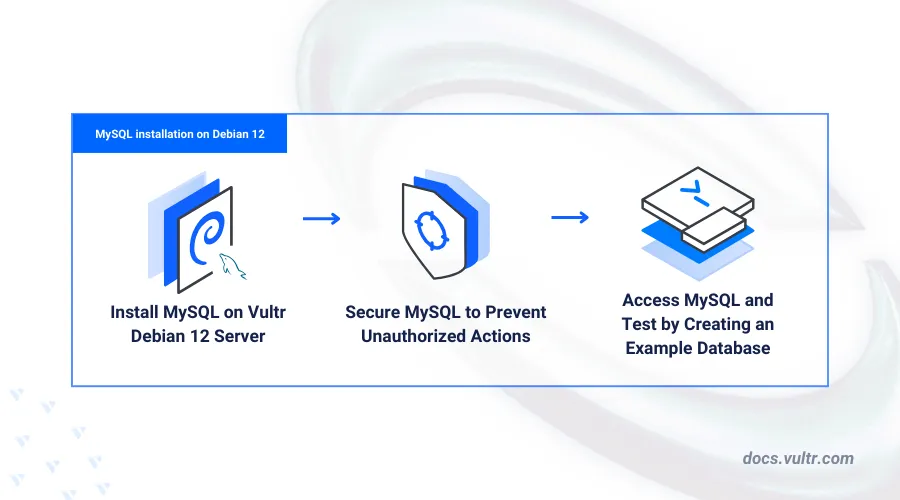
How to Install MySQL on Debian 12
Introduction
MySQL is an open-source relational database management system (RDBMS) that enables the storage, management, and retrieval of database records on a server. MySQL works as a database backend and uses the SQL (Structured Query Language) syntax to store relational data in the form of tables to enable efficient records management on a server. When combined with Debian 12, a stable and secure Linux distribution, MySQL operates seamlessly, providing a reliable and high-performance database environment. Debian 12’s robust package management system ensures easy installation, security updates, and efficient resource utilization, making it an ideal choice for deploying MySQL in production or development environments.
This article explains how to install MySQL on Debian 12, secure the database server, and enforce strong authentication policies for all database users.
Prerequisites
Before you begin:
Deploy a Debian 12 instance on Vultr.
Access the server using SSH.
Create a non-root user with sudo privileges and switch to the user.
Install MySQL on Debian 12
The MySQL database server package is not available in the default APT repositories on Debian 12. Follow the steps below to download the latest MySQL repository information package and install MySQL on your server.
Download the latest MySQL repository information package.
console$ wget https://dev.mysql.com/get/mysql-apt-config_0.8.30-1_all.deb
Visit the MySQL APT repository page to verify and download the latest script version.
Install the MySQL repository information using the file.
console$ sudo dpkg -i mysql-apt-config_0.8.30-1_all.deb
Reply to the following MySQL repository set up script prompts to install the latest database server sources.
┌────────────────┤ Configuring mysql-apt-config ├─────────────────┐ │ Which MySQL product do you wish to configure? │ │ │ │ MySQL Server & Cluster (Currently selected: mysql-8.0) │ │ MySQL Tools & Connectors (Currently selected: Enabled) │ │ MySQL Preview Packages (Currently selected: Disabled) │ │ Ok │ │ │ │ │ │ <Ok> │ │ │ └─────────────────────────────────────────────────────────────────┘- Keep MySQL Server & Cluster selected and press Enter to save changes.
- Select your desired MySQL server version. For example,
mysql-8.0and press Enter to apply the version repository information. - Press Down on your keyboard, select OK and press Enter to apply the MySQL repository information on your server.
Update the server's package index to apply the new MySQL repository information.
console$ sudo apt update
Install the MySQL database server package.
console$ sudo apt install mysql-server -y
- Enter a new
rootdatabase user password when prompted and press Enter.
Enter root password:- Enter the password again and press Enter to apply changes.
Re-enter root password:- Keep
Use Strong Password Encryption (RECOMMENDED)selected and press Enter to enable password authentication for all database users on the server.
Use Strong Password Encryption (RECOMMENDED) Use Legacy Authentication Method (Retain MySQL 5.x Compatibility)- Enter a new
View the installed MySQL version on your server.
console$ mysql --version
Output:
mysql Ver 8.0.38 for Linux on x86_64 (MySQL Community Server - GPL)
Manage the MySQL System Service
MySQL uses the mysqld system service to manage the database server runtime processes through the systemd daemon. Follow the steps below to manage the MySQL system service and enable the database server to automatically start at boot time.
Enable the MySQL database server to automatically start at boot time.
console$ sudo systemctl enable mysql
Start the MySQL database server.
console$ sudo systemctl start mysql
View the MySQL system service status and verify that it's running.
console$ sudo systemctl status mysql
Output:
● mysql.service - MySQL Community Server
Loaded: loaded (/lib/systemd/system/mysql.service; enabled; preset: enabled)
Active: active (running) since Fri 2024-06-28 15:20:55 UTC; 52s ago
Docs: man:mysqld(8)
        http://dev.mysql.com/doc/refman/en/using-systemd.html
Main PID: 3302 (mysqld)
Status: "Server is operational"
Tasks: 36 (limit: 1092)
Memory: 433.4M
CPU: 662ms
CGroup: /system.slice/mysql.service
        └─3302 /usr/sbin/mysqld
Based on the above output, the MySQL database server is active and running.
Secure the MySQL Database Server
The MySQL root database user is actively secure on your server with the password you set earlier during the installation process. MySQL includes additional insecure defaults such as test databases and remote access to the root database user on your server. Follow the steps below to disable all insecure default configurations and secure the MySQL database server.
Run the MySQL secure installation.
console$ sudo mysql_secure_installation
Reply to the following MySQL prompts to secure your database server.
Enter the
rootdatabase user to start the secure installation script and modify the database server configuration.Securing the MySQL server deployment. Enter password for user root:Enter Y and press Enter to enable the
VALIDATE PASSWORD COMPONENTand ensure strict password security policies.Would you like to setup VALIDATE PASSWORD component? Press y|Y for Yes, any other key for No:Set your desired MySQL database server password strength policy. For example, enter 2 and press Enter to enable the use of strong passwords on your server.
LOW    Length >= 8
MEDIUM Length >= 8, numeric, mixed case, and special characters
STRONG Length >= 8, numeric, mixed case, special characters and dictionary file

Please enter 0 = LOW, 1 = MEDIUM and 2 = STRONG: 2
Enter N when prompted to change the
rootdatabase user password, or enter Y to change the password.Change the password for root ? ((Press y|Y for Yes, any other key for No) :Enter Y and press Enter when prompted to remove
anonymous userson the database server.Remove anonymous users? (Press y|Y for Yes, any other key for No) :Enter Y and press Enter to disable remote access to the
rootdatabase user.Disallow root login remotely? (Press y|Y for Yes, any other key for No) :Enter Y and press Enter to remove the
test databaseon your server.Remove test database and access to it? (Press y|Y for Yes, any other key for No) :Enter Y and press Enter to update the MySQL privileges table and apply your configuration changes.
Reload privilege tables now? (Press y|Y for Yes, any other key for No) :Output:
Success.

All done!
Access MySQL
MySQL uses the mysql client tool to connect and access the database server console. You can also use compatible graphical interface tools such as MySQL Workbench and PhpMyAdmin to access the MySQL database server console. Follow the steps below to access the MySQL console and perform basic SQL operations on the database server.
Log in to the MySQL console as the
rootdatabase user.console$ sudo mysql -u root -p
Enter the
rootuser password you created earlier when prompted.Create a new sample database
shop.sqlmysql > CREATE DATABASE shop;
View all databases and verify that the new sample
shopdatabase is available.sqlmysql > SHOW DATABASES;
Output:
+--------------------+
| Database           |
+--------------------+
| information_schema |
| mysql              |
| performance_schema |
| shop               |
| sys                |
+--------------------+
5 rows in set (0.00 sec)
Switch to the
shopdatabase.sqlmysql > USE shop;
Create a new sample table
productswith 4 columns to store sample data.sqlmysql > CREATE TABLE products ( product_id INT AUTO_INCREMENT PRIMARY KEY, product_name VARCHAR(50) NOT NULL, category VARCHAR(40), price DECIMAL(10, 2) );
Insert new data to the
productstable with the following SQL values.sqlmysql > INSERT INTO products (product_name, category, price) VALUES ('Laptop', 'Electronics', 999.34), ('Office Chair', 'Furniture', 149.19), ('Blender', 'Appliances', 49.20), ('Backpack', 'Accessories', 39.57);
Query the
productstable data and verify that your values are available.sqlmysql > SELECT * FROM products;
Output:
+------------+--------------+-------------+--------+
| product_id | product_name | category    | price  |
+------------+--------------+-------------+--------+
|          1 | Laptop       | Electronics | 999.34 |
|          2 | Office Chair | Furniture   | 149.19 |
|          3 | Blender      | Appliances  |  49.20 |
|          4 | Backpack     | Accessories |  39.57 |
+------------+--------------+-------------+--------+
4 rows in set (0.00 sec)
Create a new sample database user
db_userwith a strong password. ReplaceStrong@@password123with your desired password depending on the database server policy.sqlmysql > CREATE USER 'db_user'@'localhost' IDENTIFIED BY 'Strong@@password123';
Grant the
db_userfull privileges to theshopdatabase.sqlmysql > GRANT ALL PRIVILEGES ON shop.* TO 'db_user'@'localhost';
Reload the MySQL privileges table to apply changes.
sqlmysql > FLUSH PRIVILEGES;
Exit the MySQL console.
sqlmysql > EXIT
Log in to the MySQL database server as the new database user
db_userto test access to theshopdatabase.console$ sudo mysql -u db_user -p
Enter the
db_useruser password when prompted and press Enter to access the database console.View all databases and verify that the
shopdatabase is available.sqlmysql> SHOW DATABASES;
Output:
+--------------------+
| Database           |
+--------------------+
| information_schema |
| performance_schema |
| shop               |
+--------------------+
3 rows in set (0.00 sec)
Exit the MySQL console.
sqlmysql> EXIT
Conclusion
You have installed MySQL on a Debian 12 server and enabled secure authentication policies on the database server. You can create multiple database records and integrate the MySQL database server with processing applications such as PHP to securely query SQL data for use in your dynamic web applications. For more information and database server security options, visit the MySQL documentation.