
How to Migrate Workloads from Equinix Metal to Vultr Bare Metal
Migrating workloads enables you to transfer your existing applications and service configurations to a new host. You can migrate from Equinix Metal to Vultr Bare Metal and transfer existing data, applications, and service configurations with minimal downtime. Vultr Bare Metal instances are dedicated single-tenant servers with CPU and GPU support for high-demand workloads, allowing you to host all types of applications.
Follow this guide to migrate workloads from Equinix Metal to Vultr Bare Metal. You will use Rsync to mirror directories and transfer files to a Vultr Bare Metal instance, ensuring continued service delivery for your applications.
Prerequisites
Before you begin, you need to:
- Have access to an existing Equinix account.
- Create or log in to your Vultr account to provision the destination Vultr Bare Metal instance.
Prepare the Source Equinix Metal Instance
Follow the steps below to prepare the source Equinix Metal instance you intend to migrate to
Log in to your Equinix Metal account.
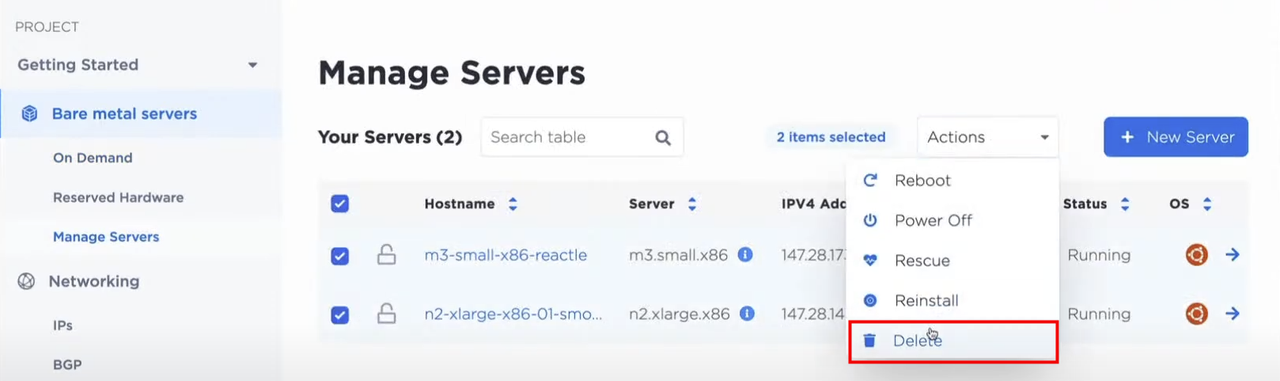
Navigate to Manage Servers on the main navigation menu.
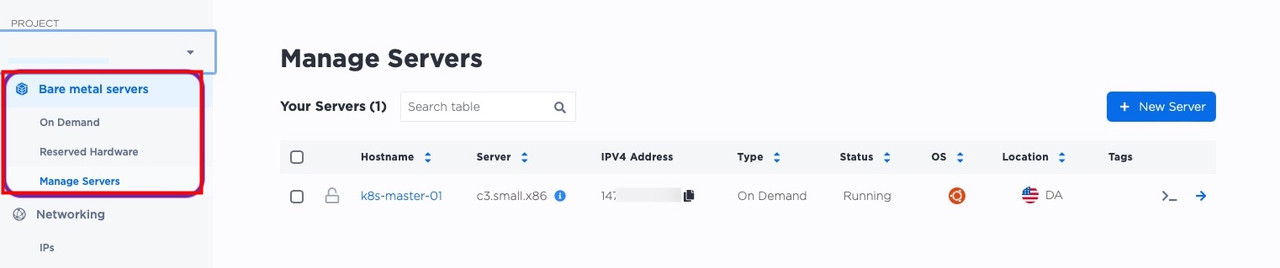
Click your target Equinix Metal instance to open its management page.
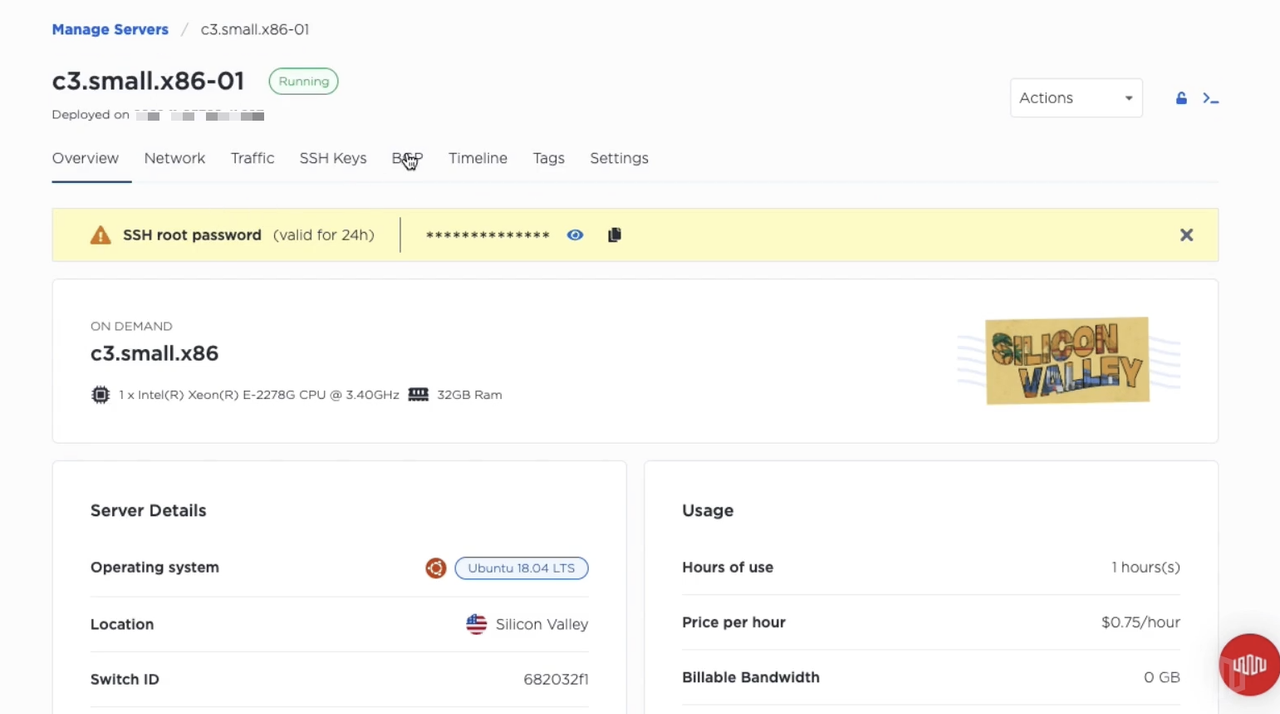
Verify the server specifications and operating system information to provision a Vultr Bare Metal instance with similar details.
Use SSH to access the Equinix Metal instance as
root.console$ ssh root@Equinix-Metal-IP
Prepare the Source Data Directories
Data directories contain your applications, configurations, and files. Follow the steps below to prepare the data directories on your source Equinix Metal instance before migrating to the destination Vultr Bare Metal instance.
Identify your target data directories, such as
/var/www.console# ls /var/wwwCommon data directories include the following, depending on your hosted applications.
/usr/local/share: Stores local application data./opt: Contains third-party software packages./var/www: Stores web application data and web server content./usr/share: Contains additional application data, including manual pages and documentation./usr/bin: Stores applications or commands accessible to all users./usr/sbin: Stores executable system binaries and additional applications./usr/lib: Contains shared application libraries./srv/ftp: Stores FTP data./srv/www: Contains additional web server data or web applications./var/lib: Stores application-specific data such as databases and runtime configurations. Data is stored in application specific directories such as/var/lib/nginx,/var/lib/mysql,/var/lib/postgresqldepending on the installed applications./etc: Contains system and application configuration files. It includes multiple files and sub-directories that may not require migration to the destination instance. Important files and directories include the following, depending on your applications./etc/hostname: Contains the system hostname./etc/hosts: Contains host information./etc/ssh: Contains SSH configurations./etc/ssl: Contains SSL Configurations./etc/systemd: Contains system service files./etc/nginx: Contains Nginx web server configurations./etc/apache2or/etc/httpd: Contains Apache web server configurations.
Long list the files in each directory such as
/var/wwwto verify the contents, user, group, and permission information.console# ls -l /var/wwwYour output should be similar to the one below.
total 8
drwxr-xr-x 2 www-data www-data 4096 Apr  2 12:56 example.com
drwxr-xr-x 3 www-data www-data 4096 Apr  2 12:56 html
Verify the directory information to set the correct ownership, users, groups, and file permissions to prevent runtime errors after migrating to the destination Vultr Bare Metal instance.
Trace specific application files and note the directory paths to migrate.
console# lsof -p $(pgrep -d',' <application-name>)For example, list all open directories that the Nginx web server is actively using.
console# lsof -p $(pgrep -d',' nginx)Note all application data directories in use and prepare them for transfer to the destination Vultr Bare Metal instance.
Back up all databases when running a database server such as MySQL.
console# mysqldump -u root -p --all-databases > all_databases_backup.sqlVerify the ownership, permissions, and contents of each directory to prevent runtime errors after migration. Plan and schedule files such as database backups to migrate to the destination Vultr Bare Metal instance.Note
Provision the Destination Vultr Bare Metal Instance
Follow the steps below to provision the destination Vultr Bare Metal instance.
Log in to the Vultr Console.
Provision a Vultr Bare Metal instance with a similar operating system and server specifications as the source Equinix Metal instance.
Navigate to Products and click Compute.
Click your Vultr Bare Metal instance to open its management page.
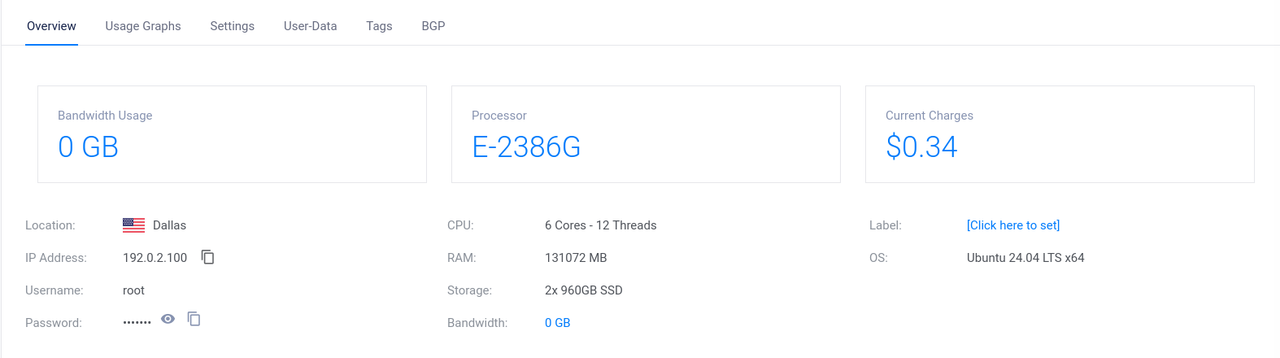
Verify that the instance's operating system matches with your source Equinix Metal instance.
Copy the user connection credentials within the Overview tab.
Use SSH to access the Vultr Bare Metal instance as
root.console$ ssh root@VULTR-SERVER-IP
Optional: Enable rescue mode on your Vultr Bare Metal instance if you plan to migrate live system directories to prevent permission and runtime errors.Note
Install Rsync on Both Instances
Rsync is an opensource file transfer tool that synchronizes files and directories, ensuring fast data transfers between instances. You can use Rsync to transfer files from your source Equinix Metal to the destination Vultr Bare Metal instance. Follow the steps below to install Rsync on both instances to transfer files.
Update the APT package index.
console# apt updateInstall Rsync.
console# apt install rsync -yVerify the installed Rsync version.
console# rsync --version
Update the DNF package index.
console# dnf updateInstall Rsync.
console# dnf install rsync -yVerify the installed Rsync version.
console# rsync --version
Synchronize the Pacman package database.
console# pacman -SyuInstall Rsync.
console# pacman -S rsyncVerify the installed Rsync version.
console# rsync --version
Update the APK package index.
console# apk updateInstall Rsync on Arch Linux.
console# apk add rsyncVerify the installed Rsync version.
console# rsync --version
Migrate Users and Groups to the Vultr Bare Metal Instance
Data directories contain specific ownership and permission information. Migrating existing users and groups allows you to migrate data directories without any permission or user inconsistencies. The following files include the user and group information on Linux by default.
/etc/passwd: Contains the user account information including usernames, user IDs (UIDs), group IDs (GIDs), home directories, and default shell information/etc/shadow: Stores encrypted user password information./etc/group: Contains system groups, user groups, group IDs (GIDs), and the group membership information./etc/gshadow: Contains encrypted group password information, along with group membership and administrator details./home: Contains the user home directories, which include user-specific files, configurations, and application data.Only the
rootuser can modify the user and group information in Linux. Follow the steps below to migrate users and groups asrootfrom your Equinix Metal instance to the Vultr Bare Metal instance.
Transfer the
/homedirectory to your Vultr Bare Metal instance. Enter yourrootuser password when prompted.console$ rsync -avz --progress --perms --owner --group /home root@SERVER-IP:/home/
The above Rsync command transfers all user home directories and files in the
/homedirectory to the destination instance, preserving all ownership and user privileges. Within the command:a: Enables archive mode to preserve symbolic links, file permissions, directory structure, and the source modification times.v: Enables verbose mode to display all files transferred to the destination instance.z: Enables compression, which reduces bandwidth usage with faster data transfers.--progress: Displays the real-time progress for each directory or file copied to the destination instance.--perms: Preserves the directory and file permissions.--owner: Preserves the file owner information.--group: Preserves the group ownership information.
Transfer all user and group files to the destination Vultr Bare Metal instance, retaining the ownership and file permissions.
console$ rsync -avz --progress --perms --owner --group /etc/passwd /etc/shadow /etc/group /etc/gshadow root@192.0.2.100:/etc/
The above Rsync command overwrites the user and group information on the destination Vultr Bare Metal instance, allowing you to log in to the instance with your old user information.
Overwriting the user and group owner information on the destination instance enables you to use your old user credentials to log in to the destination instance. Use your existing (source) user credentials to migrate any other files to the destination Vultr Bare Metal instance.Note
Migrate Data Directories to Vultr Bare Metal
Follow the steps below to migrate your data directories to the destination Vultr Bare Metal instance.
Migrate the
/etcdata directories to the destination Vultr Bare Metal instance, overwriting the existing files.console# rsync -avz --progress --perms --owner --group /etc/hostname /etc/hosts /etc/ssh /etc/ssl /etc/timezone root@VULTR-SERVER-IP:/etcMigrate the
/usrdata directories.console# rsync -avz --progress --perms --owner --group /usr/local/share /usr/share /usr/bin /usr/sbin /usr/lib root@VULTR-SERVER-IP:/usrIf you receive the following remote host identification error. It's a result of a change in the SSH configurations after overwriting the
/etc/sshfiles on the destination instance.@@@@@@@@@@@@@@@@@@@@@@@@@@@@@@@@@@@@@@@@@@@@@@@@@@@@@@@@@@@ @ WARNING: REMOTE HOST IDENTIFICATION HAS CHANGED! @ @@@@@@@@@@@@@@@@@@@@@@@@@@@@@@@@@@@@@@@@@@@@@@@@@@@@@@@@@@@ IT IS POSSIBLE THAT SOMEONE IS DOING SOMETHING NASTY!Remove the destination server entry from your
known_hostsfile or delete the file to synchronize the SSH changes you applied earlier.console# rm .ssh/known_hosts
Migrate the
/vardata directories.console# rsync -avz --progress --perms --owner --group /var/www /var/lib /var/run /var/log root@VULTR-SERVER-IP:/varMigrate the
/optdata directory.console# rsync -avz --progress --perms --owner --group /opt root@VULTR-SERVER-IP:/optMigrate system directories, skipping the existing files. For example, migrate the
/etc/systemd/systemdirectory to transfer all system services while retaining the existing service files.console# rsync -avz --progress --perms --owner --group --ignore-existing --links --progress /etc/systemd/system root@VULTR-SERVER-IP:/etc
Test the Data Integrity
Data corruption may occur while migrating to the destination Vultr Bare Metal instance. Follow the steps below to compare the source and destination directories to verify that the migration is successful.
Generate a checksum for each data directory on the source Equinix Metal instance.
console# find /directory -type f -exec sha256sum {} \; > /opt/source_dir_checksums.txtTransfer the generated checksum file to the destination Vultr Bare Metal instance.
console# rsync -avz /opt/source_dir_checksums.txt root@VULTR-SERVER-IP:/optGenerate a checksum for each migrated data directory on the destination instance.
console# find /directory -type f -exec sha256sum {} \; > /opt/destination_dir_checksums.txtUse
diffto compare the checksum files for both instances and verify that the data directories match.console# diff /opt/source_dir_checksums.txt /opt/destination_dir_checksums.txtIf the above command does not return any output, the source and destination data directories match. If the command outputs differences in directories or checksum values, review the differences and migrate any missing data directories, except for system-specific directories such as
/etc/network.
Cut Over to the Vultr Bare Metal Instance
Follow the recommendations below to cut over from the Equinix Metal instance to your Vultr Bare Metal instance.
Reboot the Vultr Bare Metal instance to ensure all system configuration changes are applied.
Verify that all applications, users, groups, and data directories are available on the Vultr Bare Metal instance.
Restore all application-specific files, such as database backups and web server configurations.
Log in to your domain provider and update your DNS records to point to the Vultr Bare Metal instance.
Wait for DNS propagation to complete, then test access to all applications hosted on your Vultr Bare Metal instance.
Deprovision your source Equinix Metal instance after verifying that the migration to your Vultr Bare Metal instance is successful.
Conclusion
You have migrated an Equinix Metal instance to Vultr Bare Metal. You can generate new configurations, upgrade your instance, and cut over traffic, ensuring minimal downtime for your applications. Use Console Connect to create a direct connection to Vultr for low latency and faster transfers when migrating large amounts of data without using the Internet.