
How to Set Up Firewall Policies using Firewalld
Introduction
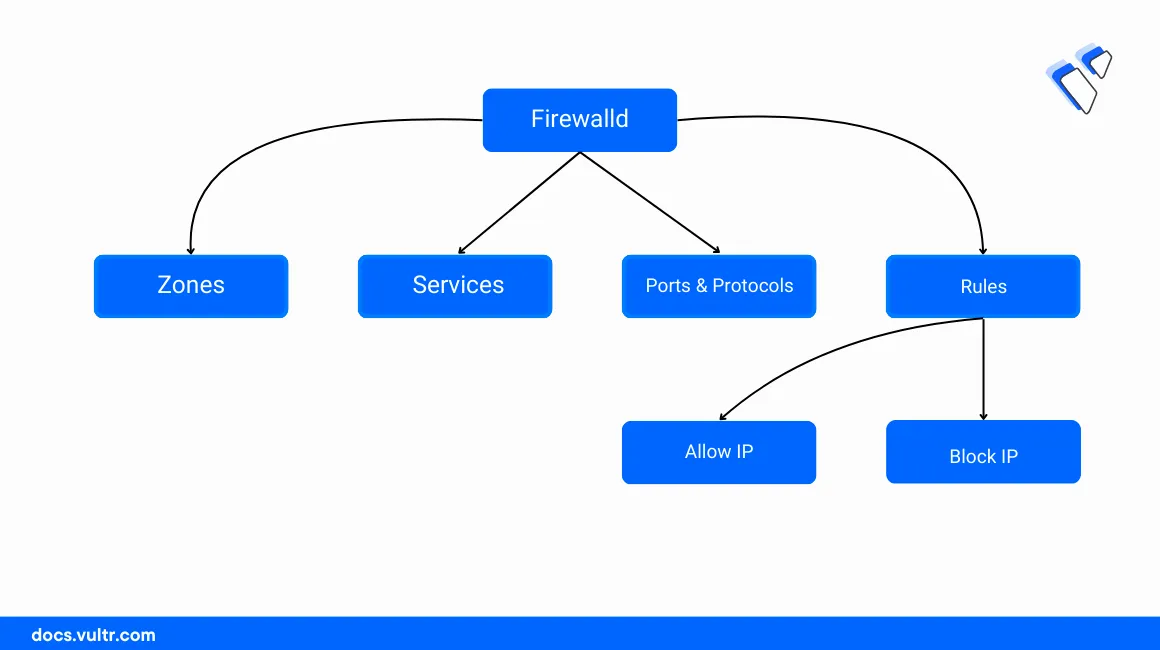
Firewalld is a dynamic firewall application that provides a flexible way of setting up network filtering policies on a server by extending the Kernel-based Iptables functionalities. It provides flexible configuration options which include zone-based firewall management policies that represent a specific level of trust depending on your server network connections to protect the system from unauthorized access.
In this article, you will set up firewall policies using Firewalld and configure sample rules to filter network requests on a Vultr Cloud Server.
Prerequisites
Before you begin:
Deploy a Vultr Rocky Linux server to use as the workstation.
Access the server using SSH as a non-root user with sudo privileges.
Update the server:
console$ sudo dnf update
Install Firewalld
Firewalld is available as a default system package on most Redhat-based server distributions such as CentOS, Rocky Linux, and AlmaLinux. When unavailable, follow the steps below to install and enable Firewalld to set up firewall filtering rules on the server.
Install Firewalld.
console$ sudo dnf install firewalld
Enable the Firewalld application to start at boot time.
console$ sudo systemctl enable firewalld
Start Firewalld.
console$ sudo systemctl start firewalld
Verify that the Firewalld service is active and running.
console$ sudo firewall-cmd --state
Run the following command to save all runtime changes to the permanent Firewalld configuration.
console$ sudo firewall-cmd --runtime-to-permanent
Set Up Firewalld Zones
Firewalld zones represent the level of trust for network connections associated with a specific network interface. Each zone includes a different security level and policies that govern the traffic flow on the associated interface. By default, Firewalld runs with the following zones:
public: Applies to public-facing interfaces connected to external networks such as the Internet.home: Applies to network interfaces associated with home networks or small office environments.work: Works with corporate or organization network interfaces with better security over the home zone.internal: Works with private interfaces connected to networks such as Vultr VPCs.external: Applies to external untrusted networks. It's similar to the public zone but applies a higher security level by blocking incoming connection requests while accepting outgoing network connections.dmz: Works with network interfaces connected to demilitarized zones partly connected to the Internet and filtered by a firewall.block: Blocks all incoming and outgoing network traffic. It's useful when troubleshooting server network interfaces or networking errors.
View all available Firewalld zones.
console$ sudo firewall-cmd --get-zones
Output:
block dmz drop external home internal nm-shared public trusted workView the default Firewalld zone.
console$ sudo firewall-cmd --get-default-zone
Output:
publicView the active Firewalld zone and the associated server network interfaces.
console$ sudo firewall-cmd --get-active-zones
Output:
public
  interfaces: enp1s0
View the Firewalld zones assigned to a specific network interface. For example, view the
enp8s0network interface zone.console$ sudo firewall-cmd --get-zone-of-interface=enp8s0
Run the following command to change an interface from one zone to another. For example, change the
enp1s0interface to the external zone.console$ sudo firewall-cmd --zone=home --change-interface=eth0
Output:
successSwitching interfaces between zones sets different firewall rules and policies on the network interface for troubleshooting or testing purposes on the server.
View the active zones again to verify that two Firewalld zones are active due to the new interface assignment.
console$ sudo firewall-cmd --get-active-zones
Output:
home
  interfaces: enp8s0
public
  interfaces: enp1s0
View all firewall rules associated with the active zone. By default
public.console$ sudo firewall-cmd --list-all
Output:
public (active)
  target: default
  icmp-block-inversion: no
  interfaces: enp1s0 enp8s0
  sources:
  services: cockpit dhcpv6-client ssh
  ports:
  protocols:
  forward: yes
  masquerade: no
  forward-ports:
  source-ports:
  icmp-blocks:
  rich rules:
Change the active zone depending on your server networking environment. For example, change the Firewalld zone to
external.console$ sudo firewall-cmd --change-zone=public
Set Up Firewall Policies using Firewalld
Firewalld accepts network ports, system services, and service names across multiple zones depending on your server interfaces. Every Firewalld zone for example public applies the set policies and rules to the associated interfaces. Follow the steps below to set up firewall policies using Firewalld on the server.
To delete Firewalld rules, replace the --add option with --remove to delete the rule. For example, delete the FTP port 21 policy in the public zone.
```console
$ sudo firewall-cmd --zone=public --permanent --remove-port=22/tcp
```
Allow Network Ports
Add a new Firewalld rule that allows the SSH TCP port
22through the public zone.console$ sudo firewall-cmd --zone=public --permanent --add-port=22/tcp
The above rule allows SSH access to the server using port
22through the public zone. In addition, the rule is permanently saved in the firewall table using the--permanentoption.Allow another service port
80through the firewall.console$ sudo firewall-cmd --zone=public --permanent --add-port=80/tcp
View the active Firewalld zone ports to verify the new rules.
console$ sudo firewall-cmd --zone=public --list-ports
Output:
22/tcp 80/tcpRun the following command to allow a range of ports through the public Firewalld zone. For example, port
7000to7500depending on your internal hosts.console$ sudo firewall-cmd --zone=public --permanent --add-port=4990-4999/udp
Allow System Services
View the list of available Firewalld services on your server.
console$ sudo firewall-cmd --get-services
Output:
RH-Satellite-6 RH-Satellite-6-capsule afp amanda-client amanda-k5-client amqp amqps apcupsd audit ausweisapp2 bacula bacula-client bb bgp bitcoin bitcoin-rpc bitcoin-testnet bitcoin-testnet-rpc bittorrent-lsd ceph ceph-mon cfengine checkmk-agent cockpit collectd condor-collector cratedb ctdb dhcp dhcpv6 dhcpv6-client distcc dns dns-over-tls docker-registry docker-swarm dropbox-lansync elasticsearch etcd-client etcd-server finger foreman foreman-proxy freeipa-4 freeipa-ldap freeipa-ldaps freeipa-replication freeipa-trust ftp galera ganglia-client ganglia-master git gpsd grafana gre high-availability http http3 https ident imap imaps ipfs ipp ipp-client ipsec irc ircs iscsi-target isns jenkins kadmin kdeconnect kerberos kibana klogin kpasswd kprop kshell kube-api kube-apiserver kube-control-plane kube-control-plane-secure kube-controller-manager kube-controller-manager-secure kube-nodeport-services kube-scheduler kube-scheduler-secure kube-worker kubelet kubelet-readonly kubelet-worker ldap ldaps libvirt libvirt-tls lightning-network llmnr llmnr-tcp llmnr-udp managesieve matrix mdns memcache minidlna mongodb mosh mountd mqtt mqtt-tls ms-wbt mssql murmur mysql nbd netbios-ns netdata-dashboard nfs nfs3 nmea-0183 nrpe ntp nut openvpn ovirt-imageio ovirt-storageconsole ovirt-vmconsole plex pmcd pmproxy pmwebapi pmwebapis pop3 pop3s postgresql privoxy prometheus prometheus-node-exporter proxy-dhcp ps3netsrv ptp pulseaudio puppetmaster quassel radius rdp redis redis-sentinel rpc-bind rquotad rsh rsyncd rtsp salt-master samba samba-client samba-dc sane sip sips slp smtp smtp-submission smtps snmp snmptls snmptls-trap snmptrap spideroak-lansync spotify-sync squid ssdp ssh steam-streaming svdrp svn syncthing syncthing-gui synergy syslog syslog-tls telnet tentacle tftp tile38 tinc tor-socks transmission-client upnp-client vdsm vnc-server wbem-http wbem-https wireguard ws-discovery ws-discovery-client ws-discovery-tcp ws-discovery-udp wsman wsmans xdmcp xmpp-bosh xmpp-client xmpp-local xmpp-server zabbix-agent zabbix-server zerotierAllow a service such as HTTPS for access through the public zone table.
console$ sudo firewall-cmd --zone=public --add-service=https --permanent
Allow another service such as FTP through the public zone.
console$ sudo firewall-cmd --zone=public --add-service=ftp --permanent
Reload Firewalld to apply the new service changes.
console$ sudo firewall-cmd --reload
Output:
cockpit dhcpv6-client ftp http https ssh
Enable Forwarding and IP Address Rules
Allow incoming traffic to the SSH port
22from your public server IP address192.0.2.100.console$ sudo firewall-cmd --zone=public --add-rich-rule='rule family="ipv4" source address="192.0.2.100" port protocol="tcp" port="80" accept'
Forward traffic from one port to another. For example, forward traffic from the internal port
8080to the destination port8900through all IP addresses.console$ sudo firewall-cmd --zone=public --add-forward-port=port=80:proto=tcp:toport=8080:toaddr=0.0.0.0 --permanent
The above rule forwards all incoming requests on port
8080to8900to securely expose a specific resource on different ports.Reload Firewalld to save the zone changes.
console$ sudo firewall-cmd --reload
Create Custom Firewalld Zones
Create a new Firewalld zone with a custom name such as
example-zone.console$ sudo firewall-cmd --permanent --new-zone=example-zone
Reload Firewalld to save changes.
console$ sudo firewall-cmd --reload
View the Firewalld zones and verify that the new custom zone is available.
console$ sudo firewall-cmd --permanent --get-zones
Output:
block dmz drop example-zone external home internal nm-shared public trusted work
Firewalld Panic Mode
Firewalld panic mode blocks all incoming and outgoing network connections on the server to protect the system in case of security threats. When enabled, the server blocks all connections including your active SSH session. Follow the steps below to enable panic mode and troubleshoot the system in case of external threats or network failures.
View the Firewalld panic mode status.
console$ sudo firewall-cmd --query-panic
Output:
noEnable panic mode to block all network connections on the server.
console$ sudo firewall-cmd --panic-on
View the Firewalld panic mode status and verify that it's active.
console$ sudo firewall-cmd --query-panic
Output:
yesIn case Firewalld blocks your SSH session, access your instance page in the Vultr Console and use the Vultr Console to start a new server terminal session.
Conclusion
You have set up firewall policies using Firewalld on a Vultr Cloud Server and configured multiple rules to filter network connections using zone profiles. Firewalld uses zones, services, ports, and custom rules as the major firewall configuration options to filter network traffic on a server. To manually modify the Firewalld configurations, navigate to the /etc/firewalld application data directory. For more information, visit the application manual page using the man firewalld command.