How to Use Redis® Streams in Go with Vultr Managed Database for Caching
Introduction
Redis® is an open-source, in-memory data store that supports many advanced data structures like String, Hash, List, Set, and Sorted Set, along with other capabilities such as Pub/Sub messaging and stream processing. It also supports high availability, scalability, and reliability by combining asynchronous replication with Redis® Cluster.
Redis® Streams is an append-only log data structure that supports durable and reliable messaging with the ability to replay messages and use Consumer Groups for load balancing. You can think of it as a combination of Redis® List and Redis® Pub/Sub. It adopts the producer-consumer pattern where producers send data to the Stream and consumers subscribe to data arriving into the Stream.
Redis® has client libraries for many programming languages, including Go, Java, and Python.
This article explains how to use Redis® Streams and the Go client with Vultr Managed Databases for Caching. You will learn:
- An overview of Redis® Streams and its commands.
- How to create and delete a Vultr Managed Database for Caching.
- How to securely connect to the database over TLS and use Redis® Streams with the
go-redisclient to build an asynchronous data processing application.
Prerequisites
To follow the instructions in this article, you should install these on your local workstation:
- A recent version of the Go programming language (version 1.18 or higher)
- curl, which is a popular command-line
HTTPclient. - redis-cli
- Option 1: Install redis-cli as part of the Redis® package for your operating system.
- Option 2: Install the NodeJS standalone version of redis-cli.
Redis® Streams overview
Redis® Streams has a rich set of features that it exposes in the form of commands, which can be categorized as these operations:
- Add data to Stream
- Get information about a Stream
- Read data from Stream
- Read data from Stream using consumer group
- Handle Consumer group
- Handle Pending List
- Deleting data from Stream
Add data to Stream
You can add entries (key-value pairs) to Stream using XADD. It returns the ID of the added entry, which is auto-generated if a specific ID is not passed as an argument.
Get information about a Stream
The XINFO STREAM command exposes a lot of useful attributes of a Stream, such as the number of entries, consumer groups, first and last entry, and so on. You can also use this command's FULL modifier to get a detailed reply.
Read data from Stream
XRANGE can be used to fetch the stream entries within a given range of IDs. - and + are special IDs which refer to the minimum and the maximum possible ID respectively. You can use XREVRANGE to get the entries in reverse order (end ID first and the start ID later).
XREAD can retrieve data from one or more streams, only returning entries with an ID greater than the last received ID reported by the client.
Read data from Stream using consumer group
XREADGROUP supports the concept of consumer groups, which are clients that consume different parts of the messages arriving in a given stream. Think of it as an advanced version of the XREAD.
Handle Consumer group
XGROUP family of commands helps manage consumer groups as well as consumers.
XGROUP CREATEandXGROUP DESTROYcan create and destroy a consumer group, respectively.- Similarly,
XGROUP CREATECONSUMERandXGROUP DELCONSUMERcan create and destroy a consumer with a specified consumer group (respectively). - With
XGROUP SETID, you can modify the group's last delivered ID without having to delete and recreate the group. XINFO GROUPSlist of all consumer groups of the stream, including data such as the number of consumers in the group, as well the consumer group lag, which is nothing but the number of entries that are yet to be delivered to the group's consumers.- With
XINFO CONSUMERS, you can get the list of consumers who belong to a consumer group of the specified Stream.
Handle Pending List
XPENDING can be used to get a deeper understanding of a stream's consumer groups. XACK is used to acknowledge processed messages, and it removes those messages from the Pending Entries List. While XCLAIM does not delete an entry from the Pending List, it changes the ownership of a message in the Pending List such that another consumer can process it. XAUTOCLIAM is a short form of invoking XPENDING followed by XCLAIM.
Deleting data from Stream
XDEL deletes the specified entries from a stream, while XTRIM works by evicting older entries if required.
Create Redis® Database
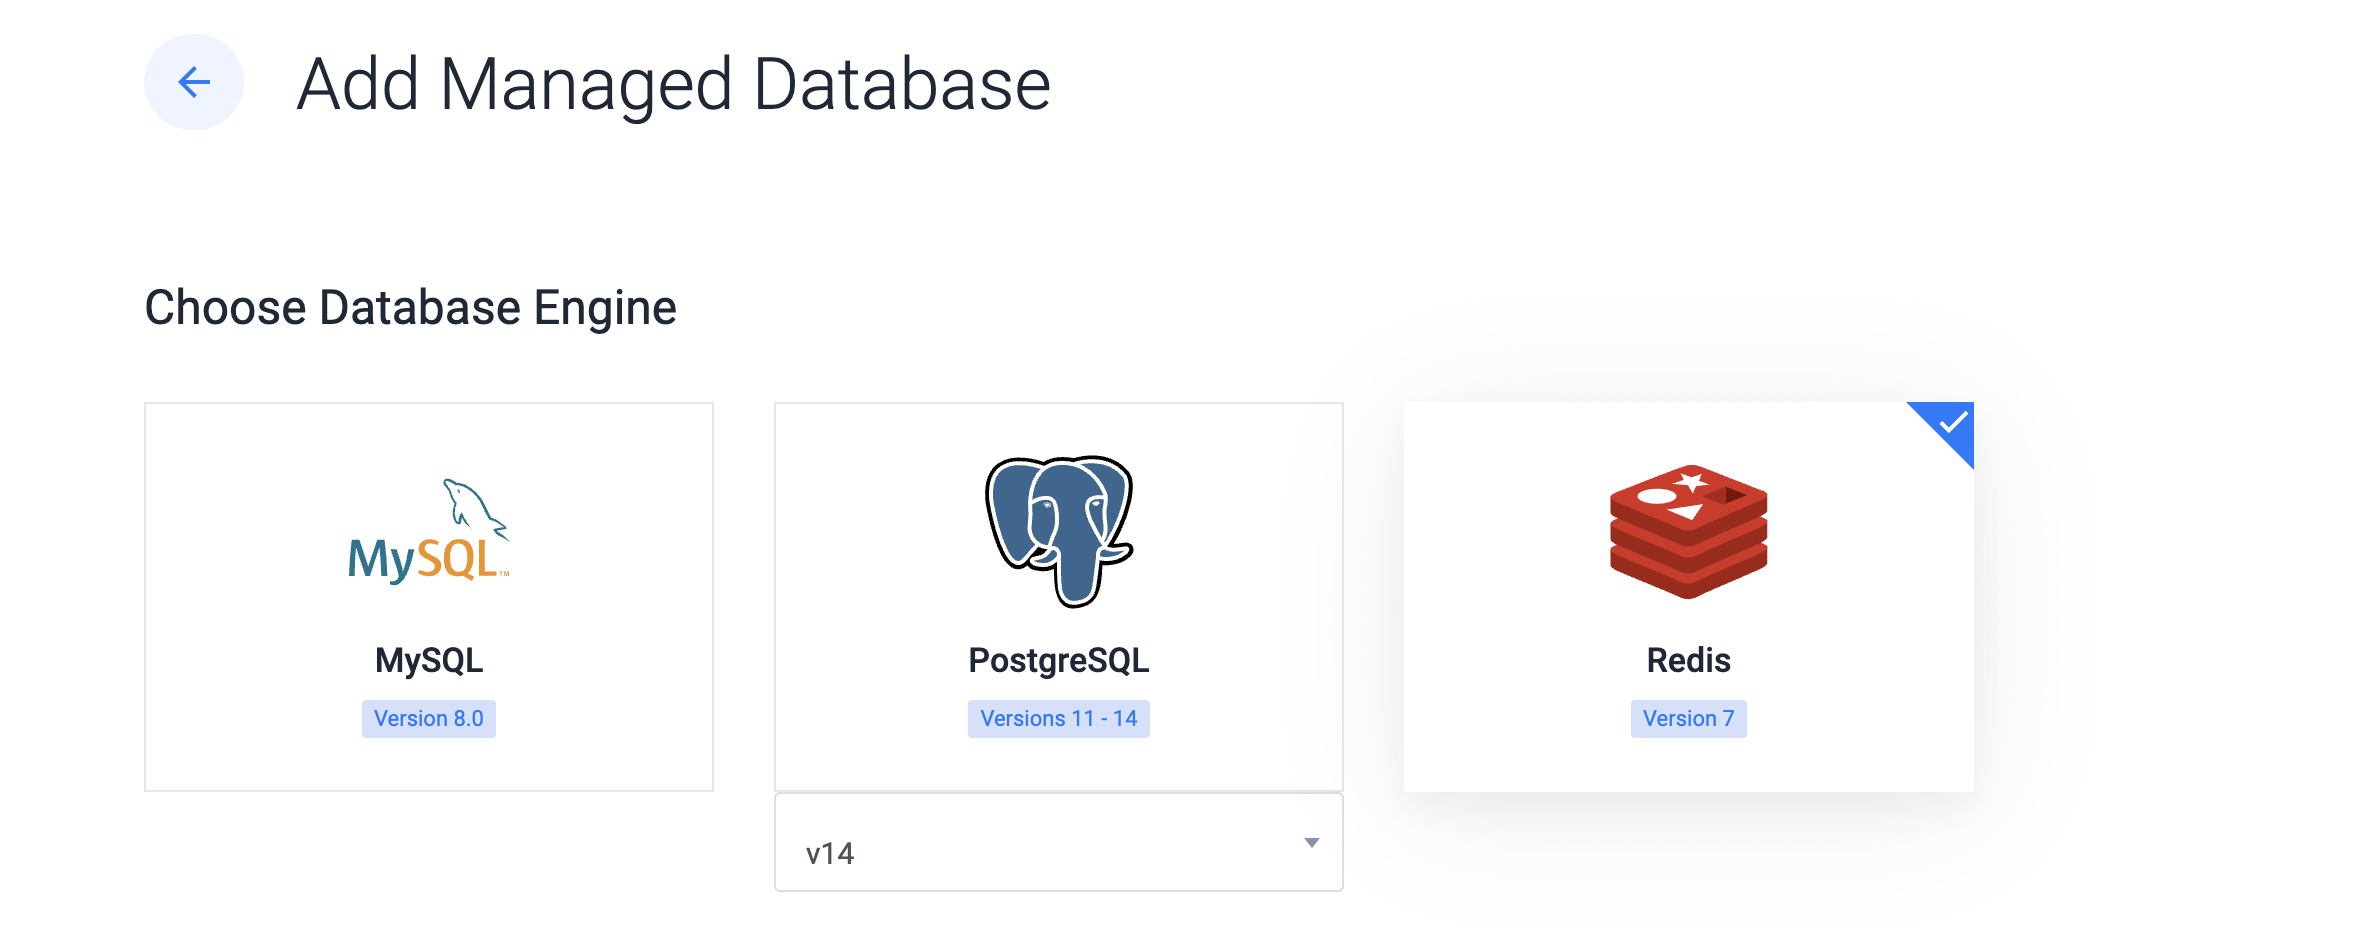
Log into your Vultr account, navigate to Add Managed Database and follow the below steps.
Choose the Redis® database engine.
You can choose from several options in the Server Type. This includes Cloud Compute, Cloud Compute High Performance - AMD or Intel, Optimized Cloud Compute - General Purpose, and Storage or Memory Optimized. You can select zero or more replica nodes as well as the cluster location. A replica node is the same server type and plan as the primary node.

After you add a label for the database cluster, click Deploy Now to create the cluster. It will take a few minutes for the cluster to be available, and the Status should change to Running.
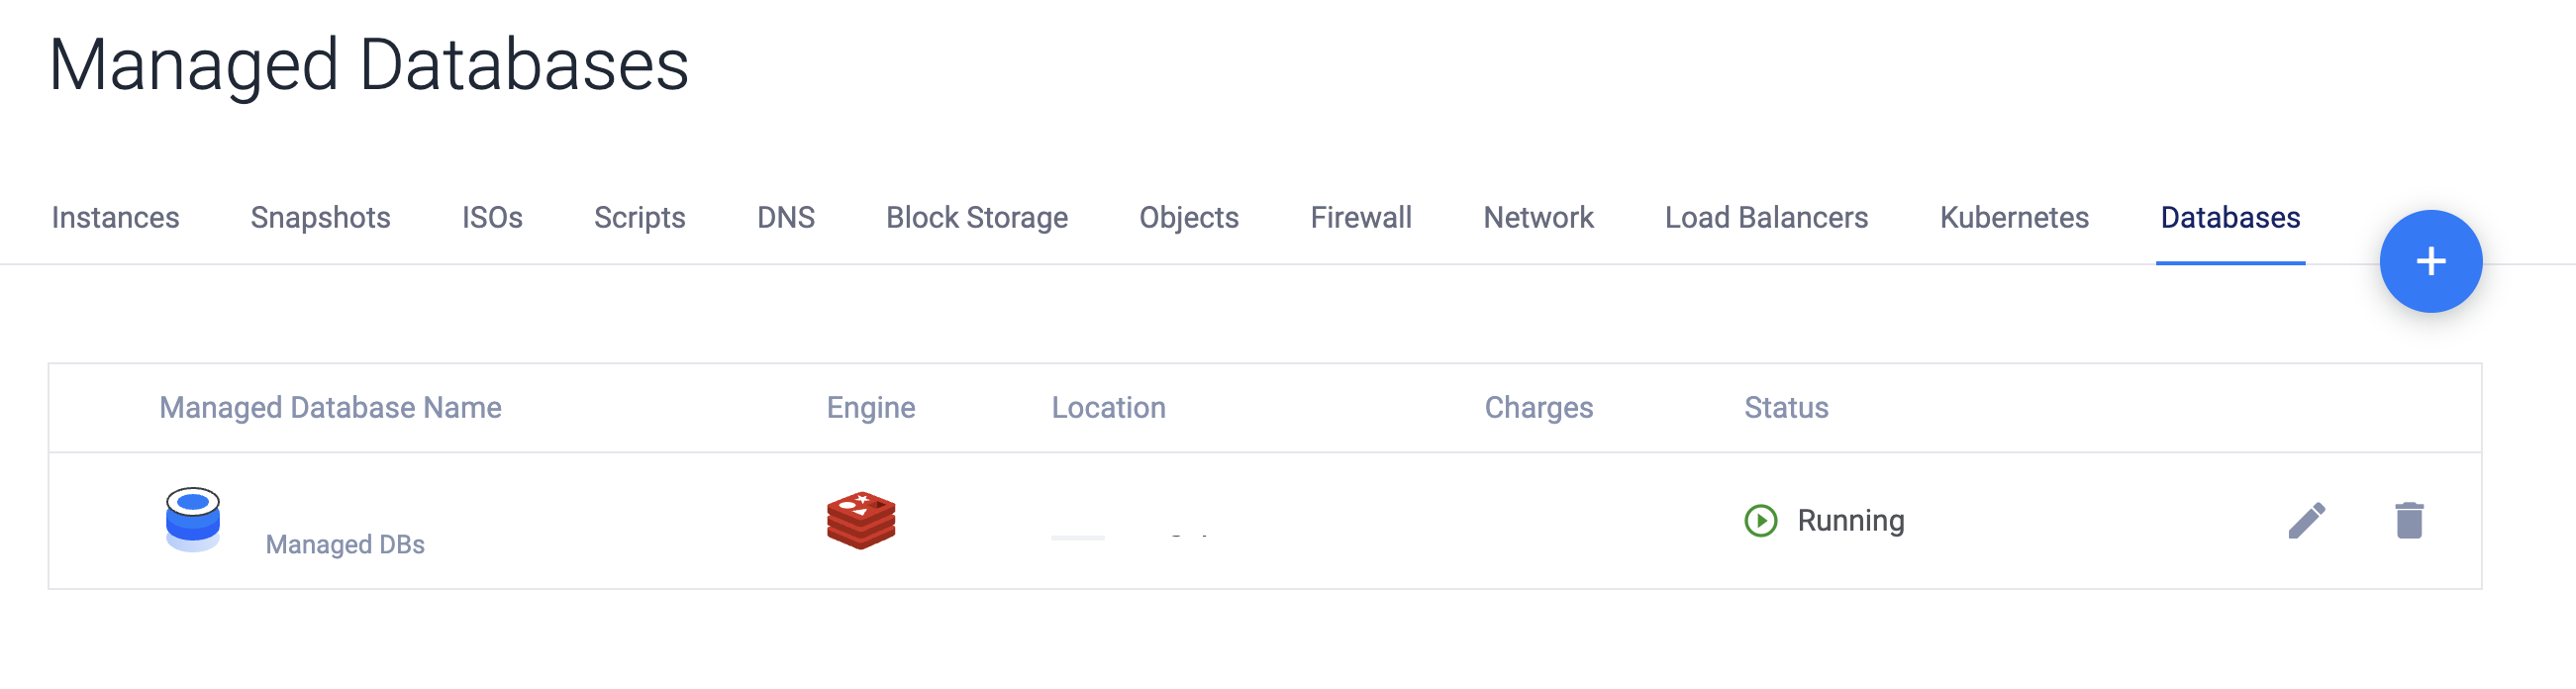
The database is ready.
Application
The application demonstrated in this article uses Redis® Streams to process product information asynchronously.
- A REST endpoint that receives product information (using HTTP
POST) and adds it to a Redis® Stream. - A consumer process (based on Redis® Streams consumer group -
XREADGROUP) to process the data and save it to a Redis®Hash.
Initialize the project
Create a directory and switch to it:
mkdir redis-streams-go
cd redis-streams-go
Create a new Go module:
go mod init redis-streams-goThis will create a new
go.modfile
Create a new file main.go:
touch main.goImport libraries
To import required Go modules, add the following to main.go file:
package main

import (
    "context"
    "crypto/tls"
    "errors"
    "fmt"
    "io/ioutil"
    "log"
    "net/http"
    "os"
    "strings"
    "time"

    "github.com/go-redis/redis/v8"
)
Add global variables and constants
Add the code below to main.go file:
var (
    client   *redis.Client
    redisURL string
)

const (
    consumerGroupName = "product-processor-group"
    hashPrefix        = "product:"
    streamName        = "products"
)clientis a pointer to a*redis.Client, which is initialized in theinitfunction (discussed next).redisURLis the URL of the Redis® database.streamNameis the name of a Redis® Stream.consumerGroupNameis a constant and is the name of the Redis® Streams consumer group.hashPrefixis the word that will be prefixed to the name of ahashwhere product information will be stored.
Add the init function
Add the code below to main.go file:
func init() {
    redisURL = os.Getenv("REDIS_URL")
    if redisURL == "" {
        log.Fatal("missing environment variable REDIS_URL")
    }

    opt, err := redis.ParseURL(redisURL)
    if err != nil {
        log.Fatal("invalid redis url", err)
    }

    opt.TLSConfig = &tls.Config{}

    client = redis.NewClient(opt)

    _, err = client.Ping(context.Background()).Result()
    if err != nil {
        log.Fatal("failed to ping redis", err)
    }

    client.XGroupCreateMkStream(context.Background(), streamName, consumerGroupName, "$")
}- The
initfunction reads the Redis® URL from theREDIS_URLenvironment variable and fails if it's missing. Pingfunction is used to verify successful connectivity with Redis®.- Finally, a Redis® Stream consumer group is created using
XGroupCreateMkStream, and the$signifies that the consumer group will start consuming new items in the Stream.
Add the main function
Add the main function to main.go file:
func main() {
    go processor()

    http.HandleFunc("/", addProduct)

    fmt.Println("started HTTP server")
    log.Fatal(http.ListenAndServe(":8080", nil))
}
The main does the following:
- Start a
goroutineto process items from the Redis® Stream (discussed later). - Register an
HTTPhandler (discussed later). - Start the
HTTPserver.
Add the addProduct HTTP handler function
Add the addProduct function to main.go file:
func addProduct(w http.ResponseWriter, req *http.Request) {

    info, err := ioutil.ReadAll(req.Body)
    if err != nil {
        log.Fatal("invalid product info payload", err)
    }
    defer req.Body.Close()

    productID := strings.Split(string(info), ",")[0]
    productName := strings.Split(string(info), ",")[1]

    err = client.XAdd(context.Background(), &redis.XAddArgs{
        Stream: streamName,
        Values: []interface{}{productID, productName}}).Err()

    if err != nil {
        log.Fatal("failed to add product info to stream", err)
    }

    fmt.Println("added product info to stream", productID)
}
The addProduct function provides a REST endpoint for client applications to submit product information (ID and name):
- First, the product information in the
HTTPbody is read usingioutil.ReadAll - The product information is a
CSVstring which is split into ID and product name. XAddis used to add the product information to the Stream - the product ID is used as the key, and the name is used as the value.
Add the processor function
Add the processor function to main.go file:
func processor() {
    fmt.Println("product processor started")

    for {
        result, err := client.XReadGroup(context.Background(), &redis.XReadGroupArgs{
            Streams: []string{streamName, ">"},
            Group:   consumerGroupName,
            Block:   1 * time.Second,
        }).Result()

        if err != nil {
            if errors.Is(err, redis.Nil) {
                continue
            }
            log.Fatal("failed to get stream records", err)
        }

        for _, s := range result {
            for _, message := range s.Messages {

                var hash string
                for k, _ := range message.Values {
                    hash = hashPrefix + k
                }

                err = client.HSet(context.Background(), hash, message.Values).Err()
                if err != nil {
                    log.Fatal("hset failed", err)
                }
                fmt.Println("product added to hash", hash)

                client.XAck(context.Background(), streamName, consumerGroupName, message.ID).Err()
                if err != nil {
                    log.Fatal("acknowledgment failed for", message.ID, err)
                }

                fmt.Println("acknowledged message", message.ID)
            }
        }
    }
}
This function starts a for loop:
- With
XReadGroupit gets product data from the Stream. - Adds the product ID and name to hash.
- If successful, it acknowledges the message using
XAck.
Save the main.go file and execute the program to try the application.
Run the program
Fetch the Go module dependencies for the program:
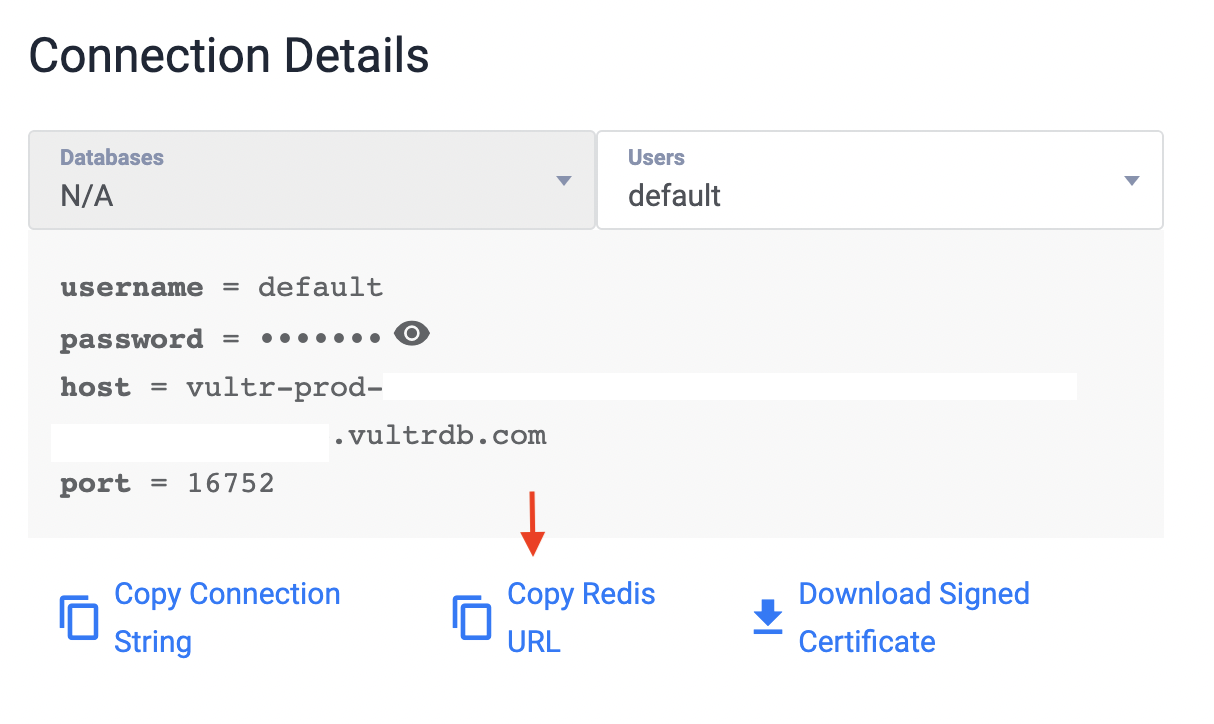
go mod tidyGet the connection URL of the Vultr Managed Database for Caching database.
- Click the Manage icon to open the Overview tab.
- From Connection Details section, choose Copy Redis® URL
To run the program, open a terminal and enter the following:
export REDIS_URL=<paste the Redis URL>
go run main.go
You should see the following output:
started HTTP server
product processor started
Add a product by sending data to the REST endpoint. From another terminal, execute this command:
curl -i -XPOST -d' product-1, iPhone' http://localhost:8080You should see the following response:
HTTP/1.1 200 OK
Date: Thu, 08 Jan 2022 18:33:08 GMT
Content-Length: 0
In the application logs, you will see a similar output (the acknowledged message ID will be different in your case):
added product info to stream product-1
product added to hash product:product-1
acknowledged message 1670524388251-0
Verify that the product data was saved to Redis® Hash. Use the Redis CLI:
redis-cli -u <paste the Redis URL> HGETALL product:product-1The call to HGETALL should respond with this output:
  1) "product-1"
  2) "iPhone"
Add another product by sending data to the REST endpoint:
curl -i -XPOST -d' product-2,iPad' http://localhost:8080You should see the following response:
HTTP/1.1 200 OK
Date: Thu, 08 Jan 2022 18:35:08 GMT
Content-Length: 0
In the application logs, you will see a similar output (the acknowledged message ID will be different in your case):
added product info to stream product-2
product added to hash product:product-2
acknowledged message 1670524560512-0
Verify that the product data was saved to Redis® Hash. Use the Redis® CLI:
redis-cli -u <paste the Redis URL> HGETALL product:product-2The call to HGETALL should respond with this output:
  1) "product-2"
  2) "iPad"
Continue adding a few more products:
curl -i -XPOST -d' product-3,iMac' http://localhost:8080
curl -i -XPOST -d' product-4, AirPod' http://localhost:8080
curl -i -XPOST -d' product-5, AirTags' http://localhost:8080
In each case, just like before:
- Make a note of the
HTTPresponse. - Check the application logs.
- Use Redis® CLI to verify the creation of the corresponding
Hashwith the product information.
Finally, to stop the application, go back to the terminal where the application is running and press CTRL+C.
After completing this article's tutorial, you can delete the database.
Delete the Redis® Database
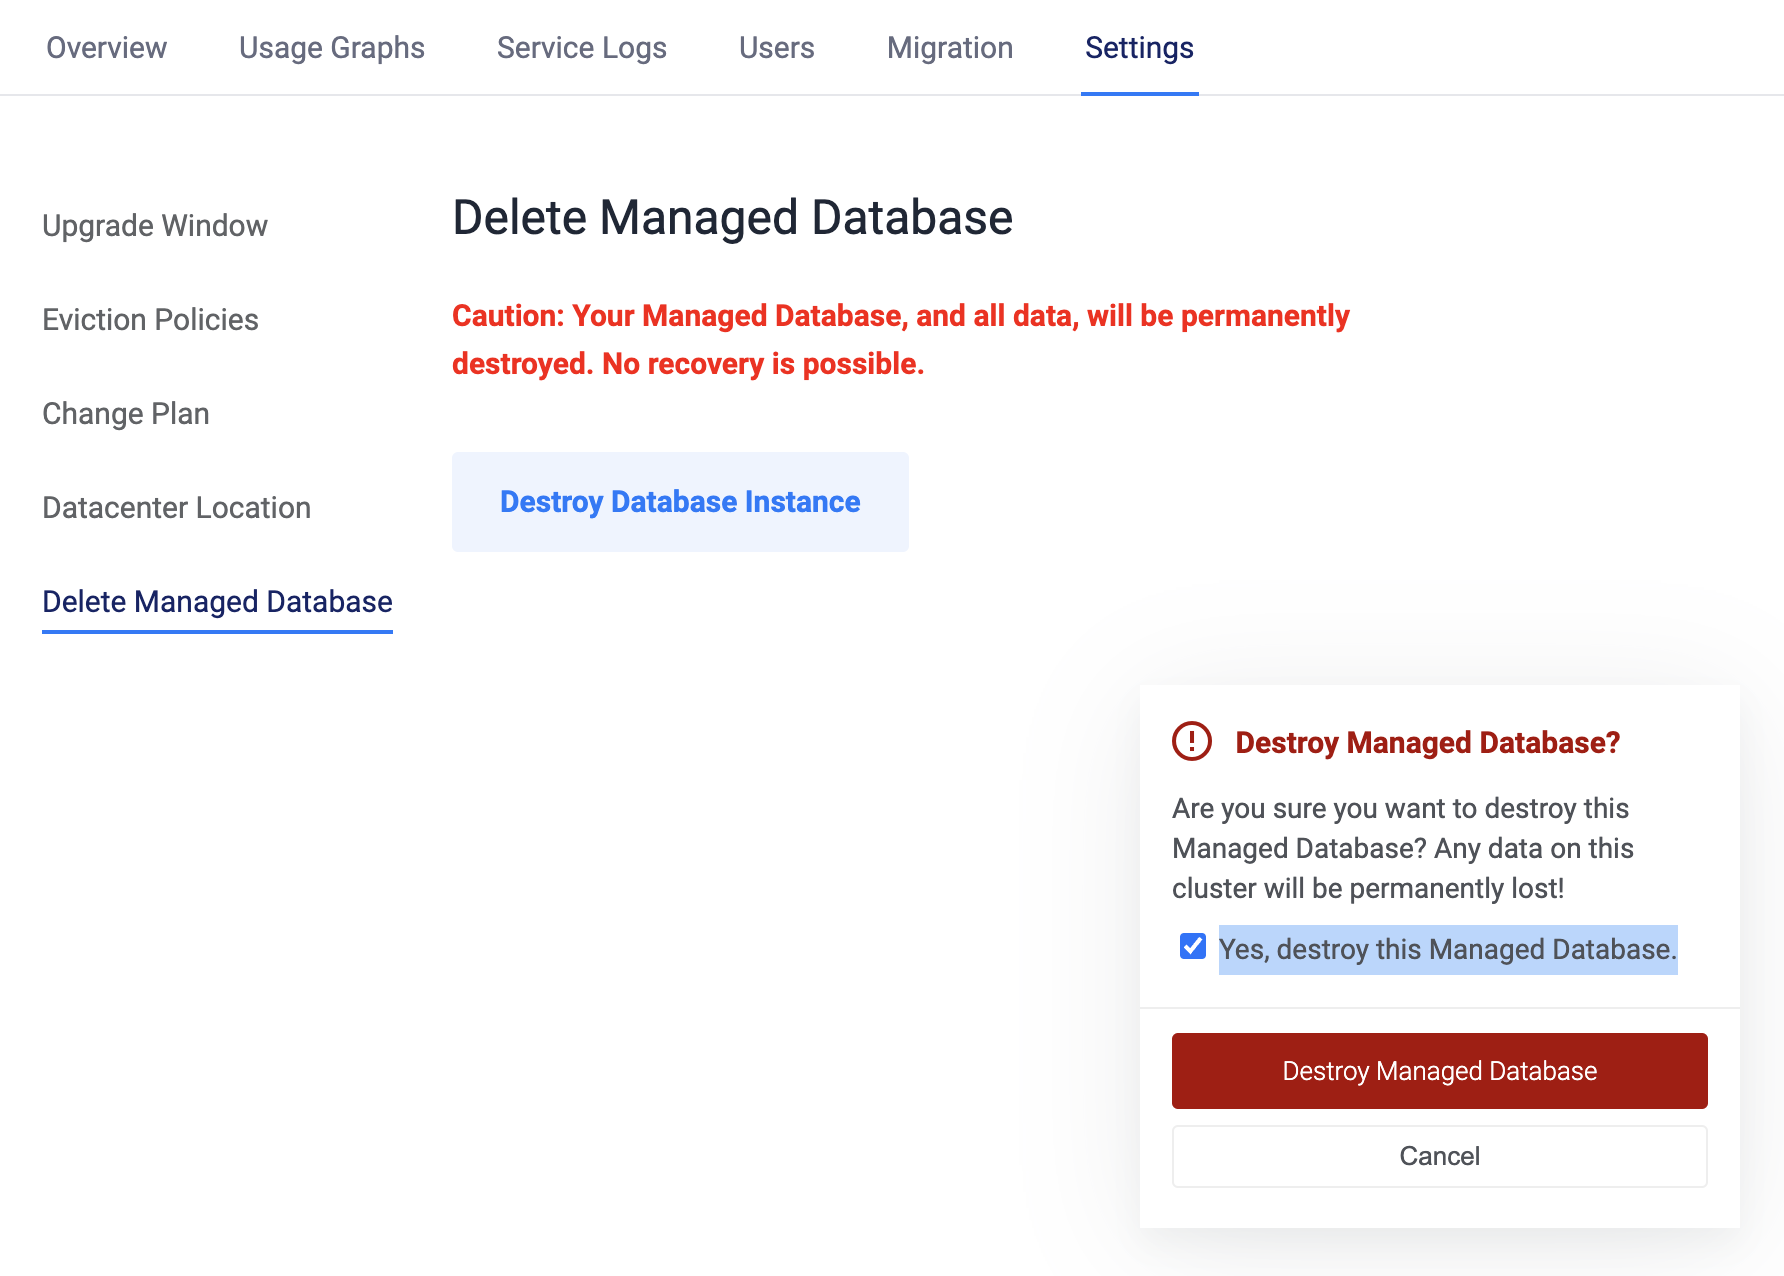
To delete the database that you've created, log into your Vultr account and follow the below steps for the database you want to delete:
- Click the Manage icon to open the Settings tab.
- Choose Delete Managed Database and click Destroy Database Instance
- In the Destroy Managed Database? pop-up window, select the checkbox Yes, destroy this Managed Database. and then click Destroy Managed Database
Conclusion
Following this article, you built an application to process product data asynchronously with Redis® Streams and the go-redis client.
You can also learn more in the following documentation:
- Vultr Managed Databases Quickstart
- Managed Database for Caching Guide
- How to Securely Connect to Redis® with TLS/SSL in Go, NodeJS, PHP, Python, and redis-cli
- Implement Redis® Transactions and Locks with Golang and MySQL on a Linux Server
- Create a Redis® Leaderboard with Golang
- Implement Rate-limiting with Redis® and Golang on a Linux Server