Introduction
Node.js is a backend Javascript runtime environment that is light and highly scalable. It is used to build real-time applications such as video streaming applications. To make development easier, Node js developers created a node package manager (npm). This package manager acts as the Node.js command line. It is used for installing modules and initializing projects.
In this tutorial, you will learn how to install npm on Windows and how to use it.
How to Install npm on Windows
Follow the steps below to download and install the Node.js .msi file. The Node.js .msi file includes the node package manager. You don’t have to download them separately like before.
Go to the Nodej.s website and download the Long Term Support (LTS) version of Node.js. The LTS version has features that have abundant documentation and it is stable in terms of security and performance when compared to the Node.js current version.
Navigate to the Download folder in the file manager and click the
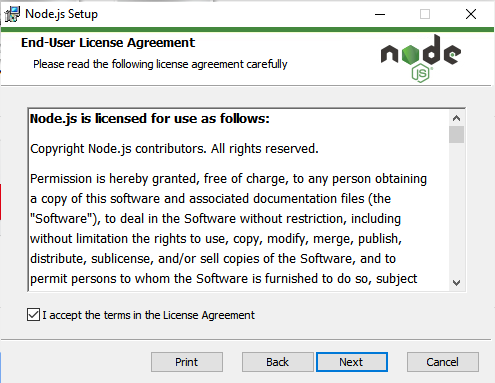
.msipackage to start the installation procedure.Accept the terms in the License Agreement.
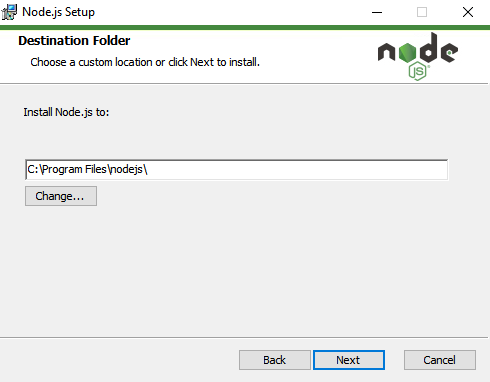
Add a different directory if you want but you can just leave the default location set by Node.js.
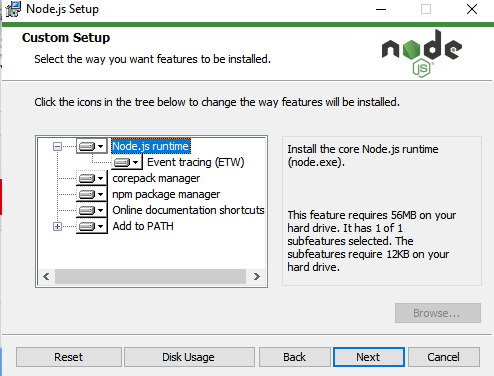
Select the Node.js features you want to install or remove by clicking on the drop-down list. You can leave everything on default if you don’t have any changes to make.
Check the box to install essential tools required by Node.js and npm.
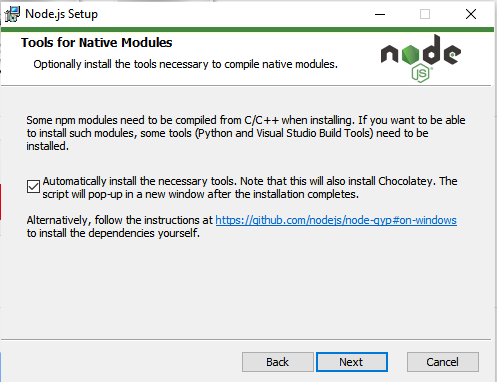
Finish the installation process by clicking on the install button to install Node.js.
Confirming that npm and Node.js have been installed successfully
Use the npm -v command to check the version of the node package manager you just installed. You will get the version number if it has been successfully installed.
npm -v
8.1.0
Use node -v command to check if Node.js has been installed successfully. This command will also show the version number if Node.js has been successfully installed.
node -v
8.1.0
How to initialize a project using npm
The npm init command is used to create a Node.js project. The npm init command will create a package where the project files will be stored. All the modules you download will be stored in the package.
npm init The npm init command will also create the package.json file, and prompt you to add the following project information when creating a project:
- Project name
- Project initial version
- Project description
- The project's entry point
- The project's entry point
- The project's test command
- The project's git repository
- The project's license
The information will be stored in the package.json file. The package.json file contains the important details and metadata of your project such as package versions.
Here is an example of a package.json file:
{
  "name": "hometech",
  "version": "1.0.0",
  "description": "How to install node package manager",
  "main": "index.js",
  "scripts": {
    "test": "echo \"Error: no test specified\" && exit 1",
    "start": "node server.js"
  },
  "author": "Boemo Mmopelwa",
  "license": "MIT",
  "dependencies": {
    "@apollo/client": "^3.3.7",
    "Express": "^3.0.1",
    "apollo-angular": "^2.2.0",
    "express": "^4.17.1",
    "express-graphql": "^0.12.0",
    "graphql": "^15.4.0"
  },
  "devDependencies": {},
  "keywords": [
    "vultr"
  ]
}
The package.json file is stored in your current prescribed directory but you can also move it to your desired destination.
If you want to skip the questions asked when creating a project, use this command:
npm init --yes The above command will initialize the project and skip all the required details required by the package.json file. You can set these configuration details later when you’re ready to add them. But these are important details that should never be forgotten to be added.
You can use the following commands to install additional information:
- npx license: use this command to download your preferred license package such as MIT.
- npx gitignore: This command downloads the gitignore file from GitHub’s repo of your choice using the gitignore package.
- npx covgen: This command uses the covgen package to generate the Contributor Covenant. This command will also generate a code of conduct that all contributors must abide by.
Setting config options for the init command
The node package manager allows you to set default config options for the npm init command.
Here are some of the commands you can use to set default config options:
Setting the author’s email address
The following command sets your default email address.
> npm set init.author.email "enter your email address here"Setting the author’s name
The following command sets your default author name.
> npm set init.author.name "enter your author name here"Setting the project license
The following command sets your project’s license.
> npm set init.license "MIT"How to add dependencies in the package.json file manually
Use the dependencies attribute to manually add dependencies to the package.json file by referencing the name and version of the dependency using any text editor such as Microsoft Visual studio:
{
 "name": "hometech",
 "version": "1.0.0",
 "dependencies": {
 "my_dep": "^1.0.0",
 }
}
Use the devDependencies attribute to manually add devDependencies name and version to the package.json file:
"name": "hometech",
"version": "1.0.0",
"dependencies": {
"my_dep": "^1.0.0",
},
"devDependencies" : {
"my_test_framework": "^3.1.0".
"another_dev_dep": "1.0.0 - 1.2.0"
}
How to list packages in dependencies
You can check and keep track of all installed using the npm list command. The npm list command will generate a list of all installed packages.
npm listThe command will output all installed packages:
demo@1.0.0 C:\Users\Demo
+-- @apollo/client@3.3.7
+-- apollo-angular@2.2.0
+-- array-flatten@1.1.1 extraneous
+-- body-parser@1.19.0 extraneous
+-- content-disposition@0.5.3 extraneous
+-- cookie-signature@1.0.6 extraneous
+-- cookie@0.4.0 extraneous
+-- debug@2.6.9 extraneous
+-- destroy@1.0.4 extraneous
+-- ee-first@1.1.1 extraneous
+-- encodeurl@1.0.2 extraneous
+-- escape-html@1.0.3 extraneous
+-- etag@1.8.1 extraneous
+-- express-graphql@0.12.0
+-- Express@3.0.1 invalid: "^4.17.1" from the root project
+-- finalhandler@1.1.2 extraneous
+-- forwarded@0.1.2 extraneous
+-- fresh@0.5.2 extraneous
+-- graphql@15.4.0
+-- http-errors@1.7.2 extraneous
+-- type-is@1.6.18 extraneous
+-- utils-merge@1.0.1 extraneous
How to Install Modules using npm
The npm install command is used to install modules such as Express. To use this command just add the name of your module after the install keyword.
npm install <enter the module name here>If you don’t want to install a specific module you can go ahead and install modules and project dependencies listed in the package.json file using the following command.
npm installIf you are installing a module that hasn’t been listed in the package.json file. You can use the following command to install and add the module to the package.json file as a project dependency.
npm install <module> --save You can also use the --save-dev flag which adds the module as a devDependencies. Development dependencies (devDependencies) are used for development purposes only, they are not required during runtime.
npm install <module> --save-dev How to Install Modules Globally on your System
If you want all of your applications to use a specified module, install the module globally by using the--global flag so that all Node.js applications in your system can access the module:
npm install <enter the module you want to install globally here> --global Inspecting and auditing installed packages
Security vulnerabilities found in packages often cause service outages and data loss. Inspecting and auditing your Node.js package dependencies using the npm audit command could help you identify security vulnerabilities and fix them before they cause data loss.
The npm audit command is only supported in npm version 6.0.0 and later versions only.
The npm audit command sends details about the package’s dependencies and devDependencies for inspection to your default registry. A report will be sent back which contains results of your package dependencies, devDependencies, bundledDependencies, and optionalDependencies security state.
Follow the following steps to audit your package dependencies:
- Launch the command line and navigate to your package directory.
- Make sure that your package includes the package.json and package-lock.json files.
- Insert the
npm auditcommand and press enter to start the security auditing process. - After the report has been generated using the previous command you can now analyze the audit report and implement security measures to eliminate security vulnerabilities detected in your package dependencies.
Node Package Manager Command Cheat Sheet
Here is a list of essential commands that you will use after you install Node.js and the node package manager.
- npm uninstall <package>: This command is used to uninstall a package.
- npm list -g --depth=0: List globally installed packages.
- npm -g uninstall <name>: This command is used to uninstall a global package.
- npm-windows-upgrade: Upgrade npm on Windows.
- npm run: list available scripts to run.
- npm-windows-upgrade: This command is used to update npm.