
How to Use Vultr’s Supabase Marketplace Application.
Supabase is an open-source Backend-as-a-Service (BaaS) platform that simplifies backend development with a scalable architecture. It is built on top of PostgreSQL and provides an ecosystem of tools and features to streamline backend management while reducing complexity. Its architecture is designed to scale from small projects to enterprise applications, ensuring seamless growth without major reconfigurations.
Follow this guide to use Vultr’s Supabase Marketplace Application. You will deploy a Supabase marketplace application on Vultr and explore its dashboard.
Deploy the Vultr Marketplace Application for Supabase
Deploying Supabase on Vultr allows you to leverage a fully managed backend with PostgreSQL, authentication, buckets for storage, and serverless functions. Using the Vultr Marketplace, you can quickly deploy a Supabase instance and start building applications without complex configurations. Follow the steps below to Deploy Supabase.
Log in to your Vultr Console.
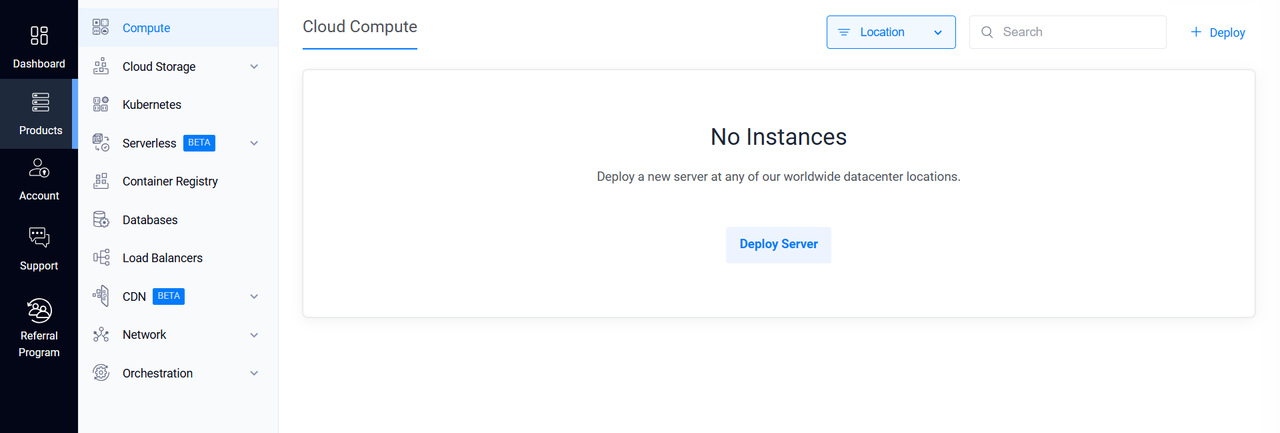
Navigate to the Products section, select Compute, and then click Deploy Server.
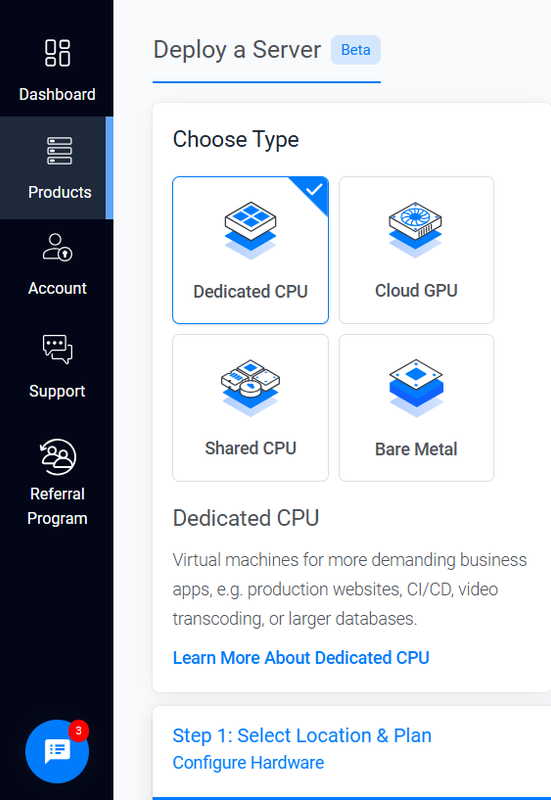
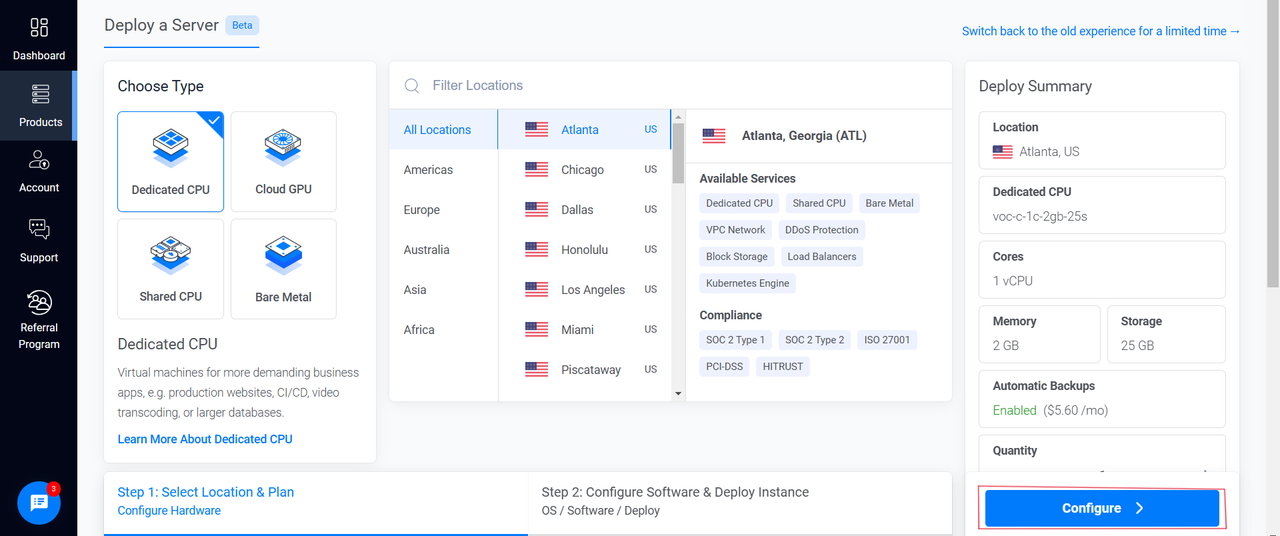
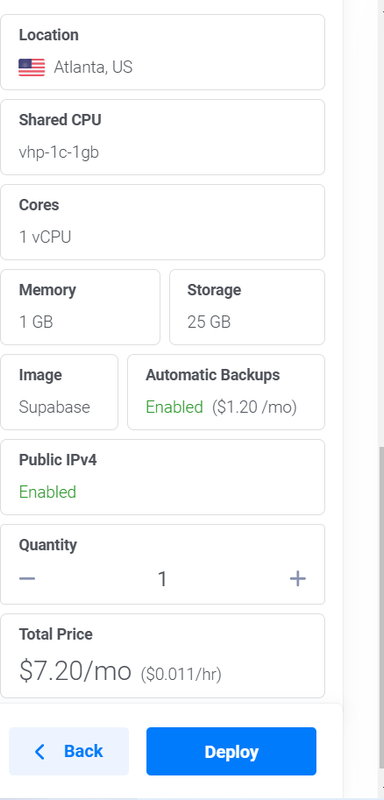
Choose Dedicated CPU as the server type.
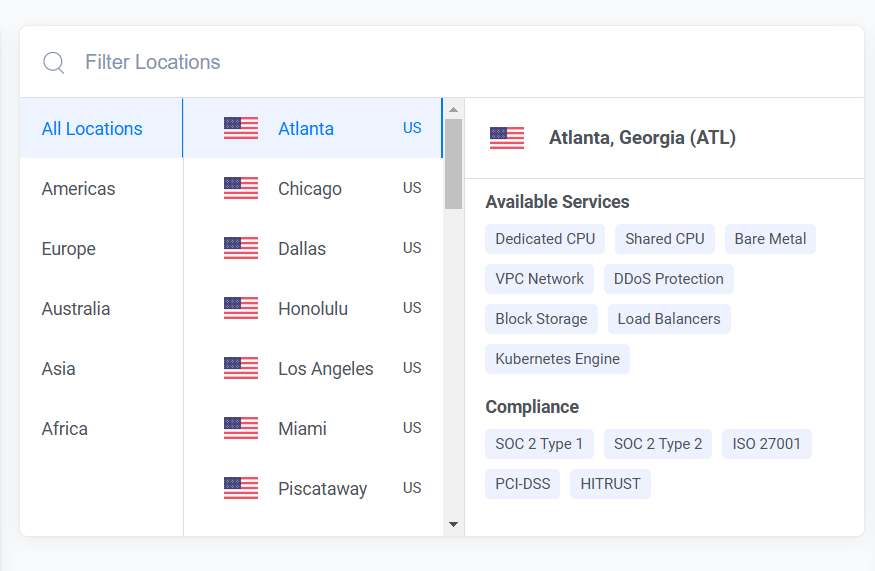
Select a server location closest to your target audience from Vultr’s 33 global locations.
Select a server plan that meets your application requirements.
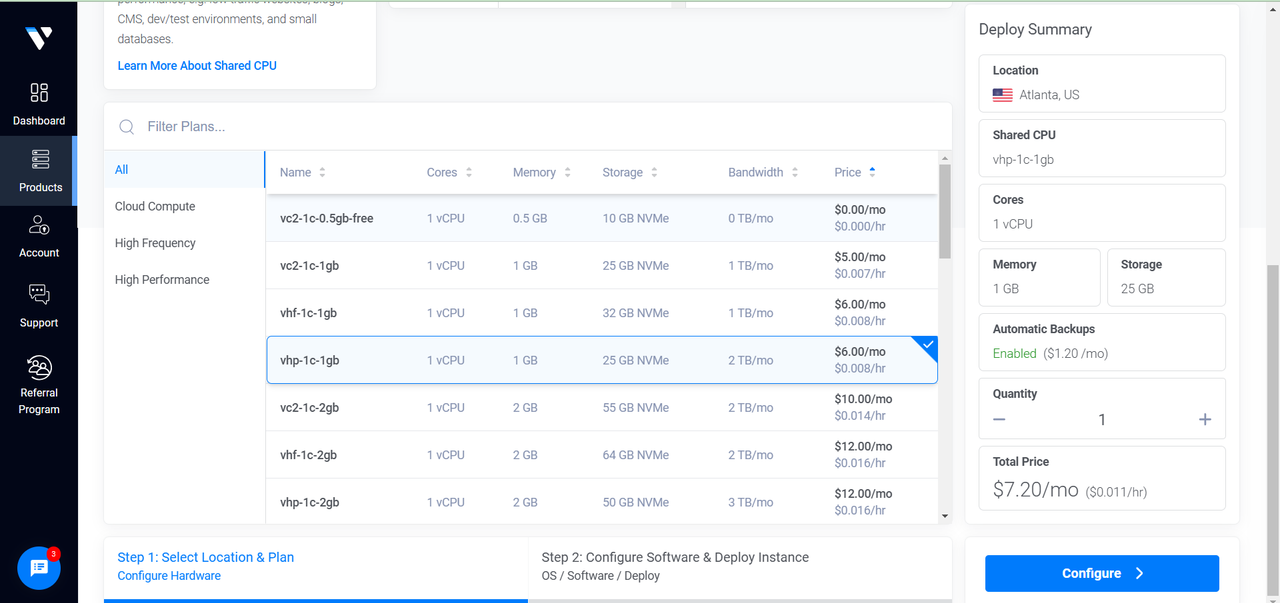
Click the Configure button to proceed.
Under Marketplace Apps, search for Supabase and select it as the Marketplace Application.
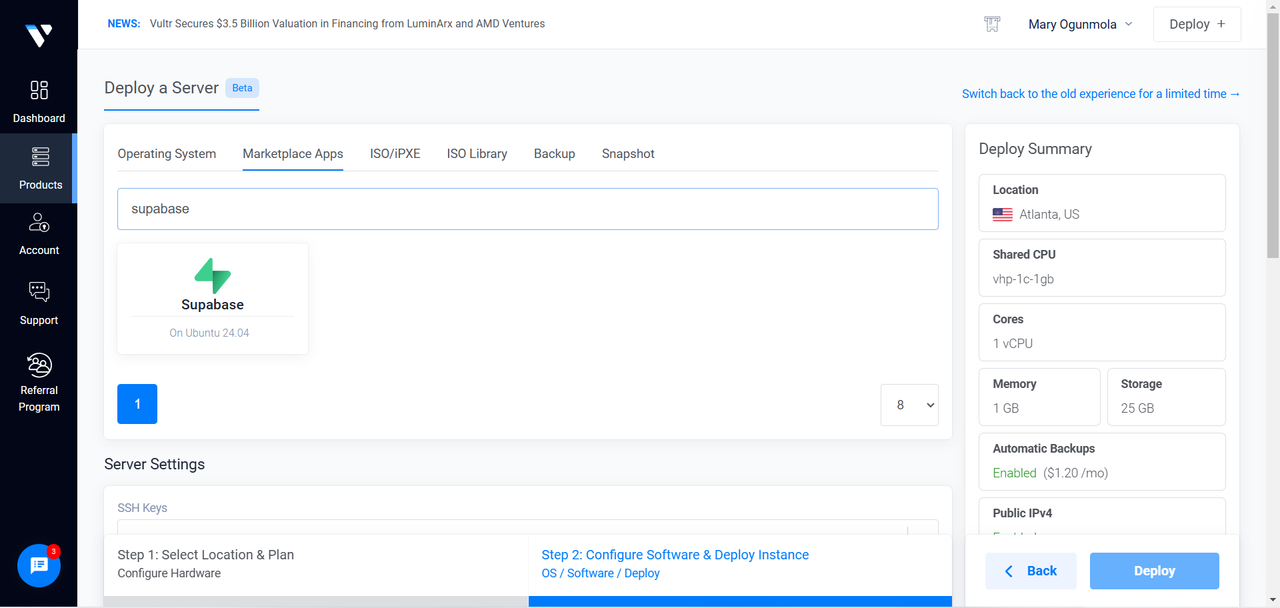
Add any additional features as required.
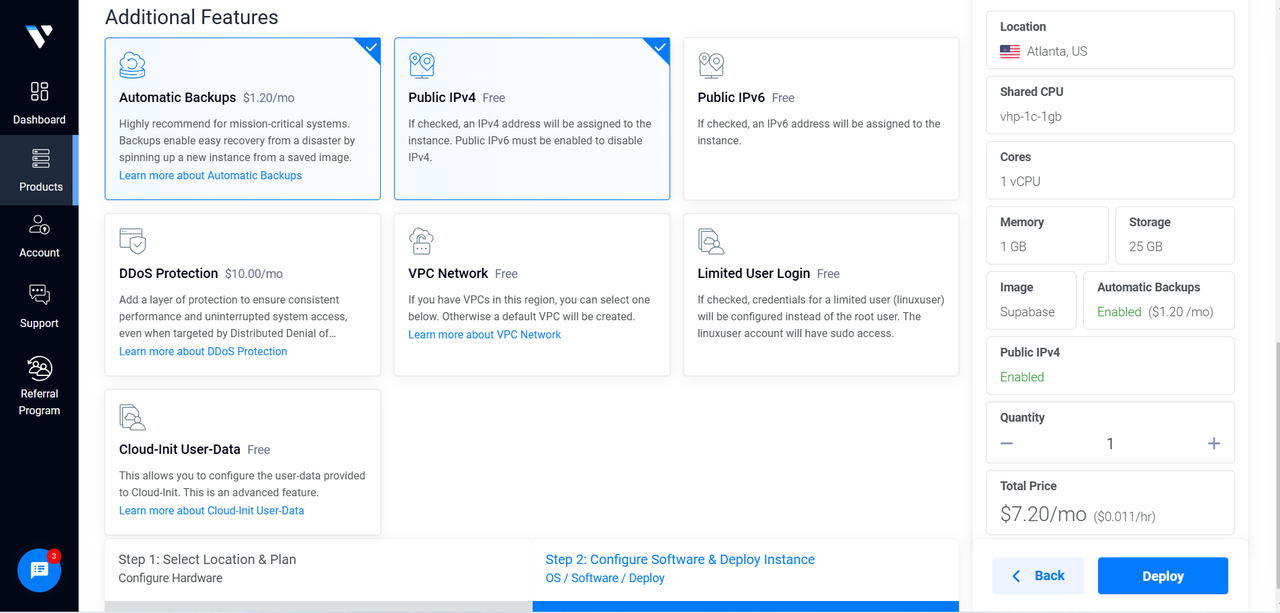
Review your configurations and click the Deploy button to start deployment.
After the deployment is completed, go to the Compute section under Products to view your Supabase instance.
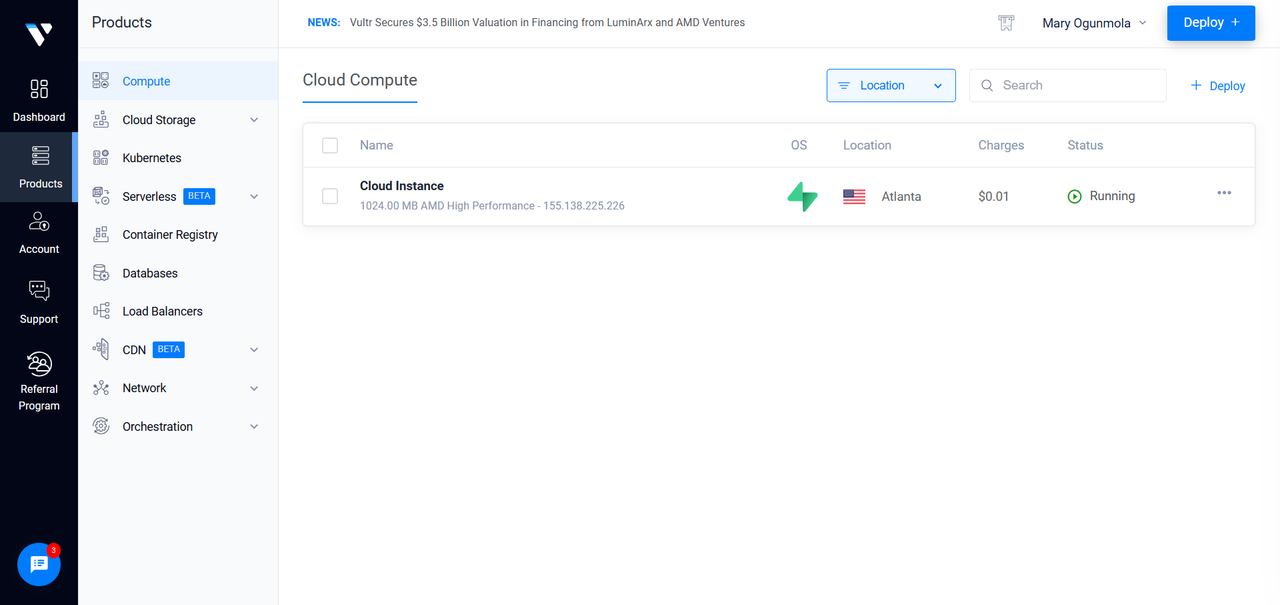
Click the server to view its details and scroll down to the app instructions section.
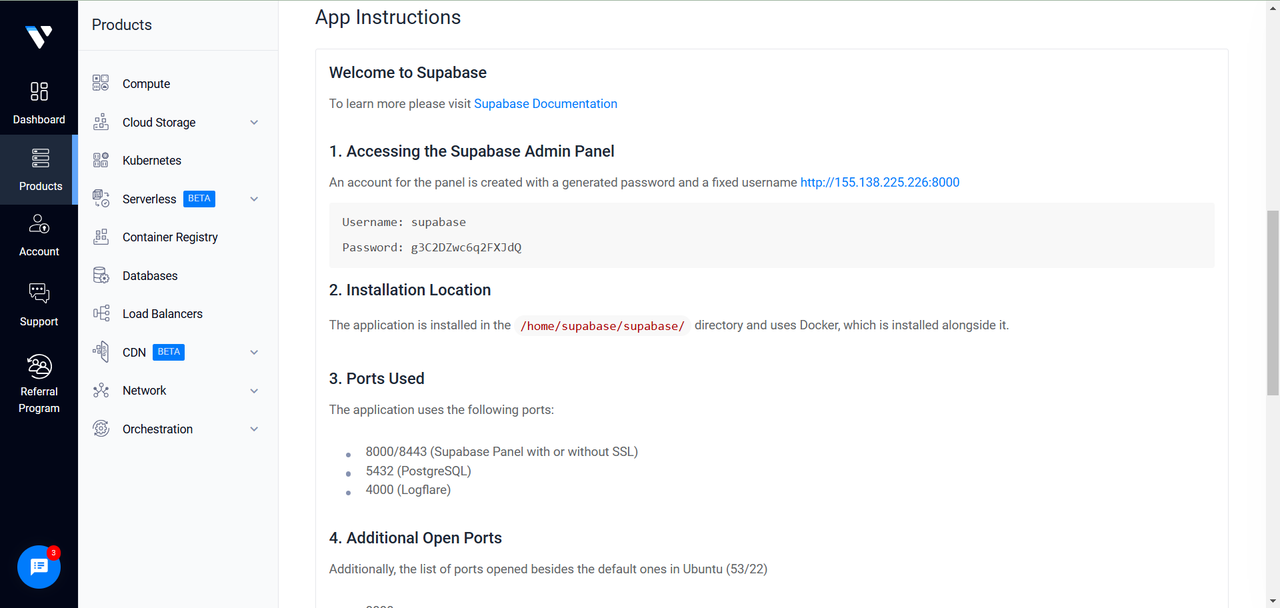
The app instructions section provides essential details for your Supabase Marketplace application.
Supabase Core Features and Benefits
Supabase provides a range of services to streamline backend development. The following are the core features and benefits of Supabase.
Database Management: Supabase offers a fully managed PostgreSQL database with SQL query support, advanced indexing a built-in query editor, and schema visualization tools.
Authentication: Secure user authentication with support for email/password, OAuth providers, and third-party authentication integrations.
Real-time Capabilities: Supabase offers real-time data synchronization using PostgreSQL's replication engine.
Storage: Provides scalable file storage with secure access and seamless integration into applications.
API Auto-generation: Automatically generates RESTful APIs for all database tables and views. This saves time by using APIs that are instantly ready for CRUD (Create, Read, Update, Delete) operations.
GraphQL Support: Supabase supports GraphQL for flexible and efficient queries of complex data structures.
Configure Supabase
After deploying Supabase on Vultr, you must configure essential settings to secure and optimize your instance. This includes updating API keys to enhance security and ensure proper authentication for database access. Supabase generates default keys during deployment, but regenerating them prevents potential security risks.
Update Supabase API Keys
Supabase generates a JWT Secret during deployment, which you can use to regenerate the Anon and Service Role API keys. These keys authenticate your requests to Supabase and provide secure access to your database. You need to regenerate the keys to ensure security and proper authentication, as the default keys can become outdated or compromised. Follow the steps below to update your API Keys.
SSH into your Supabase instance and create a new directory. Replace
supabase-projectwith your preferred name.console# mkdir supabase-projectNavigate to the
supabase-projectdirectory.console# cd supabase-projectUpdate the server's APT package index.
console# apt updateInstall the Node Package Manager (NPM).
console# apt install npmInstall
jsonwebtoken.console# npm install jsonwebtokenRetrieve the
Supabase JWT Secretfrom the App Instructions section in the Vultr Console.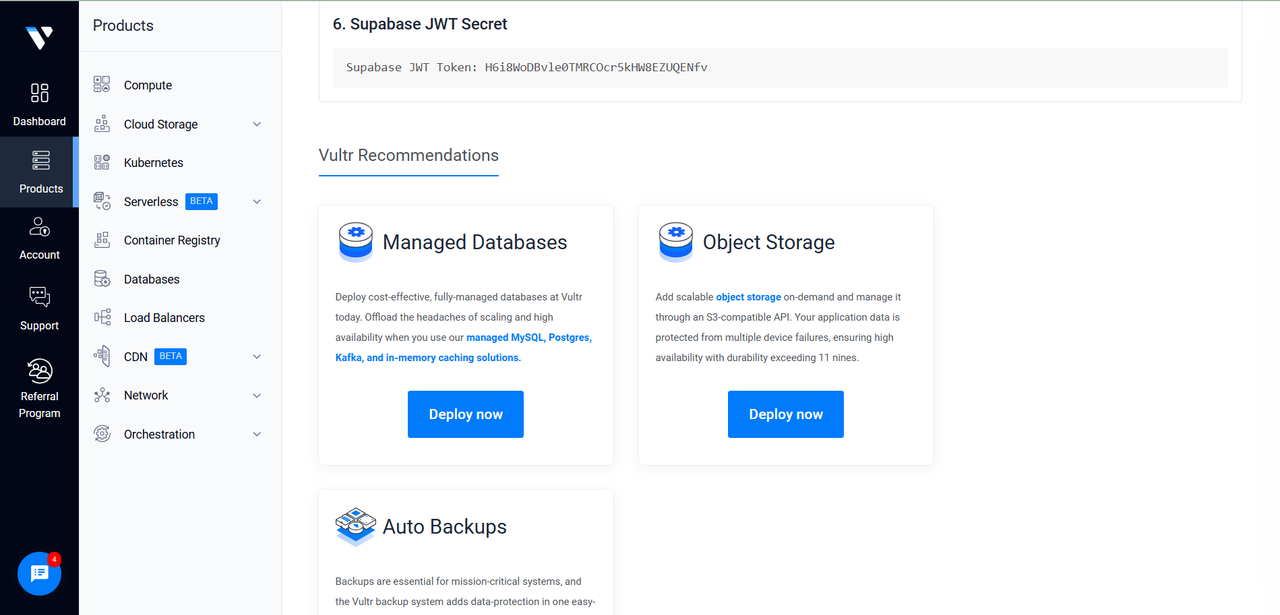
Create a JavaScript file using a text editor such as
nano.console# nano generate_keys.jsAdd the following javascript code to the
generate_keys.jsfile. Replaceyour_jwt_secretwith the Supabase JWT secret you have copied.javascriptconst jwt = require('jsonwebtoken'); // Replace with the JWT you copied const SUPABASE_JWT_SECRET = "your_jwt_secret"; const payloadAnon = { role: "anon", iss: "supabase", iat: Math.floor(Date.now() / 1000), exp: Math.floor(Date.now() / 1000) + 60 * 60 * 24 * 365 }; const payloadServiceRole = { role: "service_role", iss: "supabase", iat: Math.floor(Date.now() / 1000), exp: Math.floor(Date.now() / 1000) + 60 * 60 * 24 * 365 }; // Generate tokens const anonKey = jwt.sign(payloadAnon, SUPABASE_JWT_SECRET, { algorithm: "HS256" }); const serviceRoleKey = jwt.sign(payloadServiceRole, SUPABASE_JWT_SECRET, { algorithm: "HS256" }); console.log("ANON_KEY=", anonKey); console.log("SERVICE_ROLE_KEY=", serviceRoleKey);
Execute the javascript using
node.console# node generate_keys.jsYour output should be similar to the one below:
ANON_KEY= eyJhbGciOiJIUzI1NiIsInR5cCI6IkpXVCJ9.eyJyb2xlIjoiYW5vbiIsImlzcyI6InN1cGFiYXNlIiwiaWF0IjoxNzM5MzE2OTE1LCJleHAiOjE3NzA4NTI5MTV9._paR1mPwH0v_Z87hoLtxXNxL9DDPXq02qP52EnbEJkc
SERVICE_ROLE_KEY= eyJhbGciOiJIUzI1NiIsInR5cCI6IkpXVCJ9.eyJyb2xlIjoic2VydmljZV9yb2xlIiwiaXNzIjoic3VwYWJhc2UiLCJpYXQiOjE3MzkzMTY5MTUsImV4cCI6MTc3MDg1MjkxNX0.cr0G2uCroQt0FQs-vvLreU3oHWzVij4Cc5NbKFZQuSc
To update the API keys, navigate to the Supabase docker directory.
console# cd /home/supabase/supabase/docker/Open the
.envfile with a text editor such asnano.console# nano .envFind and replace the following keys with the newly generated keys.
ANON_KEY="your_new_anon_key"
SERVICE_ROLE_KEY="your_new_service_role_key"
Save and close the file.
To apply the changes, you have to remove and recreate the Supabase containers.
Remove the Supabase containers.
console# docker compose downRecreate the Supabase containers.
console# docker compose up -d
Optional: Access Supabase PostgreSQL Database
When you deploy Supabase Marketplace Application on Vultr, a default PostgreSQL database is automatically created. This database serves as the backend for your application, handling data storage, authentication, and queries. You can find the PostgreSQL login credentials in the App Instructions section of your Vultr instance and use them to connect directly to the database.
Navigate to the
App Instructionssection of your Supabase instance, and note the PostgreSQL database login credentials.
Connect to the PostgreSQL database using the following PostgreSQL connection string format.
postgres://<user>.<pooler_tenant_id>:<password>@<host>:<port>/<database>Replace the placeholders with your credentials:
- user: Your PostgreSQL database user
- pooler_tenant_id: Your tenant ID (found in your Supabase
.envfile) - password: Your PostgreSQL database password
- host: Your Supabase instance IP address
- port: Default PostgreSQL port, 5432
- database: Default database, postgres
The pooler tenant ID is required for authentication when connecting to a Supabase database deployed via Docker, including the Vultr Marketplace version. Without it, authentication will fail.NoteTo find or update your pooler tenant ID, navigate to your Supabase docker directory:
console# cd /home/supabase/supabase/docker/Open the
.envfile.console# nano .envLook for the POOLER_TENANT_ID variable and update it with your preferred ID.
POOLER_TENANT_ID=your-tenant-idTo apply the changes, you need to remove and recreate the Supabase containers.
Remove the Supabase containers.
console# docker compose downRecreate the Supabase containers.
console# docker compose up -d
You can use this connection string in database clients like pgAdmin, DBeaver, or directly in your application.
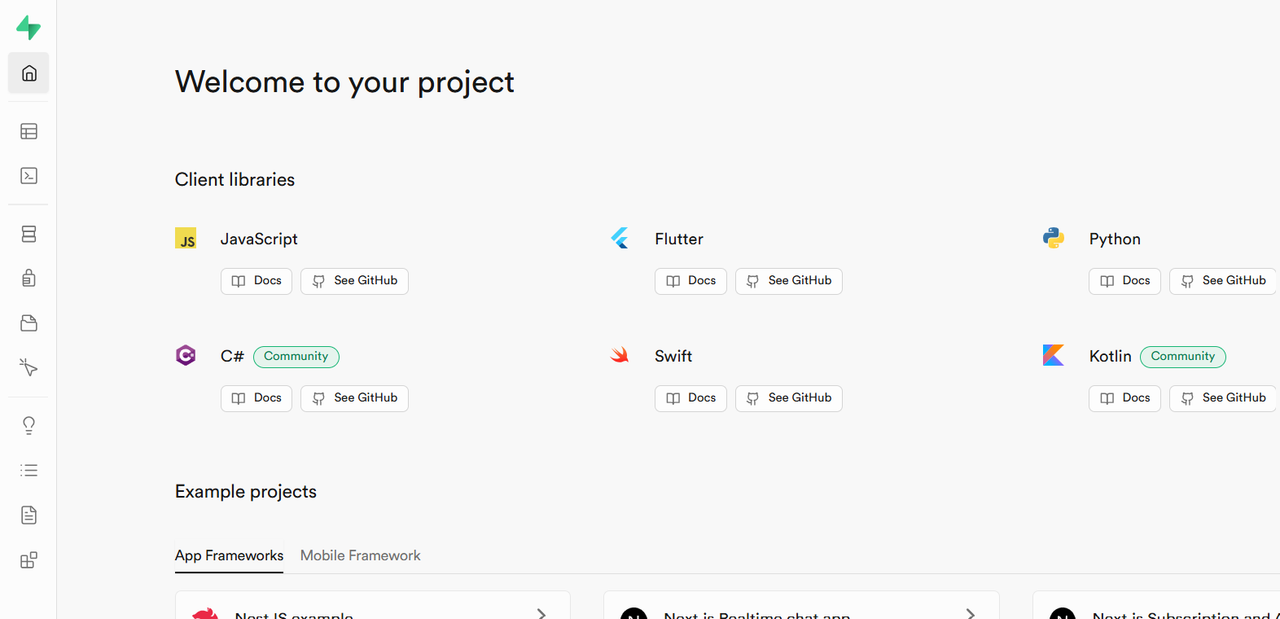
Explore Supabase Dashboard
This section guides you through the Supabase dashboard and its key features. You will manage your database, tables, run SQL queries, create storage buckets, and set up user authentication.
Open a browser tab and enter
http://<ip-address>:8000. Replace<ip-address>with your Supabase instance's IP address.Enter the
usernameandpasswordfrom the App Instructions to log in to the Supabase Admin dashboard.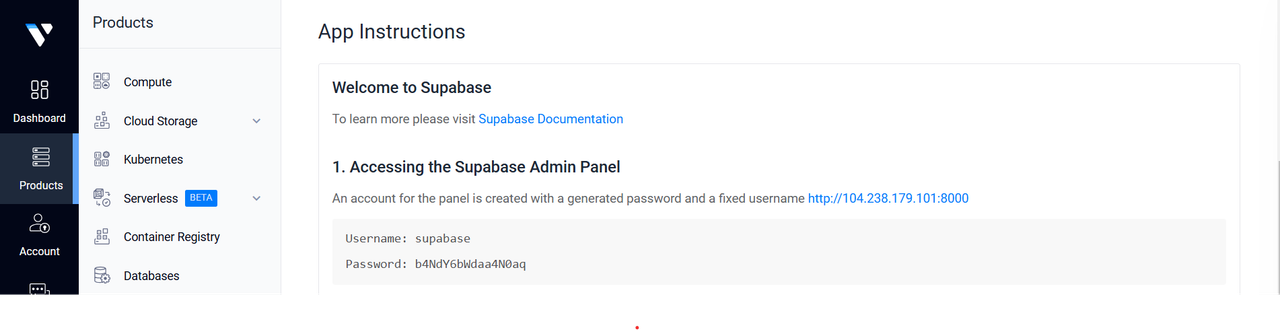
After logging in, the Supabase dashboard displays.
Manage the Database
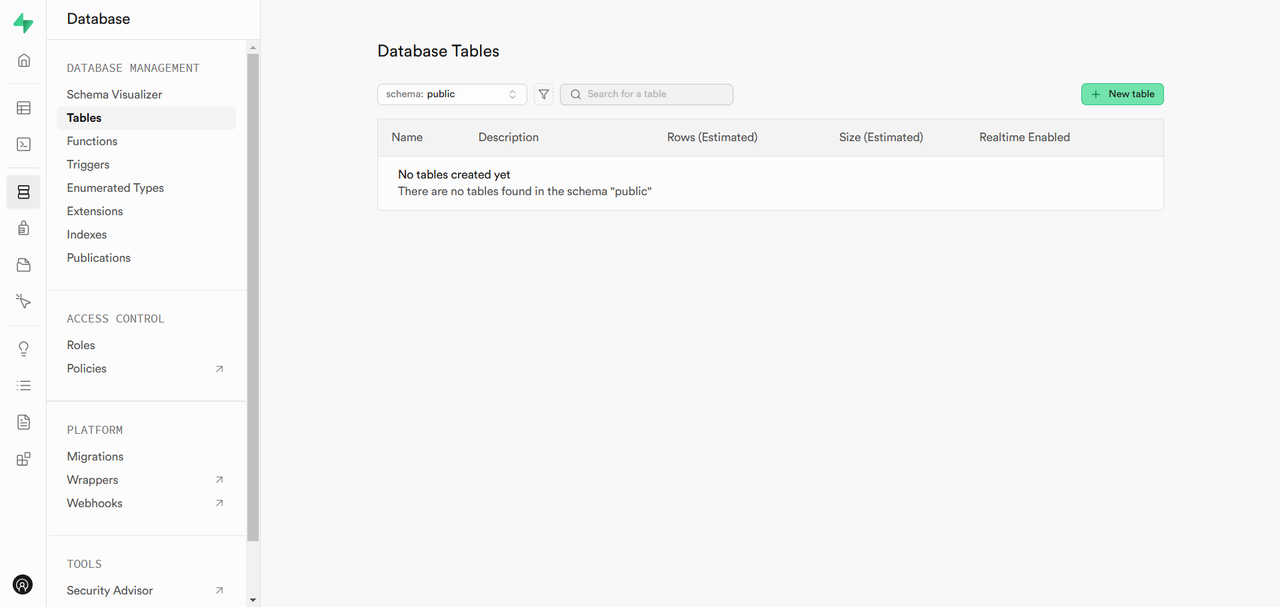
Navigate to the Database section in the side menu and click Tables.
Click New Table to create a new table.
Enter a
nameanddescriptionfor the table.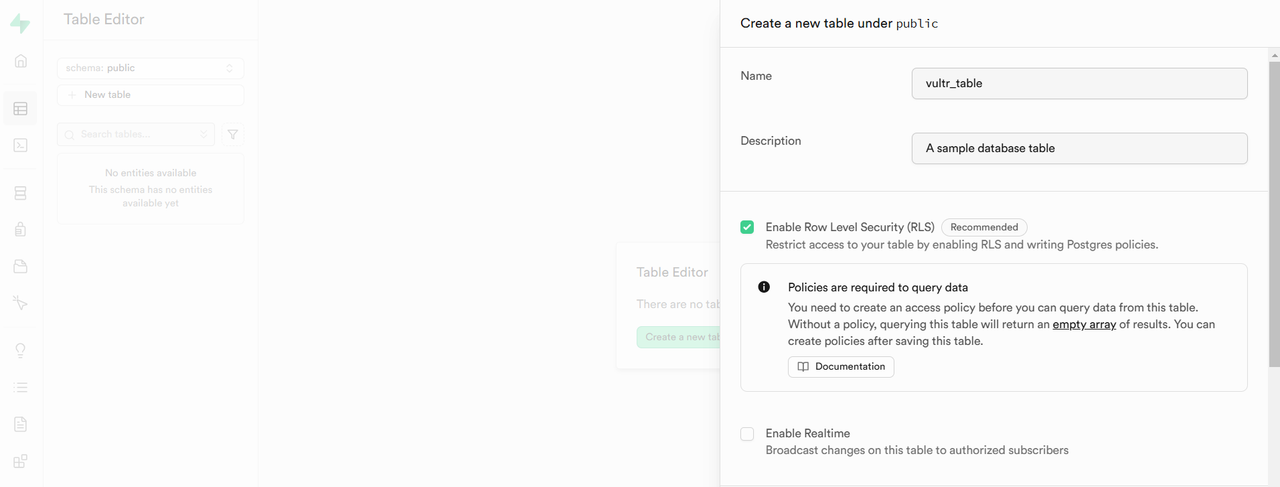
Click Add Column, and specify the
name,datatype, andconstraints.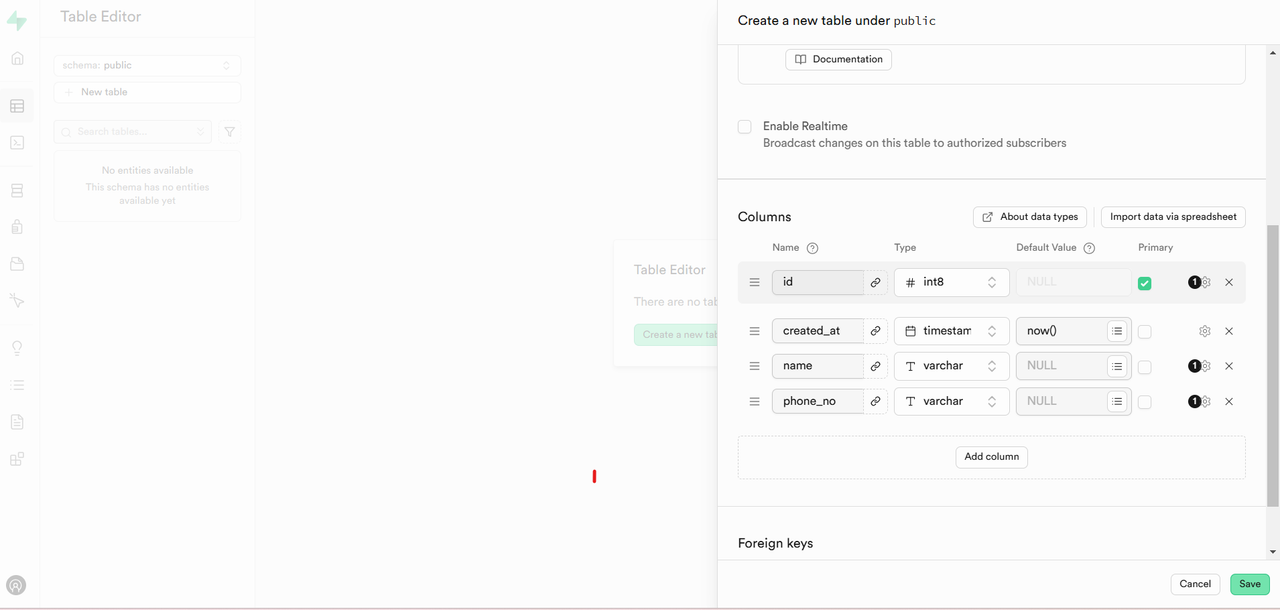
Click Save to create the table.
Run SQL Queries
Supabase allows you to run SQL queries via the dashboard. To insert values into the created table, navigate to the
SQL Editorsection in the side menu.In the SQL Editor, enter the following query and click Run.
sqlINSERT INTO vultr_table (name, phone_no) VALUES ('John Doe', '1234567890');
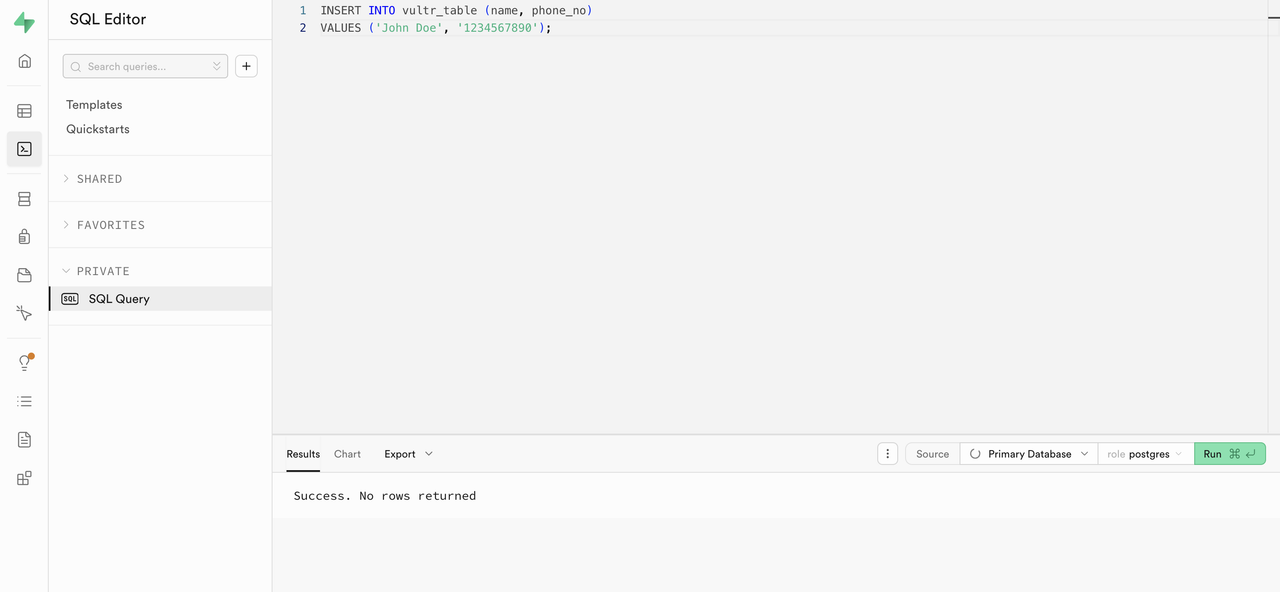
Output:
Success. No rows returned
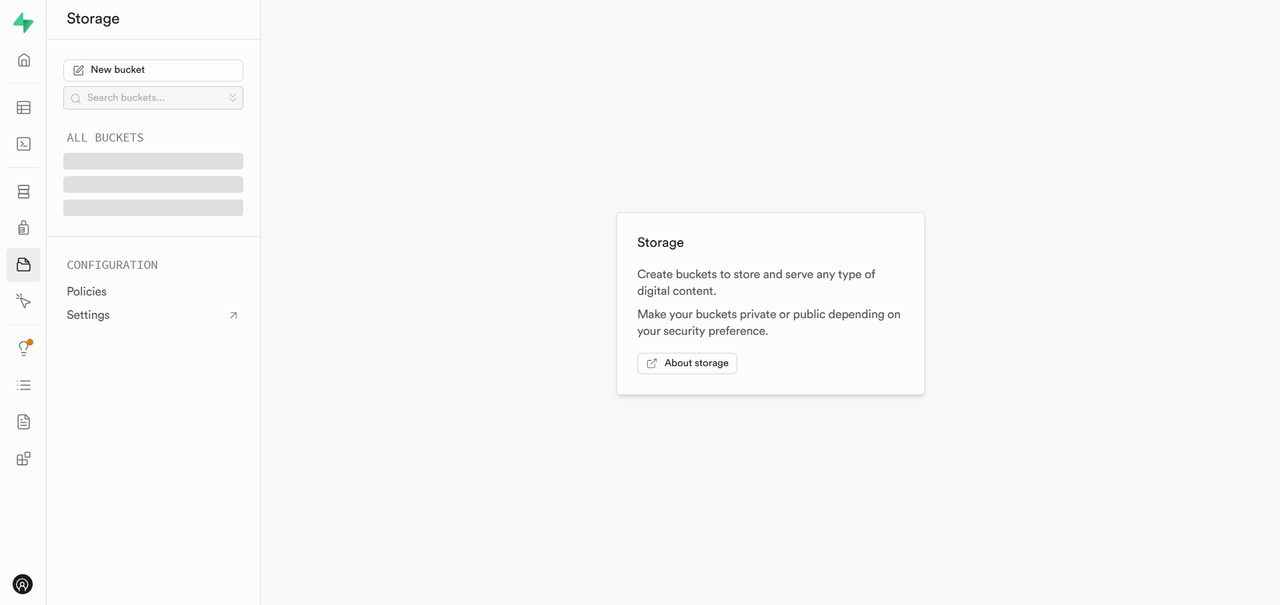
Manage Storage
To manage your files, navigate to the Storage section in the side menu.
Click New Bucket to create a new storage bucket.
Enter a Bucket Name, configure access permissions, and set a file size limit. Click Save.
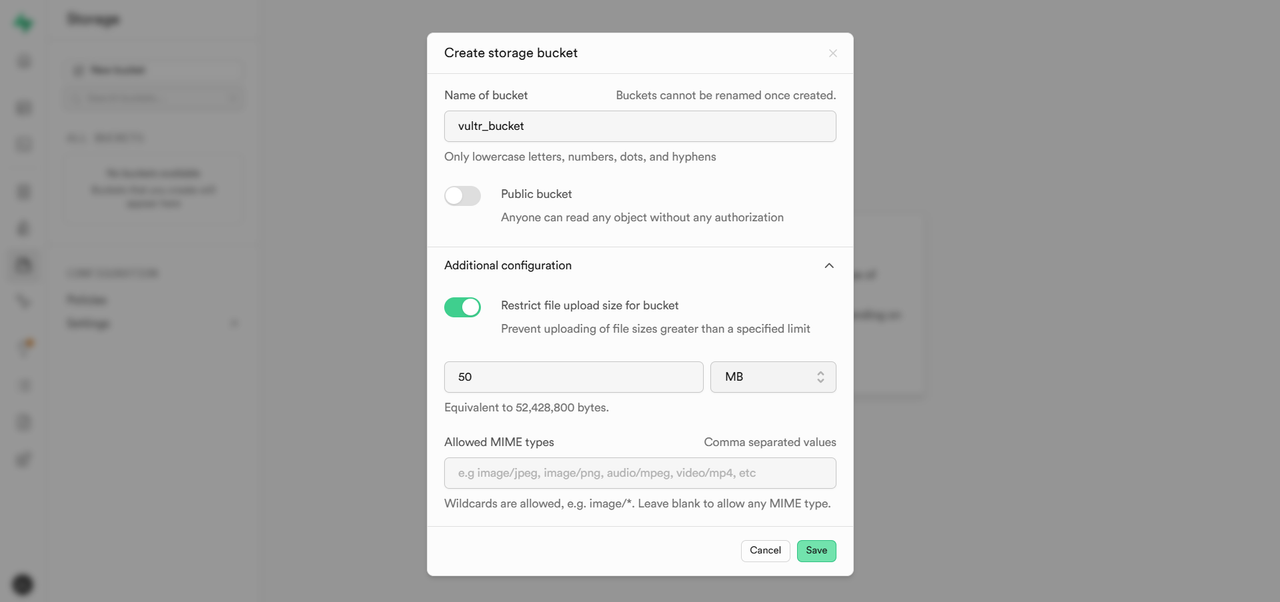
Upload a file.
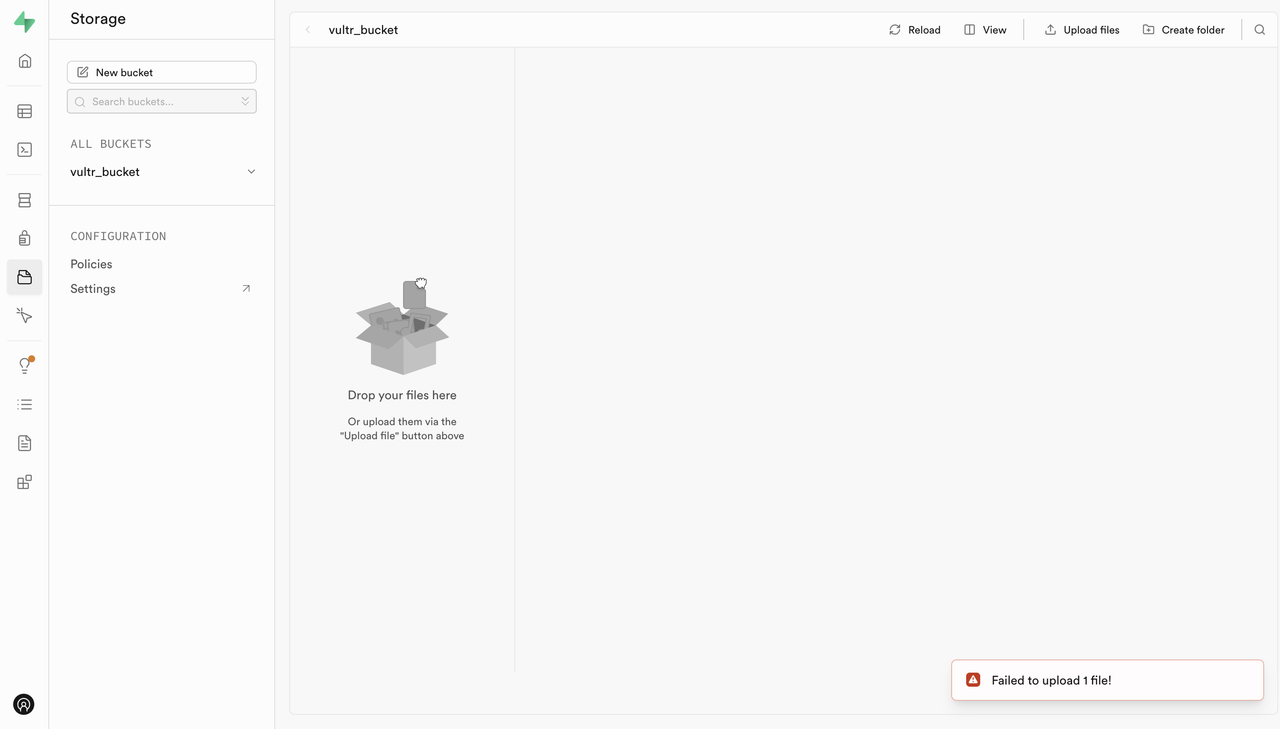
If the upload fails with "Failed to upload 1 file!" update the configuration to resolve the issue:
Access your server and navigate to your Supabase docker directory.
console# cd /home/supabase/supabase/docker/Open the
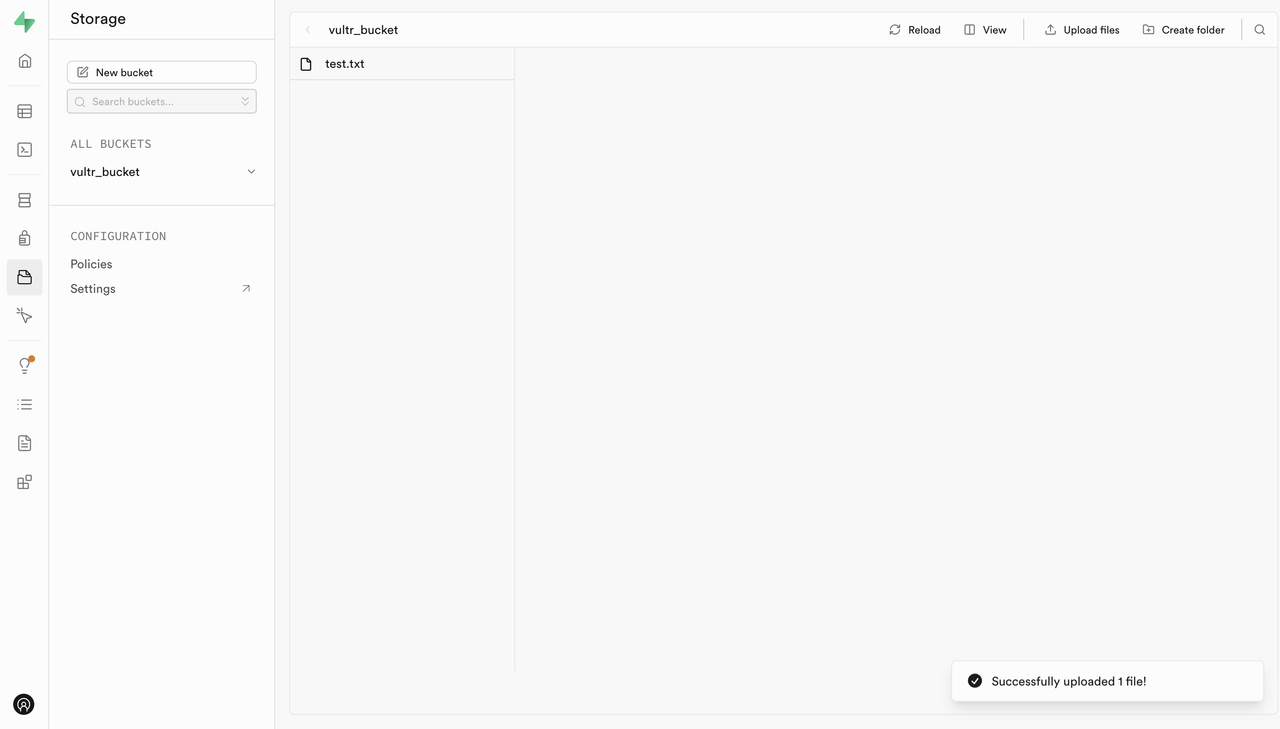
.envfileconsole# nano .envLook for the SUPABASE_PUBLIC_URL variable and update it with your Supabase instance public IP:
consoleSUPABASE_PUBLIC_URL=http://<ip-address>:8000
Replace
<ip-address>with your actual public IP.To apply the changes, you need to remove and recreate the Supabase containers.
Remove the Supabase containers.
console# docker compose downRecreate the Supabase containers.
console# docker compose up -d
Try uploading the file again.
Configure Authentication
Supabase allows you to create and manage users for authentication and access control. To add a new user, navigate to the Authentication section in the side menu.
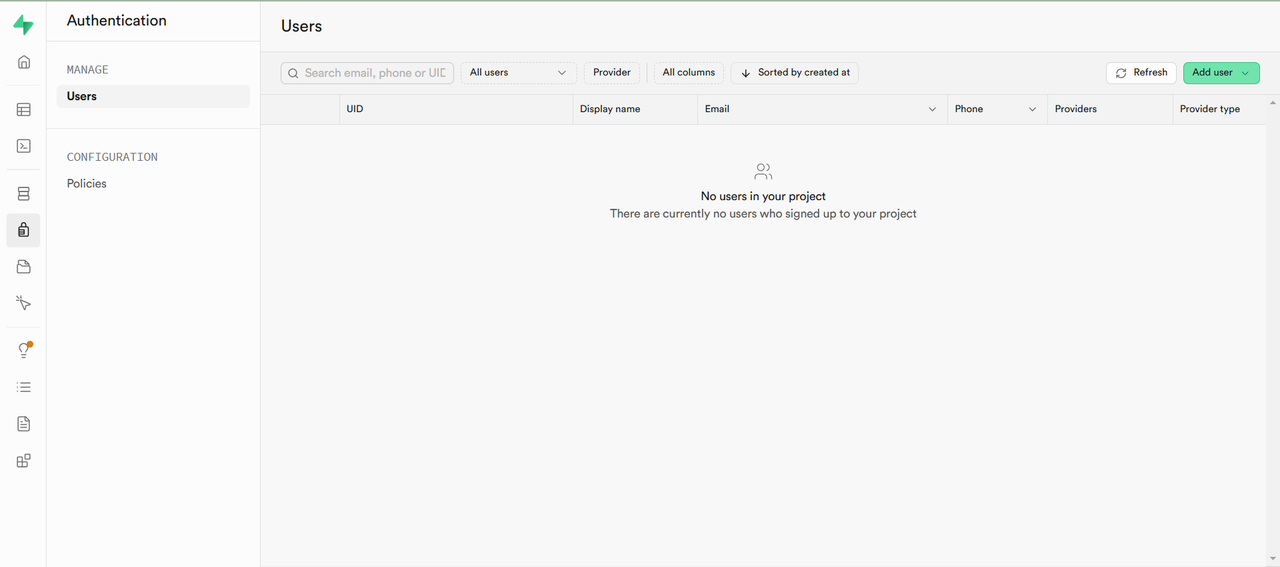
Click
Add User, thenCreate New User.Enter an
email addressandpassword, then clickCreate User.
Your user will be created.
Conclusion
You have deployed Vultr's Supabase Marketplace Application and explored its core features such as database management, storage, and authentication. You can save setup time and focus on actual application development using multiple Supabase features on your server.