
Install pgAdmin 4 for PostgreSQL on FreeBSD 12.2

Introduction
pgAdmin is an open-source software project for administrating and managing PostgreSQL database server that includes a graphical administration interface, an SQL query tool, and a procedural code debugger. This guide explains how to install pgAdmin 4 on FreeBSD 12.2.
Prerequisites
- Deploy a Vultr FreeBSD 12.2 Server.
- Create non-root sudo user.
- Install PostgreSQL 12.
1. Configure PostgreSQL
Access the PostgreSQL instance.
$ sudo su - postgresModify the default user
postgrespassword.psql -c "alter user postgres with password 'yourPassword'"Create user
pgadmin.createuser pgadminCreate a
testdbdatabase owned by userpgadmin.createdb testdb -O pgadminExit the PostgreSQL instance
exit
2. Install pgAdmin 4
Create a symbolic link of
Python3.8binary to/usr/local/bin/python.$ sudo ln -s /usr/local/bin/python3.8 /usr/local/bin/pythonInstall and upgrade
pip, which is a package manager for Python.$ sudo pkg install py38-pip $ sudo pip install --upgrade pipInstall the
virtualenvpackage, which is used to create isolated Python environments.$ sudo pkg install py38-virtualenvCreate a virtual environment for
pgAdmin.$ virtualenv pgadmin4Activate the Virtual environment.
$ . pgadmin4/bin/activateInstall Python dependencies.
$ sudo pip install cryptography==3.1.1 pyopenssl ndg-httpsclient pyasn1 simple-websocketInstall Python SQLite3 package.
$ sudo pkg install py38-sqlite3Download and install Python wheel package for pgAdmin. To get the latest version, go to pgAdmin wheel packages.
$ sudo pip install https://ftp.postgresql.org/pub/pgadmin/pgadmin4/v5.4/pip/pgadmin4-5.4-py3-none-any.whlCreate the data directories and give write permissions.
 $ sudo mkdir -pv /var/lib/pgadmin
 $ sudo chmod 770 /var/lib/pgadmin
 $ sudo mkdir -pv /var/log/pgadmin
 $ sudo chmod 770 /var/log/pgadmin
Install the nano editor.
$ sudo pkg install nanoCopy the pgAdmin configuration file.
$ sudo cp ./pgadmin4/lib/python3.8/site-packages/pgadmin4/config.py ./pgadmin4/lib/python3.8/site-packages/pgadmin4/config_local.pyEdit the configuration file.
$ sudo nano ./pgadmin4/lib/python3.8/site-packages/pgadmin4/config_local.pyFind the line
DEFAULT_SERVER = '127.0.0.1'and change it to match the line below.DEFAULT_SERVER = '0.0.0.0'Save and exit the file.
Run pgAdmin 4.
$ sudo python pgadmin4/lib/python3.8/site-packages/pgadmin4/pgAdmin4.pyEnter your email address and password to create your pgAdmin administrator account.
Open your browser and navigate to your server's IP address at port 5050 to access the pgAdmin 4 user interface. Use the email address and password that you set in the previous step. For example:
http://192.0.2.11:5050
3. Connect to the Database Server with pgAdmin 4
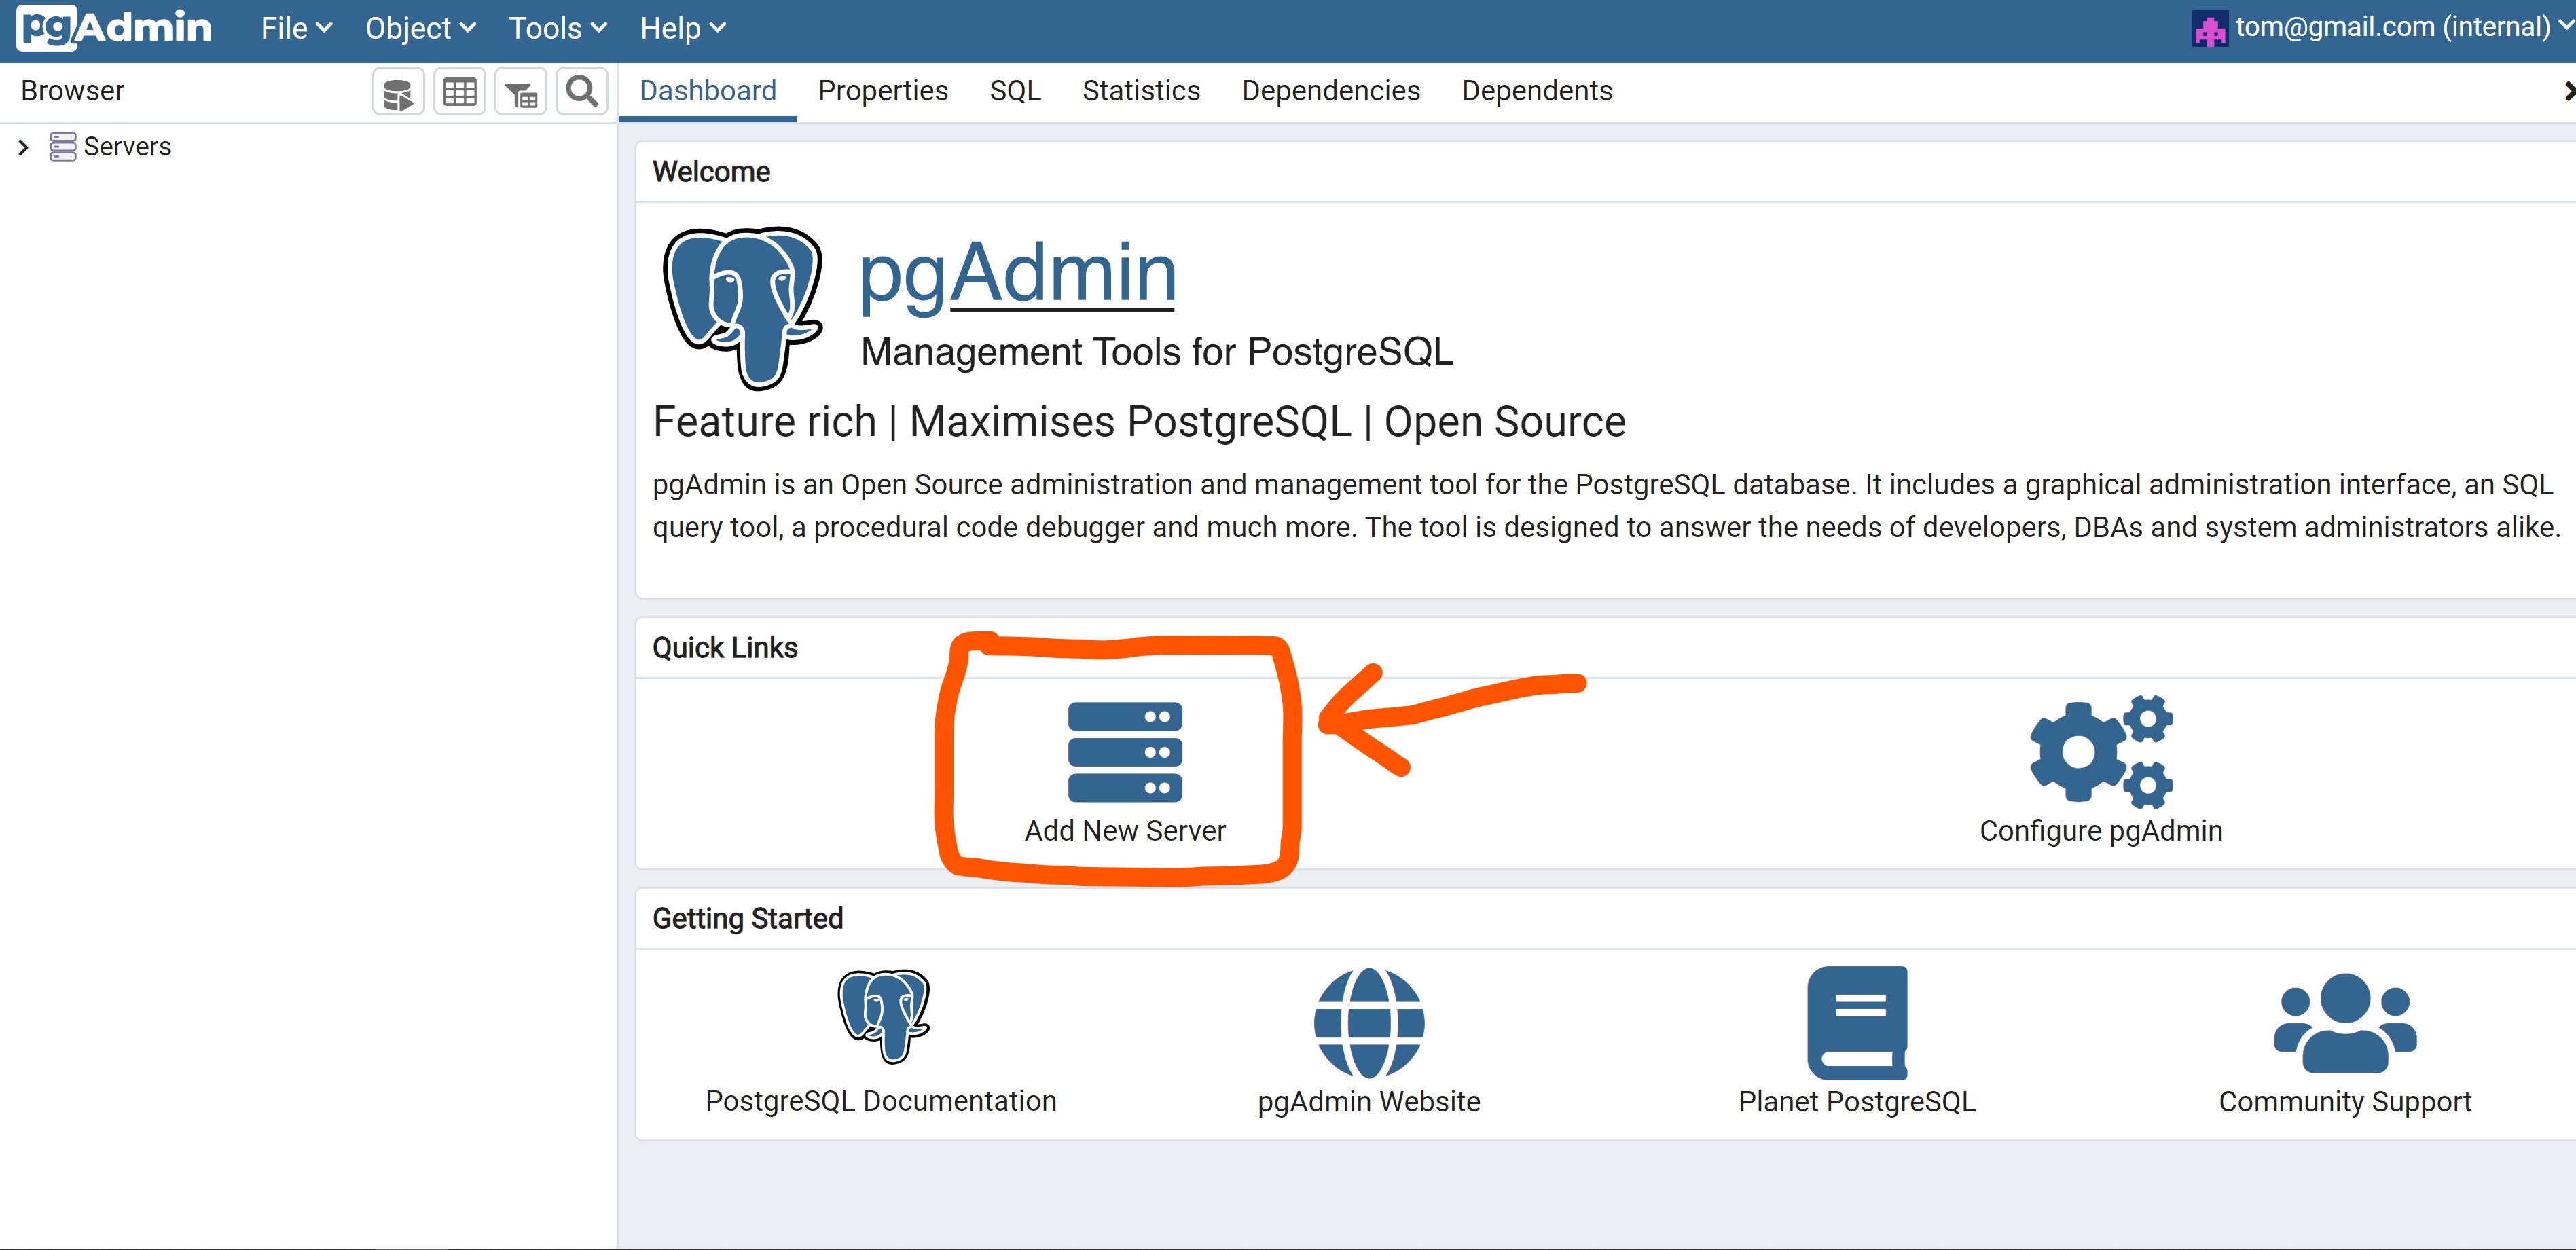
Go to the pgAdmin 4 Vultr Console and click Add New Server.
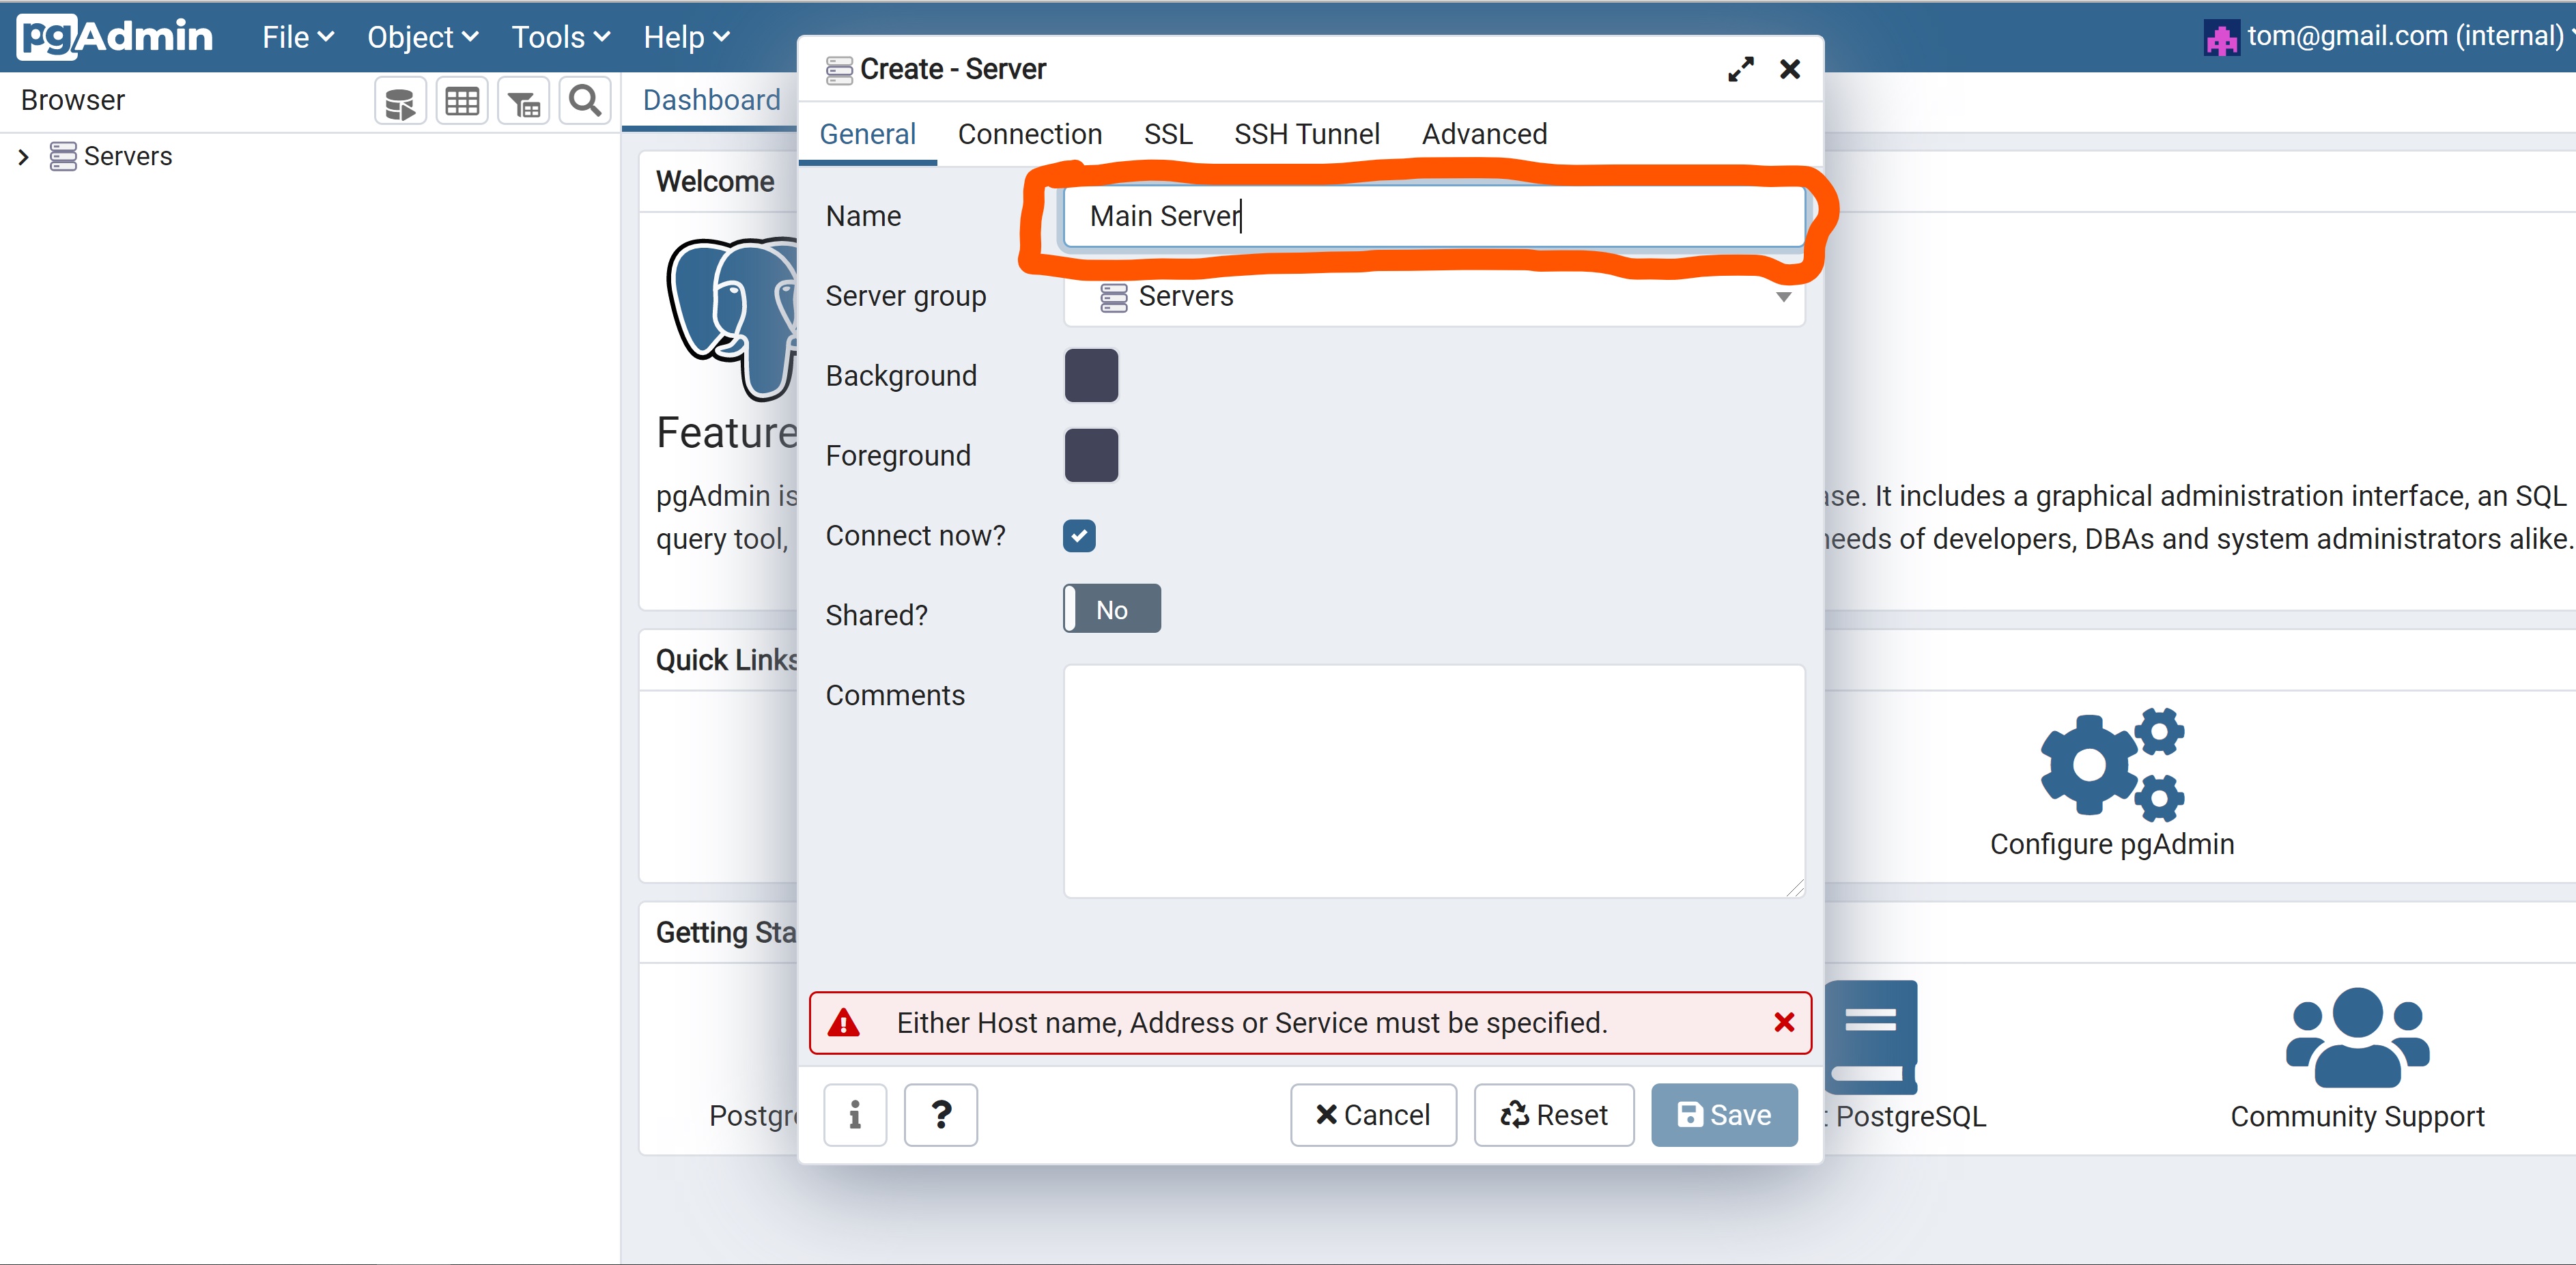
You'll be prompted with a dialog box. Enter your preferred server name in the Name field.
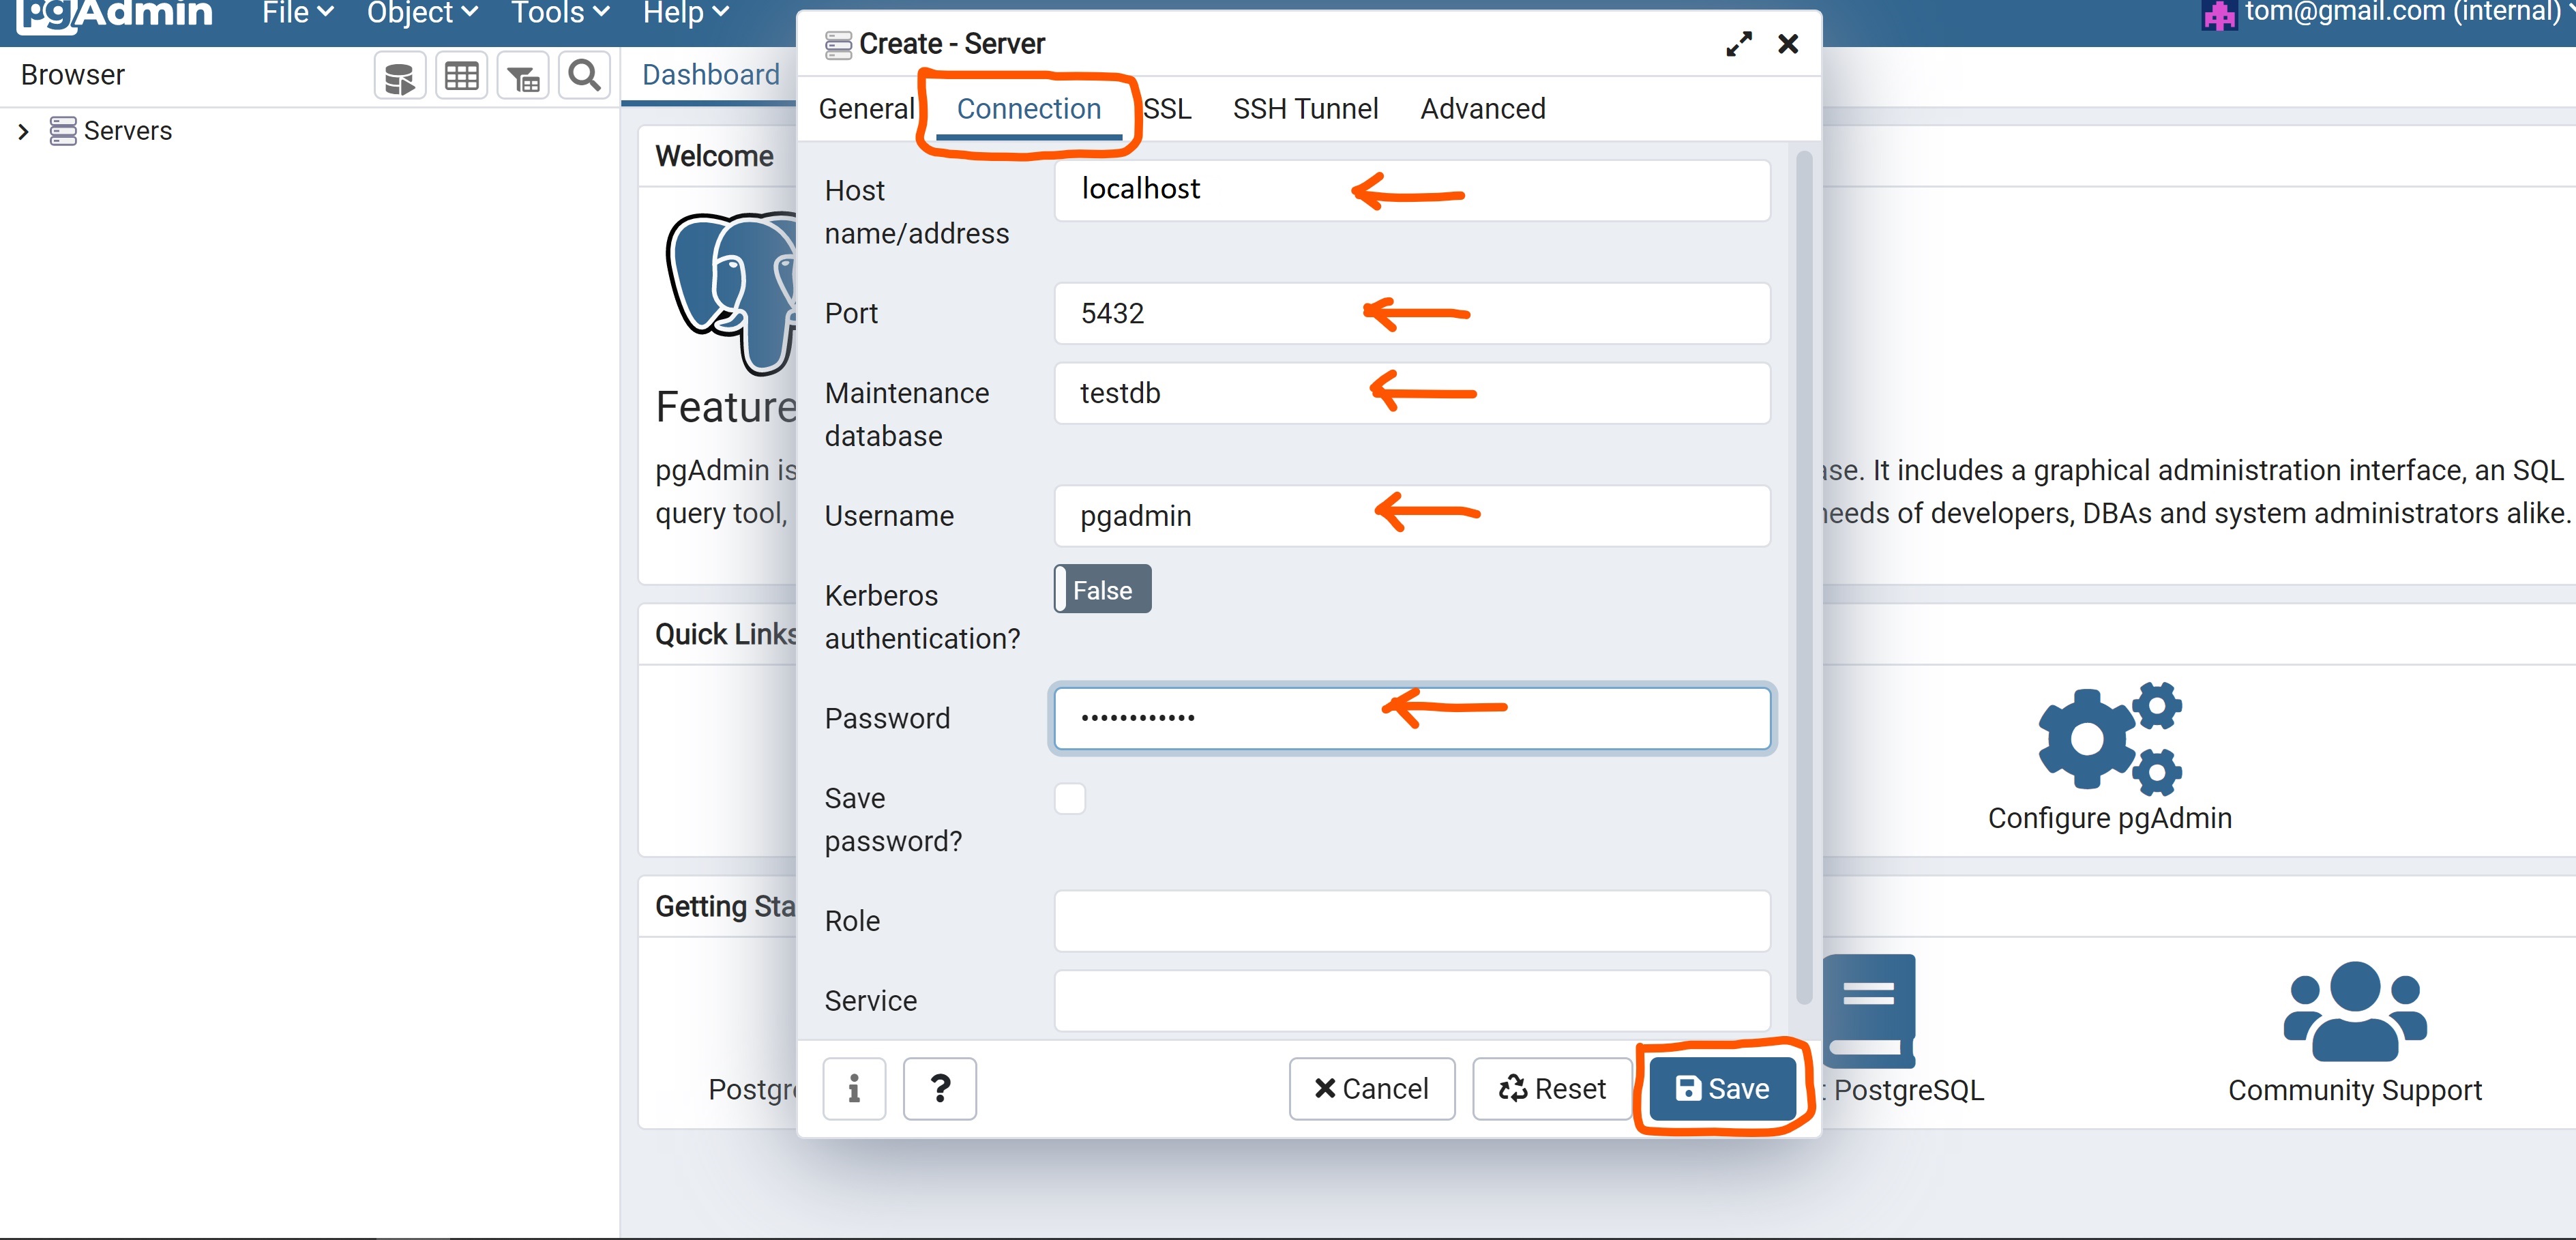
Switch to the Connection tab and enter the required fields with the appropriate data.
- Enter localhost under the Host name/address.
- Leave Port value as 5432.
- Enter
testdbunder Maintenance database. - Enter
pgadminunder Username. - Enter the database password you chose in section 1.
- Click Save to login to the server.
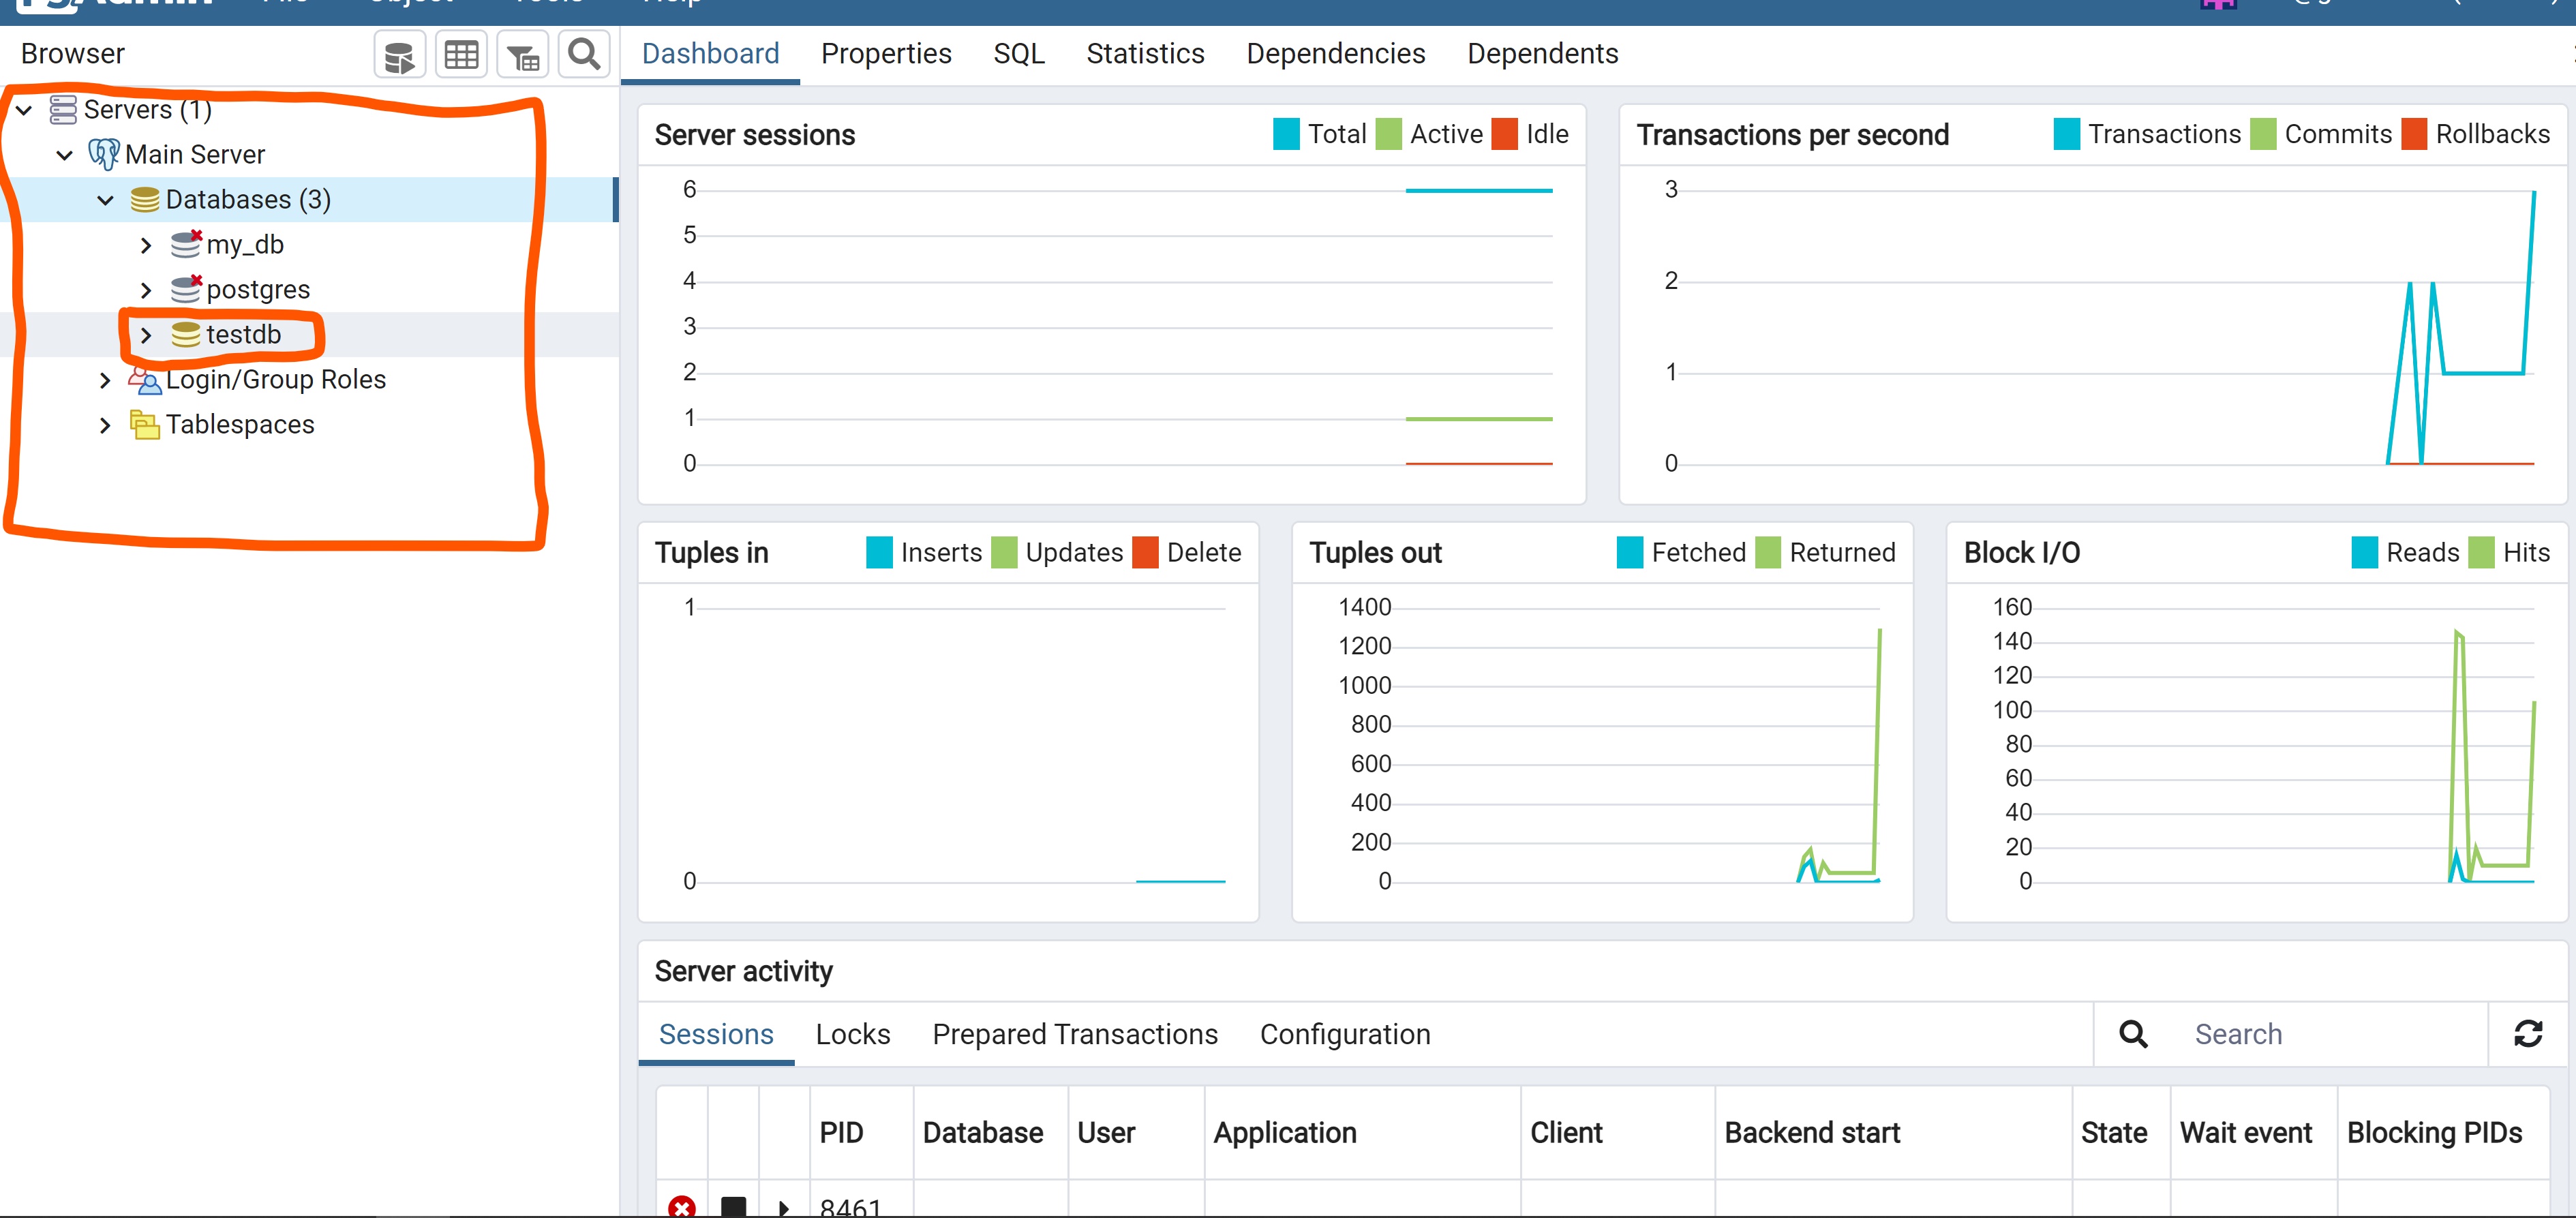
After a successful connection, choose your server in the upper left corner, then expand the arrows to access the testdb database.
Conclusion
You have installed pgAdmin 4 for PostgreSQL Server. You can now manage your database server via the dashboard.