

Introduction
This article demonstrates how to integrate a Vultr Managed Database for MySQL with Apache Kafka using the Debezium source connector for MySQL. Behind the scenes, this is made possible by Change Data Capture (also referred to as CDC), which can track row-level create, update and delete operations in MySQL tables. These change data capture events can be used to integrate MySQL with other systems.
Change data capture is a popular solution, and it is often combined with Apache Kafka and Kafka Connect.
Apache Kafka
Apache Kafka is a messaging system that allows clients to publish and read streams of data (also called events). It has an ecosystem of open-source solutions that you can combine to store, process, and integrate these data streams with other parts of your system in a secure, reliable, and scalable manner.
Some key components of Kafka include:
- Broker (Node): A Kafka broker runs the Kafka JVM process. A best practice is to run three or more brokers for scalability and high availability. These groups of Kafka brokers form a cluster.
- Producers: These are client applications that send messages to Kafka. Each message is nothing but a key-value pair.
- Topics: Events (messages) are stored in topics, and each topic has one or more partitions. Data in each of these partitions are distributed across the Kafka cluster for high availability and redundancy.
- Consumers: Just like producers, consumers are also client applications. They receive and process data/events from Kafka topics.
Kafka Connect
To build integration solutions, you can use the Kafka Connect framework, which provides a suite of connectors to integrate Kafka with external systems. There are two types of Kafka connectors:
- Source connector: Used to move data from source systems to Kafka topics.
- Sink connector: Used to send data from Kafka topics into target (sink) systems.
Debezium
Debezium is a set of source connectors for Kafka Connect. You can use it to capture changes in your databases so that your applications can respond to them in real time. It records all row-level changes within each database table in a change event stream, and applications simply read these streams to see the change events in the same order in which they occurred.
When it comes to integrating with relational databases, the JDBC connector (source and sink) and Debezium (source) connectors are widely used solutions. The JDBC connector works by polling the database table to retrieve data, while Debezium relies on change data capture.
Demonstration Scenario
The solution demonstrated in this article consists of the following components:
- MySQL - You will set up a Vultr Managed Database for MySQL.
- Apache Kafka and Zookeeper - These will run as Docker containers and are orchestrated using Docker compose.
- Kafka Connect - A Kafka Connect instance will also run as a Docker container. The Debezium MySQL connector will be installed in this instance.
You will create a sample table (called Persons) in the MySQL database. Changes made to data in this table will be detected by the Debezium MySQL connector and sent to a Kafka topic. Underneath the hood, the connector reads from the MySQL binlog and produces change events for row-level operations.
Prerequisites
Before following the steps in this guide, you need to:
Deploy a new Ubuntu 22.04 LTS Vultr cloud server for Kafka.
Create a non-root sudo user.
Install Docker.
Install Docker Compose
Install mysql which is an command-line client for MySQL. Because this guide uses a Vultr managed database, you only need the MySQL command-line client to query the database.
$ sudo apt install mysql-clientInstall curl, which is a popular command-line
HTTPclient.
Create a MySQL Database
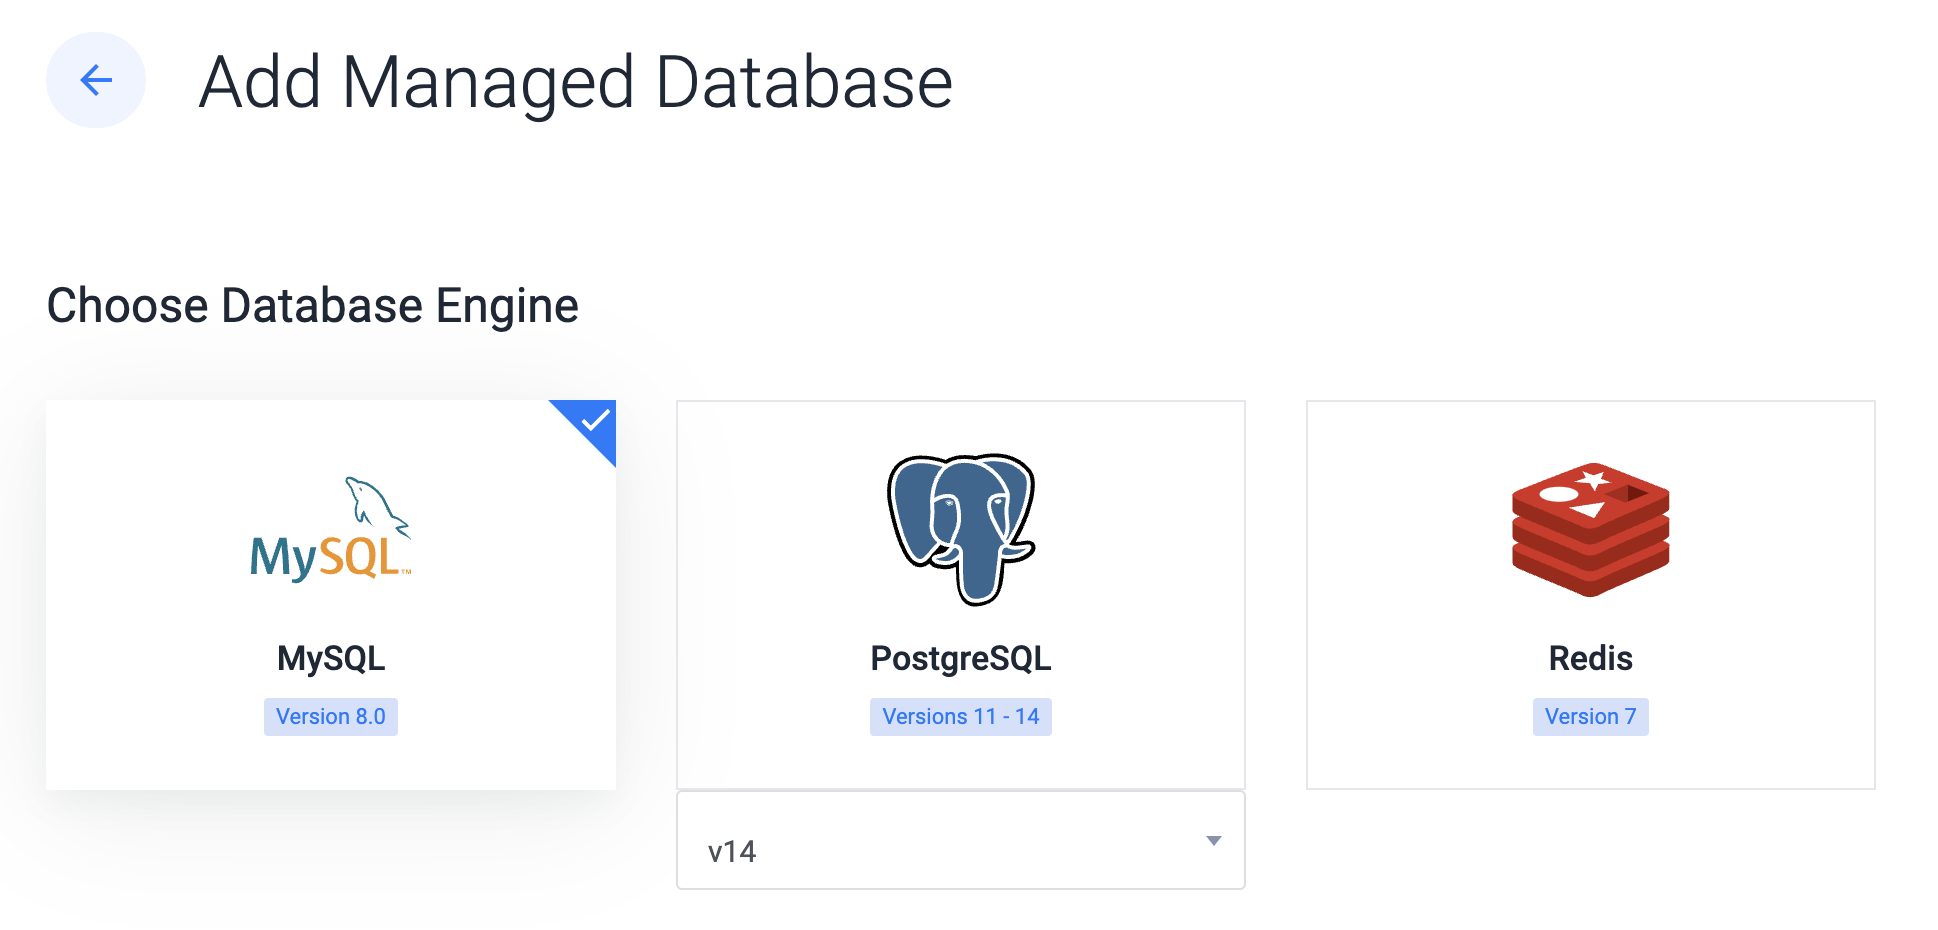
Log into your Vultr account, navigate to Add Managed Database and follow the below steps.
Choose the MySQL database engine.
Choose a Server Type: Cloud Compute, Cloud Compute High Performance - AMD or Intel, Optimized Cloud Compute - General Purpose, Storage or Memory Optimized. Along with that, you should also select zero or more replica nodes as well the cluster location. A replica node is the same server type and plan as the primary node. You can opt for the Cloud Compute Server Type without a replica node.
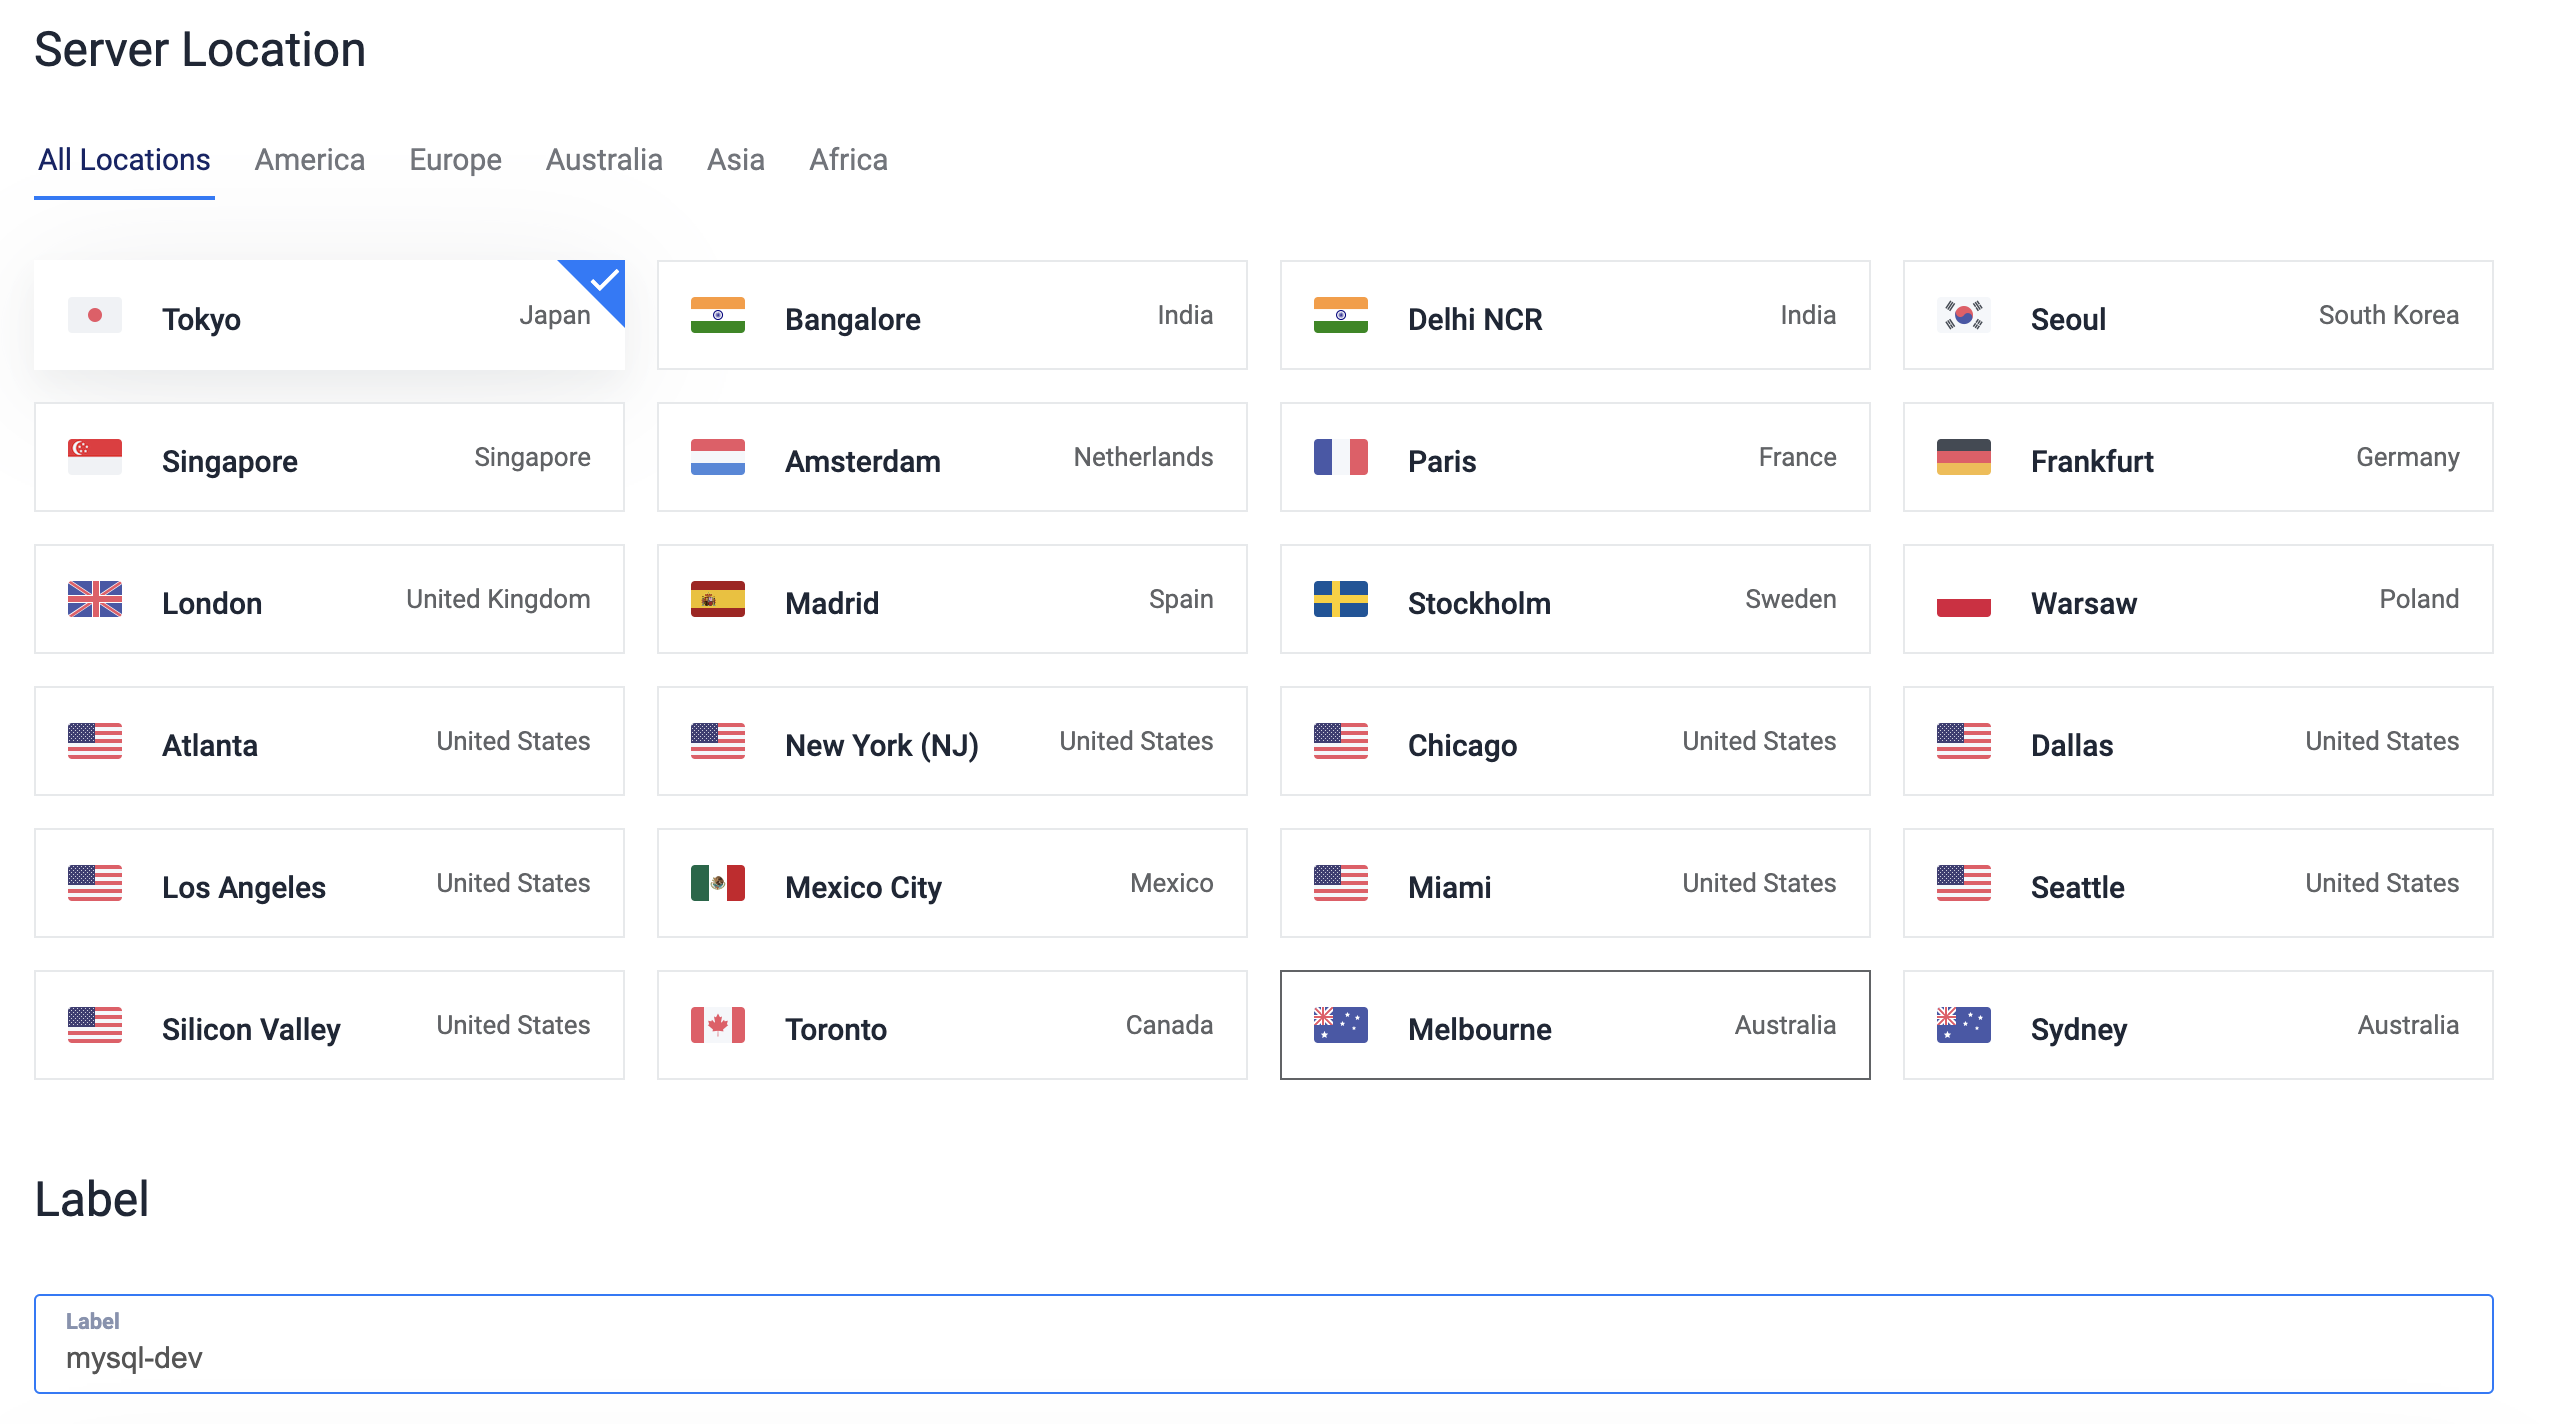
After you add a label for the database cluster, click Deploy Now to create the cluster. It will take a few minutes for the cluster to be available and the Status should change to Running.
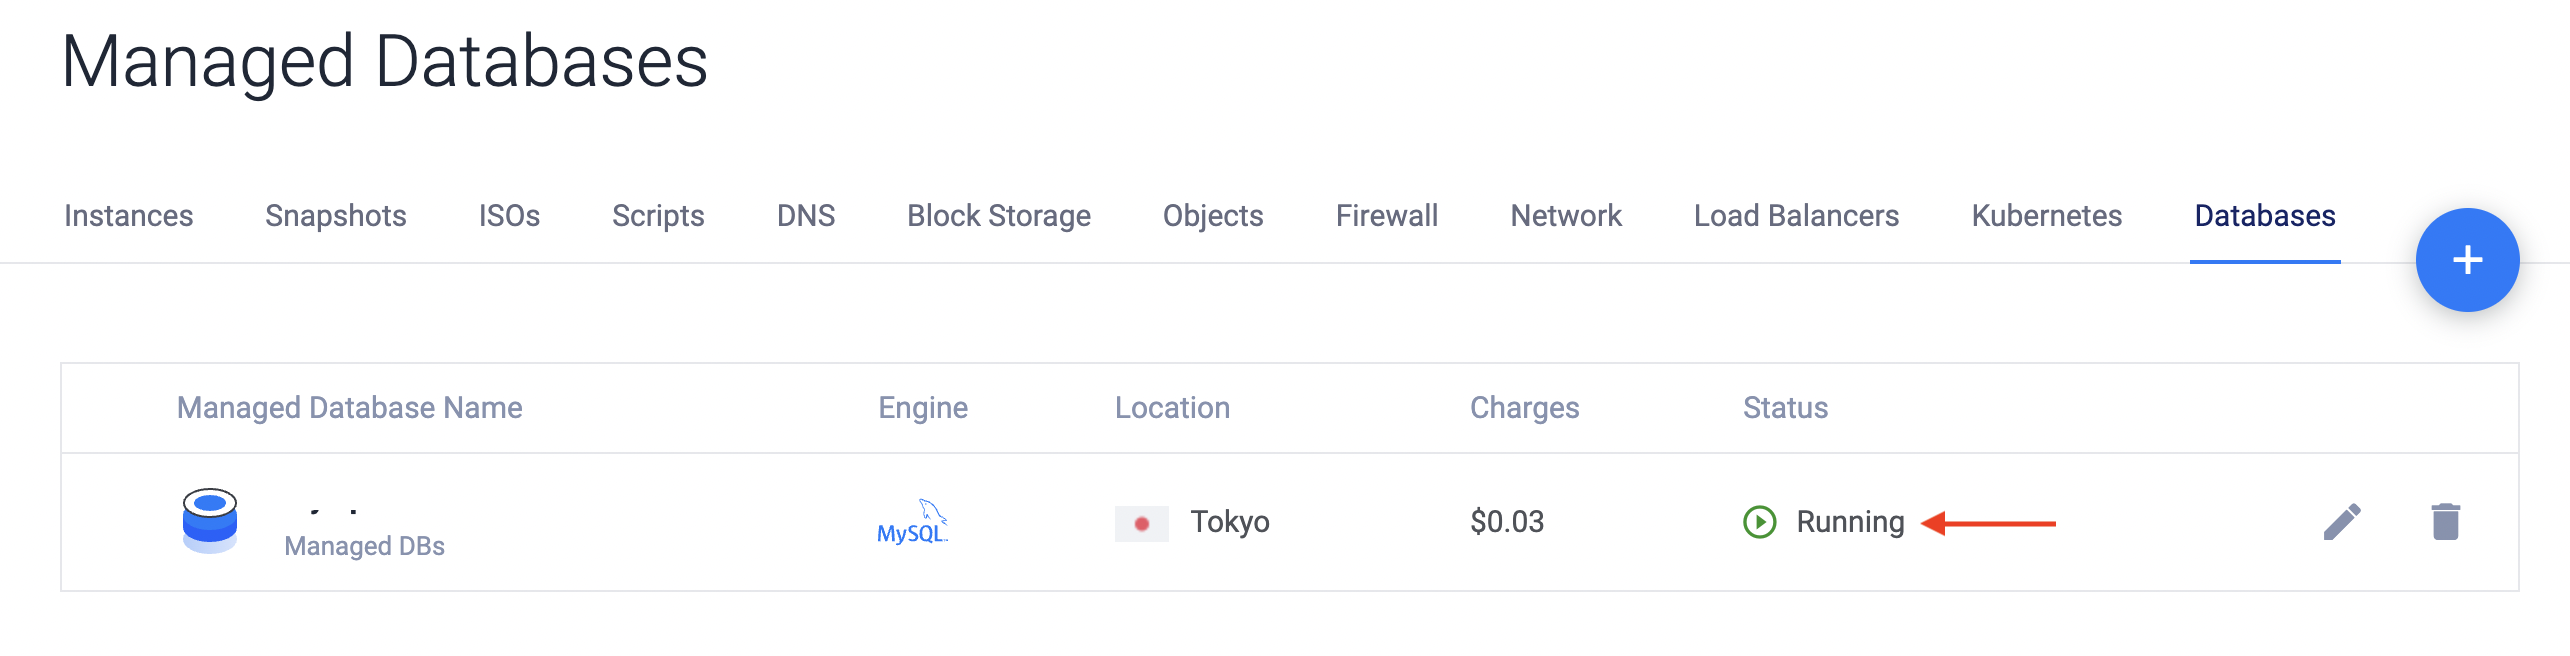
After the database is ready, you can proceed with the next steps.
Create a Table
Get the connection string details for the MySQL database.
In the Managed Database section of the Vultr customer portal, click the Manage icon to open the Overview tab.
From Connection Details section, click Copy Connection String.
SSH as the non-root user to the Kafka server you deployed in the Prerequisites section.
In the SSH session, paste the
mysqlconnection string you copied from the Vultr customer portal.After a successful database connection, you should see this prompt as the output:
mysql>Switch to the correct database:
use defaultdb;You should see this output:
Database changedTo create the
Personstable, enter this SQL:CREATE TABLE Persons ( Personid int NOT NULL AUTO_INCREMENT, LastName varchar(255) NOT NULL, FirstName varchar(255), Age int, PRIMARY KEY (Personid) );After successful table creation, you should see this output:
Query OK, 0 rows affected (0.28 sec)To confirm, you can query the table:
select * from Persons;Because there are no rows in the table, you should see this output:
Empty set (0.26 sec)
Start the Services
On the Kafka server, create a new directory and change to it.
 $ mkdir vultr-mysql-kafka
 $ cd vultr-mysql-kafka
Create a new file
docker-compose.yaml:$ touch docker-compose.yamlAdd the following to
docker-compose.yamlfile and save it:version: "2" services: zookeeper: image: quay.io/debezium/zookeeper ports: - 2181:2181 kafka: image: quay.io/debezium/kafka ports: - 9092:9092 links: - zookeeper depends_on: - zookeeper environment: - ZOOKEEPER_CONNECT=zookeeper:2181 - KAFKA_ADVERTISED_LISTENERS=PLAINTEXT://kafka:9092 kafka-connect: image: debezium/connect ports: - 8083:8083 links: - kafka depends_on: - kafka environment: - BOOTSTRAP_SERVERS=kafka:9092 - GROUP_ID=1 - CONFIG_STORAGE_TOPIC=kafka_connect_configs - OFFSET_STORAGE_TOPIC=kafka_connect_offsets - STATUS_STORAGE_TOPIC=kafka_connect_statuses* The
zookeeperservice is created from thequay.io/debezium/zookeeperDocker image and exposes port2181.- The
kafkaservice is created from thequay.io/debezium/kafkaDocker image and exposes port9092. It is linked to thezookeeperservice, and the following Kafka-related environment variables have also been configuredZOOKEEPER_CONNECT- The Zookeeper node to connect to.KAFKA_ADVERTISED_LISTENERS- Advertised Kafka listener.
- The
kafka-connectservice is created fromdebezium/connectDocker image and exposes port8083. It is linked to thekafkaservice, and the following Kafka Connect-related environment variables have also been configuredBOOTSTRAP_SERVERS- The Kafka broker to connect to.GROUP_ID- Consumer group ID assigned to Kafka Connect consumer.CONFIG_STORAGE_TOPIC- Topic to store connector configuration.OFFSET_STORAGE_TOPIC- Topic to store connector offsets.STATUS_STORAGE_TOPIC- Topic to store connector status.
- The
To start all the services, open a new SSH session to the Kafka server and enter the command below.
$ docker-compose --project-name mysql-kafka-cdc up
It will take some time for all the Docker containers to be ready. Once all containers have started, proceed to the next step.
Configure the Debezium Connector
Before you continue, get the connection details for Vultr MySQL Managed Database.
Click the Manage icon to open the Overview tab.
From Connection Details section, note down the following attributes:
username,password,host,port, anddatabase.On the Kafka server, create a new file
source-connector.json:$ touch source-connector.jsonAdd the following to
source-connector.jsonfile and save it. Make sure to substitute the MySQL connection parameters for the Vultr MySQL Managed Database you obtained in the previous step.{ "name": "source-connector", "config": { "connector.class": "io.debezium.connector.mysql.MySqlConnector", "database.hostname": "[Vultr_hostname]", "database.port": "[Vultr_port]", "database.user": "[Vultr_username]", "database.password": "[Vultr_password]", "database.server.id": "424242", "database.server.name": "vultrmysql", "database.include.list": "defaultdb", "database.history.kafka.bootstrap.servers": "kafka:9092", "database.history.kafka.topic": "dbhistory.defaultdb", "include.schema.changes": "true" } }Here is a summary of the connector configuration properties:
connector.class- The name of the Java class for the MySQL connector.database.hostname- Hostname of the Vultr Managed MySQL database.database.port- Port number of the Vultr Managed MySQL database.database.user- Name of the database user for connecting to the Vultr Managed MySQL database.database.password- Password to use when connecting to the Vultr Managed MySQL database.database.dbname- The name of the MySQL database from which to stream the changes.database.sslmode- Whether to use an encrypted connection. The valuerequireimplies that a secure connection will be established with the Vultr MySQL Managed database.database.include.list- List of databases hosted by the MySQL server.
Invoke the Kafka Connect REST endpoint to create the connector.
$ curl -X POST -H "Content-Type: application/json" --data @source-connector.json http://localhost:8083/connectors
After you have started Kafka, Zookeeper, and Kafka Connect as Docker containers and installed the Debezium source connector, follow the steps below to check the integration and verify whether the data is flowing from the MySQL table to the Kafka topic.
Test the Integration
Go back to the SSH session where you connected to MySQL using
mysqlclient.Execute the SQL command below to insert data into the table:
INSERT INTO Persons (FirstName,LastName,Age) VALUES ('John','Doe', 42);If successful, you should see the following output:
Query OK, 1 row affected (0.26 sec)Check the inserted record:
select * from Persons;You should see the following output:
 +----------+----------+-----------+------+
 | Personid | LastName | FirstName | Age  |
 +----------+----------+-----------+------+
 |        1 | Doe      | John      |   42 |
 +----------+----------+-----------+------+
 1 row in set (0.26 sec)
Open a second SSH session as the non-root user to the Kafka server.
In the new SSH session, start a Kafka consumer with the Kafka CLI and confirm data in the Kafka topic. Use
docker execto access the Kafka docker container.$ docker exec -it mysql-kafka-cdc_kafka_1 bashStart the Kafka consumer.
$ cd bin && ./kafka-console-consumer.sh --topic vultrmysql.defaultdb.Persons --bootstrap-server kafka:9092 --from-beginning
The topic vultrmysql.defaultdb.Persons is auto-generated by the Debezium connector based on a pre-defined naming convention which is <database server name>.<schema name>.<table name>.
You should see records in the Kafka topic in the form of a JSON payload. The change event JSON is rather large since it contains all the information about the changed record, including its schema.
{"schema":{"type":"struct","fields":[{"type":"struct","fields":[{"type":"int32","optional":false,"field":"Personid"},{"type":"string","optional":false,"field":"LastName"},{"type":"string","optional":true,"field":"FirstName"},{"type":"int32","optional":true,"field":"Age"}],"optional":true,"name":"vultrmysql.defaultdb.Persons.Value","field":"before"},{"type":"struct","fields":[{"type":"int32","optional":false,"field":"Personid"},{"type":"string","optional":false,"field":"LastName"},{"type":"string","optional":true,"field":"FirstName"},{"type":"int32","optional":true,"field":"Age"}],"optional":true,"name":"vultrmysql.defaultdb.Persons.Value","field":"after"},{"type":"struct","fields":[{"type":"string","optional":false,"field":"version"},{"type":"string","optional":false,"field":"connector"},{"type":"string","optional":false,"field":"name"},{"type":"int64","optional":false,"field":"ts_ms"},{"type":"string","optional":true,"name":"io.debezium.data.Enum","version":1,"parameters":{"allowed":"true,last,false,incremental"},"default":"false","field":"snapshot"},{"type":"string","optional":false,"field":"db"},{"type":"string","optional":true,"field":"sequence"},{"type":"string","optional":true,"field":"table"},{"type":"int64","optional":false,"field":"server_id"},{"type":"string","optional":true,"field":"gtid"},{"type":"string","optional":false,"field":"file"},{"type":"int64","optional":false,"field":"pos"},{"type":"int32","optional":false,"field":"row"},{"type":"int64","optional":true,"field":"thread"},{"type":"string","optional":true,"field":"query"}],"optional":false,"name":"io.debezium.connector.mysql.Source","field":"source"},{"type":"string","optional":false,"field":"op"},{"type":"int64","optional":true,"field":"ts_ms"},{"type":"struct","fields":[{"type":"string","optional":false,"field":"id"},{"type":"int64","optional":false,"field":"total_order"},{"type":"int64","optional":false,"field":"data_collection_order"}],"optional":true,"field":"transaction"}],"optional":false,"name":"vultrmysql.defaultdb.Persons.Envelope"},"payload":{"before":null,"after":{"Personid":1,"LastName":"Doe","FirstName":"John","Age":42},"source":{"version":"1.9.5.Final","connector":"mysql","name":"vultrmysql","ts_ms":1672899884000,"snapshot":"false","db":"defaultdb","sequence":null,"table":"Persons","server_id":2769384068,"gtid":"64dc4a88-8cb4-11ed-9143-56000443b665:34","file":"binlog.000022","pos":1040,"row":0,"thread":1344,"query":null},"op":"c","ts_ms":1672899884228,"transaction":null}}Every change event generated by the connector has the following components (repeated twice) - schema and payload.
- The first
schemafield corresponds to the event key and describes the structure of the table's primary key. The firstpayloadfield is part of the event key, and it contains the key for the row that was changed. - The second
schemafield corresponds to the event value and describes the structure of the row that was changed. The secondpayloadfield is part of the event value. It has the structure described by the previousschemafield and contains the actual data for the row that was changed.
Go to first SSH session, where you have the mysql terminal, and continue to insert more data in the table:
INSERT INTO Persons (FirstName,LastName,Age) VALUES ('Tom','Sawyer', 25);
INSERT INTO Persons (FirstName,LastName,Age) VALUES ('Harry','Smith', 26);
INSERT INTO Persons (FirstName,LastName,Age) VALUES ('Peter','Parker', 27);
In the second SSH session, where you have the Kafka consumer terminal, you should see more change data capture records being sent to the Kafka topic.
Cleanup
To shut down the Docker containers, run the following command from a new terminal:
$ docker-compose --project-name mysql-kafka-cdc down -vAfter you have completed the tutorial in this article, you can delete the Vultr MySQL Managed Database.
Delete the Vultr MySQL Managed Database
Log into your Vultr account and navigate to Managed Databases.
- For the database you just created, choose the delete icon.
- In the Destroy Managed Database? pop-up window, select the checkbox Yes, destroy this Managed Database. and click on Destroy Managed Database
Conclusion
In this article, you were able to use the Debezium Kafka source connector for MySQL to integrate Vultr Managed MySQL Database with Kafka using change data capture. By doing this, changes made to your MySQL database tables were detected in real-time and sent to a Kafka topic.
Next steps
Now that the data is in the Kafka topic, you can use the respective Kafka Connect sink connectors to integrate other services, including databases (MongoDB), search indices (Elasticsearch), and more.
You can also learn more in the following documentation:
No comments yet.