Leverage WordPress Object Cache with Vultr Managed Databases for Caching

Introduction
Redis® is an open-source in-memory database that works as an object caching solution for Content Management Systems (CMS) such as WordPress. Object caching keeps database query results in memory and delivers them faster when users make similar requests. For example, when a WordPress page loads on your site, the MySQL database server sends the first response, and any additional requests receive responses from the WordPress Object Cache memory
By integrating WordPress with a Vultr Managed Database for Caching, the request handling process between your MySQL database gets improved with Object Caching enabled by the Redis® database which improves your general site performance. Follow the steps in this article to leverage WordPress Object Cache with a Vultr Managed Database for Caching.
Prerequisites
Before you begin:
Deploy a WordPress server using the Vultr Marketplace application
If you have an existing WordPress server, follow the steps in this article to integrate Redis® object caching
Create a full Backup of your WordPress site to recover your site in case of any critical errors
Install the WordPress Redis® Object Cache Plugin
Redis® Object Cache is a persistent object cache plugin that stores MySQL database responses to an existing Redis® database. When a WordPress user makes a request, the MySQL database returns a result and the generated response is cached to your Redis® database and served until expiry. Install the Redis® Object Cache plugin on your WordPress site as described in the steps below.
Using a web browser such as Chrome, log in to your WordPress administrator dashboard
https://example.com/wp-adminOn the left navigation bar, find and click Plugins
On the Plugins page, click Add New
Enter the keyword
Redis® Object Cachein the Search Plugins fieldWithin the search results, find the
Redis® Object Cacheplugin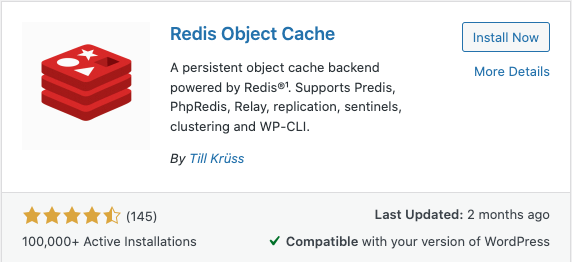
Click Install Now to install the plugin on your WordPress site
Click Activate to enable the plugin
Configure the Redis® Object Cache Plugin
To enable the Redis® Object Cache plugin and store all WordPress database responses to your Vultr Managed Database for Caching, make changes to your wp-config.php file as described below.
Using SSH, access your WordPress server as a non-root user with sudo privileges
$ ssh example-user@SERVER-IPWhen using a control panel such as cPanel or Plesk without SSH access, enable Redis® on your account to integrate PHP with Redis®
Install the PHP Redis® extension
On Ubuntu or Debian servers:
$ sudo apt install php-redisOn CentOS, Rocky Linux, or RHEL-based servers:
$ dnf install php-redisNavigate to your WordPress web root directory. Usually,
/var/www/htmlor/var/www/public_html$ cd /var/www/htmlList files in the directory to verify that all WordPress files are available
$ lsBack up the WordPress
wp-config.phpfile$ sudo cp wp-config.php wp-config.ORIGUsing a text editor such as Nano, edit the
wp-config.phpfile$ sudo nano wp-config.phpFind the following WordPress debugging directive
define( 'WP_DEBUG', false );Change it from
falsetotrueto display any configuration errorsdefine( 'WP_DEBUG', true );Add the following configurations at the end of the file. Replace all example values with your actual Vultr Managed Database for Caching details
 define( 'WP_REDIS_SCHEME', 'tls' );
 define( 'WP_REDIS_HOST', 'vultr-prod-example.vultrdb.com' );
 define( 'WP_REDIS_PORT', 16752 );
 define( 'WP_REDIS_PASSWORD', 'Vultr-Redis-Password' );
 define( 'WP_REDIS_DATABASE', 0 );
 define( 'WP_REDIS_TIMEOUT', 1 );
 define( 'WP_REDIS_READ_TIMEOUT', 1 );
 define( 'WP_REDIS_RETRY_INTERVAL', 3 );
Save and close the file.
Below is what the above Redis® connection directives represent:
WP_REDIS_SCHEME: Defines the connection mechanism to your Redis® databasetlsenforces a secure TLS connection to the databaseWP_REDIS_HOST: Sets the Vultr Managed Database for Caching hostnameWP_REDIS_PORT: Sets the Vultr Managed Database for Caching connection portWP_REDIS_PASSWORD: Sets the Vultr Managed Database for Cachingdefaultuser password to use for authentication to the databaseWP_REDIS_DATABASE: Defines the target Redis® database to bind your WordPress site. Redis® Cluster database values range from0to15, select your desired database number depending on your Vultr Managed Database for Caching cluster usageWP_REDIS_TIMEOUT: Sets the maximum time in seconds a connection to the Redis® database should wait before terminating in case of a failure.1sets the waiting time to 1 secondWP_REDIS_READ_TIMEOUT: Defines the maximum time WordPress should wait to receive Redis® responses. When the time elapses, the operation becomes unsuccessfulWP_REDIS_RETRY_INTERVAL: Sets the time in milliseconds a failed connection to the Redis® database should restart.3instructs WordPress to retry the connection after every3milliseconds,1000sets the retry interval to1second
In a new web browser session, access your WordPress administrator dashboard
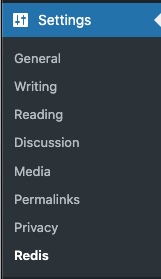
https://example.com/wp-adminOn the main navigation menu, find and click Settings
Select Redis® from the list of dropdown options
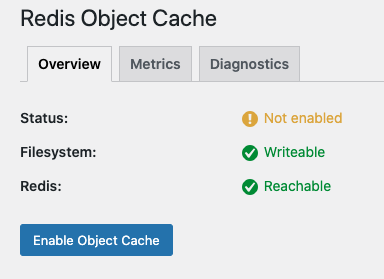
Within the Redis® Object Cache plugin page, verify that the Redis® value is
ReachableNavigate to Diagnostics and verify that your
wp-config.phpchanges display in the log output like the one below:Status: Drop-in not installed PhpRedis: 5.1.1 Metrics recorded: 0 Filesystem: Working WP_REDIS_SCHEME: "tcp" WP_REDIS_HOST: "vultr-prod-example.vultrdb.com" WP_REDIS_PORT: 16752 WP_REDIS_DATABASE: 0 WP_REDIS_TIMEOUT: 1 WP_REDIS_READ_TIMEOUT: 1 WP_REDIS_PASSWORD: •••••••• Drop-ins: []Navigate back to the Overview tab, and click Enable Object Cache to connect your Vultr Managed Database for Caching with your WordPress Site
When successful, verify that the Status field changes to
Connectedand the connection details display on your plugin page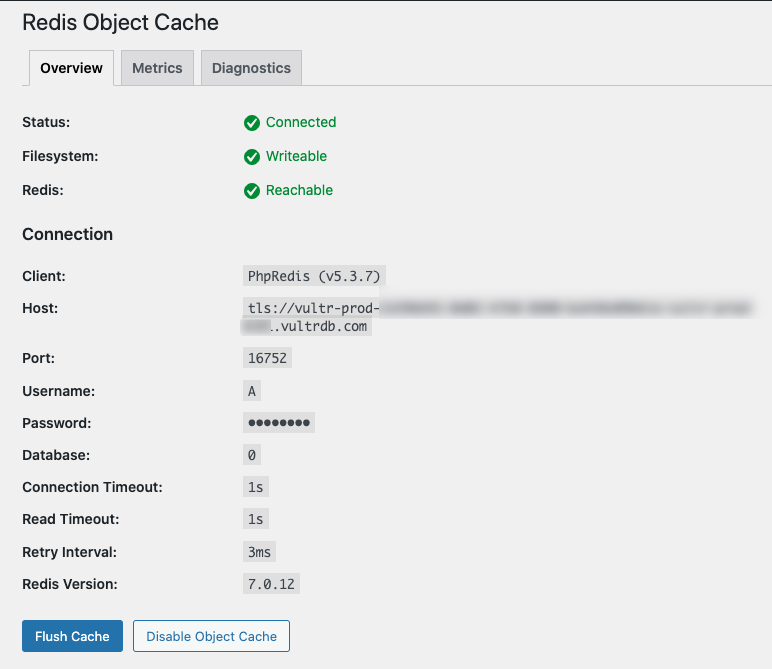
If the connection fails and the Status field is
Not Connected, navigate to Diagnostics and view the details on why your connection fails
Test the WordPress Object Caching Data
To test that your WordPress data is available in the Vultr Managed Database for Caching as the Object Cache storage, install the Redis® CLI tool on your server and view your cached data as described below.
Using SSH, access your WordPress server console
$ ssh example-user@SERVER-IPInstall the Redis® CLI tool on your server
$ sudo apt install redisUsing your Vultr Managed Database for Caching connection string, connect to the database cluster
$ redis-cli -u rediss://default:[YOUR_PASSWORD]@[-vultrdb.com]:16752When successful, verify that the Redis® cluster works correctly
> pingOutput:
PONGSelect your WordPress Redis® database. For this article, the database
0applied in yourwp-config.phpfile> select 0View the available data in the database
> keys *Your output should look like the one below:
 94) "wp:post-queries:wp_query-bd439aca13dc14dc82d1e7533b47b441-0.24954800 1695929332"
 95) "wp:default:is_blog_installed"
 96) "wp:post-queries:wp_query-58900d8f14e49bfe6854751899db67b8-0.14774800 1695929332"
 97) "wp:posts:9"
 98) "wp:site-transient:wp_remote_block_patterns_8b4fc2c6224785bc57d976c11baeaeb5"
 99) "wp:comment-queries:get_comments-fbb001ab5aa3f7e15b8511e52af82c41-0.72589800 1695928288"
 100) "wp:post-queries:wp_query-b0801891911659cc716c426655d11a0d-0.23627600 1695929330"
 101) "wp:post-queries:wp_query-916b5df869e5920ac3e40e95396e0e90-0.24954800 16959293320.23554800 1695929330"
 102) "wp:post-queries:wp_query-b53a158b77118c629e053f0d7bafbc03-0.26738100 16959293170.23184000 1695929317"
 103) "wp:post-queries:wp_query-4687a2847791544c62c28a7fe5e1a1a9-0.23275500 16959293170.23184000 1695929317"
 104) "wp:post-queries:wp_query-9efcb4c3e7cedb5ca63c3e3941fd10f3-0.22376600 1695929330"
 105) "wp:comment-queries:get_comments-a0c619f46f1580e85878c1b708cdefd9-0.72589800 1695928288"
 106) "wp:posts:5"
As displayed in the above output, all cached WordPress database responses are available in the Vultr Managed Database for Caching. When users perform similar requests, the Vultr Managed Database for Caching sends the cached responses which increases the general site response time with no need for new MySQL database queries.
Troubleshooting
Depending on your WordPress configuration environment, you may encounter any of the following errors you can fix using the recommended solutions.
HTTP Error 500
The HTTP error 500 represents a configuration error within your web server files. For example, if the wp-config.php file has misconfigured values, PHP throws an error to the web server causing the error 500 notice. In case the above error displays, fix it in the steps below.
Navigate to your web server logs directory. For example when using Nginx
/var/log/nginx, Apache/var/log/apache2$ cd /var/log/nginxView the web server error logs
$ sudo cat error.logWhen using custom error logs in your configuration, for example,
example.com.error.log, view the file insteadOutput:
 2023/09/28 19:00:52 [error] 60867#60867: *972 FastCGI sent in stderr: "PHP message: PHP Fatal error:  Uncaught Error: Undefined constant "tls" in /var/www/example.com/wp-config.php:3
 Stack trace:
 #0 /var/www/example.com/wp-load.php(50): require_once()
 #1 /var/www/example.com/wp-admin/admin.php(34): require_once('...')
 #2 /var/www/example.com/wp-admin/options-privacy.php(10): require_once('...')
Find the latest error entry returned at the time you load the WordPress site. For example, the above output points to a corrupted
wp-config.phpfile. Rename the file$ sudo mv wp-config.php wp-config-error.phpRecover the original
wp-config.phpfile to fix the error$ sudo cp /var/www/example.com/wp-config-ORIG.php /var/www/example.com/wp-config.phpView the contents of your error
wp-config.phpfile and verify the source of the error. Usually, a string with missing single quotation marks''can corrupt the fileRevisit your WordPress site and verify that the HTTP error 500 does not display again. If persistent, view the latest web server error log entry
https://example.com
Redis® Object Cache Diagnostics Errors
If you receive the following
READerror:Ping: Connection Exception: read error on connection to vultr-prod-EXAMPLE.vultrdb.com:16752 (RedisException) Errors: [ "read error on connection to vultr-prod-EXAMPLE.vultrdb.com:16752"Verify that you are using the correct Redis® connection scheme in your
wp-config.phpfile. By default, a Vultr Managed Database for Caching requires atlsconnectionIf you receive the following
Connection Refusederror:Ping: Connection Exception: read error on connection to vultr-prod-a238a852-b0e6-44a5-ab05-e7148f81d820-vultr-prod-8c01.vultrdb.com:16752 (RedisException) Errors: [ "Connection refused" ]Verify that the Vultr Managed Database for Caching details applied in your
wp-config.phpfile are correctIf you receive the following
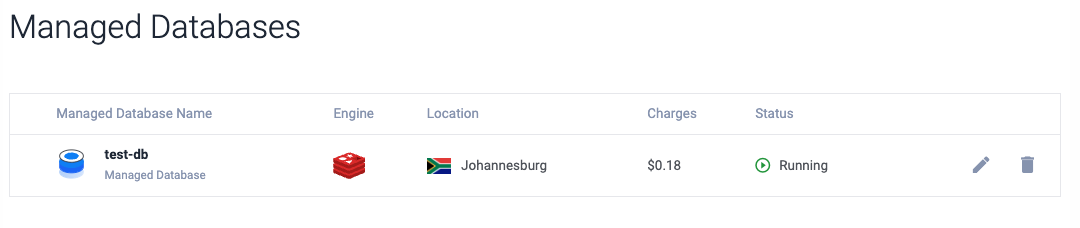
Redis® Server Went Awayerror:Ping: Connection Exception: Redis server went away (RedisException) Errors: [ Redis server went away" ]Verify your Vultr Managed Database for Caching cluster status is set to Running
Also, ensure that the Redis® connection details are above all configurations in the
wp-config.phpfile and below the<? phpdirectiveError Establishing a Redis® Connection
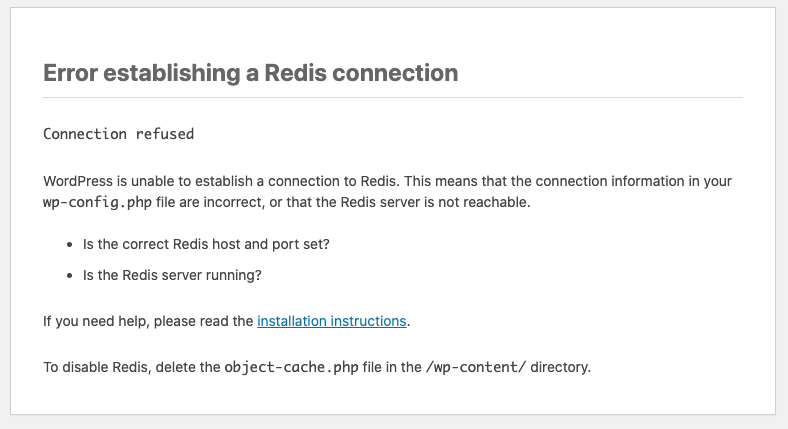
Add the Redis® connection details at the top of the
wp-config.phpfile, but below the<? phpdirective
Conclusion
You have integrated WordPress with a Vultr Managed Database for Caching Cluster. Using one managed database cluster, you can connect multiple WordPress databases to different database IDs and perform object caching to improve your general site performance. Each time site visitors view and visit your WordPress site, database responses get cached to your Redis® database which offers faster responses with the same data. For more Redis® Object Cache Plugin configuration options, visit the project repository.
Next Steps
To implement more solutions and leverage your WordPress server resources, visit the following resources: