How to Apply a Public Read Policy for Vultr Object Storage Subscription
Updated on 26 May, 2026Learn how to configure public read access for Vultr Object Storage buckets to share files with anyone on the internet without authentication.
Vultr Object Storage subscription public read setting provides a method for sharing data with anyone on the internet. Setting a bucket access to public allows anyone to retrieve files without authenticating to your subscription. Therefore, only grant access to assets specifically intended for public like static website hosting files.
Follow this guide to set Vultr Object Storage subscription to Public Read using s3cmd and AWS CLI.
- S3cmd
- AWS CLI
Deploy Vultr Object Storage subscription and create a bucket.
Configure
s3cmdwith Vultr Object Storage subscription.console$ s3cmd --configure
Follow the prompts and provide Bucket credentials like Access Key, Secret Key, Default Region, and S3 Endpoint. You can retrieve these credentials from Vultr Object Storage subscription Overview page.
Enter the DNS-style template. For example, if you choose the New Jersey location, use
%(bucket)s.ewr1.vultrobjects.com.DNS-style bucket+hostname:port template for accessing a bucket [%(bucket)s.s3.amazonaws.com]: %(bucket)s.ewr1.vultrobjects.comUpload a file to the bucket. Replace
LOCAL_FILE_PATHwith the local file path andBUCKET_NAMEwith your bucket name.console$ s3cmd put LOCAL_FILE_PATH s3://BUCKET_NAME/
Copy the file URL.
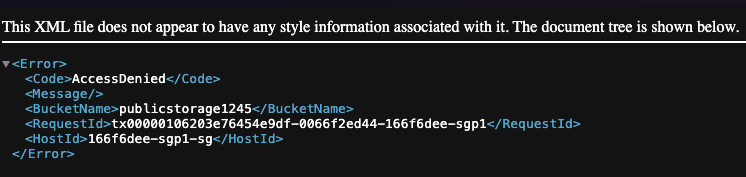
Access the file in a browser. The output displayed in the image below shows that you've not enable public access to objects in the bucket.
Create a new
jsonfile to set up a bucket policy.console$ nano public-policy.json
Copy the content below and paste it into the
jsonfile.json{ "Version": "2012-10-17", "Statement": [ { "Sid": "PublicReadGetObject", "Effect": "Allow", "Principal": "*", "Action": [ "s3:GetObject" ], "Resource": [ "arn:aws:s3:::BUCKET_NAME/*" ] } ] }
Replace
BUCKET_NAMEwith your bucket name. Save and close the file.The above S3 bucket policy grants public read-only access to all objects in the bucket. In the above settings:
Version: Uses AWS policy format as of 2012-10-17.Statement ID (Sid): LabelPublicReadGetObjectidentifies this rule.Effect: "Allow" grants permission.Principal: "*" allows everyone public access.Action: "s3:GetObject" permits downloading objects.Resource: Applies to all objects in the bucket mentioned in the policy.
Set the bucket policy. Replace
BUCKET_NAMEwith your bucket name.console$ s3cmd setpolicy public-policy.json s3://BUCKET_NAME
Verify the bucket policy if needed.
console$ s3cmd info s3://BUCKET_NAME
Confirm the new policy by accessing the object URL in a browser.
Configure the AWS CLI.
console$ aws configure --profile my-config
Follow the prompts and provide Bucket credentials like Access Key, Secret Key, and Default Region. You can retrieve these credentials from Vultr Object Storage subscription Overview page.
Upload a file to the bucket. Replace
HOSTNAMEwith your S3 endpoint hostname,BUCKET_NAMEwith your bucket name,OBJECT_KEYwith the destination key, andLOCAL_FILE_PATHwith the local file path.console$ aws --endpoint-url https://HOSTNAME --profile my-config s3api put-object --bucket BUCKET_NAME --key OBJECT_KEY --body LOCAL_FILE_PATH
Copy the file URL.
Access the file in a browser. The output displayed in the image below shows that you've not enabled public access to objects in the bucket.
Create a new
jsonfile, such aspublic-policy.jsonto set up a bucket policy.console$ nano public-policy.json
Copy the content below and paste it into the
jsonfile.json{ "Version": "2012-10-17", "Statement": [ { "Sid": "PublicReadGetObject", "Effect": "Allow", "Principal": "*", "Action": [ "s3:GetObject" ], "Resource": [ "arn:aws:s3:::BUCKET_NAME/*" ] } ] }
Replace
BUCKET_NAMEwith your bucket name. Save and close the file.Set the policy for the bucket. Replace
HOSTNAMEwith your S3 endpoint hostname andBUCKET_NAMEwith your bucket name.console$ aws --profile my-config --endpoint-url https://HOSTNAME s3api put-bucket-policy --bucket BUCKET_NAME --policy file://public-policy.json
Verify the bucket policy if needed.
console$ aws --profile my-config --endpoint-url https://HOSTNAME s3api get-bucket-policy --bucket BUCKET_NAME
Confirm the new policy by accessing the object URL in a browser.