Virtual Network Computing (VNC) is a connection system that allows you to use your local computer, mouse, and keyboard to control a remote server running a graphical desktop environment. VNC makes software installation, file management, and server setup easy since it offers a straightforward point-and-click graphical user interface (GUI).
In this article, you will learn how to install, configure and secure VNC on Debian 11 using Tight VNC.
Prerequisites
- Deploy a Debian 11 Server on Vultr
- SSH and Login as a sudo user
- Update the server
- Install a VNC client on your Local Computer
1. Install Gnome
Depending on your graphical environment flavor, there are several variants like Xfce and KDE, among others to choose from. This tutorial explains how to install the Gnome environment.
Update and upgrade the server packages.
$ sudo apt update

$ sudo apt upgrade
Install necessary Gnome fonts:
$ sudo apt install xfonts-100dpi xfonts-100dpi-transcoded xfonts-75dpi xfonts-75dpi-transcoded xfonts-baseInstall Gnome:
$ sudo apt install gnome2. Install VNC Server
Similar to Gnome, several VNC variants are available in Debian repositories. For this article, install Tiger VNC because it's secure and actively maintained.
Install Tiger VNC by running the following command:
$ sudo apt install tigervnc-common tigervnc-standalone-server 3. Configuration
Configure VNC with an access password for your account, then create the initial configuration files directory by running the following command:
$ vncserverEnter a strong password to keep your server secure. Also, select n when prompted to enter a view-only password since this would limit you from controlling the remote server.
You will require a password to access your desktops.
Password:
Verify:
Would you like to enter a view-only password (y/n)? n
Once configured, Your output will be similar to the one below:
New 'X' desktop is Example:1
Creating default startup script /home/example/.vnc/xstartup Starting applications    specified in /home/example/.vnc/xstartup Log file is  /home/example/.vnc/Example:1.log
1represents the display port number, and it's incremented on the service port, instead of 5900, it becomes 5901, representing your account port. If you run thevncservercommand again, a new port number will be generated.
A new hidden directory ~/.vnc is automatically created, set up a new xstartup configuration file within the directory to configure Gnome as the default graphical environment.
But first, stop the current VNC instance.
$ vncserver -kill :1Then, using your favorite editor, create and edit the file ~/.vnc/xstartup.
$ nano ~/.vnc/xstartupPaste the following lines of code:
#!/bin/sh
xrdb $HOME/.Xresources
vncconfig -iconic &
dbus-launch --exit-with-session
x-terminal-emulator -depth 32 -geometry 1920x1080 -ls -title  "$VNCDESKTOP Desktop"
gnome-session
Save and close the file.
Now, grant execute permissions on the configuration file.
$ chmod +x xstartup4. Set up VNC as a System Service
Configure the VNC instance to run as a system service to start, stop, or restart it using systemd management tools instead of manually running vncserver in your console.
Create a new service file in the /etc/systemd/system/ directory.
$ sudo nano /etc/systemd/system/vnc.servicePaste the following lines of code:
[Unit]
Description=Tiger remote desktop service
After=syslog.target network.target

[Service]
Type=simple
User=example
PAMName=login

PIDFile=/home/%u/.vnc/%H%i.pid
ExecStartPre=/bin/sh -c '/usr/bin/vncserver -kill :%i > /dev/null 2>&1 || :'
ExecStart=/usr/bin/vncserver  -geometry 1920x1080 -localhost :%i
ExecStop=/usr/bin/vncserver -kill :%i

[Install]
WantedBy=multi-user.target
Replace example with your actual username, and set your preferred display resolution next to the -geometry entry. Finally, save and close the file.
Restart the Systemd daemon.
$ sudo systemctl daemon-reloadNow, enable VNC to start at boot time.
$ sudo systemctl enable vncserver@1.serviceOutput:
Created symlink /etc/systemd/system/multi-user.target.wants/vnc@1.service → /etc/systemd/system/vnc@.service.
1represents the port number of your current VNC instance as displayed in the configuration output earlier.
Next, start the VNC Service.
$ sudo systemctl start vncserver@1Verify that VNC is up and running by querying the current status.
$ sudo systemctl status vncserver@1Your output should be similar to the one below:
● vnc@1.service - Tiger Remote desktop service (VNC)
     Loaded: loaded (/etc/systemd/system/vnc@.service; enabled; vendor preset: enabled)
     Active: inactive (dead) since Wed 2022-01-12 17:05:52 UTC; 53s ago
    Process: 41490 ExecStartPre=/bin/sh -c /usr/bin/vncserver -kill :1 > /dev/null 2>&1 || : (code=exited, status=0/SUCCESS)
    Process: 41495 ExecStart=/usr/bin/vncserver -geometry 1280x800 -localhost :1 (code=exited, status=0/SUCCESS)
    Process: 41728 ExecStop=/usr/bin/vncserver -kill :1 (code=exited, status=0/SUCCESS)
   Main PID: 41495 (code=exited, status=0/SUCCESS)
        CPU: 26ms

Jan 12 17:05:47 Example systemd[1]: Starting TinyVNC Remote desktop service (VNC)...
Jan 12 17:05:47 Example systemd[41490]: pam_unix(login:session): session opened for user example(uid=1000) by (uid=0)
Jan 12 17:05:48 Example systemd[1]: Started TinyVNC Remote desktop service (VNC).
Jan 12 17:05:48 Example systemd[41495]: pam_unix(login:session): session opened for user example(uid=1000) by (uid=0)
Jan 12 17:05:51 Example systemd[41728]: pam_unix(login:session): session opened for user example(uid=1000) by (uid=0)
Jan 12 17:05:52 Example systemd[1]: vnc@1.service: Succeeded.
5. Securely Connect over VNC
By default, VNC traffic is not encrypted, which presents security risks such as packet sniffing. However, you can securely connect to your server over VNC by adding an SSH encryption layer to the connection.
Depending on your local PC operating system, securely connect to your Debian 11 server over VNC using the following procedures.
Linux, macOS, and other Unix based operating systems
Open Terminal, and create an SSH tunnel with the following command:
ssh -L 5901:127.0.0.1:5901 -C -N user@your_server_ip
Lspecifies that SSH connections to the server port5901have to be forwarded to the specified host (127.0.0.1), and port.
Ccompresses all data.
Ninstructs SSH to strictly forward data with no console window commands.
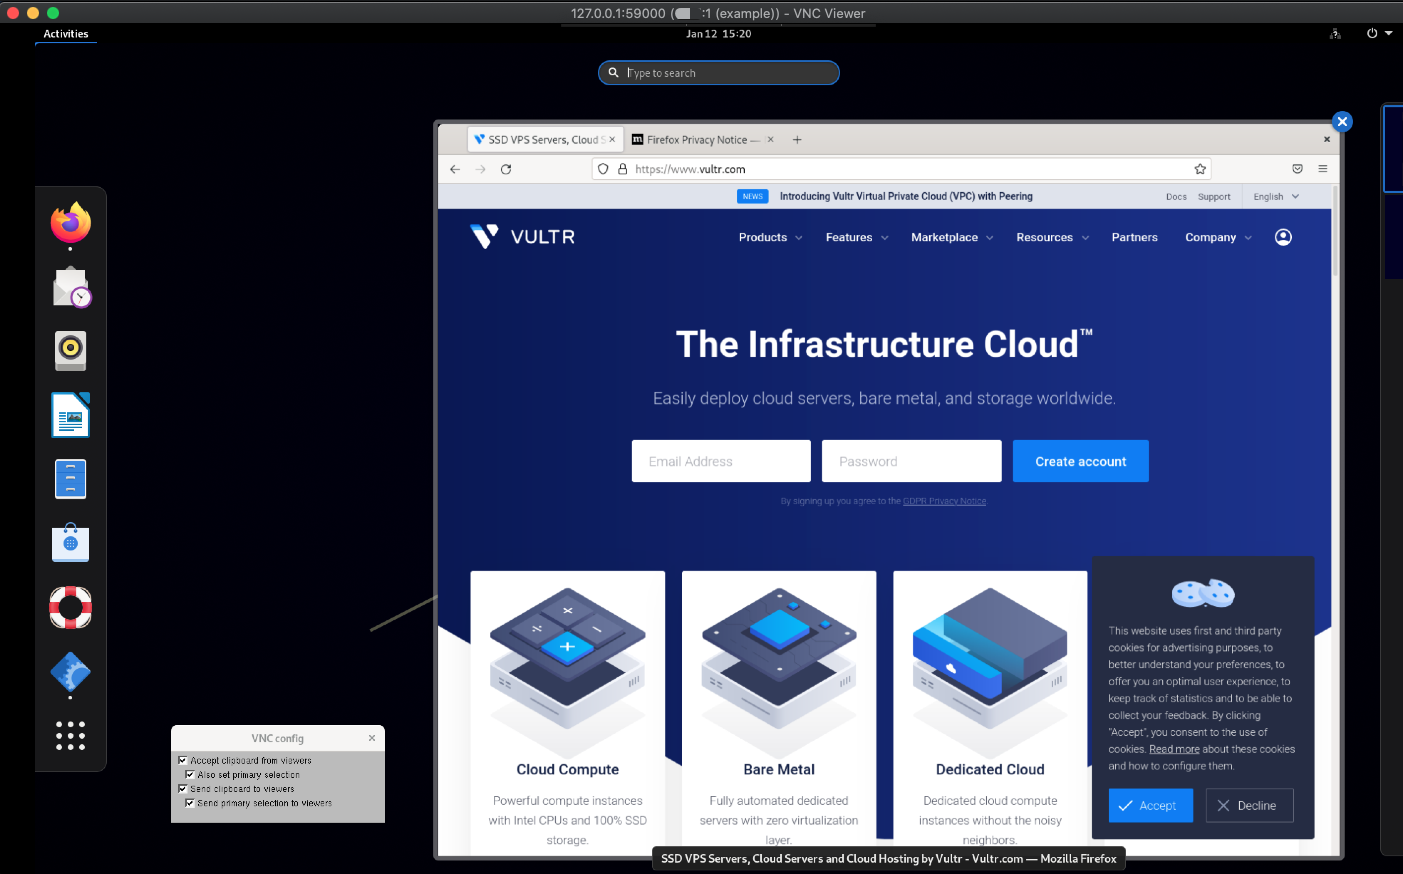
Your VNC connection will be tunneled through SSH and available on localhost port 5901. Use your VNC client software to make a connection to 127.0.0.1:5901, and start using your remote Debian 11 server desktop.

For the best display quality, change your VNC Viewer picture quality settings from Automatic to High.
Windows
To securely tunnel your VNC connection on Windows, Install Putty if not already installed, then set up SSH tunneling by navigating to the Session tab.
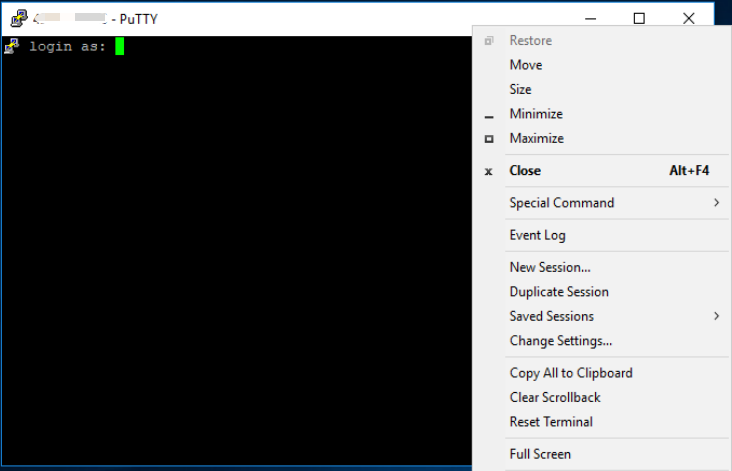
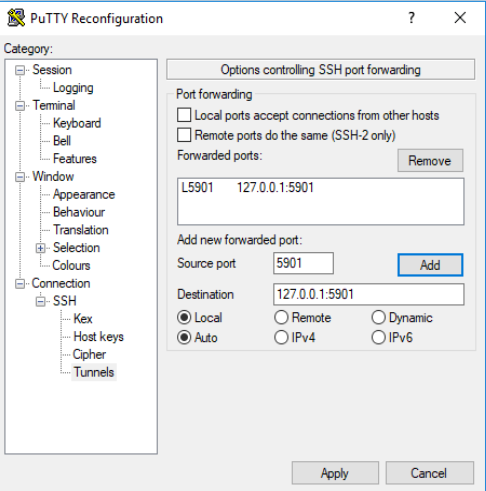
Establish an SSH connection to the server on port 22, then, in the SSH console window, right-click on the top bar, and select Change Settings from the options list. Under Connection expand the SSH option and select tunnels.

Enter the local source port (5901), then enter your local computer address 127.0.0.1 with VNC remote port 5901, and click Add to save the SSH forwarding information.

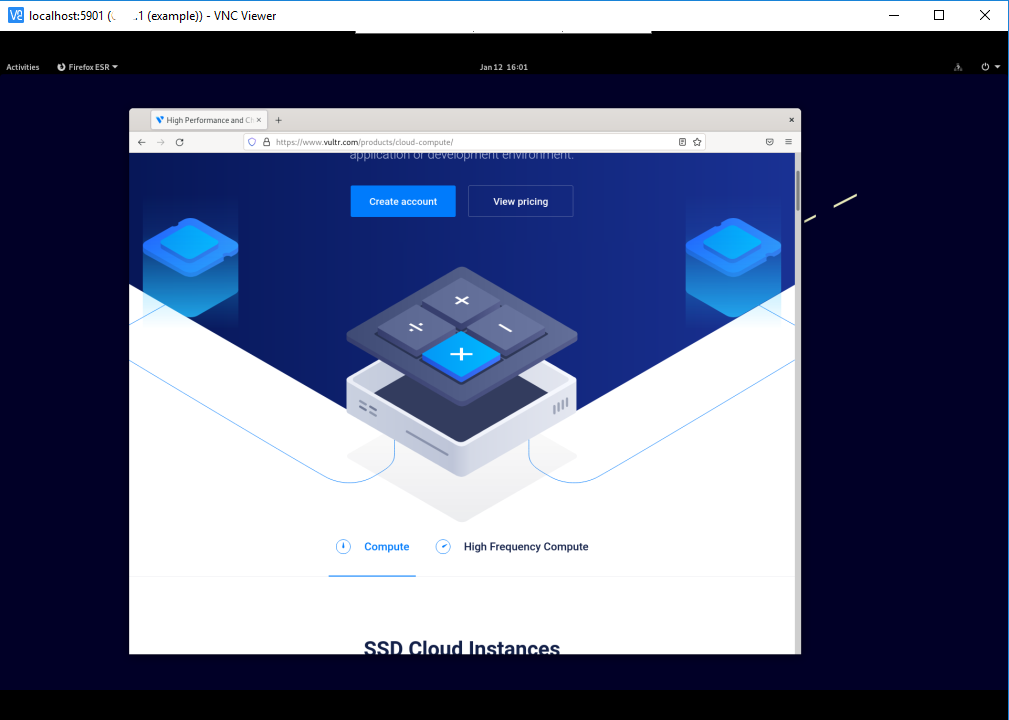
Now, click Open to start SSH forwarding to the localhost port. Open your VNC Viewer and enter address 127.0.0.1:5901 to establish a secure connection to the server. Once connected, your Debian 11 Gnome desktop is displayed.

Troubleshooting Common Errors
If you receive the following error after running the command vncserver:
(process:64512): dconf-CRITICAL **: 11:01:18.406: unable to create directory '/run/user/0/dconf': Permission denied. dconf will not work properly.Log out of your current user account, then re-login with su – Username.
Conclusion
You have successfully installed, configured, and securely connected to your VNC server on Debian 11. For every user account you create, a new port number will be created. Use the same above process to securely connect to the server.