
Cloning a Virtual Server With Vultr
On occasion, you'll need to clone a virtual server either for scaling purposes or to change the region of the server, for example. On Vultr, this is easy, as snapshots are offered. However, there are a variety of different factors that need to be accounted for as this is performed.
Supported operating systems
This article supports Windows and Linux-based operating systems.
##Step 1: Log in to your Vultr account and navigate to your server
The first thing you'll want to do is log in to your Vultr account. Head over to https://console.vultr.com/ to do this. Navigate to the instance you wish to clone, and click the snapshot tab. The tab that should be clicked is shown below:
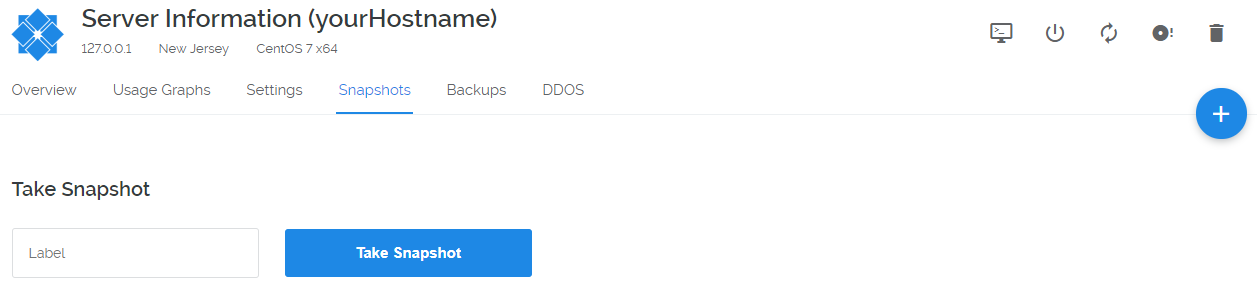
##Step 2: Create the snapshot
Creating the snapshot is simple. However, please note that you will not be able to stop or restart the instance during this time. Your server will be in a "locked" state, so make sure everything is ready before the snapshot is taken. Once you're ready, enter any label. Then, click "Take Snapshot" and wait. This can take quite long if your instance is particularly large. On a 512MB VC2 instance, you can expect to wait around five minutes.
##Step 3: Create a new instance and restore the snapshot
On any page in the Vultr control panel, there is a button that looks like the image below:

Click it to head directly to the instance creation page.
Follow through the process, and make sure to select a plan with the same or greater specifications than the previous instance. Head back to the instance list (accessible via the Servers tab on the left sidebar), locate the new instance and click "Manage". Go to the snapshot page as shown earlier and locate the snapshot you've created. It will appear as shown:

The status should be "Available." If it is not, refresh the page every few minutes until the correct status appears. Locate the "Restore" icon:

Click it, and you'll be prompted with a warning message. Make sure that you've selected the correct instance! When you are ready, click "Restore snapshot." This will take some time to complete.
At this point, once the instance is active again, it will be an exact replica of your other instance. If your configuration is DHCP based, you're done. If not, please continue to the next step.
##Step 4: Restoring network configuration
The steps will be different for Linux and Windows users.
If you are using Debian, Ubuntu or an operating system deriative of Debian, your network configuration will be located in /etc/network/interfaces. If you're using CentOS, Fedora or a RHEL-based operating system, it will either be located in /etc/sysconfig/network or /etc/sysconfig/network-scripts/ifcfg-<main_interface> (in most cases, it will be /etc/sysconfig/network-scripts/ifcfg-eth0).
On all Linux operating systems though, you will need to change the previous IP address in the configuration files to reflect the new virtual server. Make sure to change the gateway IP address and netmask to those found in the Vultr control panel.
On a Windows Server, head to Control Panel, then Network and Sharing center, and click Change Adapter Settings. Right click on the main network interface (usually Local Area Connection 1 or 2, use the one that contains your old IP), then click on Properties. Change your old IP address to the new one. The gateway IP address on Vultr and netmask is provided from the control panel.
More information is available in the "Correcting Network Configuration After Snapshot Restore" guide.