

Introduction
DreamBooth is a technology to fine-tune text-to-image diffusion models with few images of subjects so that later the model can synthesize subjects in different scenes and poses. For example, the original Stable Diffusion text-to-image model cannot generate your face because it was not trained with your face. But you can fine-tune the model with 20 images of your face. After the fine-tuning process, you can generate your face in diverse scenes with the fine-tuned model, for example, generating an image of yourself wearing a green suit in a swimming pool.
This article demonstrates the steps to use a Vultr Cloud GPU to fine-tune a Stable Diffusion text-to-image model with few images.
Prerequisites
- Create a Hugging Face account and get an access token.
- Deploy a Vultr Cloud GPU and pick Ubuntu 22.04. Then, choose GPU RAM 40GB.
- Create a non-root user with sudo access.
Setting Up Dependencies
A DreamBooth project needs diffusers and some Python libraries. First, you need to install CUDA and set up a Python virtual environment. Then, you'll install the application and its dependencies there.
Install CUDA.
 $ wget https://developer.download.nvidia.com/compute/cuda/repos/ubuntu2204/x86_64/cuda-ubuntu2204.pin
 $ sudo mv cuda-ubuntu2204.pin /etc/apt/preferences.d/cuda-repository-pin-600
 $ sudo apt-key adv --fetch-keys https://developer.download.nvidia.com/compute/cuda/repos/ubuntu2204/x86_64/3bf863cc.pub
 $ sudo add-apt-repository "deb http://developer.download.nvidia.com/compute/cuda/repos/ubuntu2204/x86_64/ /"
 $ sudo apt-get -y install cuda-11.7
 $ sudo reboot
Install Python virtual environment.
$ sudo apt install python3.10-venv -yCreate Python virtual environment and activate it.
 $ mkdir workspace
 $ cd workspace
 $ python3 -m venv venv
 $ source venv/bin/activate
Install
diffusersfrom Huggingface and its dependencies.(venv) $ pip install --pre triton (venv) $ pip install transformers ftfy bitsandbytes natsort ninja torchvision accelerate huggingface-hub (venv) $ pip install git+https://github.com/huggingface/diffusers.git
Set up the Training Data
DreamBooth requires two kinds of data. The first one is the instance data. The examples are yourself, your dog, and your car. If you choose yourself, you need 15 to 30 images of yourself in diverse poses. This tutorial uses Lionel Messi as the instance data.
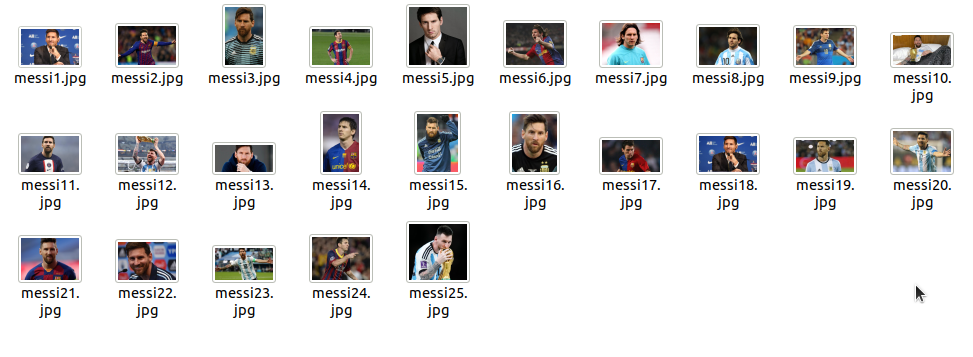
The second data that you need is the class data. Other names are regularization data and category data. This data depends on the instance data. If you use Lionel Messi as the instance data, then the class data will be men's or people's pictures. If you use your dalmatian dog as the instance data, then the class data will be dogs' pictures, including husky dogs, bulldogs, golden retriever dogs, and so on. Ideally, this data should be from 50 to 200 images.
You can find the men's class data pictures from many sources. An example is DigiFace1M. You can also search them in GitHub using the keywords Stable Diffusion Regularization Images.
Create directories to hold the instance data and the class data.
 (venv) $ mkdir -p ~/images/instance
 (venv) $ mkdir -p ~/images/class
Put Lionel Messi pictures in
~/images/instanceand men or people pictures in~/images/class. Both instance and class data pictures must be in JPEG format and have the 512x512 resolution. Stable Diffusion also supports the 768x768 resolution, but in this tutorial, you're going to use the 512x512 resolution.You can convert PNG to JPEG format and resize the images using any tool you like, like Photoshop or Gimp, but you can also use
mogrifyto do the job. Here's how to resize the images withmogrify.(venv) $ apt install graphicsmagick-imagemagick-compat -y (venv) $ mogrify -format jpg *.png (venv) $ mogrify -resize 512x512^ -gravity center -extent 512x512 *.jpgFinally, create
concepts_list.jsonand add the following content to it.[{ "instance_prompt": "lionelmessi", "class_prompt": "a man", "instance_data_dir": "/home/your_username/images/instance", "class_data_dir": "/home/your_username/images/class" }]
Later, you'll use the "lionelmessi" term to create Lionel Messi images in different poses. Notice that you defined the instance data directory and the class data directory in the JSON file. Don't forget to change your_username in the JSON file to your real username.
Executing the DreamBooth Script
Download the DreamBooth training script from a forked diffusers repository.
(venv) $ wget -q https://github.com/ShivamShrirao/diffusers/raw/main/examples/dreambooth/train_dreambooth.py> Don't download the training script from the official HuggingFace's Diffusers repository. The forked repository has some improvements like the ability to train more than 1 concepts which you'll use later.
For this example, base your DreamBooth project on Stable Diffusion 2.1.
(venv) $ export MODEL_NAME="stabilityai/stable-diffusion-2-1-base"> You could also base your DreamBooth on other versions of StableDiffusion like 2.0, 1.5, or 1.4.
Create a directory to hold the trained model.
(venv) $ mkdir ~/modelsSet the model directory to an environment variable.
(venv) $ export OUTPUT_DIR=/home/`whoami`/modelsDecide how many steps you want to train your model. This is the setting that you want to tweak. If you set it too low, the generated pictures will be of bad quality. If you set it too high, the generated pictures will be of good quality, but it will be overfitted to the point that it will ignore your prompt. For example, if the number of training steps is too high and you create a prompt "lionelmessi riding a polar bear", the pictures will be Lionel Messi's pictures in high quality, but the polar bear is missing.
Set the maximum steps in an environment variable for easy tweaking later.
(venv) $ export MAX_TRAIN_STEPS=800Log in to your HuggingFace account. Otherwise, you cannot download the base model from HuggingFace. Give your HuggingFace token when prompted.
(venv) $ huggingface-cli loginThen use the default configuration of
accelerate.(venv) $ accelerate config default> You use
acceleratewhen executing the DreamBooth script because you can choose to train the model using multiple GPUs, and there are other configurations that are useful.Finally, execute the DreamBooth training script. To make sure the script doesn't get killed, you can use
tmuxorscreen.(venv) $ accelerate launch train_dreambooth.py \ --pretrained_model_name_or_path=$MODEL_NAME \ --pretrained_vae_name_or_path="stabilityai/sd-vae-ft-mse" \ --output_dir=$OUTPUT_DIR \ --with_prior_preservation --prior_loss_weight=1.0 \ --seed=1337 \ --resolution=512 \ --train_batch_size=1 \ --train_text_encoder \ --mixed_precision="fp16" \ --gradient_accumulation_steps=1 \ --learning_rate=1e-6 \ --lr_scheduler="constant" \ --lr_warmup_steps=0 \ --num_class_images=50 \ --sample_batch_size=4 \ --max_train_steps=$MAX_TRAIN_STEPS \ --concepts_list="concepts_list.json"
Be patient; it takes time to train your model.
Executing the Inference Script to Generate Images
You'll find the trained model inside ~/models and the name of the trained model is the same as the maximum train steps you set earlier. If you use 800 as the value for MAX_TRAIN_STEPS then the full path of your trained model will be ~/models/800.
Create a Python script to use this trained model and generate Lionel Messi in different scenes. Name the Python script
dream_image.py.(venv) $ vim dream_image.pyAdd the following content to the file:
from diffusers import StableDiffusionPipeline import torch import os max_train_steps = os.environ['MAX_TRAIN_STEPS'] model_path = f"{os.environ['OUTPUT_DIR']}/{max_train_steps}" result_folder = f"{os.environ['HOME']}/images/result" pipe = StableDiffusionPipeline.from_pretrained(model_path, torch_dtype=torch.float16) pipe = pipe.to("cuda") prompt = os.environ['PROMPT'] images = pipe(prompt, guidance_scale=8, num_inference_steps=70, num_images_per_prompt=8, ).images for i, image in enumerate(images): image.save(f"{result_folder}/result_{i}.png")> The above script uses the trained model with the Stable Diffusion pipeline. The script will generate 8 sample images per prompt when executed.
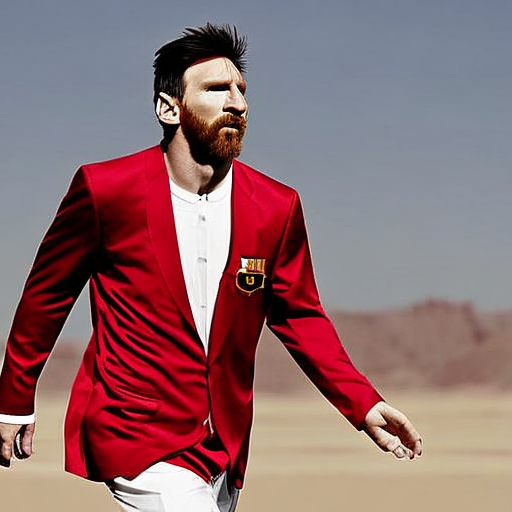
Before executing the script, you need to create the folder to hold the output images and set an environment variable for the text-to-image prompt.
(venv) $ mkdir ~/images/result (venv) $ export PROMPT="lionelmessi wearing a red suit in a desert"Then, execute the script:
(venv) $ python dream_image.py
When it completes, you'll find eight images in ~/images/result.
Use a Different Base Model
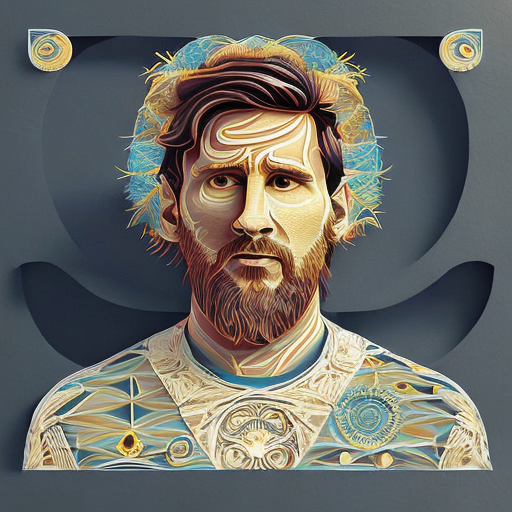
As stated earlier, you can base your DreamBooth script on other base models, including the custom models. People have uploaded DreamBooth models that you can base your DreamBooth script on. One example is MideJourney-PaperCut. On the web page, you can find the instance token is mdjrny-pprct for the custom model.
To start using this base model, change the MODEL_NAME environment variable.
(venv) $ export MODEL_NAME="ShadoWxShinigamI/MidJourney-PaperCut"Then, execute the script again.
(venv) $ accelerate launch train_dreambooth.py \ --pretrained_model_name_or_path=$MODEL_NAME \ --pretrained_vae_name_or_path="stabilityai/sd-vae-ft-mse" \ --output_dir=$OUTPUT_DIR \ --with_prior_preservation --prior_loss_weight=1.0 \ --seed=1337 \ --resolution=512 \ --train_batch_size=1 \ --train_text_encoder \ --mixed_precision="fp16" \ --gradient_accumulation_steps=1 \ --learning_rate=1e-6 \ --lr_scheduler="constant" \ --lr_warmup_steps=0 \ --num_class_images=50 \ --sample_batch_size=4 \ --max_train_steps=$MAX_TRAIN_STEPS \ --concepts_list="concepts_list.json"Change the prompt to use the instance token from the base model and your instance token together.
(venv) $ export PROMPT="mdjrny-pprct lionelmessi in a garden"Then, execute the script.
(venv) $ python dream_image.py
You can find the generated images in the same place as before.
Use Two Instances
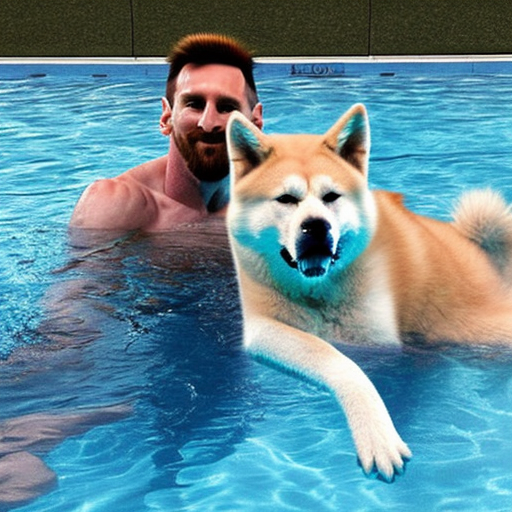
You can also train more than one instance. Suppose your dog wants to take a picture with Lionel Messi. You can combine two instances in one training process.
Create directories to hold your dog instance pictures and dogs class pictures.
(venv) $ mkdir ~/images/dog_instance (venv) $ mkdir ~/images/dog_classPut your dog instance pictures in
~/images/dog_instanceand the dogs class pictures in~/images/dog_class. You need to make sure all images are in JPG format and have a 512x512 resolution. You can find dogs class images in GitHub using the term "Dogs Stable Diffusion Regularization Images".Then, edit the
concepts_list.jsonand put the dog tokens and directories there as well.[{ "instance_prompt": "lionelmessi", "class_prompt": "a man", "instance_data_dir": "/home/your_username/images/instance", "class_data_dir": "/home/your_username/images/class" }, { "instance_prompt": "hachikodog", "class_prompt": "a dog", "instance_data_dir": "/home/your_username/images/dog_instance", "class_data_dir": "/home/your_username/images/dog_class" } ]Use the original Stable Diffusion 2.1 base model.
(venv) $ export MODEL_NAME="stabilityai/stable-diffusion-2-1-base"Then, execute the training script.
(venv) $ accelerate launch train_dreambooth.py \ --pretrained_model_name_or_path=$MODEL_NAME \ --pretrained_vae_name_or_path="stabilityai/sd-vae-ft-mse" \ --output_dir=$OUTPUT_DIR \ --with_prior_preservation --prior_loss_weight=1.0 \ --seed=1337 \ --resolution=512 \ --train_batch_size=1 \ --train_text_encoder \ --mixed_precision="fp16" \ --gradient_accumulation_steps=1 \ --learning_rate=1e-6 \ --lr_scheduler="constant" \ --lr_warmup_steps=0 \ --num_class_images=50 \ --sample_batch_size=4 \ --max_train_steps=$MAX_TRAIN_STEPS \ --concepts_list="concepts_list.json"Finally, use both instance tokens to generate pictures of Lionel Messi and your dog.
 (venv) $ export PROMPT="a photo of lionelmessi and hachikodog in a swimming pool"
 (venv) $ python dream_image.py
Check the generated images to see the pictures of your dog and Lionel Messi.
Conclusion
This article demonstrated the steps to install Diffusers and its dependencies, set up the training data, execute the DreamBooth script to train the model, and generate images using a Python script. You also learned how to use a different base model and combine two instances in one training process.
No comments yet.