
How to Build a PyTorch Container Image
Introduction
PyTorch is a flexible machine learning library for building deep learning models that can perform a wide range of tasks such as image recognition and language processing.
This article explains how to build a PyTorch container image using the Vultr Container Registry.
Prerequisites
Deploy an instance using Vultr's GPU Marketplace App
Access the server using SSH.
Start the Docker service.
console$ sudo systemctl start docker
Add the non-root user to the Docker group. For example,
linuxuser.console$ sudo usermod -aG docker linuxuser
Switch to the user:
console$ su - linuxuser
Set Up the Server
Create a new directory to store your PyTorch project files.
console$ mkdir llama-project
Switch to the directory.
console$ cd llama-project
Clone the Pytorch project repository using Git.
console$ git clone https://github.com/pytorch/pytorch
List all files and verify that a new
pytorchdirectory is available.console$ lsSwitch to the
pytorchproject directory.console$ cd pytorch
List all directory files and verify that the available Dockerfile resources.
console$ ls -a
The PyTorch project directory includes the following Dockerfile resources:
Dockerfile: Contains the PyTorch build context for both CPU systems.docker.makefile: Contains advanced GPU build context and image automation directives with support for custom dependency packages.
Use the above resources in the next sections to build a CPU or GPU system container image.
Build a PyTorch Container Image for CPU Systems
Follow the steps below to build a new PyTorch container image for CPU systems using the Dockerfile resource on your server.
Build a new PyTorch container image using the
Dockerfileresource. Replacepytorch-imagewith your desired image name.console$ docker build -f Dockerfile -t pytorch-image .
View all Docker images and verify that your new Pytoch image is available.
console$ docker images
Output:
REPOSITORY     TAG                                                   IMAGE ID       CREATED       SIZE
pytorch-image  latest                                                d3674f1db4d5   2 hours ago   11.9GB
Build a PyTorch Container Image for GPU Systems
Follow the steps below to build a new PyTorch container image for GPU systems using docker.Makefile that contains the CUDA dependency build context compatible with NVIDIA GPU servers.
Build a new PyTorch container image for GPU using the
docker.Makefile.console$ docker build -f Dockerfile -t pytorch-image .
Wait at least
2 hoursfor the build process to complete. When successful, your output should look like the one below:#29 29224.1 copying torch/include/ATen/ops/_sparse_coo_tensor_with_dims_ops.h -> build/lib.linux-x86_64-cpython-310/torch/include/ATen/ops #29 29224.1 copying torch/include/ATen/ops/absolute_compositeimplicitautograd_dispatch.h -> build/lib.linux-x86_64-cpython-310/torch/include/ATen/ops #29 29224.1 copying torch/include/ATen/ops/gradient_ops.h -> build/lib.linux-x86_64-cpython-310/torch/include/ATen/ops #29 29224.1 copying torch/include/ATen/ops/crow_indices_compositeexplicitautograd_dispatch.h -> build/lib.linux-x86_64-cpython-310/torch/include/ATen/ops #29 29224.1 copying torch/include/ATen/ops/isinf.h -> build/lib.linux-x86_64-cpython-310/torch/include/ATen/ops #29 29224.1 copying torch/include/ATen/ops/_fore #29 29224.1 [output clipped, log limit 2MiB reached] #29 29235.3 warning: no previously-included files matching '*.o' found anywhere in distribution #29 29235.4 warning: no previously-included files matching '*.dylib' found anywhere in distribution #29 29235.7 warning: no previously-included files matching '*.swp' found anywhere in distribution #29 DONE 29239.6s #30 [dev 1/1] COPY --from=build /opt/conda /opt/conda #30 DONE 10.8s #31 exporting to image #31 exporting layers #31 exporting layers 41.0s done #31 writing image sha256:d3674f1db4d5e9585a5e5b64a0cdfcb0c7d312358e267000e23b6fa9d8e7e917 done #31 naming to docker.io/root/pytorch:v1.8.0-rc1-38416-g4dc160864b3-cuda12.1-cudnn8-devel done #31 DONE 41.0sView all Docker images on the server and verify that a new
root/pytorchimage is available.console$ docker images
Output:
REPOSITORY     TAG                                                   IMAGE ID       CREATED       SIZE
root/pytorch   v1.8.0-rc1-38416-g4dc160864b3-cuda12.1-cudnn8-devel   d3674f1db4d5   3 hours ago   20.9GB
Verify the PyTorch GPU image target CUDA version and verify that your system uses the driver version or higher.
console$ cat docker.Makefile | grep CUDA_VERSION
Output:
CUDA_VERSION_SHORT       ?= 12.1
CUDA_VERSION             ?= 12.1.1
BASE_DEVEL                = nvidia/cuda:$(CUDA_VERSION)-cudnn$(CUDNN_VERSION)-devel-ubuntu22.04
Based on the above output, NVIDIA GPU Servers with CUDA version
12.1or higher can run your PyTorch GPU container image.
Upload the PyTorch Container Image to the Vultr Container Registry
Open the Vultr Console.
Click Products and navigate to Container Registry on the main navigation bar.
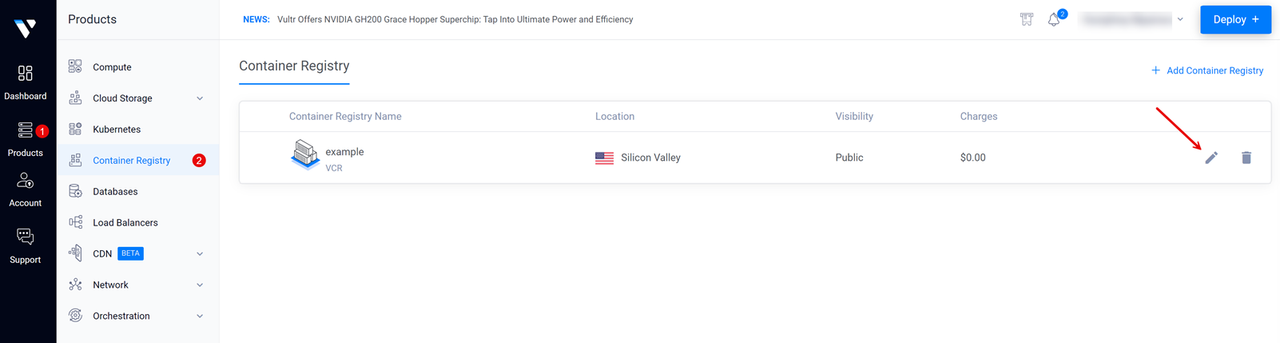
Click your target Vultr Container Registry to open the management panel and view the registry access credentials.
Copy the Registry URL value, Username, and API Key to use when accessing the registry.
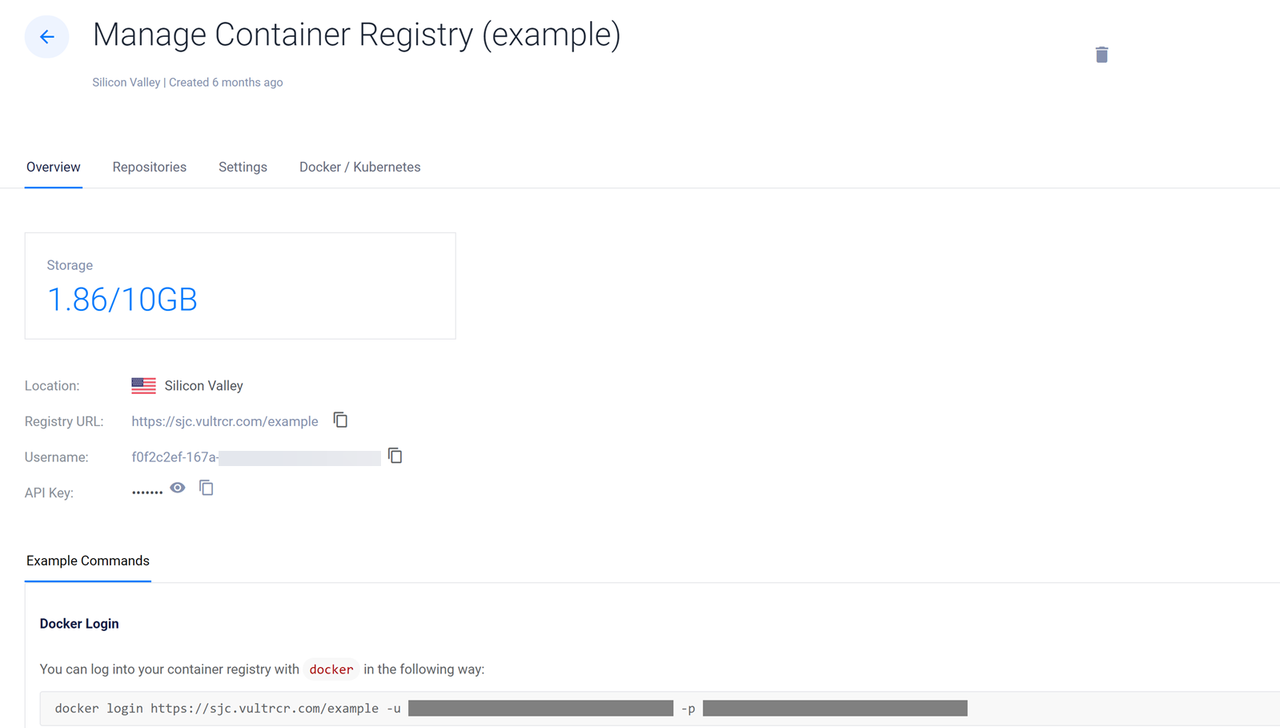
Switch to your server terminal session and log in to your Vultr Container Registry. Replace
exampleregistry,exampleuser,registry-passwordwith your actual registry details.console$ docker login https://sjc.vultrcr.com/exampleregistry -u exampleuser -p registry-password
Tag your PyTorch container image with your desired Vultr Container Registry tag. For example, tag your PyTorch GPU image ID with your registry repository tag such as
sjc.vultrcr.com/exampleregistry/pytorch-gpu-image.console$ docker tag d3674f1db4d5 sjc.vultrcr.com/exampleregistry/pytorch-gpu-image
The above command tags the Docker image with container ID
d3674f1db4d5with your Vultr Container Registry tag.View all Docker images on the server and verify that the new tagged image is available.
console$ docker images
Output:
REPOSITORY           TAG                                                   IMAGE ID       CREATED       SIZE
root/pytorch         v1.8.0-rc1-38416-g4dc160864b3-cuda12.1-cudnn8-devel   d3674f1db4d5   4 hours ago   20.9GB
sjc.vultrcr.com/exampleregistry/pytorch-gpu-image   latest                 d3674f1db4d5   4 hours ago   20.9GB
Push the tagged image to your Vultr Container Registry repository.
console$ docker push sjc.vultrcr.com/exampleregistry/pytorch-gpu-image
Open your Vultr Container Registry management panel and click Repositories on the top navigation bar to verify that the new repository is available.
