
Introduction
Nuxt.js is an open-source server-side framework based on Vue.js, Node.js, and Babel.js. It acts as the backbone of your Vue.js project to offer a structure to build your project and deploy it on a serverless platform. However, to deploy your Nuxt.js application to a controlled server and scale it in your infrastructure, use a Kubernetes platform such as the Vultr Kubernetes Engine (VKE) to deploy, manage, automate, and scale containerized applications.
This article explains how to deploy a Nuxt.js application on a Vultr Kubernetes Engine (VKE) cluster. You will prepare the application, dockerize, deploy it to a cluster, and expose it for external access.
Prerequisites
Before you begin:
- Deploy a Vultr Kubernetes Engine (VKE) cluster with at least three nodes.
- Install Kubectl on your local machine to access the cluster.
- Install Docker on your local machine.
Create a Nuxt.js Application
To create a Nuxt.js application, you must install Node.js on your local machine and use it to enable Nuxt.js as described below.
Import the Node source repository.
$ curl -sL https://deb.nodesource.com/setup_18.x -o nodesource_setup.sh && sudo bash nodesource_setup.shInstall Node.js.
$ sudo apt install nodejsVerify the installed Node.js version.
$ node -vOutput.
v18.16.0Nuxt.js has a built-in tool
create-nuxt-appthat lets you create a Nuxt.js app. Using thenpxcommand, create a new application callednuxtjs-tutorialas below.$ npx create-nuxt-app nuxtjs-tutorialOutput:
 Need to install the following packages:
 create-nuxt-app@5.0.0
 Ok to proceed? (y)
Reply to each of the Installation prompts as below:
 create-nuxt-app v5.0.0
 ✨  Generating Nuxt.js project in nuxtjs-tutorial
 ? Project name: nuxtjs-tutorial
 ? Programming language: JavaScript
 ? Package manager: Npm
 ? UI framework: None
 ? Template engine: HTML
 ? Nuxt.js modules: (Press <space> to select, <a> to toggle all, <i> to invert selection)
 ? Linting tools: (Press <space> to select, <a> to toggle all, <i> to invert selection)
 ? Testing framework: None
 ? Rendering mode: Universal (SSR / SSG)
 ? Deployment target: Server (Node.js hosting)
 ? Development tools: (Press <space> to select, <a> to toggle all, <i> to invert selection)
 ? What is your GitHub username? YOUR_GITHUB_ID
 ? Version control system: None
When successful, change to the application directory.
$ cd nuxtjs-tutorialBuild the application for production use.
$ HOST=0.0.0.0 PORT=3000 npm run buildStart the Nuxt.js Application in the background.
$ HOST=0.0.0.0 PORT=3000 npm run start &Your output should look like the below:
 ╭──────────────────────────────────────────╮
 │                                          │
 │   Nuxt @ v2.17.0                         │
 │                                          │
 │   ▸ Environment: production              │
 │   ▸ Rendering:   server-side             │
 │   ▸ Target:      server                  │
 │                                          │
 │   Memory usage: 48.5 MB (RSS: 142 MB)    │
 │                                          │
 │   Listening: http://192.0.2.1:3000/      │
 │                                          │
 ╰──────────────────────────────────────────╯
In a web browser such as Chrome, verify that you can access the Nuxt.js application dashboard.
http://192.0.2.1:3000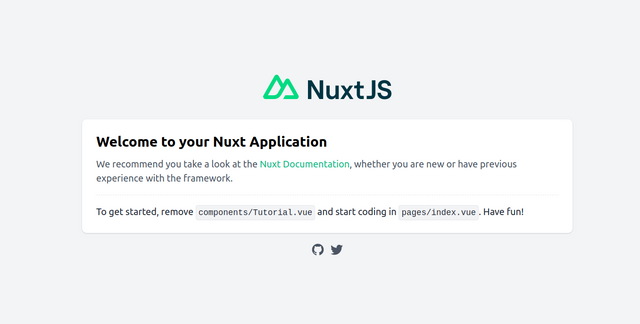
Dockerize Nuxt.js Application
In this section, create a new container image from your Nuxt.js application to deploy it in your Vultr Kubernetes Engine (VKE) cluster as described below.
In the Nuxt.js application directory, create a Dockerfile.
$ nano DockerfileAdd the following configurations to the file.
 # Dockerfile
 FROM node:16-alpine

 # create the destination directory
 RUN mkdir -p /usr/src/nuxtapp
 WORKDIR /usr/src/nuxtapp

 # update and install dependency packages
 RUN apk update && apk upgrade
 RUN apk add git

 # copy the app, note .dockerignore
 COPY . /usr/src/nuxtapp/
 RUN npm install
 RUN npm run build

 EXPOSE 3000

 ENV NUXT_HOST=0.0.0.0
 ENV NUXT_PORT=3000

 CMD [ "npm", "start" ]
The above configuration has the following key components:
FROM: Specifies the underlying OS architecture to build the image.RUN: Runs the specified command in the container.WORKDIR: Define the working directory of a Docker container at a given point of time.COPY: Makes a copy of all application files from the local machine to the docker image.EXPOSE: Expose the docker port for the external access.ENV: Defines the required environment variables before starting the application.CMD: Executes the specified command inside the container.
Save and close the file.
Create a docker image using the
docker buildcommand.$ sudo docker build -t nuxtjs-tutorial .When successful, check the created image and its size.
$ sudo docker imagesOutput.
 REPOSITORY        TAG         IMAGE ID       CREATED          SIZE
 nuxtjs-tutorial   latest      a23b9414f800   20 seconds ago   256MB
To run the docker container on port
3000. Kill the previous application background process.$ sudo kill %1Verify the PID before killing the process using the
jobscommand.$ jobsRun the container you have just built using Docker:
$ sudo docker run -dit -p 3000:3000 nuxtjs-tutorialThe above command runs the container and forwards the exposed port 3000 to port 3000 on your local machine.
Verify the status of the running container.
$ sudo docker psOutput:
 CONTAINER ID   IMAGE             COMMAND                  CREATED         STATUS         PORTS                                       NAMES
 0dcd861eab96   nuxtjs-tutorial   "docker-entrypoint.s…"   6 seconds ago   Up 5 seconds   0.0.0.0:3000->3000/tcp, :::3000->3000/tcp   musing_montalcini
In a web browser, verify that you can access the Nuxt.js application using the URL
http://127.0.0.1:3000in your web browser.
Build Nuxt.js Docker Image and Push it to DockerHub Registry
To use your Nuxt.js docker image in Kubernetes, push the image to DockerHub. To complete the steps in this section, make sure you have a Docker Hub profile to push the application.
Stop the running
nuxtjs-tutorialdocker container.$ docker container stop [nuxtjs-container-id or name]Log in to your DockerHub account.
$ docker loginWhen prompted, enter your DockerHub credentials to build and push the image. Your output should look like the one below.
 Login with your Docker ID to push and pull images from Docker Hub. If you don't have a Docker ID, head over to https://hub.docker.com to create one.
 Username: example-user
 Password: YOUR_DOCKER_HUB_PASSWORD

 Login Succeeded
Tag the Docker Image with your Docker Hub ID.
$ sudo docker tag nuxtjs-tutorial <example-user>/nuxtjs-tutorial:latestPush the image to Docker Hub. Replace
example-userwith your actual username.$ sudo docker push example-user/nuxtjs-tutorial:latestVerify that your tagged image exists.
$ docker imagesOutput.
 REPOSITORY                  TAG         IMAGE ID       CREATED         SIZE
 nuxtjs-tutorial             latest      a23b9414f800   2 minutes ago   256MB
 example-user/nuxtjs-tutorial   latest      a23b9414f800   2 minutes ago   256MB
 node                        16-alpine   d22e42cbfdbb   18 hours ago    118MB
Run the docker image to verify that it can render your Nuxt.js application.
$ sudo docker run --rm -d -p 3000:3000 example-user/nuxtjs-tutorialIn your web browser, access port
3000to access the application. For example:http://127.0.0.1:3000.
Deploy the Nuxt.js Application on a VKE Cluster
Create a new
deployment.yamlfile.$ nano deployment.yamlAdd the following configurations to the file.
 kind: Deployment
 apiVersion: apps/v1
 metadata:
   name: nuxtjs-tutorial
 spec:
   replicas: 3
   selector:
     matchLabels:
       app: nuxtjs-tutorial
   template:
     metadata:
       labels:
         app: nuxtjs-tutorial
     spec:
       containers:
       - name: nuxtjs-tutorial
         image: example-user/nuxtjs-tutorial:latest
         ports:
         - containerPort: 80
Save and close the file.
Apply the deployment to your cluster.
$ kubectl apply -f deployment.yamlVerify the deployment status.
$ kubectl get deploymentOutput:
 NAME              READY   UP-TO-DATE   AVAILABLE   AGE
 nuxtjs-tutorial   3/3     3            3           33s
Verify the pods created by your deployment.
$ kubectl get podsYour output should look like the one below:
 NAME                               READY   STATUS    RESTARTS   AGE
 nuxtjs-tutorial-74c8cd8584-hsrr7   1/1     Running   0          82s
 nuxtjs-tutorial-74c8cd8584-j8hbv   1/1     Running   0          82s
 nuxtjs-tutorial-74c8cd8584-kcs55   1/1     Running   0          82s
As displayed in the above output, the first Pod name is
nuxtjs-tutorial-74c8cd8584-hsrr7.Check the pod logs of your running application using the
kubectl logscommand.$ kubectl logs nuxtjs-tutorial-74c8cd8584-hsrr7Verify that your Nuxt.js application is running on three pods on port
3000as below.> nuxtjs-tutorial@1.0.0 start > nuxt start ℹ Listening on: http://10.244.152.66:3000/To access the application on your local machine, port forward the pod to your host port
3002as below:$ kubectl port-forward nuxtjs-tutorial-74c8cd8584-hsrr7 3002:3000 &Output:
 Forwarding from 127.0.0.1:3002 -> 3000
 Forwarding from [::1]:3002 -> 3000
You can now access your Nuxt.js application using the URL
http://localhost:3002from your local machine.
Expose the Nuxt.js Application for External Access
Your Nuxt.js application is deployed on the Vultr Kubernetes Engine cluster. However, it can be accessed only from your local machine through port forwarding. In this section, create a Service resource to expose your application to the outside world.
Create a new
service.yamlfile.$ nano service.yamlAdd the following configurations to the file.
 apiVersion: v1
 kind: Service
 metadata:
   name: load-balancer
   labels:
     app: nuxtjs-tutorial
 spec:
   type: LoadBalancer
   ports:
   - port: 80
     targetPort: 3000
     protocol: TCP
     nodePort: 32000
   selector:
     app: nuxtjs-tutorial
Save and close the file.
Apply your configuration to the Kubernetes cluster.
$ kubectl apply -f service.yamlRun the following command to get the IP Address of the new Load Balancer created for the Nuxt.js application.
$ kubectl get servicesYour output should look like the one below.
 NAME            TYPE           CLUSTER-IP      EXTERNAL-IP      PORT(S)        AGE
 kubernetes      ClusterIP      10.96.0.1       <none>           443/TCP        16m
 load-balancer   LoadBalancer   10.100.199.83   203.0.113.1      80:32000/TCP   3m5s
Verify that the Load Balancer has a public IP address as displayed in the above output.
In your web browser, access your Nuxt.js application using the Load Balancer IP. Replace the example IP
203.0.113.1with your actual Address.http://203.0.113.1
Scale the Nuxt.js Deployment
To efficiently handle incoming traffic and avoid any pod failures, scale the number of replicas for your Nuxt.js deployment depending on your needs as described below.
View the number of replicas for your Nuxt.js deployment.
$ kubectl get deploymentYour output should look like the one below.
 NAME              READY   UP-TO-DATE   AVAILABLE   AGE
 nuxtjs-tutorial   3/3     3            3           5m49s
As per the above output, the Nuxt.js deployment has three replicas.
To increase the number of replicas to 10, run the following command.
$ kubectl scale --replicas=10 deployment/nuxtjs-tutorialVerify the changes.
$ kubectl get deploymentYour output should look like the one below:
 NAME              READY   UP-TO-DATE   AVAILABLE   AGE
 nuxtjs-tutorial   10/10   10           10          12m
Verify the number of running Pods.
$ kubectl get podsOutput:
 NAME                               READY   STATUS    RESTARTS   AGE
 nuxtjs-tutorial-74c8cd8584-55m8j   1/1     Running   0          25s
 nuxtjs-tutorial-74c8cd8584-886k5   1/1     Running   0          25s
 nuxtjs-tutorial-74c8cd8584-hsrr7   1/1     Running   0          12m
 nuxtjs-tutorial-74c8cd8584-j8hbv   1/1     Running   0          12m
 nuxtjs-tutorial-74c8cd8584-kcs55   1/1     Running   0          12m
 nuxtjs-tutorial-74c8cd8584-p69qg   1/1     Running   0          25s
 nuxtjs-tutorial-74c8cd8584-qwtp8   1/1     Running   0          25s
 nuxtjs-tutorial-74c8cd8584-sngfh   1/1     Running   0          25s
 nuxtjs-tutorial-74c8cd8584-t5n75   1/1     Running   0          25s
 nuxtjs-tutorial-74c8cd8584-zpzlg   1/1     Running   0          25s
To view detailed information about your deployment, run the following command.
$ kubectl describe deployments nuxtjs-tutorialOutput:
 Name:                   nuxtjs-tutorial
 Namespace:              default
 CreationTimestamp:      Fri, 23 Jun 2023 07:36:46 +0530
 Labels:                 <none>
 Annotations:            deployment.kubernetes.io/revision: 1
 Selector:               app=nuxtjs-tutorial
 Replicas:               10 desired | 10 updated | 10 total | 10 available | 0 unavailable
 StrategyType:           RollingUpdate
 MinReadySeconds:        0
 RollingUpdateStrategy:  25% max unavailable, 25% max surge
 Pod Template:
   Labels:  app=nuxtjs-tutorial
   Containers:
    nuxtjs-tutorial:
     Image:        example-user/nuxtjs-tutorial:latest
     Port:         80/TCP
     Host Port:    0/TCP
     Environment:  <none>
     Mounts:       <none>
   Volumes:        <none>
 Conditions:
   Type           Status  Reason
   ----           ------  ------
   Progressing    True    NewReplicaSetAvailable
   Available      True    MinimumReplicasAvailable
 OldReplicaSets:  <none>
 NewReplicaSet:   nuxtjs-tutorial-74c8cd8584 (10/10 replicas created)
  Events:
   Type    Reason             Age    From                   Message
   ----    ------             ----   ----                   -------
   Normal  ScalingReplicaSet  16m    deployment-controller  Scaled up replica set nuxtjs-tutorial-74c8cd8584 to 3
   Normal  ScalingReplicaSet  4m43s  deployment-controller  Scaled up replica set nuxtjs-tutorial-74c8cd8584 to 10 from 3
View detailed information about your replicas.
$ kubectl describe replicasetsOutput:
 Name:           nuxtjs-tutorial-74c8cd8584
 Namespace:      default
 Selector:       app=nuxtjs-tutorial,pod-template-hash=74c8cd8584
 Labels:         app=nuxtjs-tutorial
                 pod-template-hash=74c8cd8584
 Annotations:    deployment.kubernetes.io/desired-replicas: 10
                 deployment.kubernetes.io/max-replicas: 13
                 deployment.kubernetes.io/revision: 1
 Controlled By:  Deployment/nuxtjs-tutorial
 Replicas:       10 current / 10 desired
 Pods Status:    10 Running / 0 Waiting / 0 Succeeded / 0 Failed
 Pod Template:
   Labels:  app=nuxtjs-tutorial
            pod-template-hash=74c8cd8584
   Containers:
    nuxtjs-tutorial:
     Image:        example-user/nuxtjs-tutorial:latest
     Port:         80/TCP
     Host Port:    0/TCP
     Environment:  <none>
     Mounts:       <none>
   Volumes:        <none>
 Events:
   Type    Reason            Age    From                   Message
   ----    ------            ----   ----                   -------
   Normal  SuccessfulCreate  17m    replicaset-controller  Created pod: nuxtjs-tutorial-74c8cd8584-hsrr7
   Normal  SuccessfulCreate  17m    replicaset-controller  Created pod: nuxtjs-tutorial-74c8cd8584-j8hbv
   Normal  SuccessfulCreate  17m    replicaset-controller  Created pod: nuxtjs-tutorial-74c8cd8584-kcs55
   Normal  SuccessfulCreate  5m32s  replicaset-controller  Created pod: nuxtjs-tutorial-74c8cd8584-sngfh
   Normal  SuccessfulCreate  5m32s  replicaset-controller  Created pod: nuxtjs-tutorial-74c8cd8584-886k5
   Normal  SuccessfulCreate  5m32s  replicaset-controller  Created pod: nuxtjs-tutorial-74c8cd8584-p69qg
   Normal  SuccessfulCreate  5m32s  replicaset-controller  Created pod: nuxtjs-tutorial-74c8cd8584-qwtp8
   Normal  SuccessfulCreate  5m32s  replicaset-controller  Created pod: nuxtjs-tutorial-74c8cd8584-t5n75
   Normal  SuccessfulCreate  5m32s  replicaset-controller  Created pod: nuxtjs-tutorial-74c8cd8584-55m8j
   Normal  SuccessfulCreate  5m32s  replicaset-controller  Created pod: nuxtjs-tutorial-74c8cd8584-zpzlg
Conclusion
In this article, you have created a Nuxt.js application, containerized it, and deployed it on a Vultr Kubernetes Engine (VKE) cluster. For more information about Nuxt.js, visit the official documentation.
No comments yet.