A Vultr Load Balancer enables the distribution and forwarding of network traffic across multiple attached instances depending on your load balancing strategy. Automatic SSL enables trusted SSL certificates using your domain to access the Load Balancer. HTTP2 and HTTP3 protocols enable secure communications and exchange of data between your Load Balancer and site visitors with improved speed and efficiency.
This article explains how to enable automatic SSL, HTTP2, and HTTP3 on a Vultr Load Balancer.
Prerequisites
Before you begin:
- Deploy a Vultr Load Balancer and attach instances to enable forwarding of network traffic.
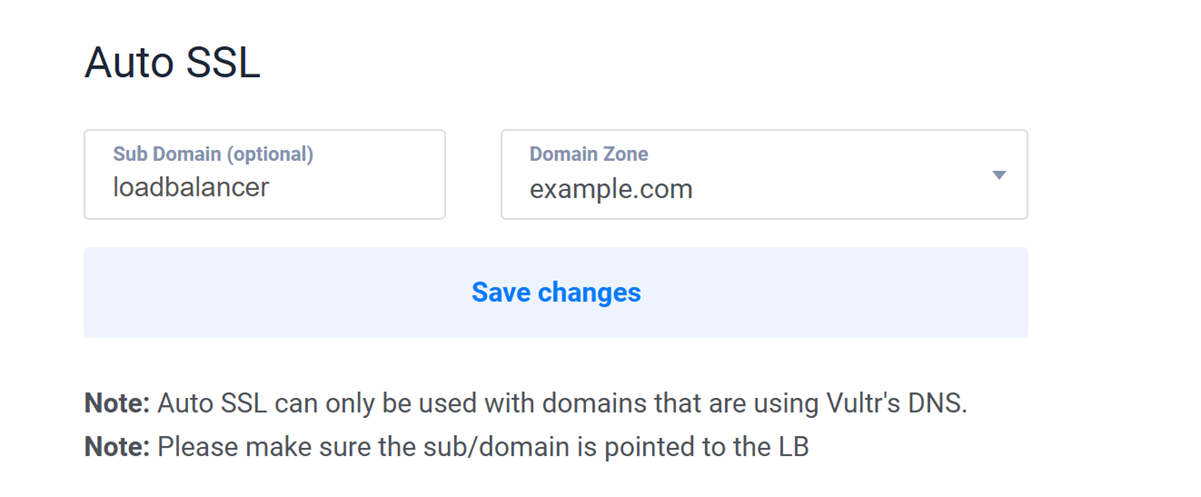
- Create a new subdomain record that points to your Load Balancer's IP Address using Vultr DNS. For example,
loadbalancer.example.com.
Enable AutoSSL
Automatic SSL requires an active domain linked to Vultr DNS in your account. Follow the steps below to enable automatic SSL on your Vultr Load Balancer.
Open your Vultr Load Balancer's management page.
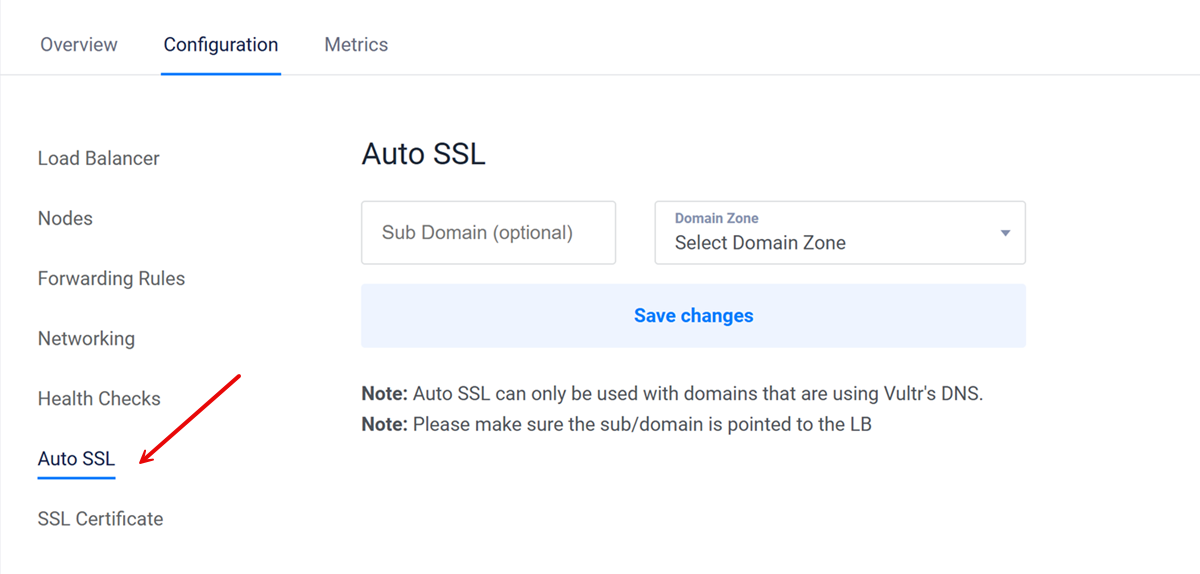
Navigate to the Configuration tab and click Auto SSL on the left navigation menu.

Enter your subdomain name in the Sub Domain (Optional) field and click the Domain Zone drop-down to select your associated Vultr DNS domain.

Click Save Changes to generate a new SSL certificate for your domain.
Verify a new prompt
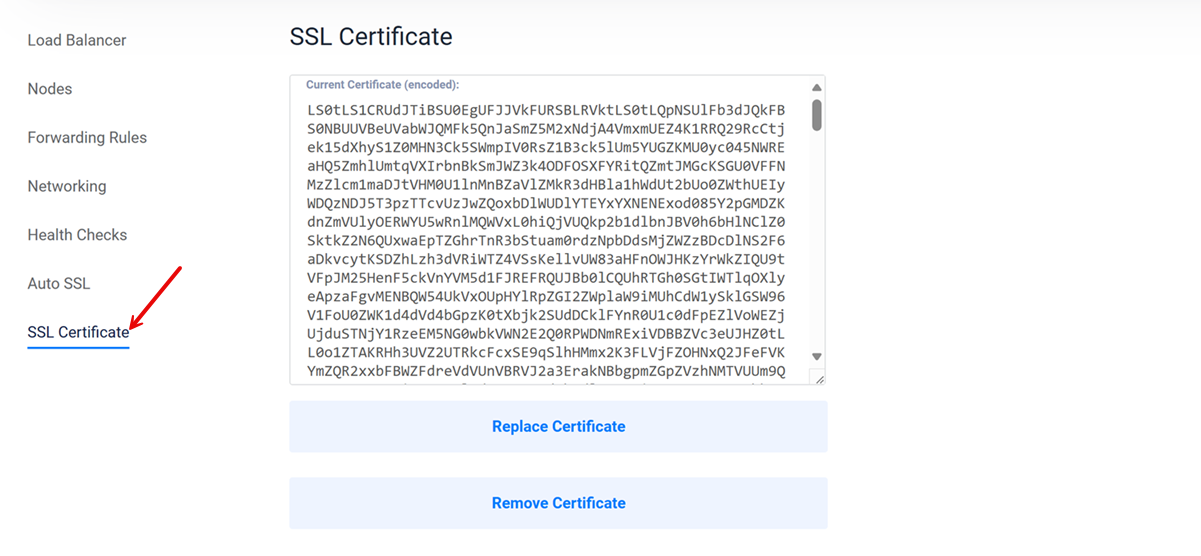
An Auto SSL job is currently in progress. Please allow a few minutes for it to completedisplays on your management page and wait for the certificate generation process to complete.Click SSL Certificate to verify the new certificate data added to your Load Balancer and ready to use with your subdomain.

Enable HTTP2
HTTP2 requires at least 1 active HTTPS forwarding rule on your Vultr Load Balancer. Follow the steps below to activate HTTPS rules and enable HTTP2 connections on your Vultr Load Balancer.
Open your Vultr Load Balancer's management page.
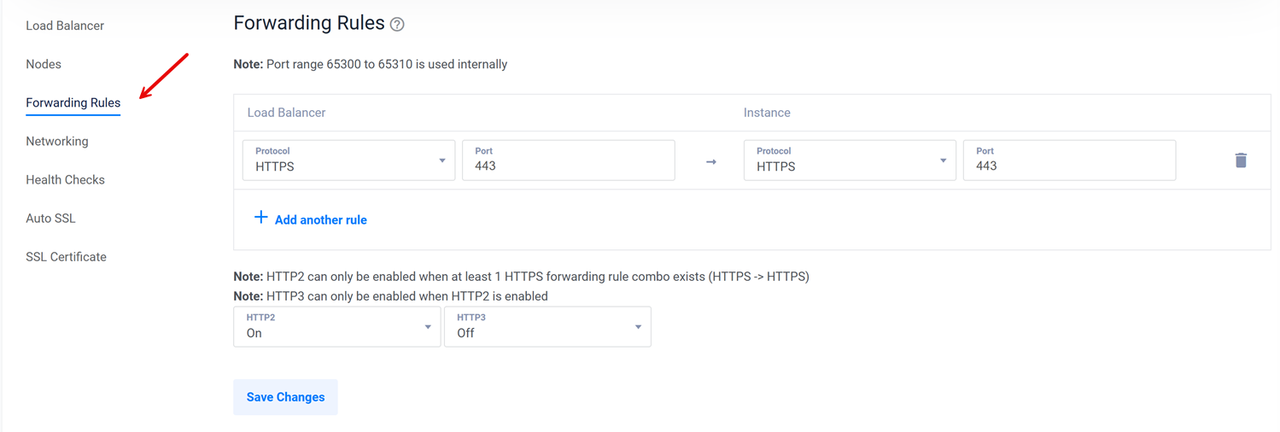
Click Forwarding Rules on the left navigation menu to set up new traffic rules.

Click the Protocol drop-down and select HTTPS from the list of options in the Load Balancer section.
Keep
443as the Port value, then enable the same HTTPS protocol and port details in your instance section.
Click Save Changes to save the forwarding rule and enable HTTPS connections.
Click the HTTP2 drop-down and select ON from the list of options.

Click Save Changes to enable HTTP2 on your Vultr Load Balancer.
Enable HTTP3
HTTP3 requires HTTP2 to be active on your Vultr Load Balancer to enable network connections. Follow the steps below to enable HTTP3 network connections on your Vultr Load Balancer.
Open your Vultr Load Balancer's management page.
Click Forwarding Rules on the left navigation menu.
Click the HTTP3 drop-down and select ON from the list of options.

Click Save to enable HTTP3 and apply changes on your Vultr Load Balancer.
Conclusion
You have enabled automatic SSL, HTTP2, and HTTP3 connections on your Vultr Load Balancer. You can use your existing subdomain to securely access your Load Balancer depending on your forwarding rules and load balancing methods.