Introduction
Let's Encrypt is an automated, open certificate authority that offers free TLS/SSL certificates for the public's benefit. The service is provided by the Internet Security Research Group (ISRG). This tutorial describes how to install a wildcard Let's Encrypt SSL certificate using certbot on a Vultr Load Balancer.
Overview
The high-level steps for this tutorial are:
- Install certbot on a workstation.
- Request a wildcard certificate using the DNS method.
- Copy the certificate information from the cert files into the Vultr Load Balancer dashboard in the Customer Portal.
You will need a UNIX-like operating system to install certbot.
1. Install certbot
Install certbot according to the instructions for your platform.
2. Request Wildcard Certificate
Run certbot with the certonly and --manual options. Replace example.com with your domain. The domain is listed twice, once for the bare domain and once for the wildcard. If you are not using the bare domain URL (https://example.com), you can omit that value and only request the wildcard.
# certbot certonly --manual -d *.example.com -d example.com -m admin@example.com --agree-tosPress Y or N + Enter to share your email address with the EFF.
Would you be willing to share your email address ...
(Y)es/(N)o: Y
Press Y + Enter to verify you agree to have your IP address logged.
Are you OK with your IP being logged?
(Y)es/(N)o: Y
The certbot wizard will print instructions to add a TXT record to your domain's DNS. For example:
- - - - - - - - - - - - - - - - - - - - - - - - - - - - - - - - - - - - - - - -
Please deploy a DNS TXT record under the name
_acme-challenge.example.com with the following value:

U5Y4xxxxxxxxxxxxxxxxxxxxxxxxxxxxxxxxxxxN914

Before continuing, verify the record is deployed.
- - - - - - - - - - - - - - - - - - - - - - - - - - - - - - - - - - - - - - - -
Press Enter to Continue
The certbot wizard will pause at this point. Do not press Enter until you've completed the DNS steps below.
Use a web browser to:
- Navigate to your DNS provider.
- Add the TXT record shown by certbot to your domain's DNS.
Test that the TXT record is propagated correctly. Popular ways to test the TXT record include dig and the dnschecker.org website. Replace example.com with your name in these examples:
To test with
dig, open another terminal window and look up the domain record, replacing example.com with your domain. Verify that the value returned is correct.# dig +short TXT _acme-challenge.example.com "U5Y4xxxxxxxxxxxxxxxxxxxxxxxxxxxxxxxxxxxN914"To use dnschecker.org, navigate to the URL, replacing example.com with your domain. Verify that the value returned is correct.
https://dnschecker.org/#TXT/_acme-challenge.example.com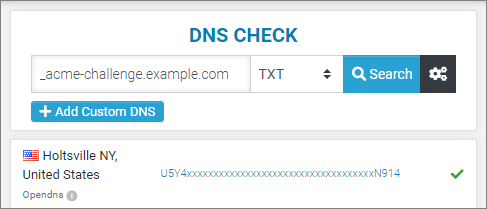
When you see the correct TXT record in the propagation test, return to the certbot wizard and press Enter to continue. If the certificate challenge succeeds, certbot will report the location of the new certificate files.
...
Cleaning up challenges

IMPORTANT NOTES:
- Congratulations! Your certificate and chain have been saved at:
/etc/letsencrypt/live/example.com/fullchain.pem
Your key file has been saved at:
/etc/letsencrypt/live/example.com/privkey.pem
3. Install Certificate
Navigate to your load balancer dashboard in the Customer Portal.
Click the three-dot menu icon for your load balancer, then click Manage.
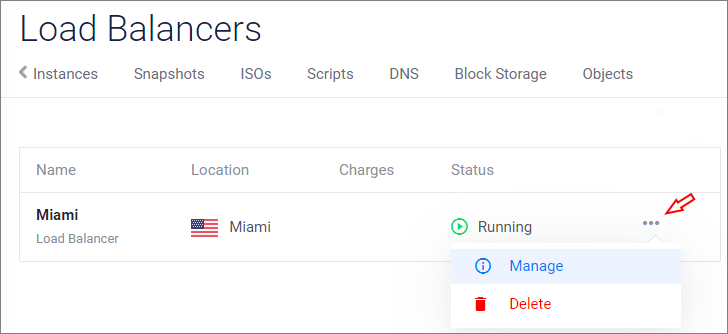
Click the Configuration tab.
Click SSL Certificate in the left menu.
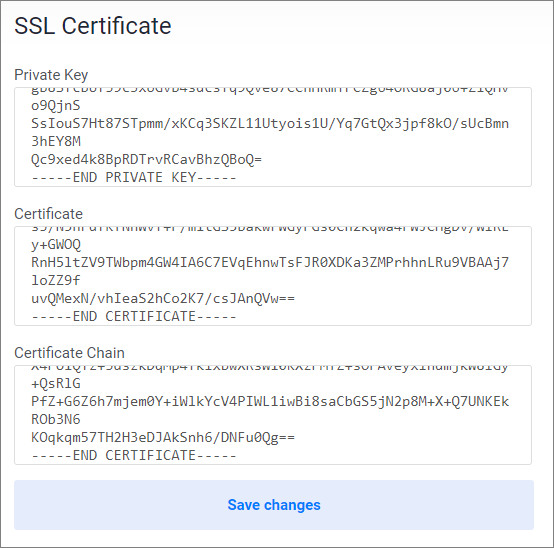
Copy the contents of your certificate files into the fields.
- Copy privkey.pem to the Private Key field.
- Copy cert.pem to the Certificate field.
- Copy chain.pem to the Certificate Chain field.
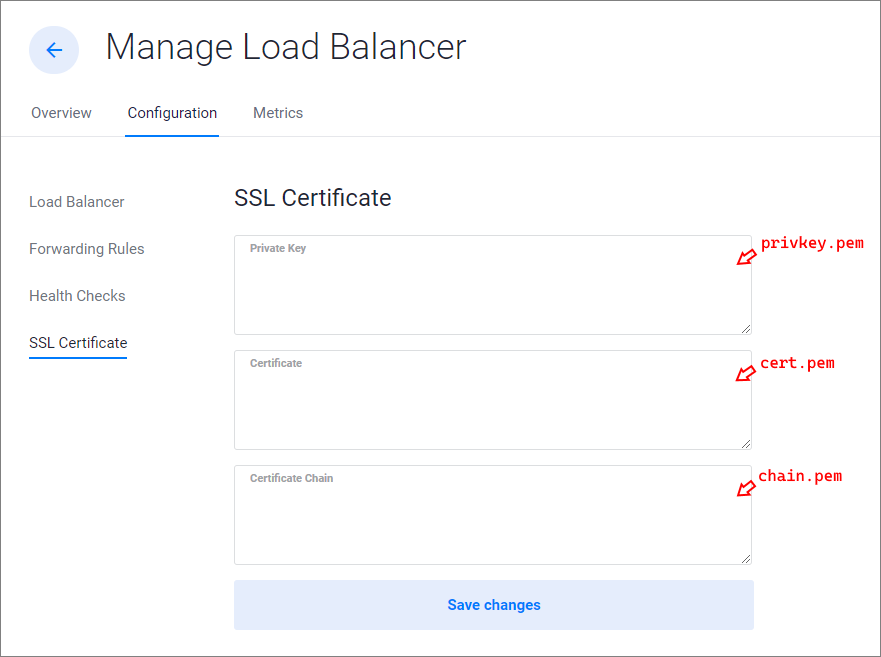
When you are finished, it should look like this example. Click Save changes.
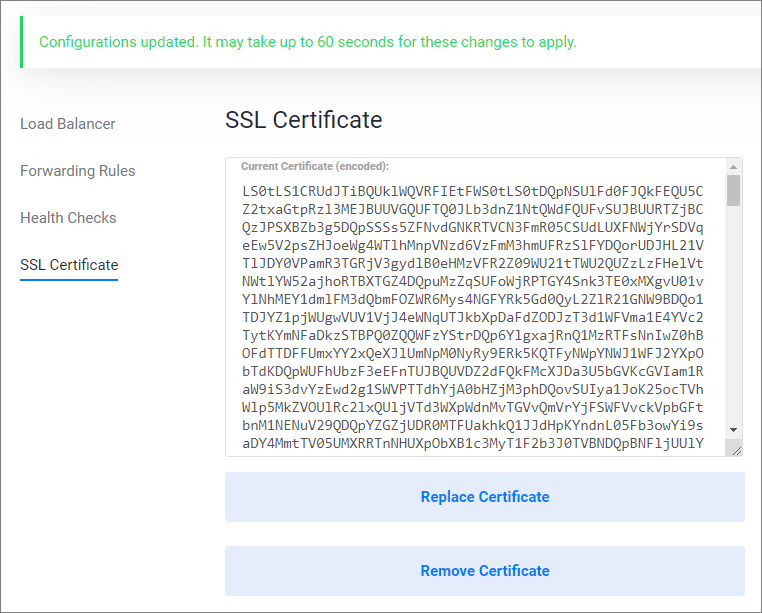
The form will update and display an encrypted certificate. The certificate will be ready to use in 60 seconds.
4. Test the Certificate
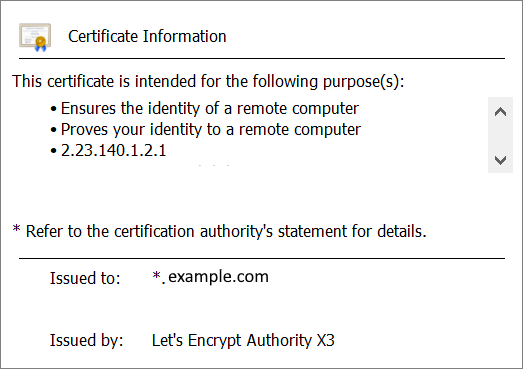
Using a web browser, navigate to your website, and verify the certificate is correct.
Summary
You have completed wildcard SSL installation using certbot. You will need to repeat these steps before the certificate expires every 90 days.
More Information
- If you are new to load-balancing network concepts, see the Vultr Load Balancer Quickstart Guide.
- For comprehensive documentation about the Load Balancer features, see the Load Balancer Feature Reference.
- The Vultr Load Balancer has its own integrated firewall; learn more in our article How to Use the Vultr Load Balancer Firewall.
- The Vultr Firewall can use a Load Balancer as an IP source. We explain more in How to Use the Vultr Firewall with a Vultr Load Balancer.
- Explore an advanced scenario with private networking and both types of firewalls in How to Configure a Vultr Load Balancer with Private Networking.